|
As far as I am concerned, a release of a kit of this vehicle (and many of the other early war Panzers) was long overdue. At the time of release of this kit there was no indication that an injection plastic kit of this little tank was forthcoming in the foreseeable future. Cpl Overby's Motorpool initiative thus presented itself as a very welcome addition to my collection. As I started two of these kits before
my involuntary and prolonged absence from modeling, it is possible
that I may have forgotten some info that I had planned to share with
you, despite the fact that I had taken notes during construction.
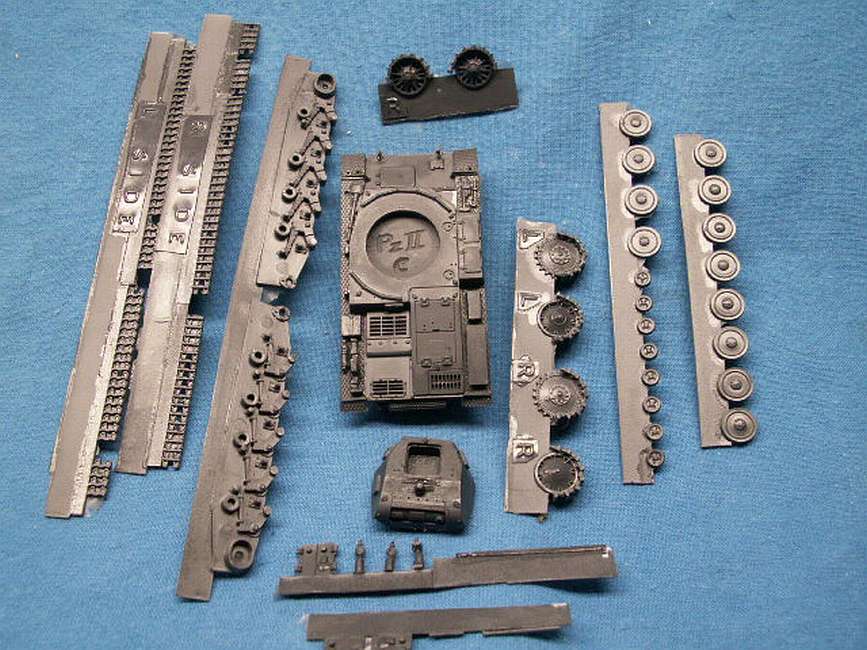
1. Packaging Sturdy top opening cardboard box.
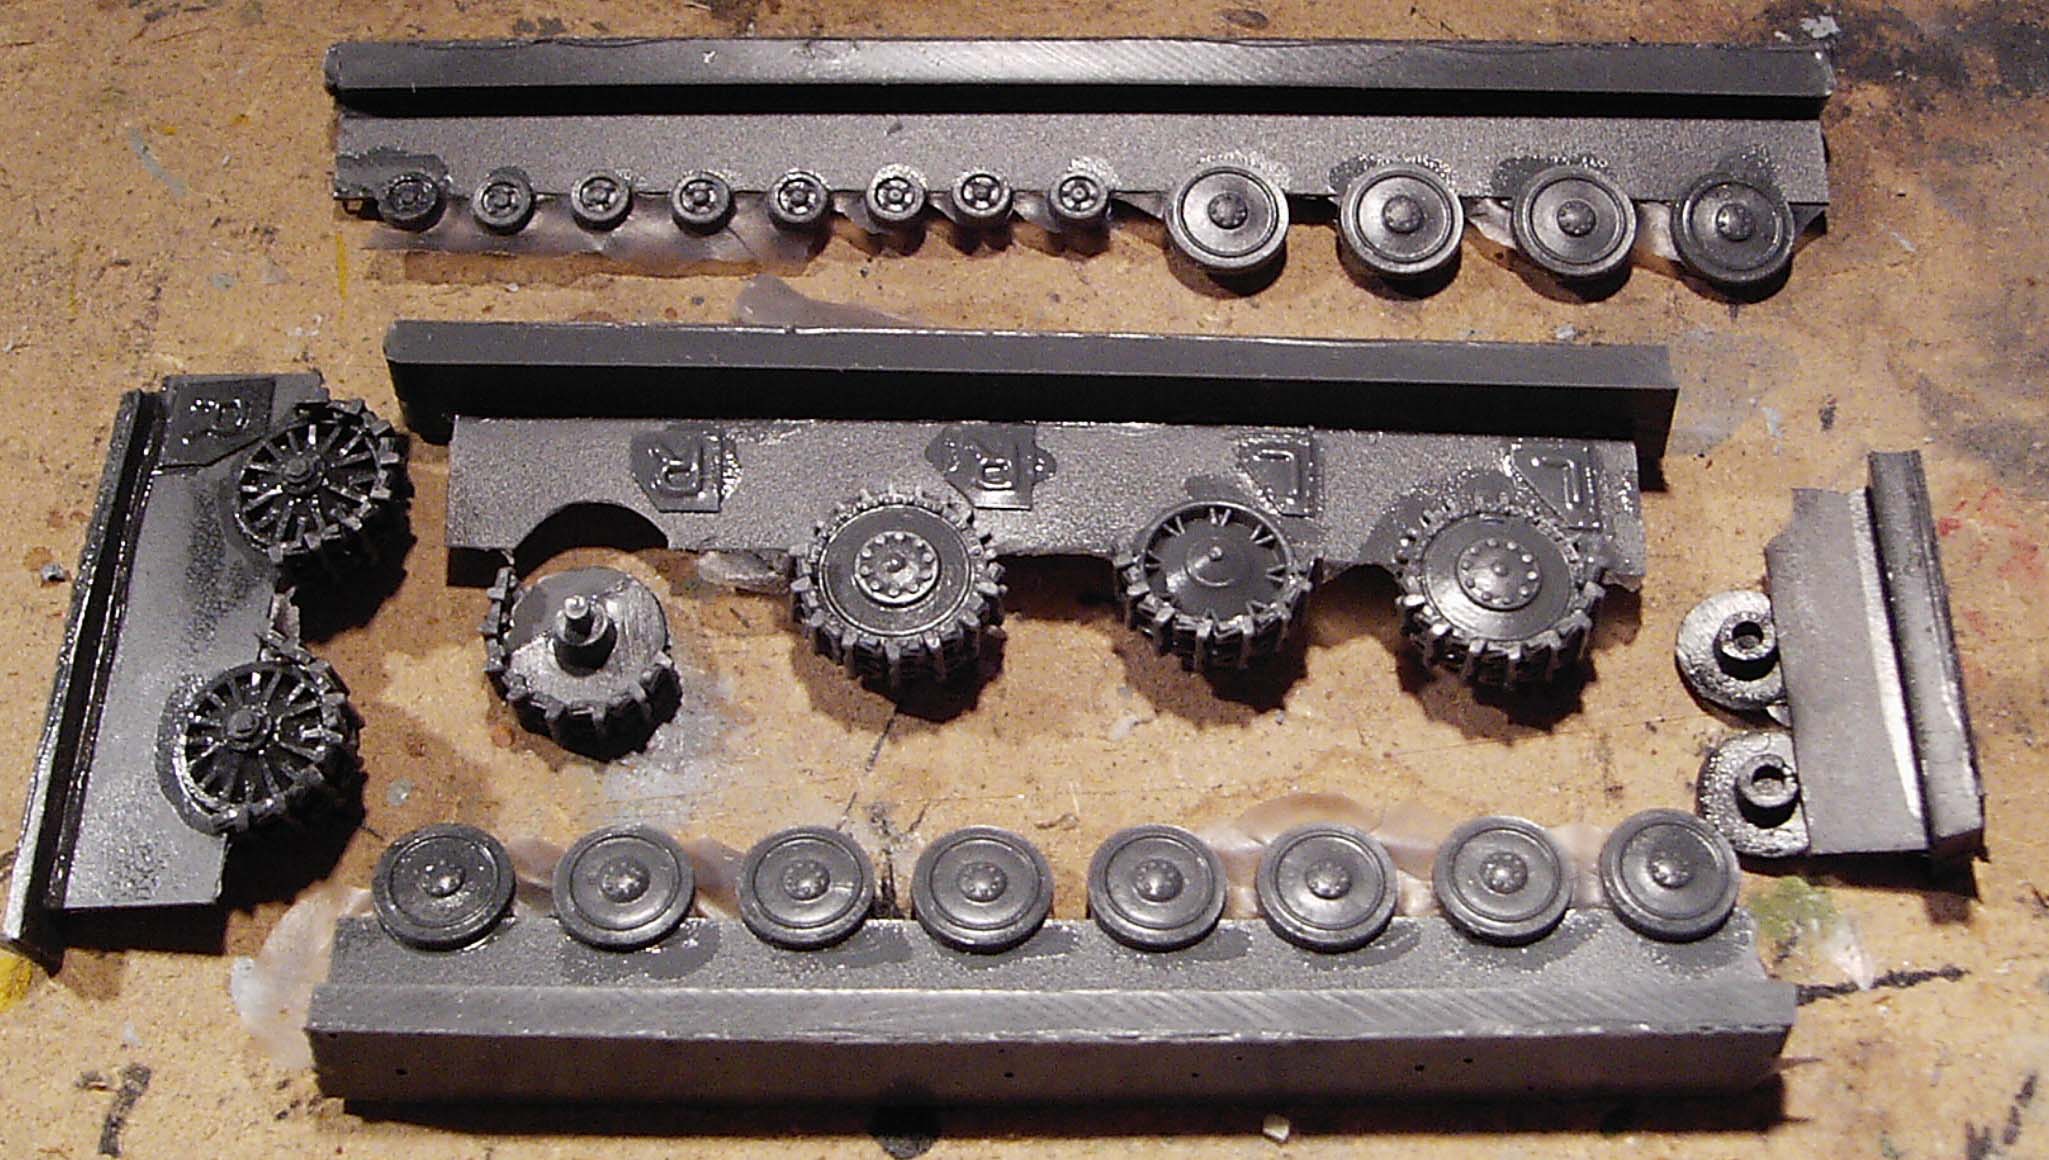
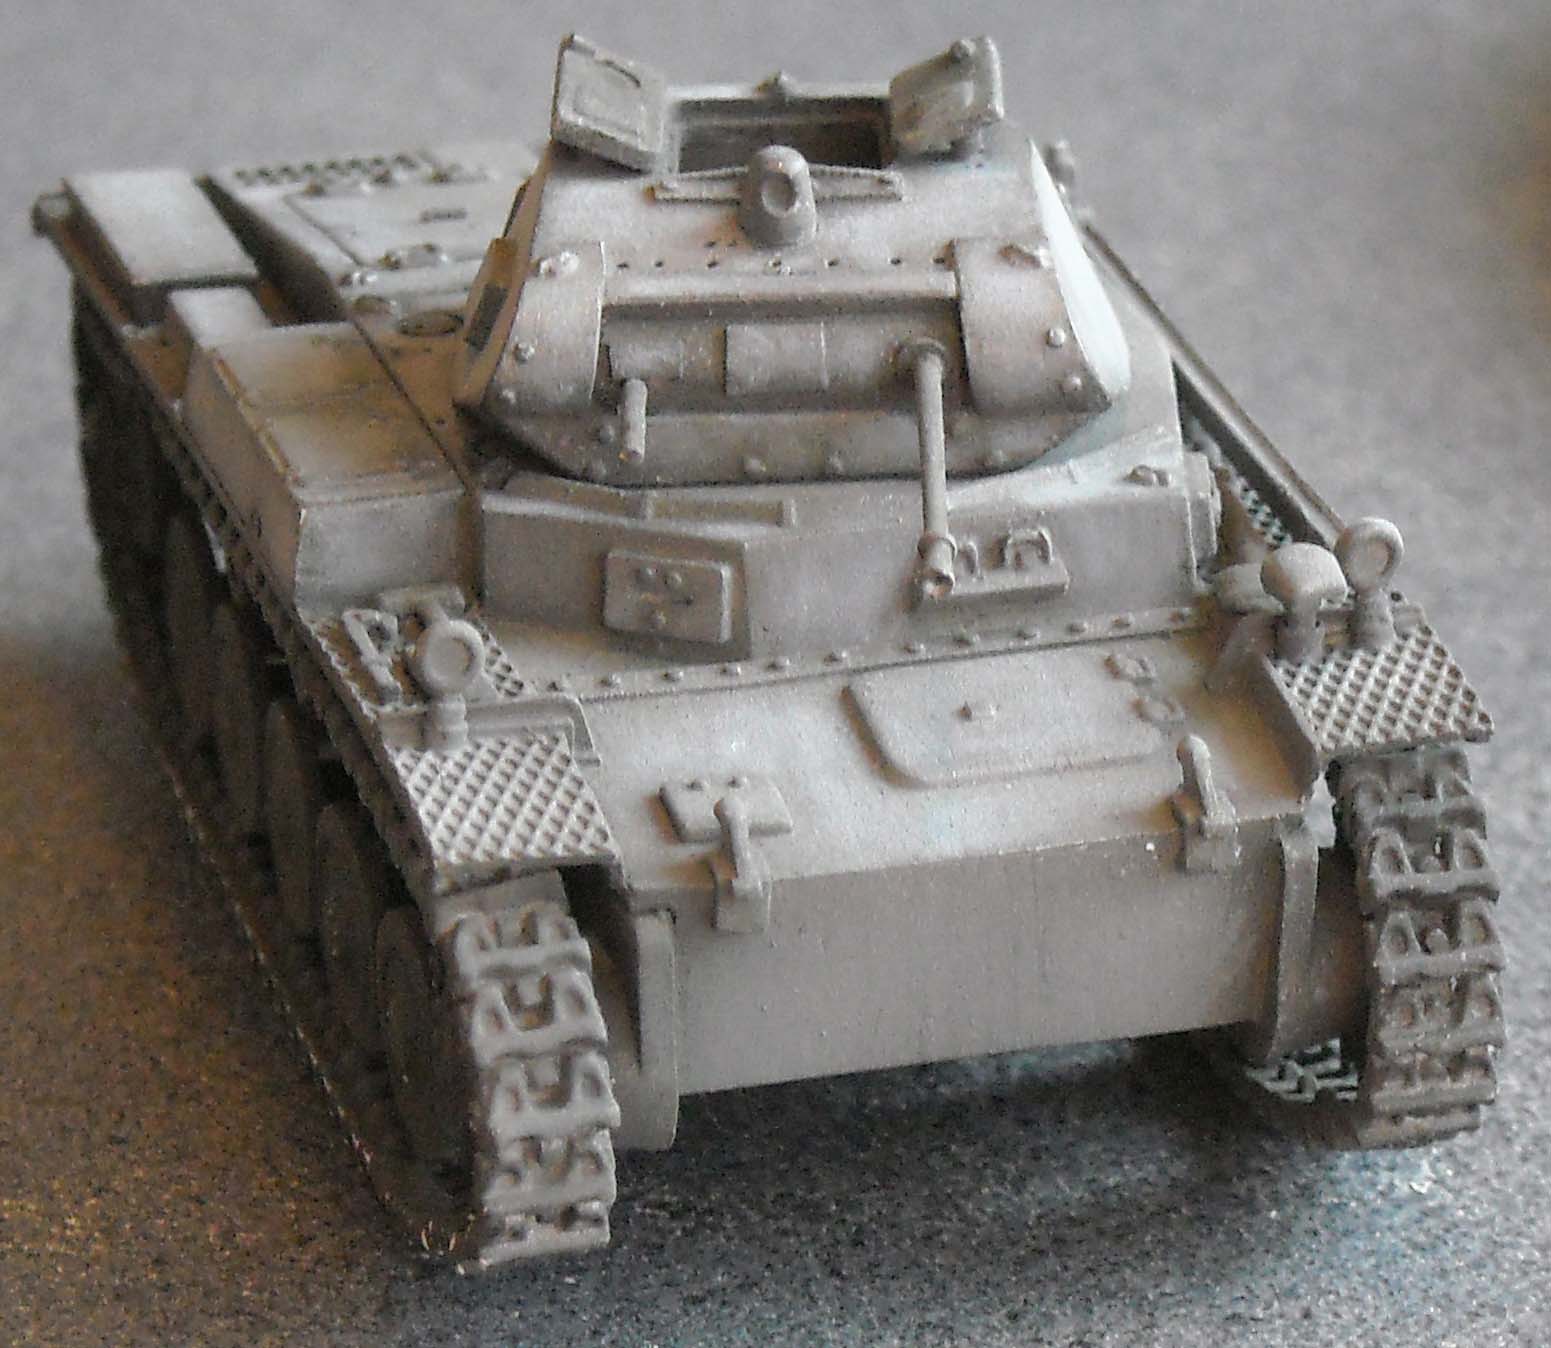
2. Type of kit Resin kit with solid hull. The turret
has a recess for a half figure. The kit traces its origins to the venerable Esci kit of the Panzer II Ausf. F.
The casting quality is very good, with crisp detail and only a very rare sink mark or air bubble and no warpage. On the engine deck, on one of the engine access panels, you can find what looks like a sink mark. I guess it is also present on the master, and might be the result of removing a part or detail that was originally there on the Esci kit, on which the master was based. Most parts come with molding 'carrots',
which are relatively easy to remove. Some other minor cleanup of seamlines
might be necessary, but only to a limited extent. The gun has a hollowed out business end. In my opinion this kit part is as good as any metal barrel you might want to spend money on.
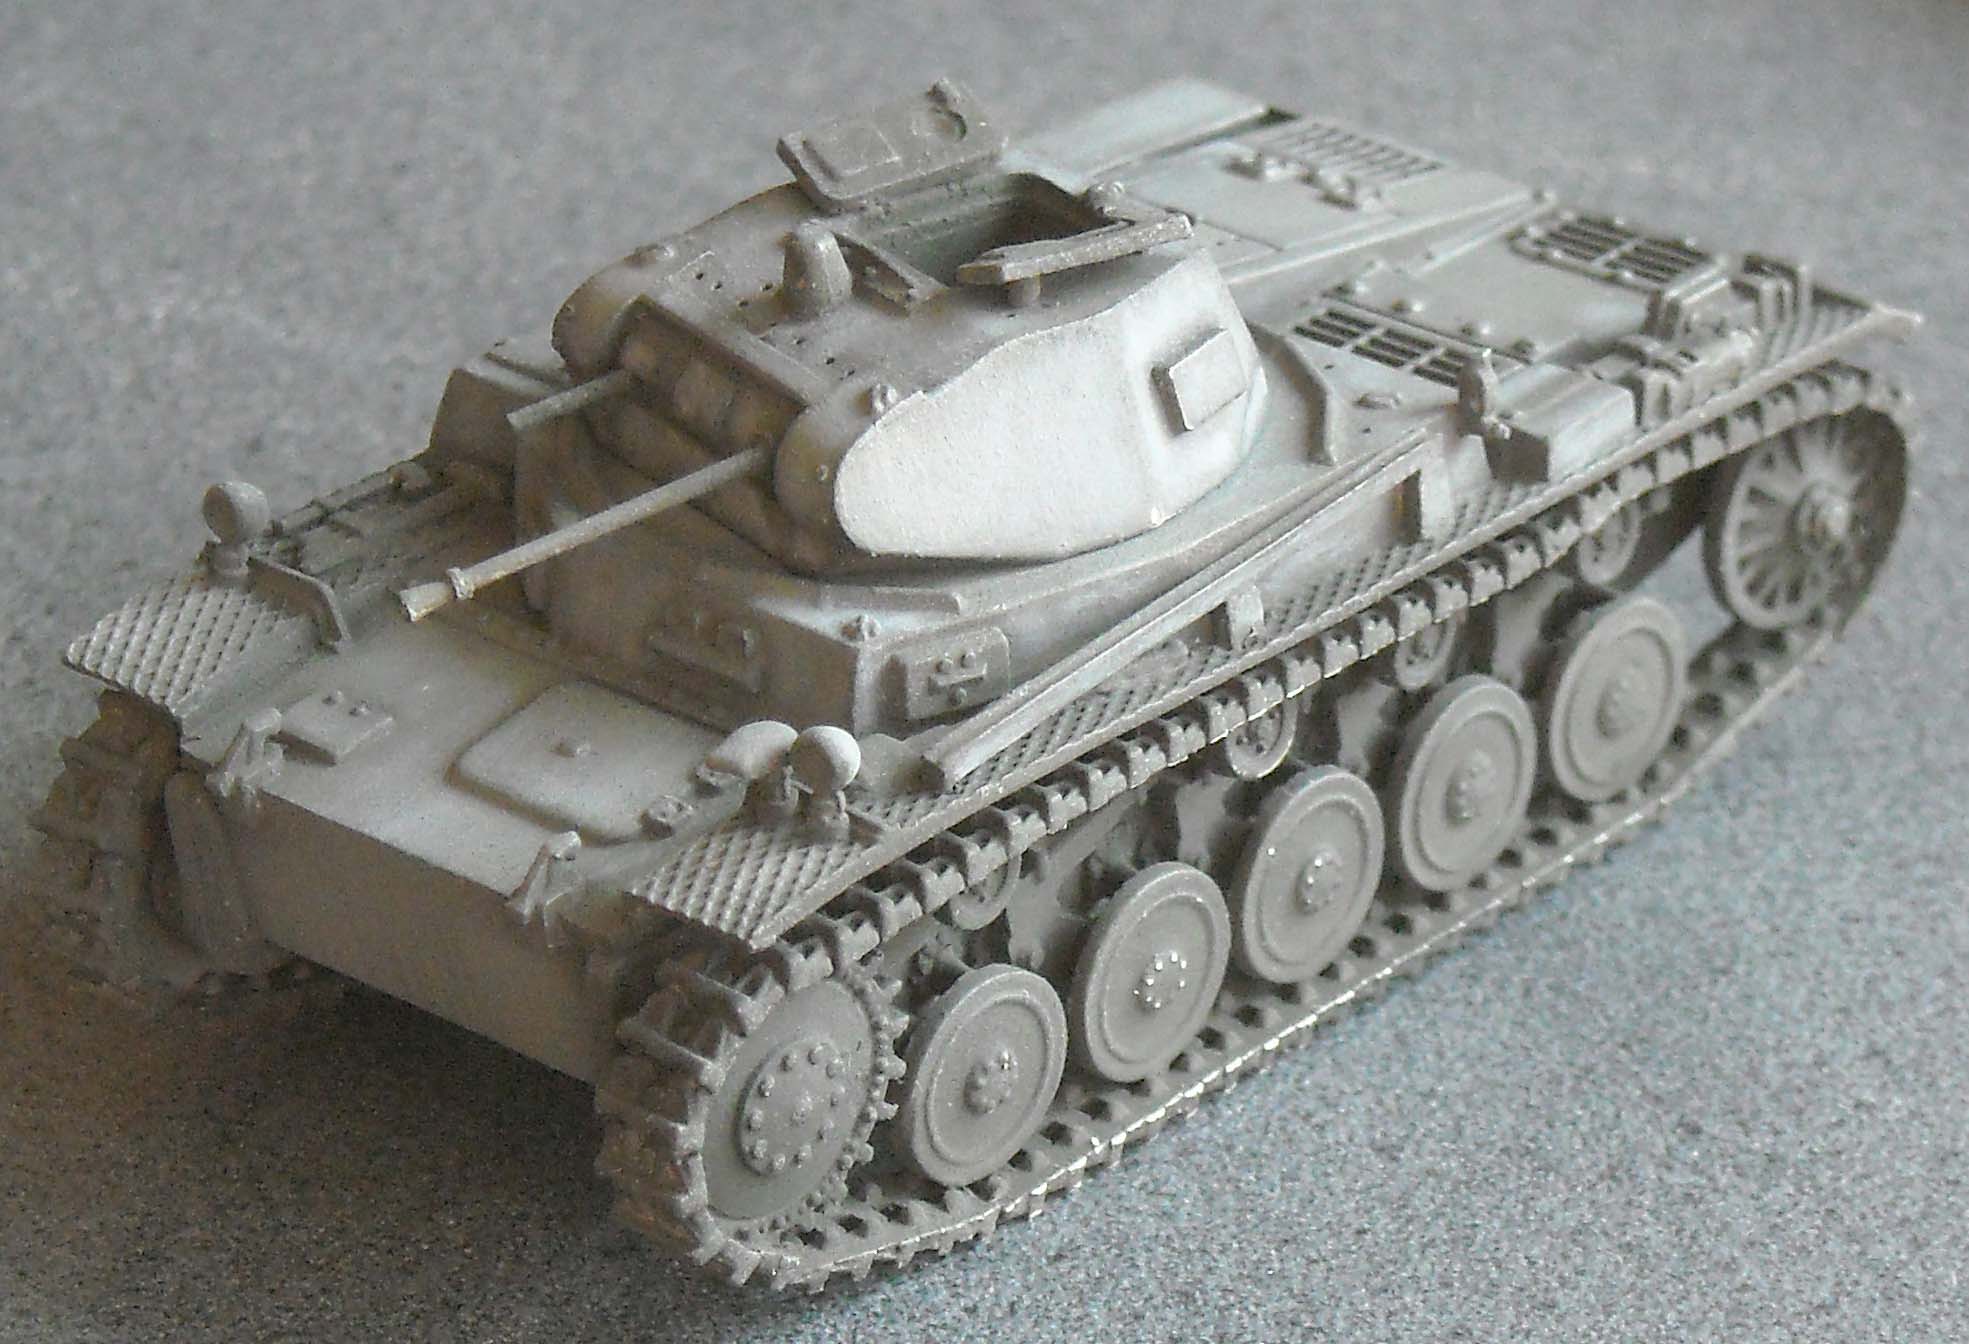
4. Version and accuracy The Pz.Kpfw II Ausf. C (7.Serie/La.S.100) was built in 1938-1939, and thus was the most modern version of this tank at the time WW2 broke out. I haven't measured this kit against available plans, but, due to its heritage, it will basically share the dimensional accuracy of the Esci kit. The kit represents an early to mid
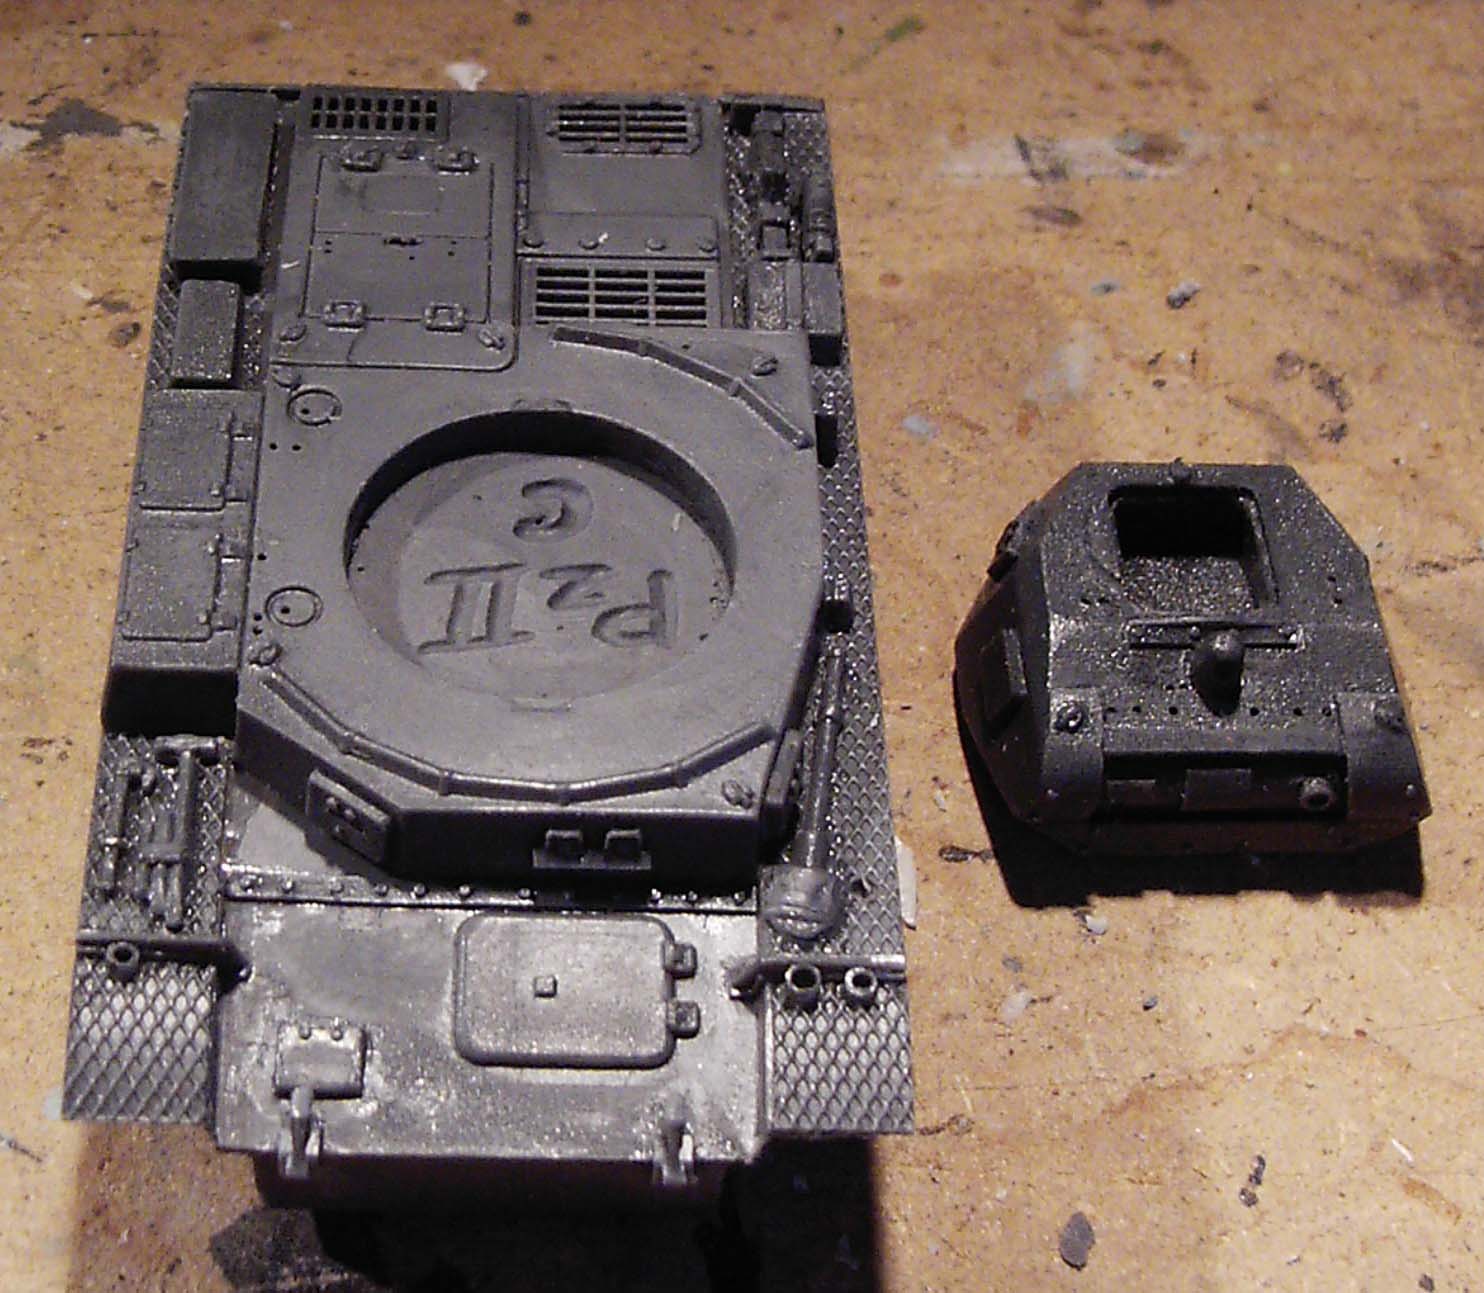
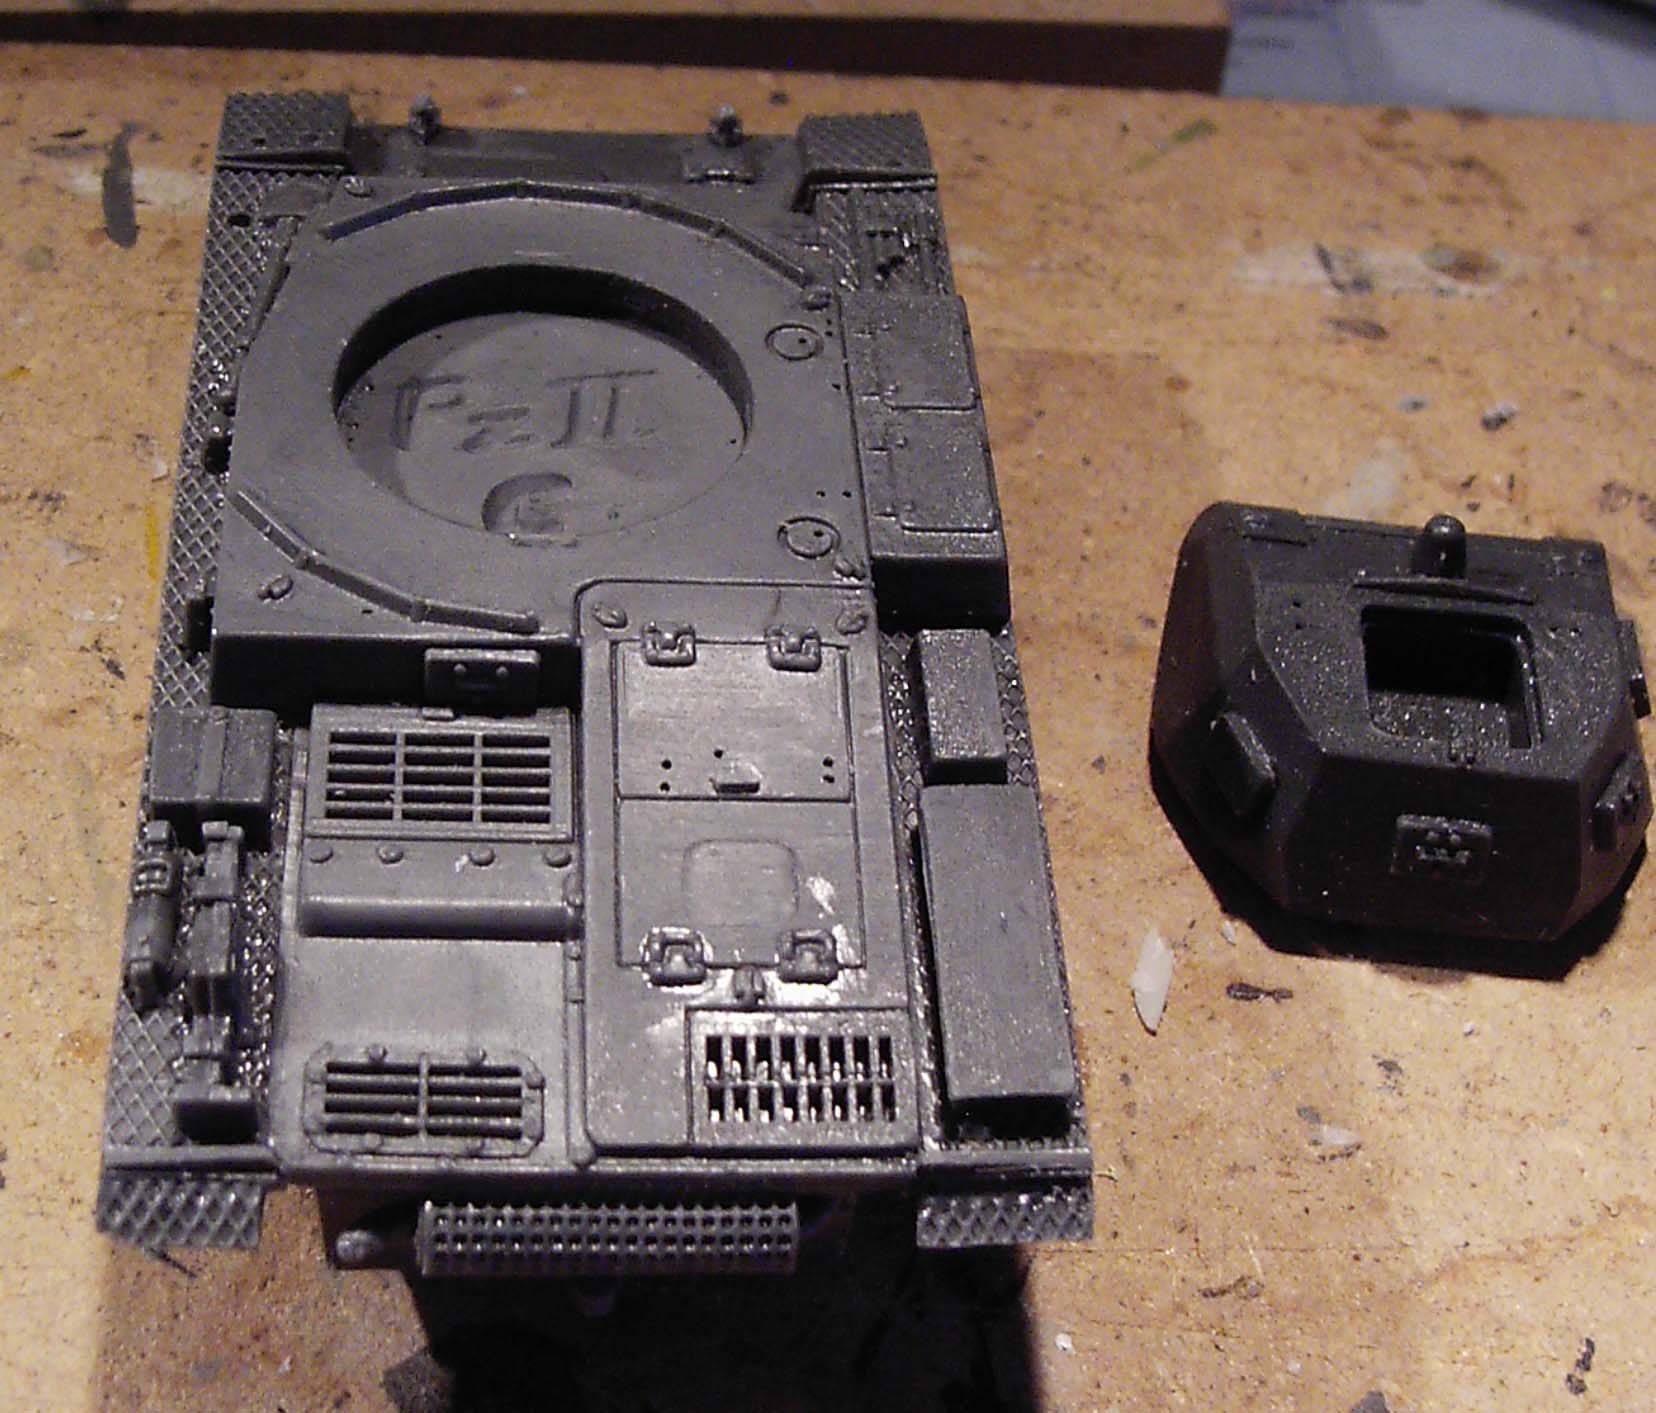
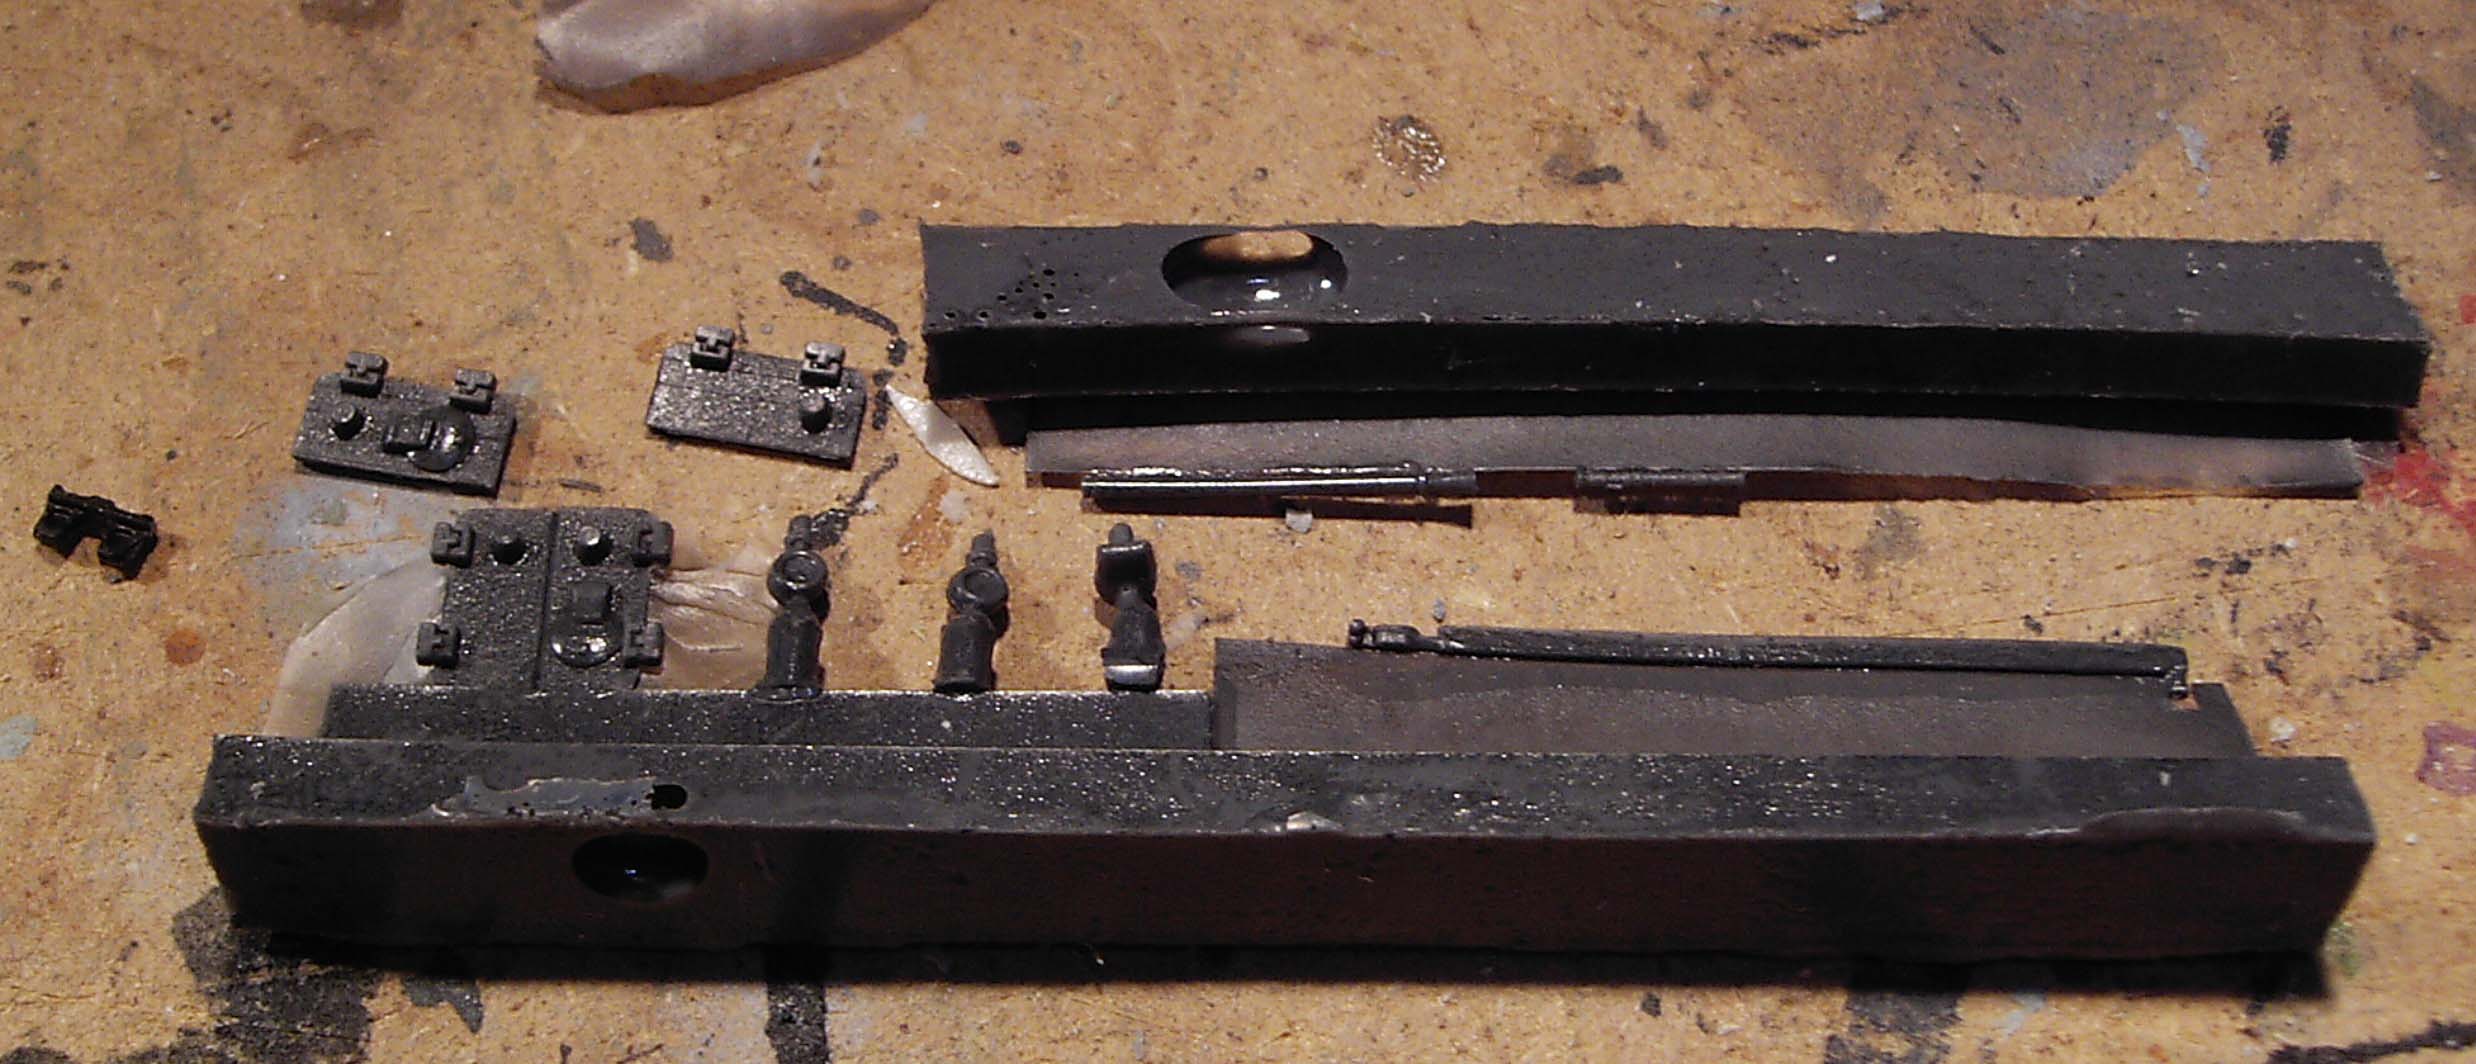
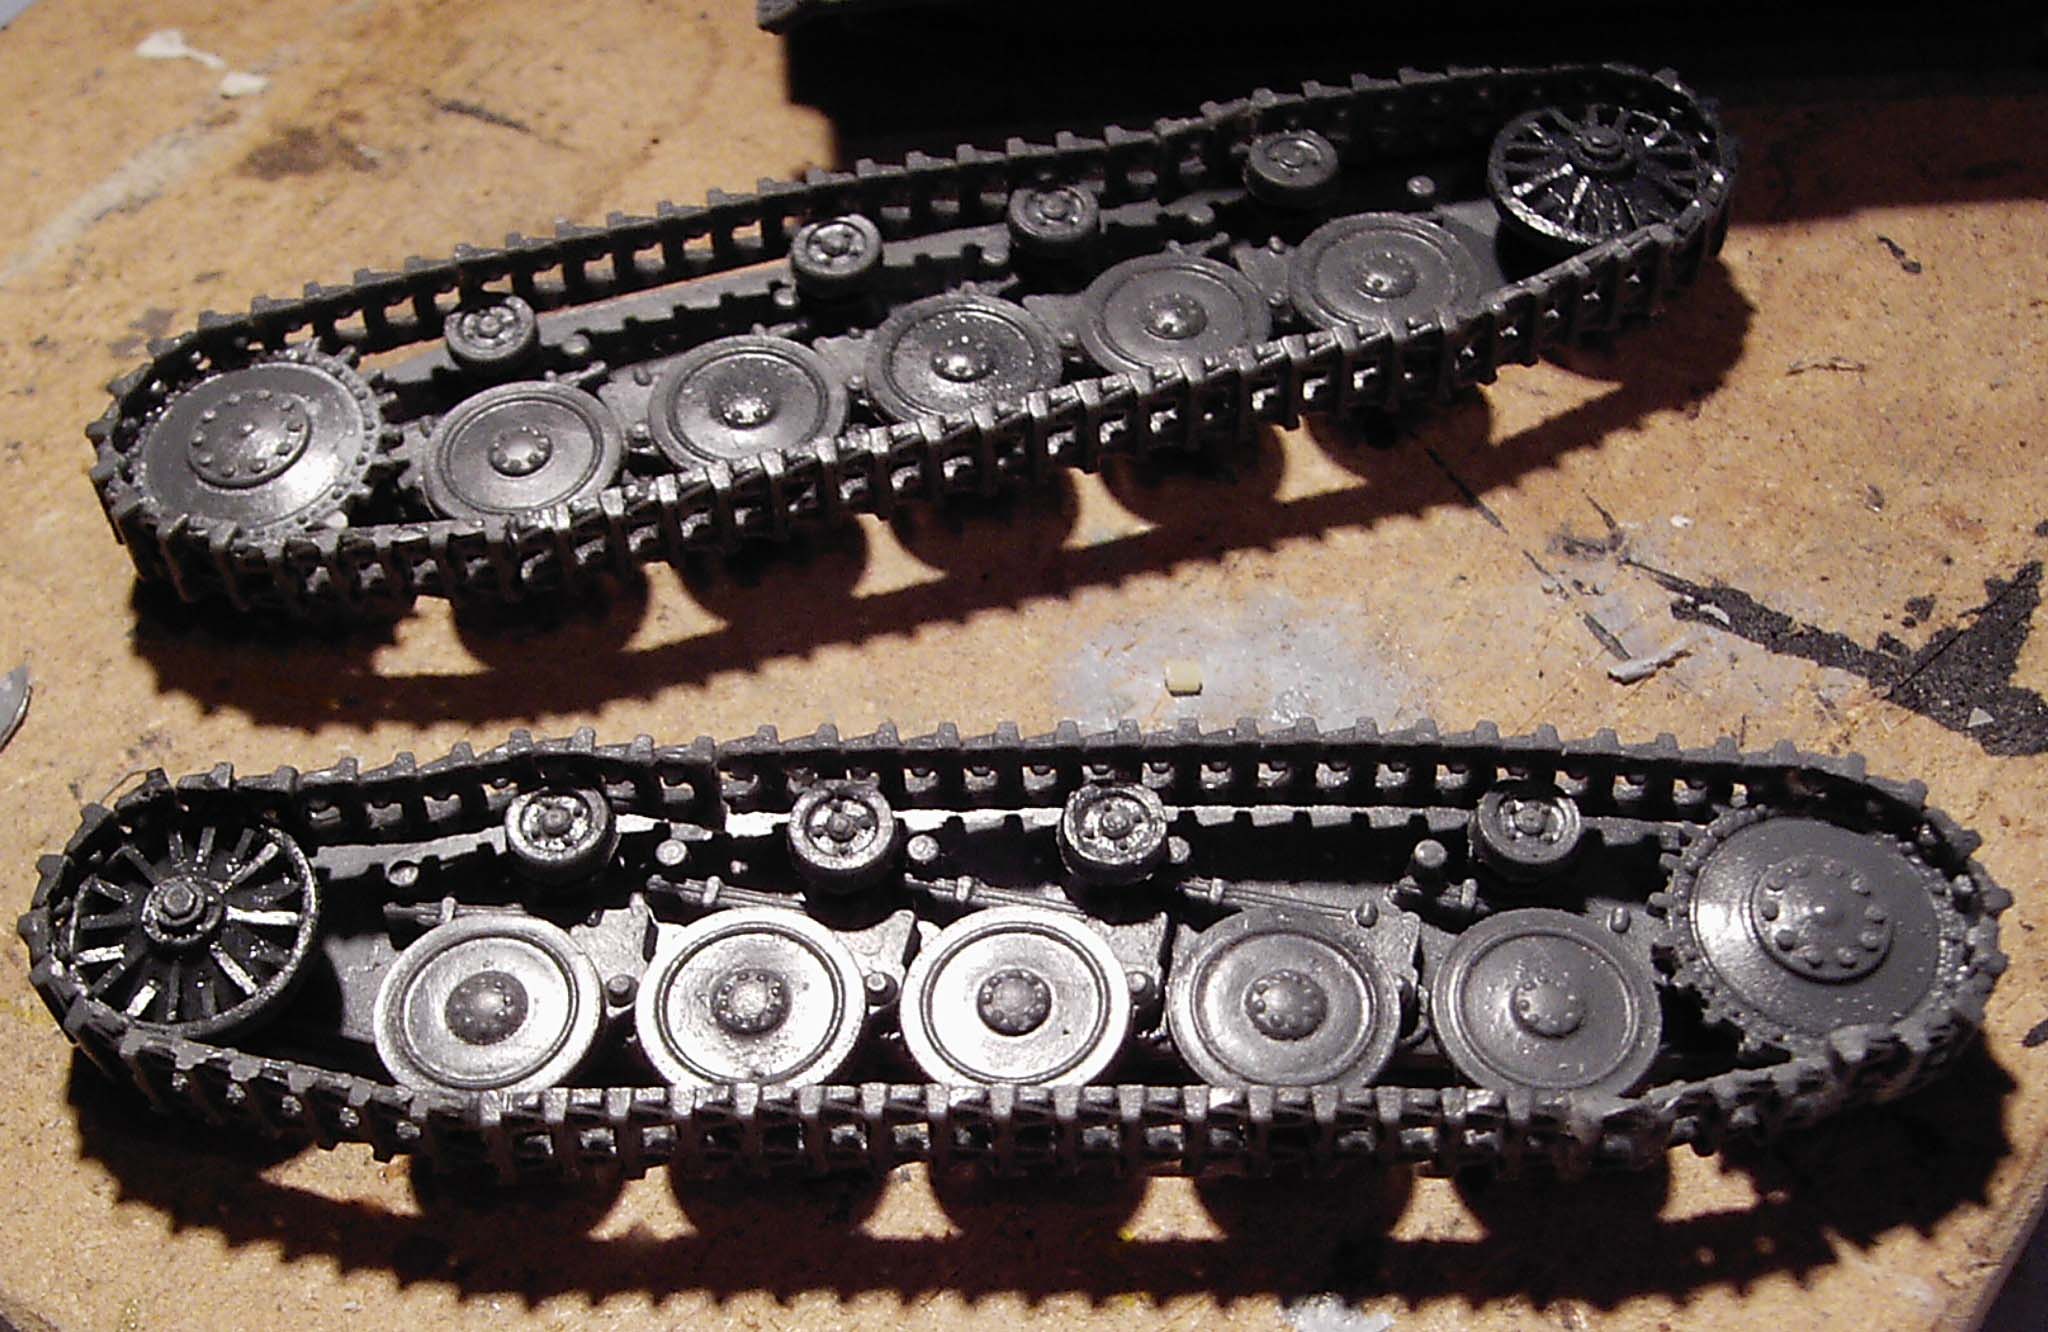
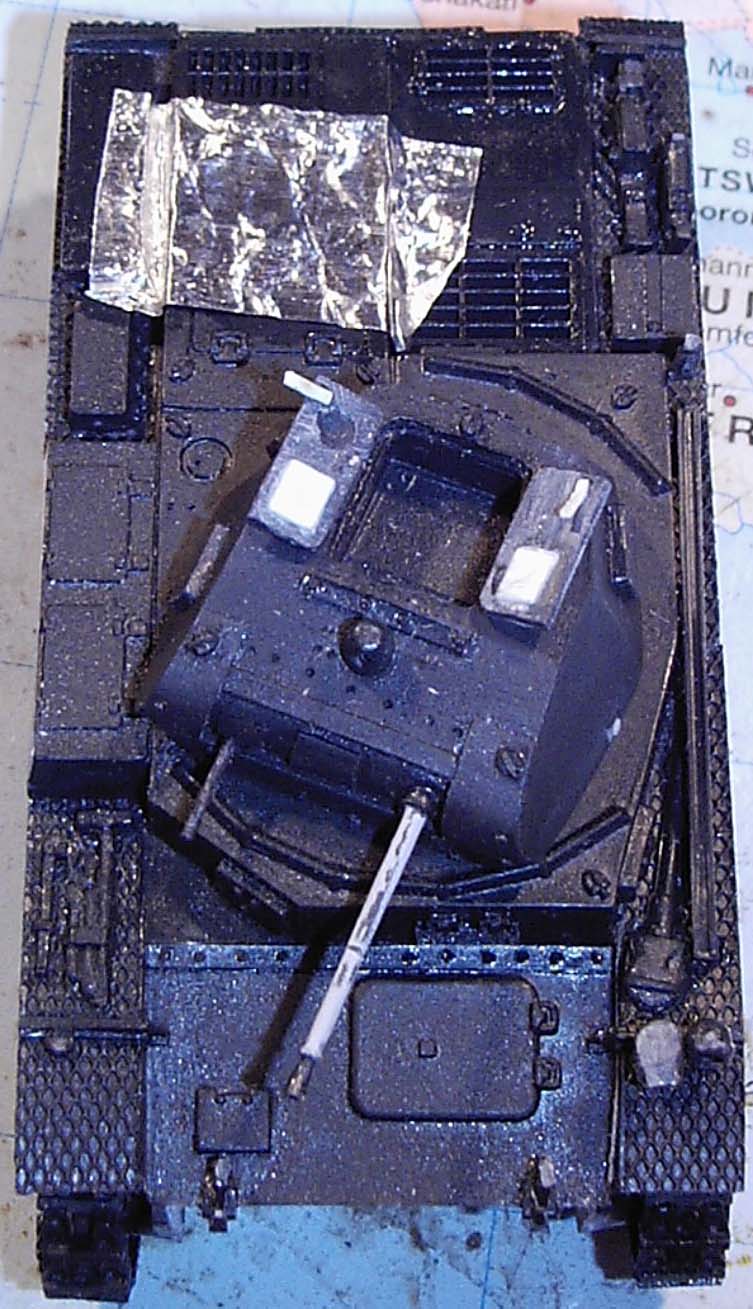
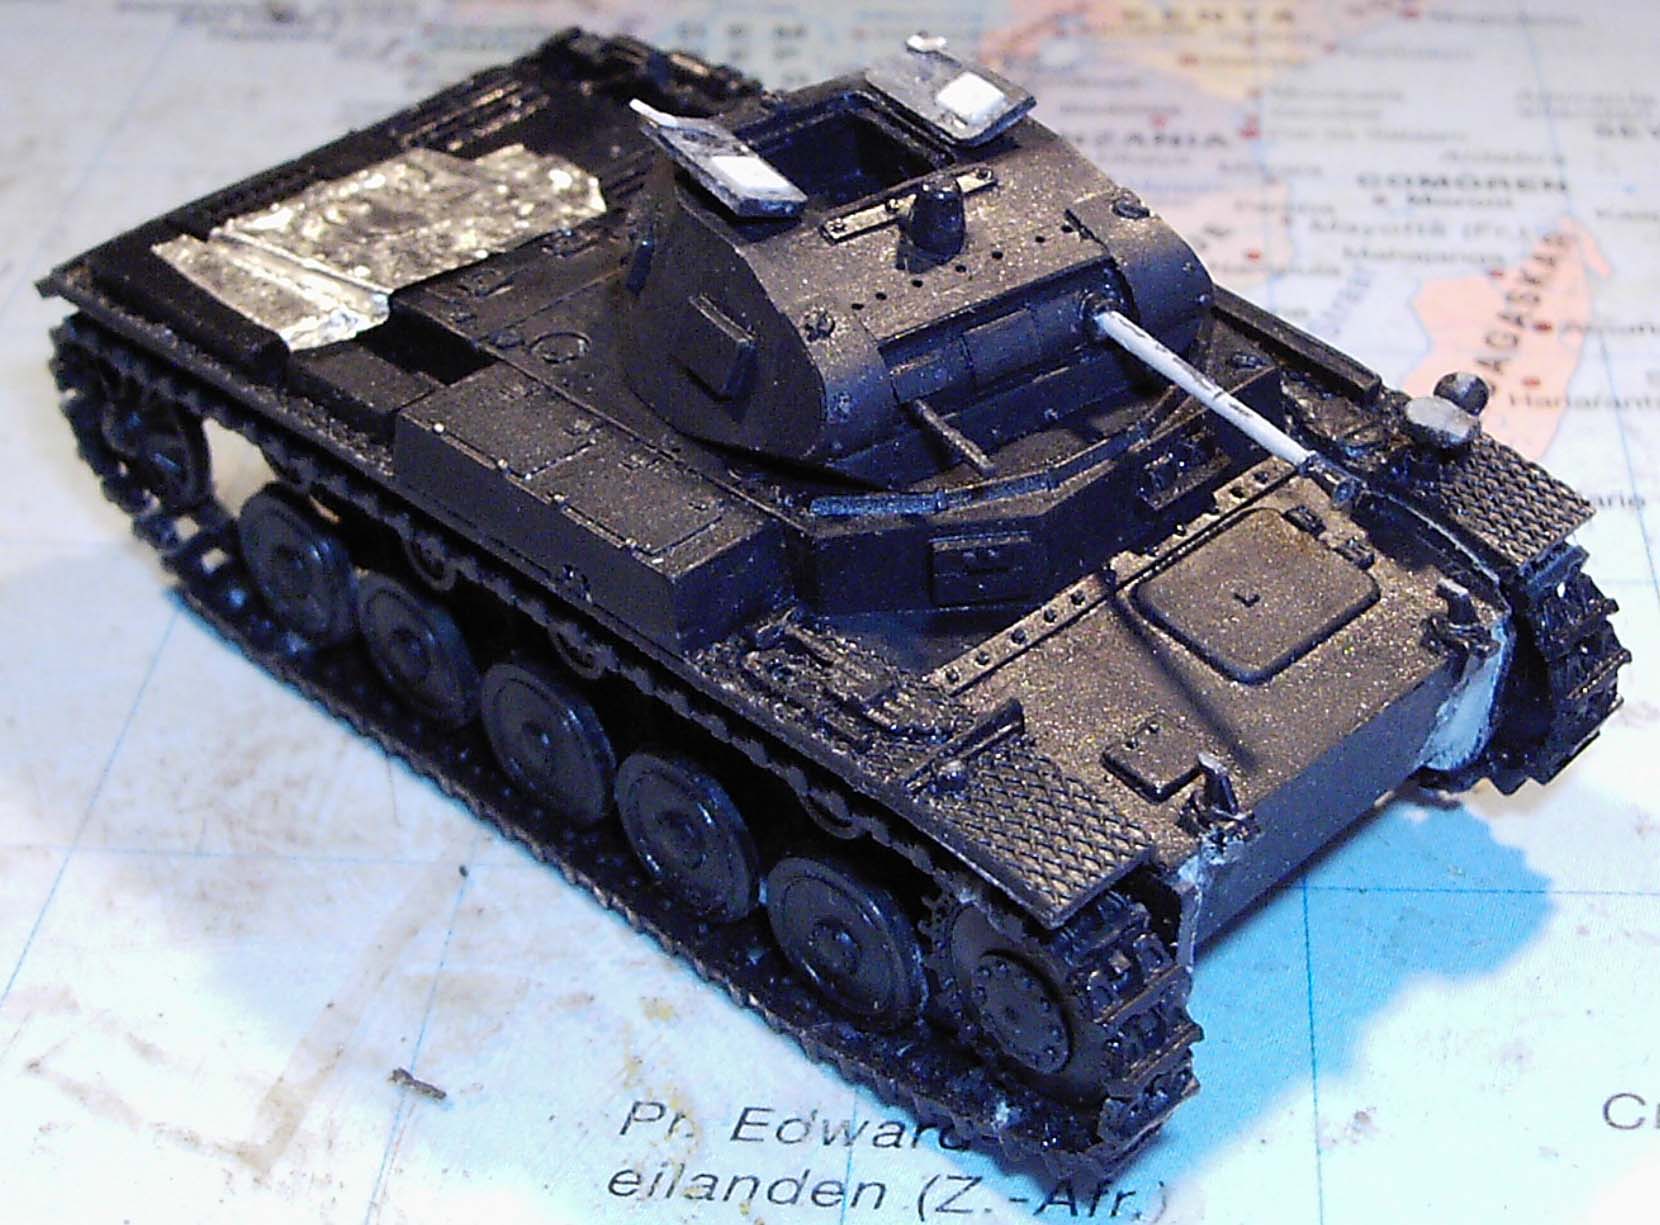
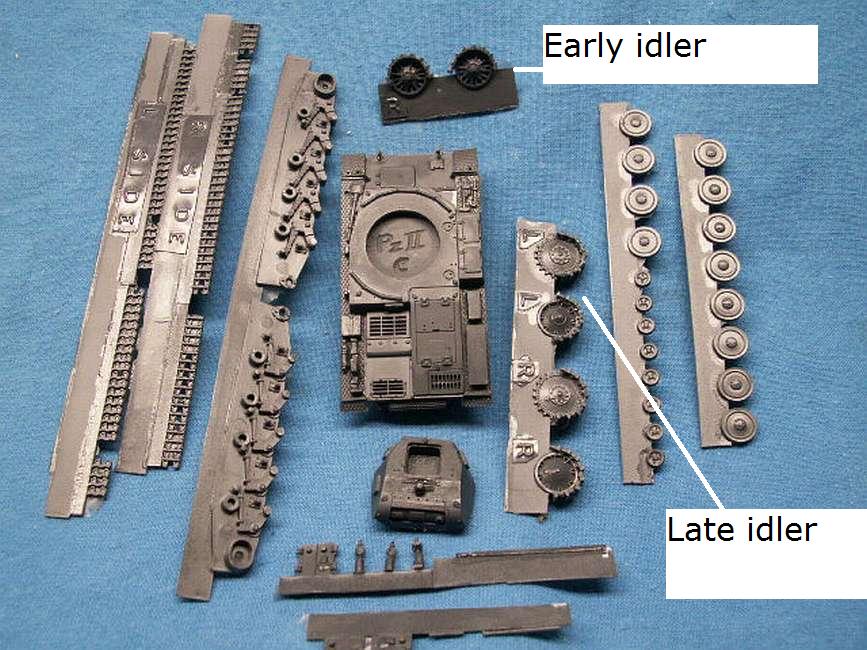
Ausf. C, i.e. You get two types of idlers, of which, in my opinion, only the early version (i.e. the one with the most spokes) is correct for this vehicle. The later style, which was introduced on the Ausf. F, might have been retrofitted to some of the older Ausf. C later in the war, though. The hull is cast with boxes on the right fender, which were only introduced in May 1941 [2], i.e. after the new commander's cupola. This is thus an inconsistency that would be quite difficult to correct. An error was found on the rear of the engine deck. The louvered hatch on the left rear was only introduced on the Ausf. F. I caught this error too late. Next time I will sand off the detail and scribe in a small hinged flap. Also the louvered hatch in front of it (towards the radio operator's station in the fighting compartment) is too large and corresponds to the type seen on the Ausf. F. This might be quite difficult to rectify. Another thing I discovered too late is that the Notek light was only introduced in October 1940 [2]. As my vehicle would find itself in a France, May 1940 setting, I should have omitted it. You get a spare roadwheel. If you like, you can add this to the noseplate, which was a common position for this piece of equipment. An omission I did discover were the lateral engine gills. Correcting this might be slightly daunting. I didn't bother. Some vehicles were fitted with an AA MG mount on the side of the hull. This item is not included. The same goes for smoke candle racks. I did choose to make a very rare MG mount on the turret roof of one of the vehicles. I corrected the "gutter" in the antenna tray on the left side of the hull. This is quite easily done with a sharp hobby knife. Also, the tow pintle needs a small vertical shaft added. Sprue will do the trick. The exhaust tube is a bit too short. Some stretched sprue might again come in handy. The antenna mount is molded in the stowed position. Turn it 90° for a deployed antenna. The horn (on the glacis) is also missing, which can be simulated with a small plastic disk, if required.
5. Instruction sheet, decals and painting options. None are included. As for the camo scheme: given the period this vehicle was operational, the best option would be 2/3 dark grey and 1/3 dark brown.
6. Construction The fit of the kit is very good, although the tracks, being link-and-length resin pieces, are a bit hard to get perfectly straight. Avoiding gaps between the individual links or lengths might require careful sanding, which I didn't bother to do. While the fact that the idler and drive sprockets come with integrally moulded track links is to be welcomed, these are unfortunately not 100% perfectly assembled and are slightly misaligned. Little can be done except to sand them off and replace them with track links from the spares box. As I did not have any spares I decided to live with it. (Besides, the dio setting I had in mind would hide most of it.) As there are only very few parts, apart from the tracks, the construction does not take very long. If you have some basic references about this vehicle, the lack of manual should not pose any problem. You can choose between open and closed commander's hatches and you get different parts for the open and closed option. Detail on the inside is present, but can be improved by adding a handle and leather padding.
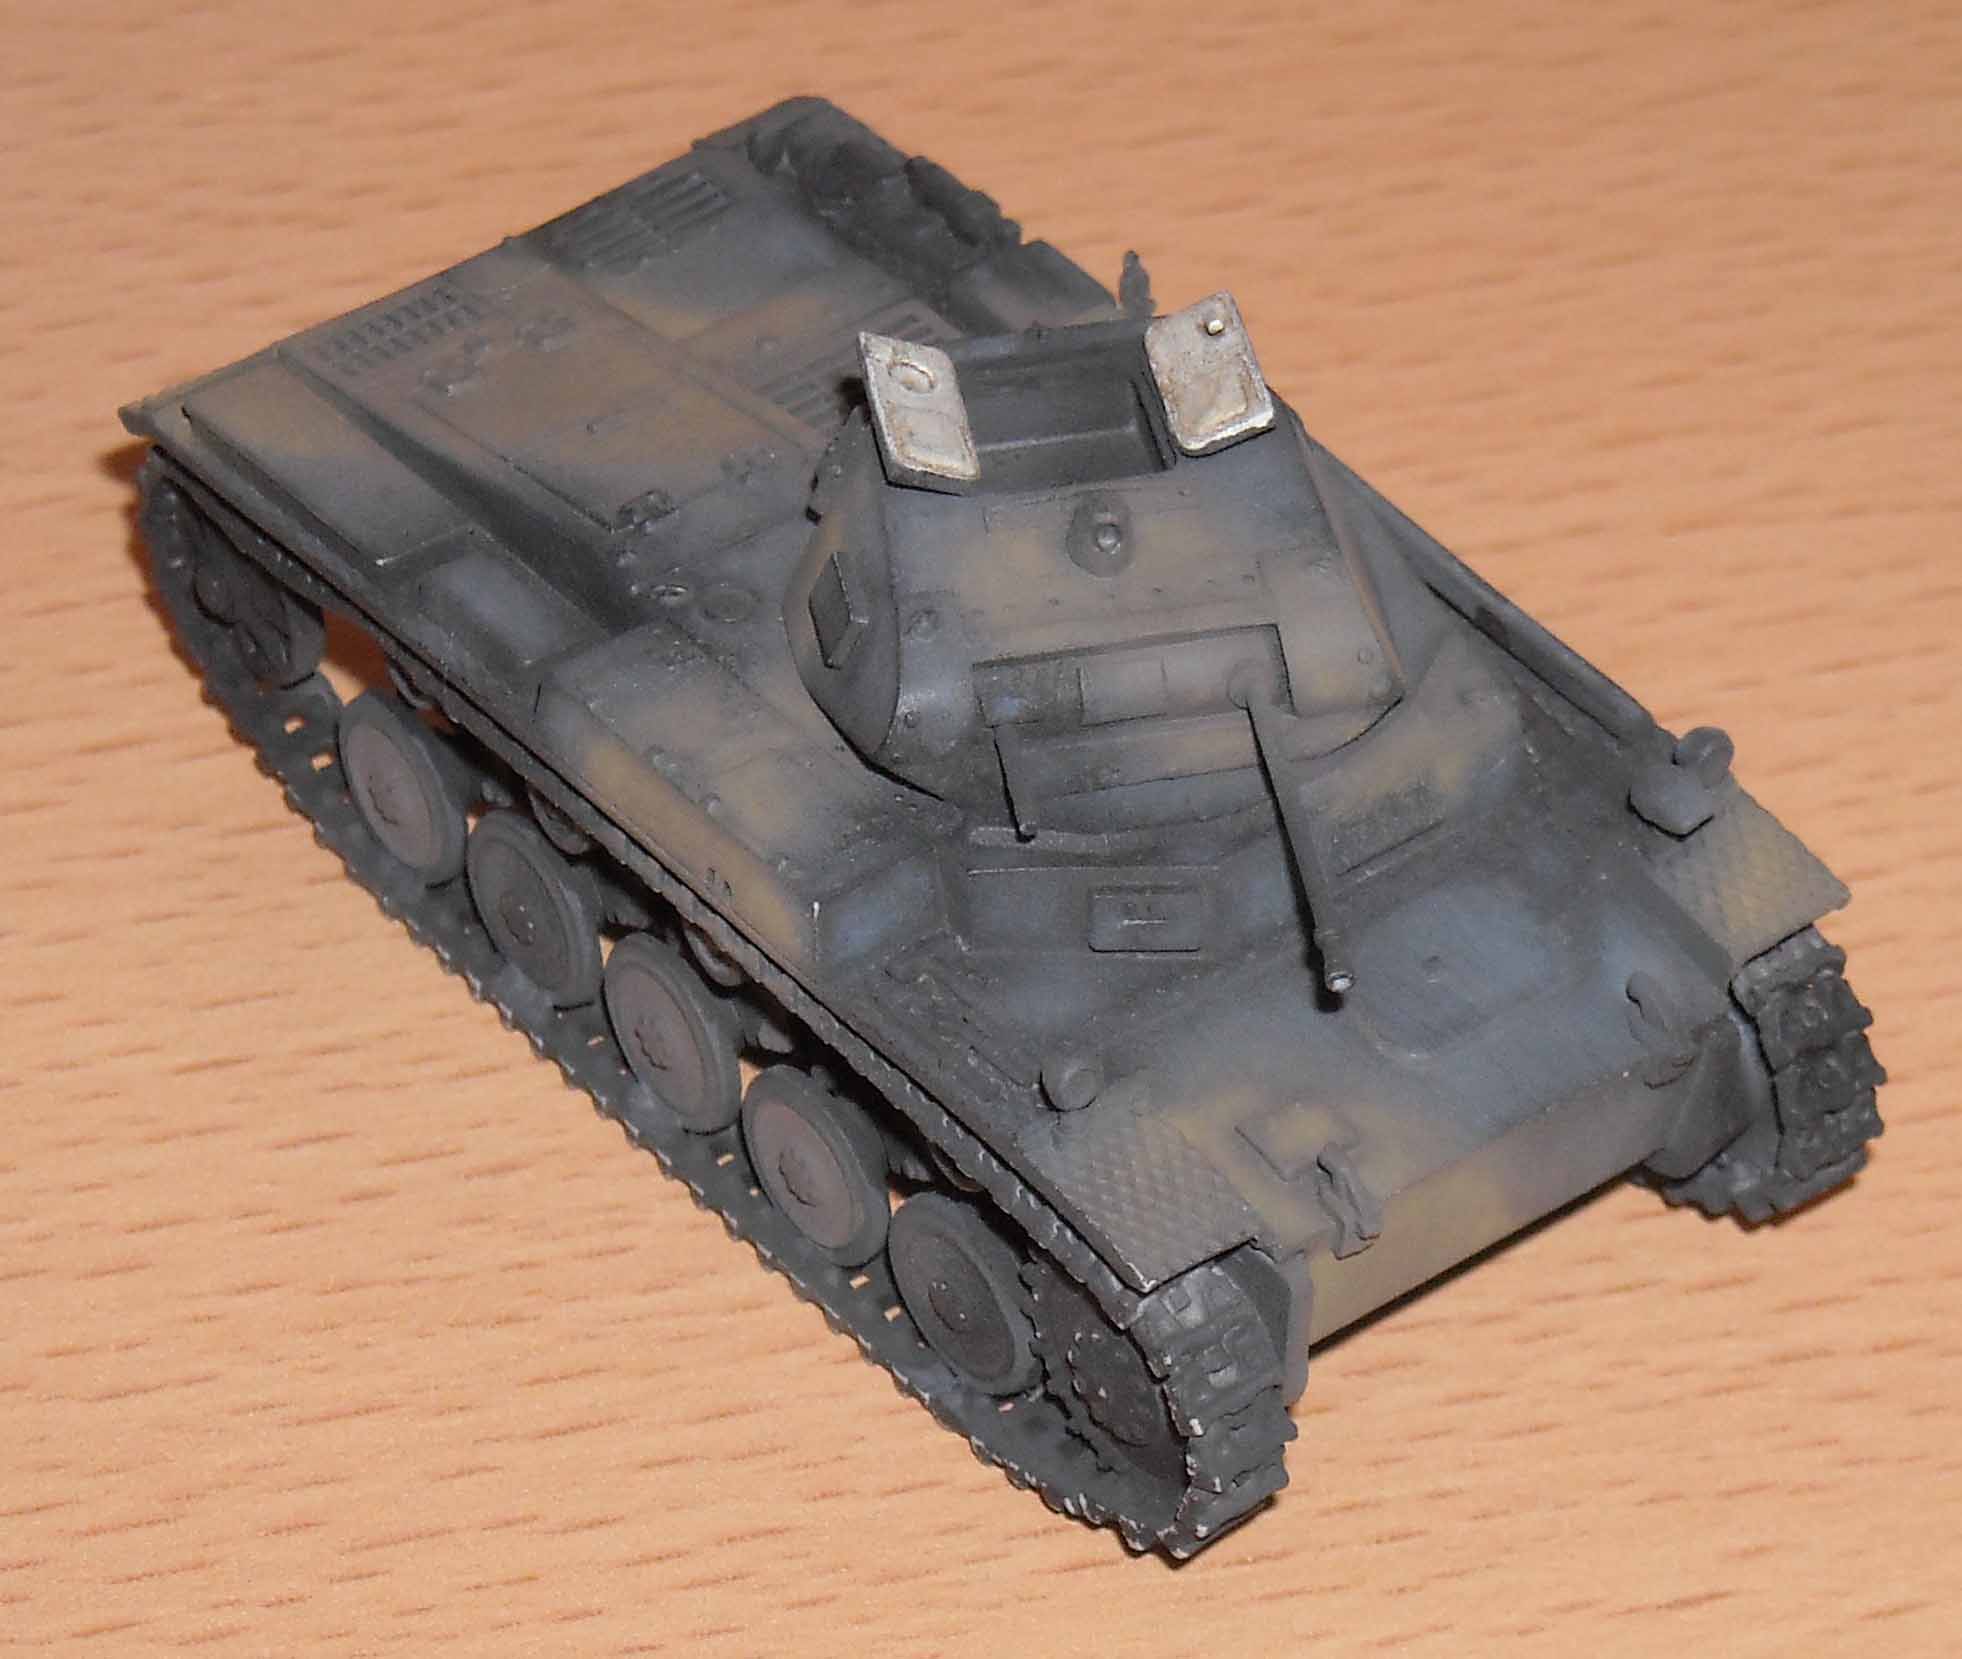
7. Painting and setting The models were first primed with grey
automotive primer after which the camo scheme that was typical for
the French campaign was sprayed on : 2/3 "Panzergrey" (Revell
78) and 1/3 Dark brown (Humbrol 98). Aftershading was done with pastels:
black for the panel edges and recesses and lighter grey, resp. brown,
for the center of the panels. The decals were custom made for my by Peddinghaus, as of the time of writing I had not found any sheet giving the early war Panzer rhomboids. (Peddinghaus meantime has added these markings to their catalogue.) The figures are from AB:
set PZ5
for the commander and set WH1 (I believe) for the infantryman.
The field cap worn by the tank commander was introduced by order HM
40, No. 429, dated 27 March 1940, for those who are interested.
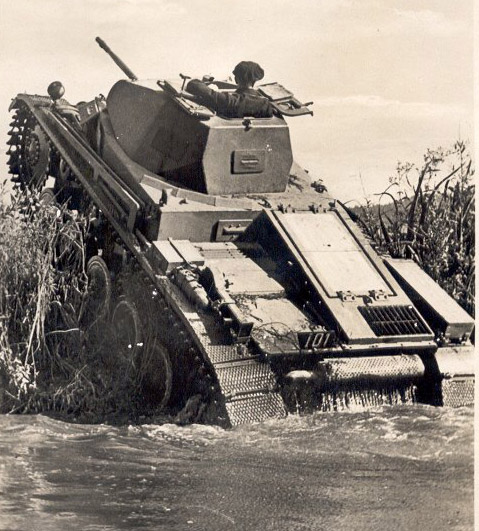
The diorama was inspired by this picture I found on www.German-Military-Photos.de (which has apparently disappeared in the meantime.).
The water in the diorama was made with
Vallejo "Still Water" with splashes of "Gallery
Glass Window Color" (which is a thinner variant of Kristal Klear).
8. General Impression I am quite pleased with this kit as
it fills a significant void with a nice kit. Assembly is fast and
straightforward, details are sharp and casting quality near perfect,
but the end result is slightly marred by the not-so-perfect tracks
around the idler and drive sprocket and the consistency errors with
the engine louvers and stowage box.
9. References [1] Achtung Panzer No7, PzKpfw I / PzKpfw II; M. Bitoh; Dainippon Kaiga; 2002. (Japanese text, with traces of English) [2] Panzer Tracts 2-1, Panzerkampfwagen II; T.L. Jentz & H.L. Doyle; Panzer Tracts, 2008 [3] Henk of Holland website: http://henk.fox3000.com/index2.htm [4] http://www.panzerworld.net/uniforms.html [5] Panzerwaffe, Volume Two; M. Healy; Ian Allan Publishing; 2008. [6] Pz. Kpfw. II Vol. I; J. Ledwoch; Wydawnictwo Militaria; 2002 |


