|
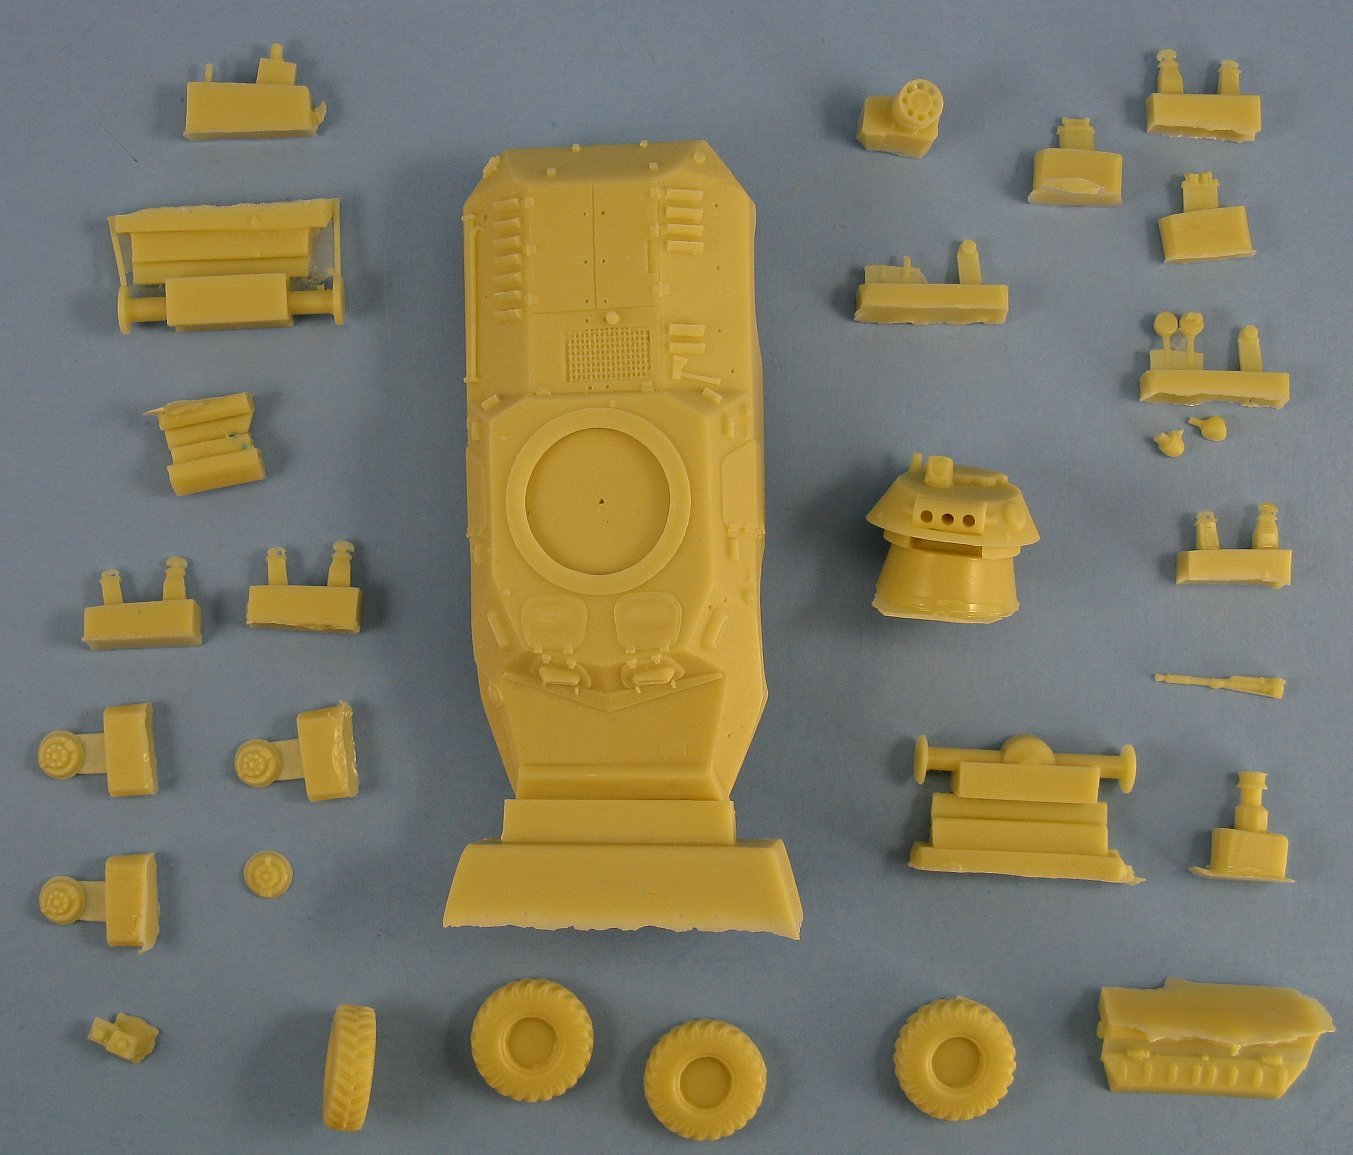
Inside the box you get 35 parts cast in a pale yellowish resin and a short section of wire to make the grab handles from.
There is an instruction sheet and a small set of decals.
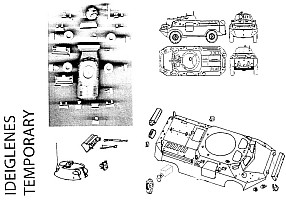 |
The instruction sheet was very poor though I'll have to assume that those included in my kit were only temporary
instructions (as printed on the instruction sheet) and will be superceded by a better set from Armada in the future. As it stands you will definitely need to reference
pictures on the World Wide Web to help locate where some of the smaller parts go. Even with lots of reference pictures I found identifying which part went
where a tad difficult. I did notice though that there were small raised rectangular areas on the hull which helped identify where things should be glued and
the size of the raised areas also helped to narrow down which parts went where when cross referenced back to the kit's pieces.
|
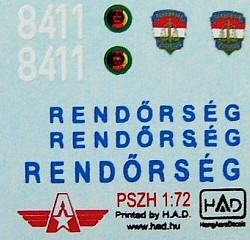 |
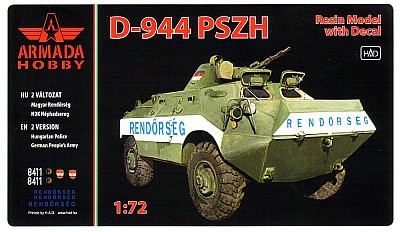
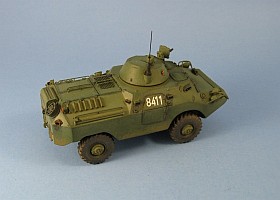
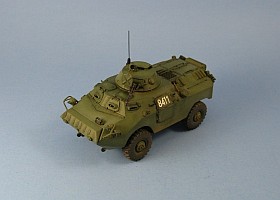
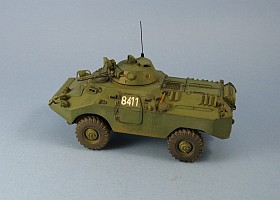
The decal sheet was printed by HAD (HungAeroDecals) and has images for two D-944 PSZH versions, both in basic overall green camouflage:
- An East German Border Police, number white 8411.
- A Hungarian Police Force vehicle (depicted on the box top artwork), with large white panels on the sides of the body and on the trim vane with the Rendorség
script in light blue superimposed thereon.
The image quality was a mixed bag. There were some very well printed images (e.g.. the Rendorség Police Badge and the white 8411)
while the light blue Rendorég script and East German badges were not quite as well done. There are no instructions on where to locate the markings other than
a couple of rather tiny photos of two built D-944s on the side of the box.
I found it interesting that the blue Rendorség decals supplied do not match the picture of the completed model found on the side of the box and on the box top
illustration. The decal sheet comes with two small scripts and one large script but if you're to believe the pictures on the box these should actually be
two large (intended for the sides of the body) and one small script (intended for the trim vane). I had wanted to build the
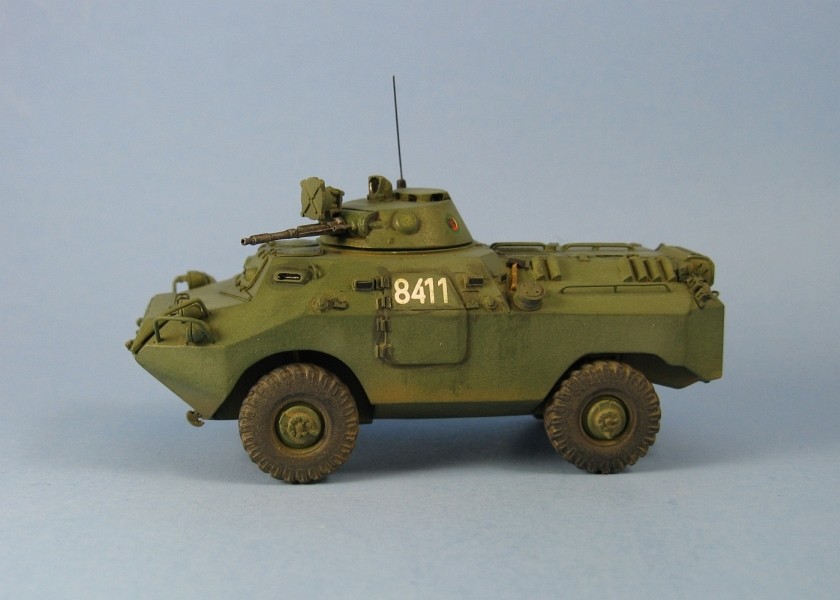
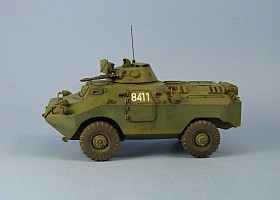
Hungarian version but my doubts regarding the veracity of the decals swayed me to building the East German version. If you look closely at the East German D-944 the white numerals
overlap the top edge of the door. This didn't seem to be right to me so I actually placed them on
the upper half of the side doors with no overlap as per a picture I have of a sister vehicle #9302 on page 352 of the book The Encyclopedia of Tanks and Armoured Fighting Vehicles,
ed. Christopher Foss, Amber Books 2002, ISBN: 978-1-905704-44-6. The decals sat down nicely and responded very well to a couple of applications of Microsol and there
was no silvering of any sort. |
|  |
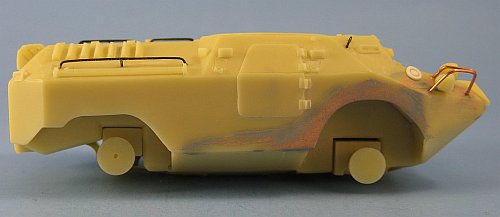
For the most part the castings were quite good. There were a few minor lumps and depressions on the underside of the hull that needed filling.
The one piece body makes this one heavy model and the detail cast integrally with the body is for the most part very distinct, though there were some spots
where it could have been better, such as the vision blocks on the turret and especially around the cooling louvers on the rear. These
are cast as solid pieces and I'm willing to bet that these should essentially be hollow. It would have been much better if the louvres had been either cast as separate
pieces or better yet done as etched brass parts. I really liked the engine mesh on the rear desk which was finely detailed. The wheels and hubs were easily the
nicest parts of the kit.
I figured that it would be best to do the grab handles and brush guards early on in the build, so first of all I deepened the
holes so they would have a nice solid fit while I did my test fitting and after they were glued into their final positions.
 |
I thought the location of the pour plug for the body was quite novel. Placing it at the nose of the vehicle's body allowed me to
cut off the plug and not worry about damaging anything else. Once removed it was a straight forward job of sanding the nose flat and filling the few holes found
under the stub.
One nice feature with the kit is that the holes for the grab handles are already in place
on the model so it's just a case of bending wire to fit and gluing it in place, making this onerous task much easier.
There was one section on the right side of the body that was not properly cast requiring some filler and I could see that the
fuel cap was not going to survive any filling work in this area, so it was cut off, to be replaced later with a scratch built item from some plastic rod.
For filling I used automotive body putty. This is my first try at using
this filling medium. It was recommended by one of the automobile modellers in my local IPMS club (who has won contests in Scale Auto Magazine) and he swears
by this stuff. Other than the rancid pinkish tinge to the filler it worked quite well and I'm told it will not shrink over time. As a precaution I brushed on some thick
grey paint to fill any small pits that may have been in the filler and sanded it smooth.
The repairs to the poor molding on the front right fender area unfortunately covered over some of the holes for
the brush guards requiring them to be re-drilled. To add the holes again I kind of guessed their locations by viewing the kit from above and noting the hole locations
on the left fender and then translated that to the right fender. The holes for the lights were way too small so I also opened them up to accept the
stalks that were cast with the lights. I trimmed the stalks quite close and the lights so they'd sit almost flush to the top of the fenders. That's
how they looked to me in the few pix I found of this beastie on the web. |
 |
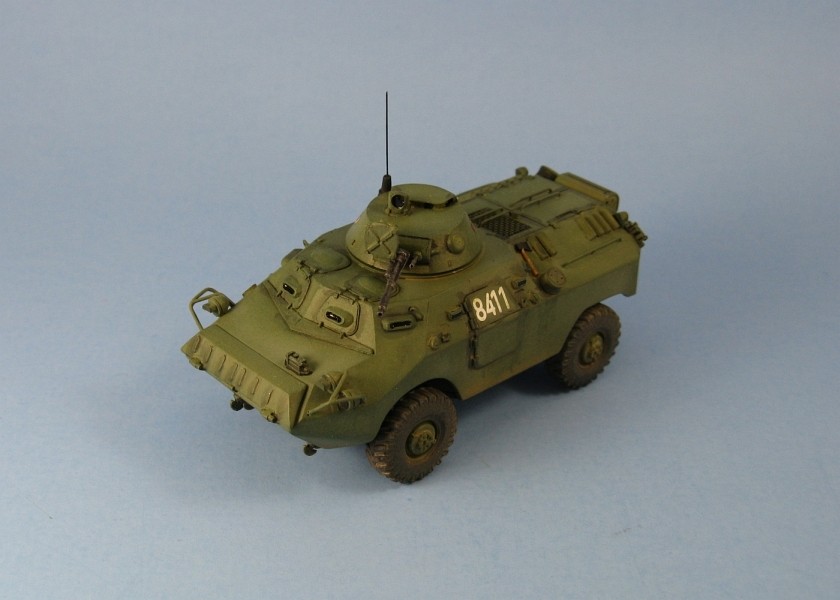
I did not use the supplied wire but substituted used my usual wire - florist's wire
for the grab handles and copper wire for the brush guards. I put the brush guards on as two piece units. The first part was the main loop that ran from front to rear.
I made one U-shaped loop to fit the holes in the hull and then made a second using the first as a template. After some test fitting to make sure
I was happy with their look and ensure that they both sat at the right height to allow me to add the lights, I then I glued them into their holes.
Next I made the rear part of the guard bending a short section of wire into an L-shaped piece. The first piece was used as a template for a second
and then both were glued into their holes after test fitting them with the U-shaped loops. Where they touch the U-shaped loops I just added a drop
of water thin super glue and then set the glue with some accelerator.
The axles come molded to large blocks of resin that slot into the hull. There is an arrow scratched into the front axle block
to indicate which way it is supposed to fit into the slot. There isn't one for the rear because it is obvious which way it fits. The front axle also has a couple of rods
cast to it that I assume are supposed to be the suspension struts. They were too long and stopped the axle block from fitting flush to the hull. I cut them off in any case
and replaced them with a section of thicker plastic rod as the supplied ones were way to spindly for my liking. The fit of the axle blocks left large seams between them and the hull.
It was impossible to get inside the fenders to filled and sand these so I just added a drop of water thin super glue and let it wick into the seams to reduce them.
There was also a problem with the rear axle. In the second picture to the left I have both axles taped to the body and you
can see that the rear axle sits much too high into the body. This made the rear wheels contact the fenders and gave the vehicle a nose up attitude when
I did a test fit of the wheels onto the ends of the axles with some blue tack. I found that a spacer of about 0.08in between the rear axle and body provided a level stance.
|
The turret has a large pour plug that needs to be removed with a saw and then sanded down. I found that after I had done this the turret
seemed to sit a bit high and left quite a noticeable gap between it and the hull. I sanded the bottom down some more to reduce this gap.
The barrel openings of the main gun and the MG were drilled out as was the exhaust pipe on the right rear fender. A short length of
guitar wire supplied the antenna. The spokes in the wire spool were rounded with a drill.
When it came time to add the wheels after the painting was complete there was enough difference in the hub diameter
versus the diameter of the terminus of the axles to give me enough play to get the model to sit flat on its wheels.
Outside of the poor resin casting in the one spot of the body and the problem with the rear axle height this is a very nice resin
kit and one that can be built fairly quickly and without too much fuss.
Review sample provided by Andras (Andy) Karacsonyi of Hunor/Armada Hobby.

|