![]()
| Modeling the M1 Abrams in 1/72nd Scale | by Doug Chaltry |
| email: dougc (at) 172shermans (d0t) com |
![]()
| Modeling the M1 Abrams in 1/72nd Scale | by Doug Chaltry |
| email: dougc (at) 172shermans (d0t) com |
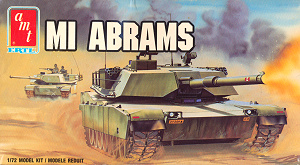
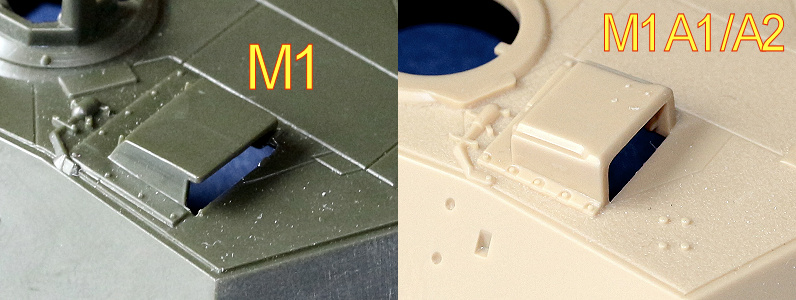
This article has been sorely in need of an update for a very long time. The original version of the article began thus: "A unique situation has developed over the past couple of years; something usually unheard of in the small-scale armor community. When a person desires to build a model of an M1 Abrams, he actually has a choice of kits to build. This situation is so uncommon, that I thought I would write a short article describing all of the available Abrams kits, and compare their respective strengths and weaknesses." Even though we already had a decent selection of kits from which to choose, a great many new offerings have hit the market since I originally wrote this article, over 15 years ago. This is due, in part, to new manufacturers wanting to give their own take on the subject, as well as to the fact that the Abrams has been continuously upgraded over the years, so that new kits were needed to allow us to build the most modern versions of this tank. The M1 Abrams Main Battle Tank comes in three basic versions, with some sub-variants:
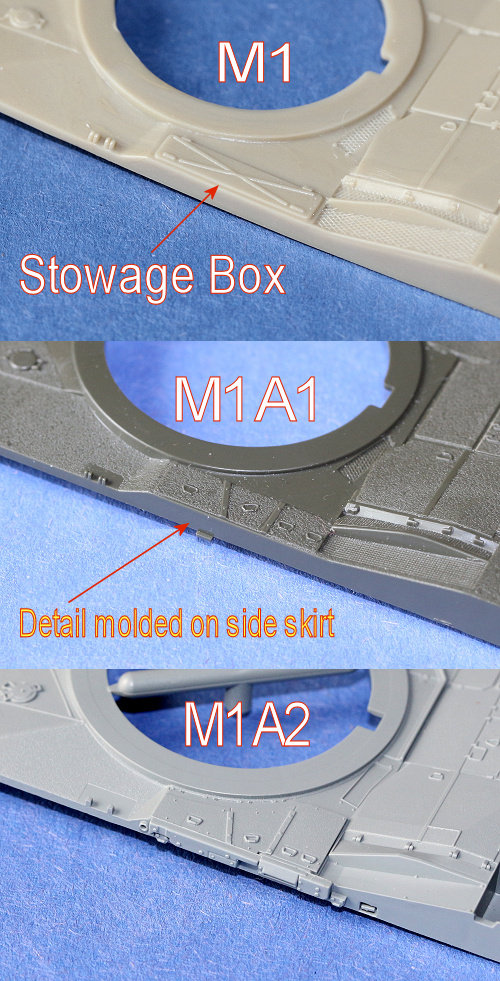
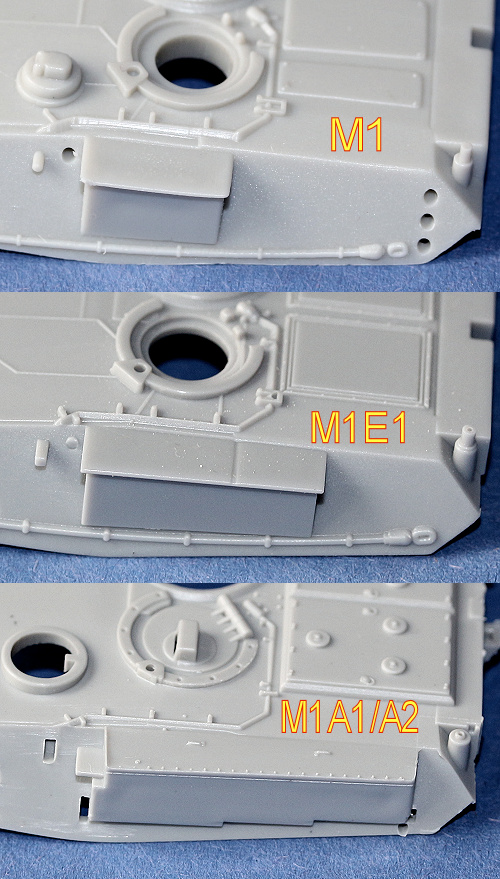
(There are probably even more sub-variants, but this article is getting convoluted enough.) There are considerable differences between the three primary versions, and some smaller differences among the sub-variants, which should be represented on a scale model. These differences will be described below. I will not provide in-depth reviews of each available kit in this article, but rather give only overview comments for each kit, as well as several comparison scans of selected kit parts to illustrate key differences between them.
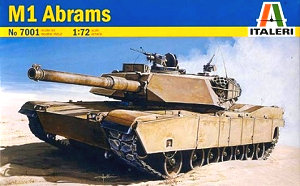
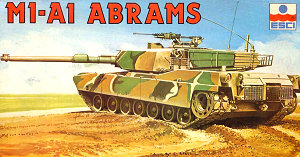
ESCI M1 Abrams, (Italeri Kit No. 7001; ESCI 8070; ESCI/Ertl 8307; AMT/Ertl 8637)
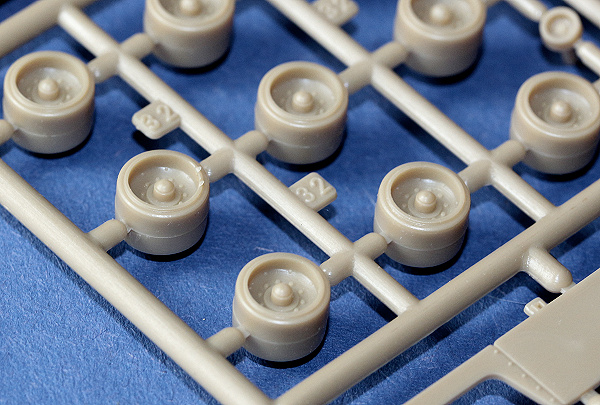
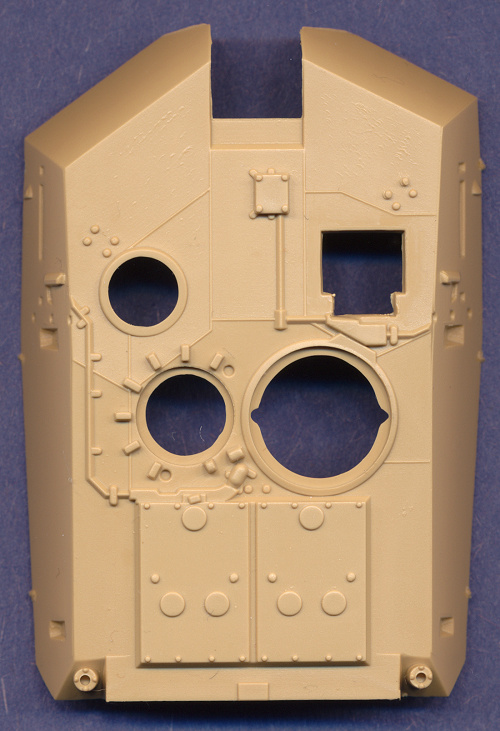
This was the first Abrams kit available on the market, originally under the ESCI label, now currently marketed by Italeri. Overall, it is a good kit, though with some errors. The dimensions are a little large (about 2.5mm too long and 1.5mm too wide, which makes the hull about 1/70th scale), but the detail on the kit parts is very good. The panel lines on the front portion of the turret roof are raised, representing the weld lines between armor plates, but are a bit too pronounced. This is the only base M1 kit with the driver's hatch molded open, but the periscope visors are molded solid. The turret storage bins and the tow cables are molded as separate pieces. The rearmost panel on the armored side skirts has the curved cutout that did not appear until the M1E1 and IPM1. There were some field modifications to this panel meant to alleviate the problem of mud buildup, but they weren't the smooth curve seen here, so this panel should be remade to be appropriate for an operational M1 (see Hasegawa M1 below). My biggest complaint with this kit, shared with several of the kits below, is the way that ESCI molded each pair of bogie wheels as a single, double-wide wheel.
Granted, with the side skirts on, it is difficult to see this shortcut without picking up the model, but this feature limits the ability of modelers to make interesting dioramas with the side skirts removed, and contest judges in model shows are sure to notice. Hasegawa M1 Abrams (Kit No. 31133/MT33)
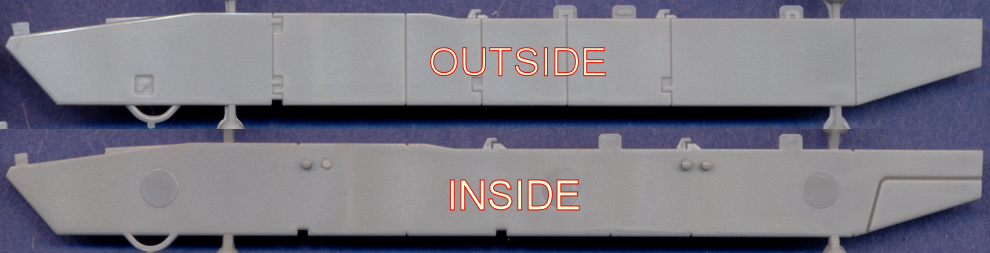
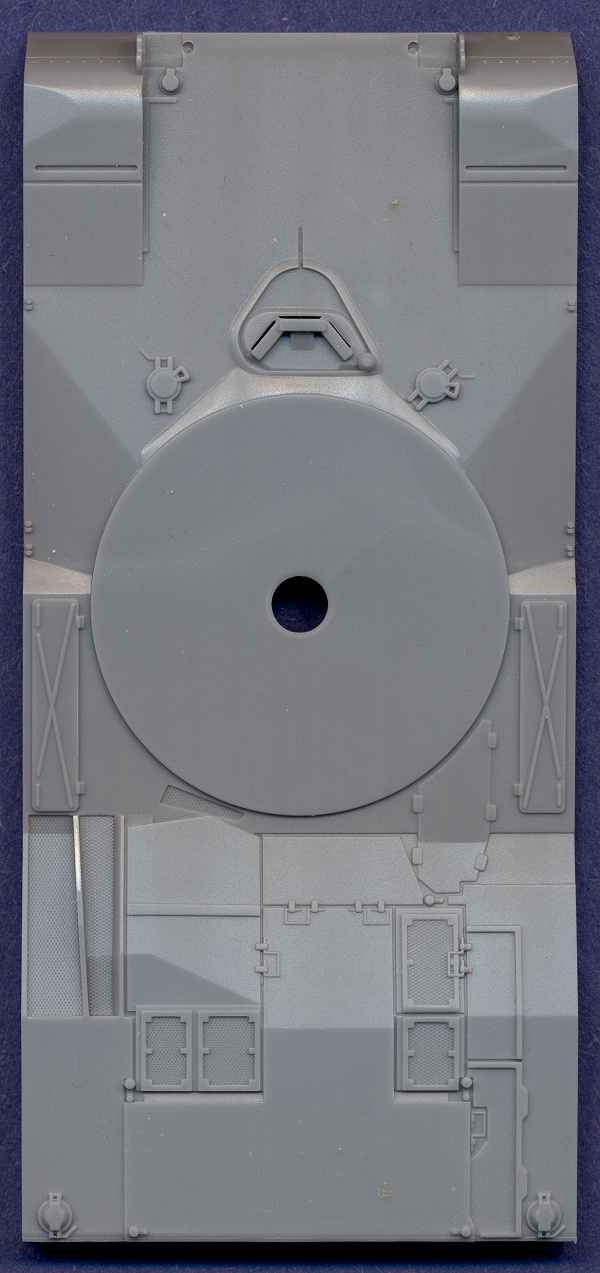
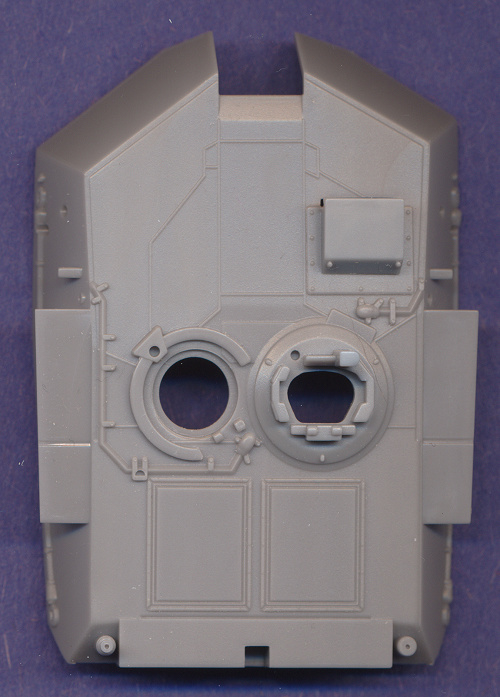
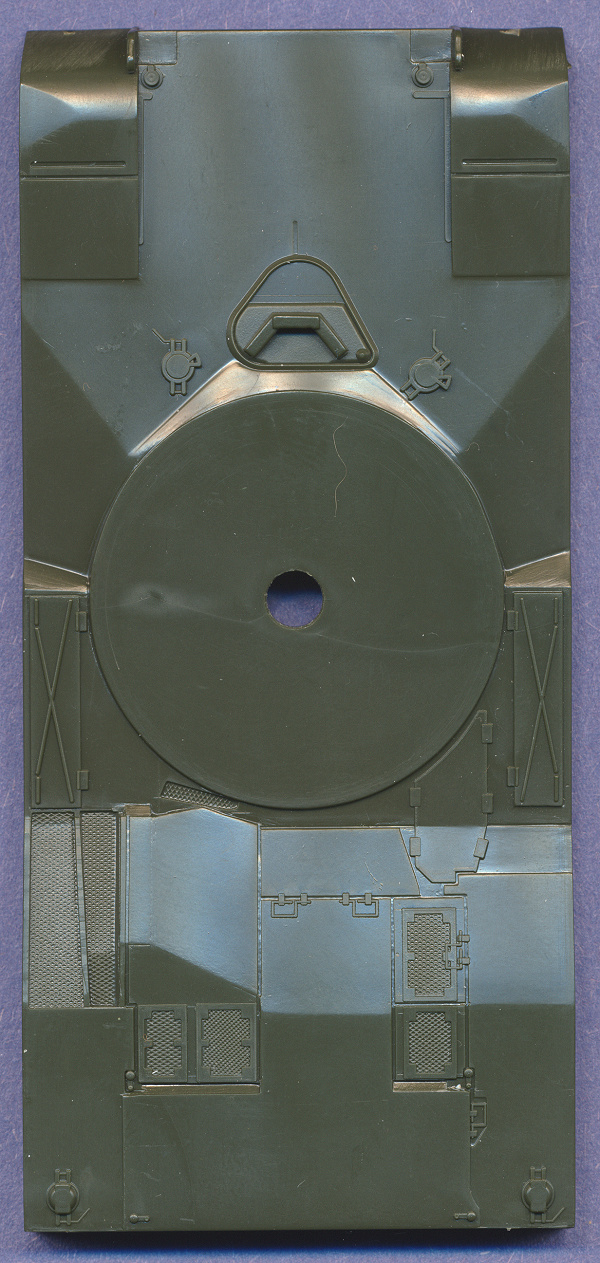
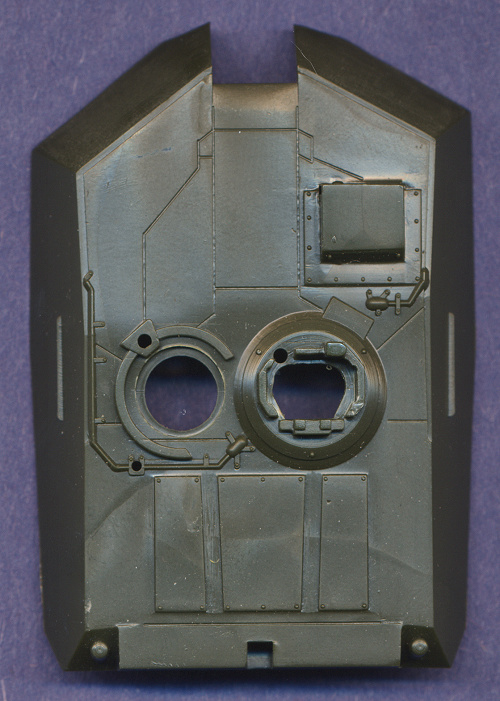
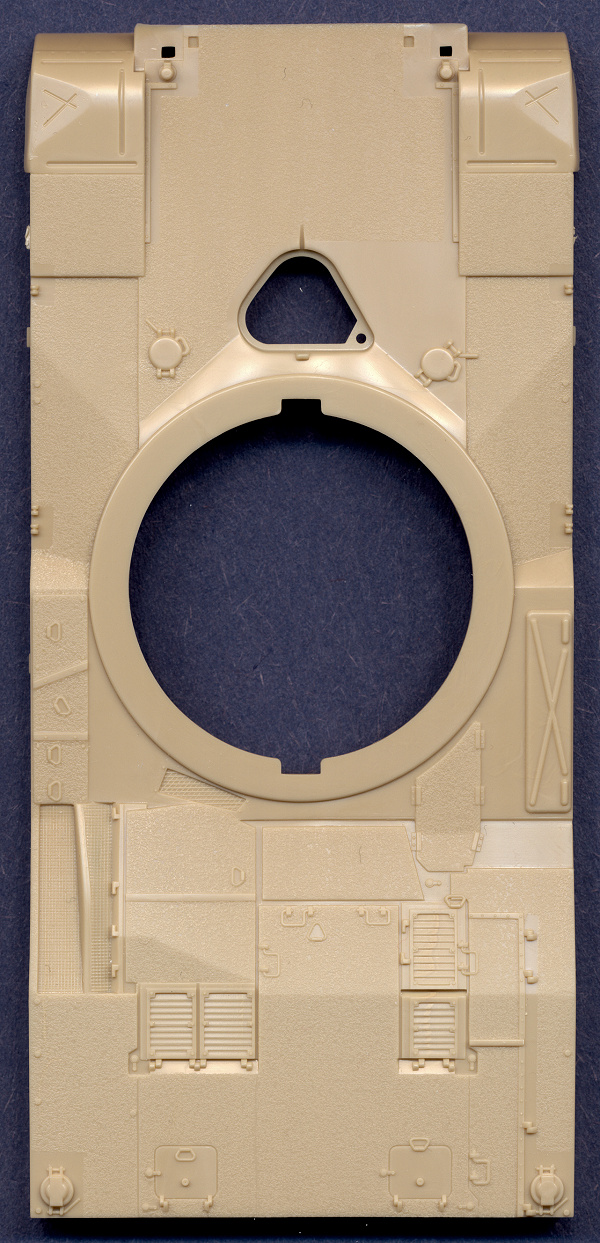
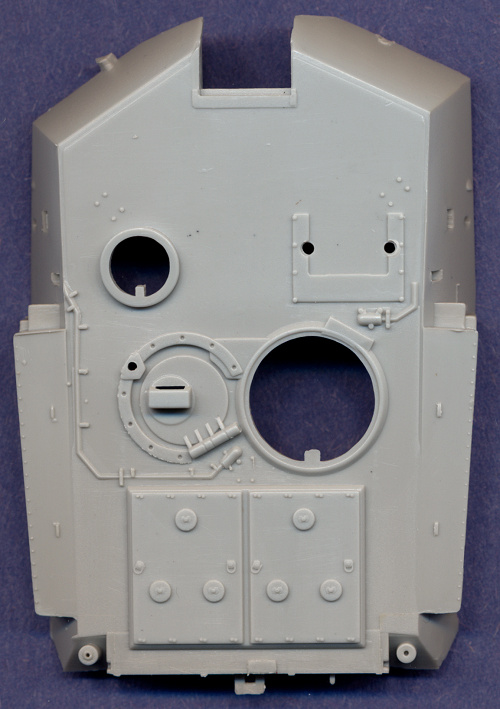
Although this kit has a couple of minor problems, it is still a pretty good model. The hull dimensions are accurate. One figure is included, and he looks fairly decent. The driver's hatch is molded closed, but the periscope visors are open, as opposed to solid blocks, as on the ESCI kit. The weld lines on the turret roof are too prominent. The turret side storage bins are molded directly on the turret, as are the tow cables, so they're a bit lacking in definition. Spare track links are molded onto the storage racks on the turret sides. The wheels are the very poor "double-wide" type described in the ESCI kit above. The rear panels on the armored side skirts are shown on the boxtop as having the curved cutout of the later design. However, the kit parts are molded as a complete armored plate (as it should be with this version), but with a groove molded on the rear of the plate allowing modelers to make the cutout themselves, if desired. See the following scan:
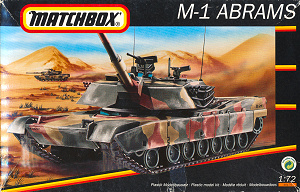
You can refer to a full construction review of this kit for further details (which has not been updated since I've obtained new reference material and expanded my knowledge of this vehicle). Matchbox M1 Abrams (Kit No. 40179)
Long out of production, this kit is a mixed bag. The hull is slightly under scale (about 1mm too short), and it is missing some details on the rear engine deck (hatches and lines). The driver's hatch is molded closed, and the periscope covers are solid blocks of plastic, instead of having open fronts. There are no tow cables provided for the turret sides. On the positive side of things, I prefer this turret to the previous two offerings because the details are a little more sharply molded. The weld lines are molded as recessed panel lines, which actually are not correct as the welds should be slightly raised, but once painted, I think these will look better than the prominently raised lines of the preceding kits. The storage boxes are molded as separate parts, and the smoke grenade launchers have protrusions coming out of a couple of the grenade cavities that are supposed to represent loaded launchers, but they don't look entirely correct. The wheels are again the "double-wide" type. The rear panels on the armored side skirts are shown on the boxtop as having the curved cutout of the later design. However, the kit parts are molded as a complete armored plate (as it should be with this version), but with a groove molded on the rear of the plate allowing the modeler to make the cutout themselves, if desired (see the scan above for the Hasegawa M1 - this kit does the same thing). If I could pick only one M1 kit, it would probably not be this one. But despite that, it is still a decent model and if it is the only choice in your local shops, I wouldn't hesitate to build one.
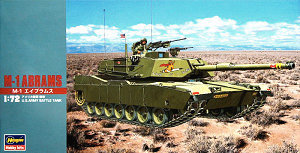
Hasegawa M1E1 Abrams (Kit No. 31135/MT35)
This kit includes the hull and running gear of the earlier Hasegawa M1 kit, but with a new turret. The gun has been changed to the 120mm, but it is a little short, and the shape of the bore evacuator is not correct. The turret has been changed to reflect the elongated storage bins on the turret sides, the rear turret bustle rack, and altered ammunition bin blast panels (although I don't think these are correct - my references are contradictory). Perhaps early M1E1s had the older style of blast panels, but later vehicles had the new design represented here? Add-on armor plates are included for the front faces of the turret, but not the extra armor for the lower front hull. Aside from those changes, the remainder of this kit is the same as their early M1 kit. The main deficiency with this kit, besides still having the double-wide road wheels, is that the NBC air filter was not added to the left hull sponson.
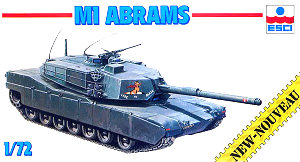
ESCI M1A1 Abrams (Kit No. 8072)
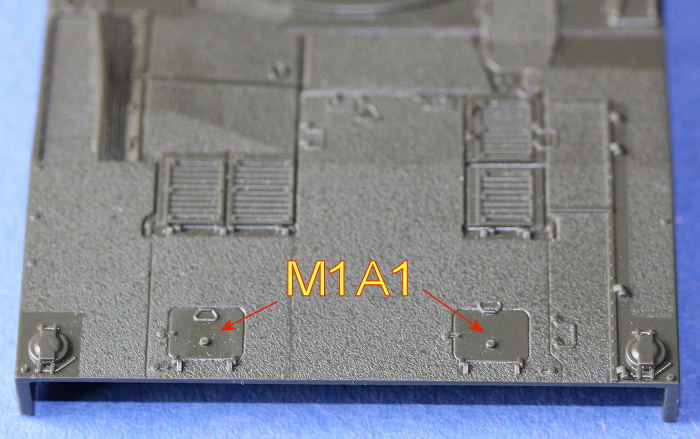
The first M1A1 Abrams kit to hit the shelves was again by ESCI, and it is now out-of-production. This is essentially the same kit as ESCI's base M1 kit, with a couple of changes. First of all, the 105mm gun was replaced with a 120mm gun, but the bore evacuator is not correctly shaped. The bustle rack on the rear of the turret is also included. Aside from these two alterations, the remainder of the kit is the same as the M1, which indicates several shortcomings. First and foremost, the turret was not lengthened. The storage bins on the turret sides are too small; there is no mounting plate for the thermal gunsight on the turret roof; the housing for the gunner's primary sight was not altered; and the ammunition bin blast panels have not been changed. Additionally, the two, small, engine access hatches were not added to the rear deck, nor was the NBC air filter change made to the left hull sponson.
I do not believe that this kit has yet been reissued by Italeri, which is probably a good thing considering its inadequacies.
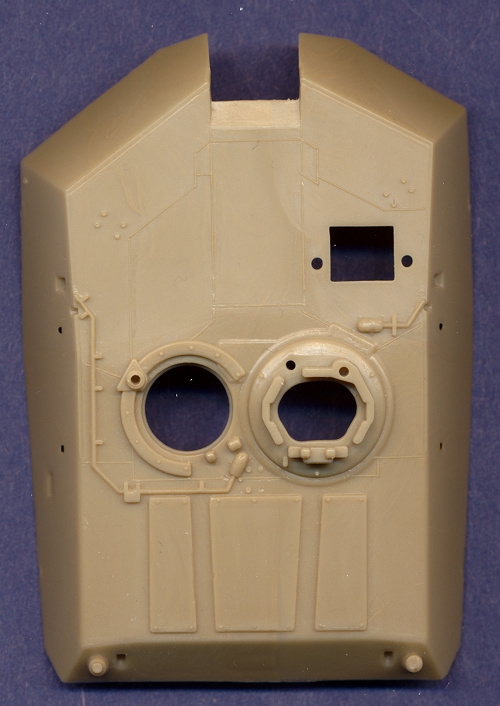
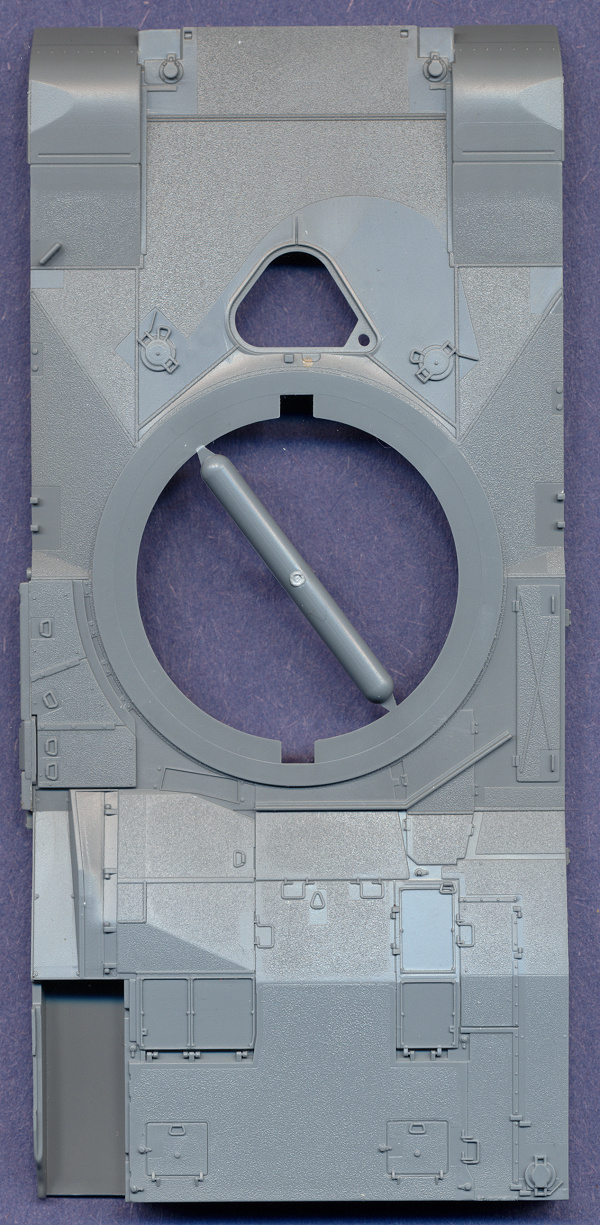
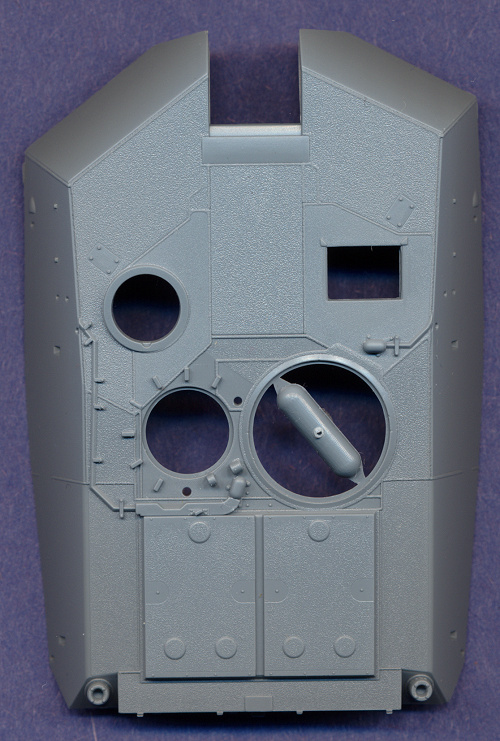
Revell-AG M1A1(HA) Abrams (Kit No. 03112)
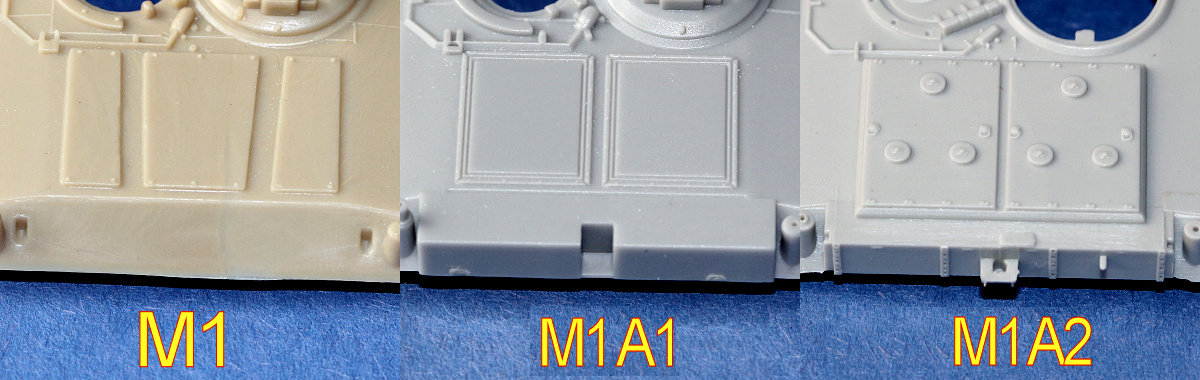
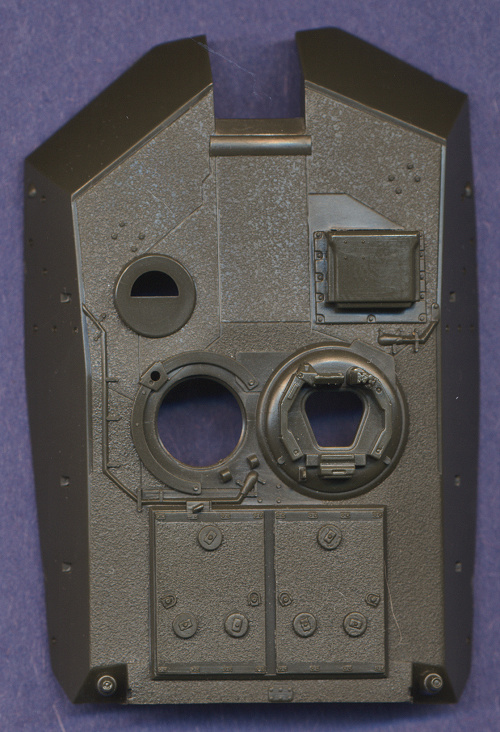
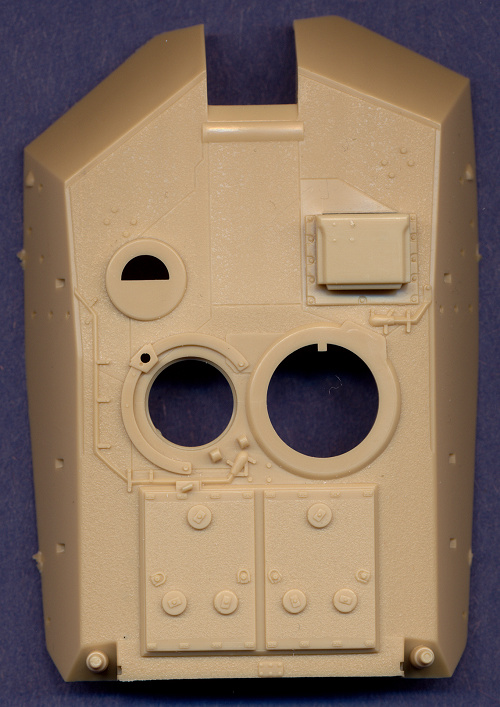
This kit was the first really good Abrams kit available of any version in this scale, though I admit that much of the initial shine on this kit has worn off, once Simon Barnes pointed out its size errors (at the bottom of the Dragon Abrams preview). The hull dimensions are a little large, about 1.5mm too wide and 2.5mm too long, but this would be noticeable only if sitting next to one of the other kits that are on the smaller side. But also, the turret is not shaped entirely correct. Although the overall length of the turret is close to correct, the turret roof is a little short, so that the front-facing armor plates are sloped too much. The overall effect is likely not too noticeable unless one is looking for it. The kit contains all the appropriate details for the A1 version of this tank. The ammunition bin blast panels are of the later style, which can also be seen on the M1A2.
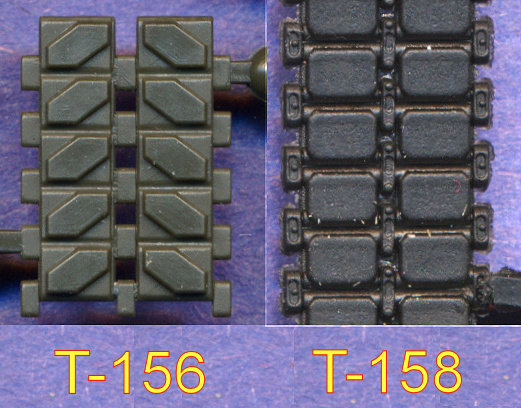
There is some very delicate texturing on the turret roof and hull surface to represent the anti-skid coating applied to these surfaces. The panel lines on the turret appear to be recessed and once painted, will simply look like gaps between patches of the non-slip surface. All of the hull and turret details are very sharply molded. The turret MG's are much more detailed than those in all the previous kits, and all crew hatches are molded open (with open periscope visors). Most importantly, this was the first Abrams kit that has each bogie wheel molded separately. The kit comes with T156 track, which was later replaced on M1A1s with the T158. Until the appearance of the Tiger Models and Flyhawk Abrams (see below), this was the finest Abrams kits on the market, and still represents the best M1A1 kit we have available. Dragon M1A1 Abrams (Kit No. 7215)
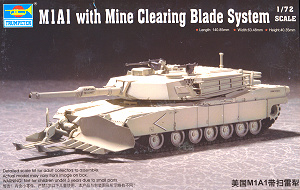
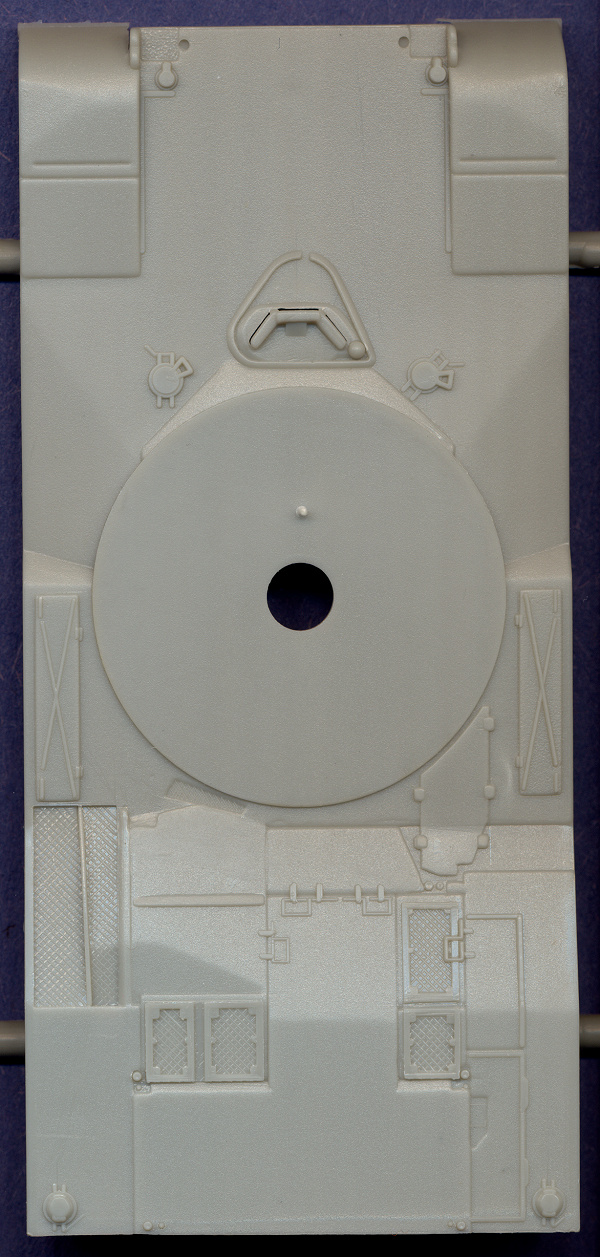
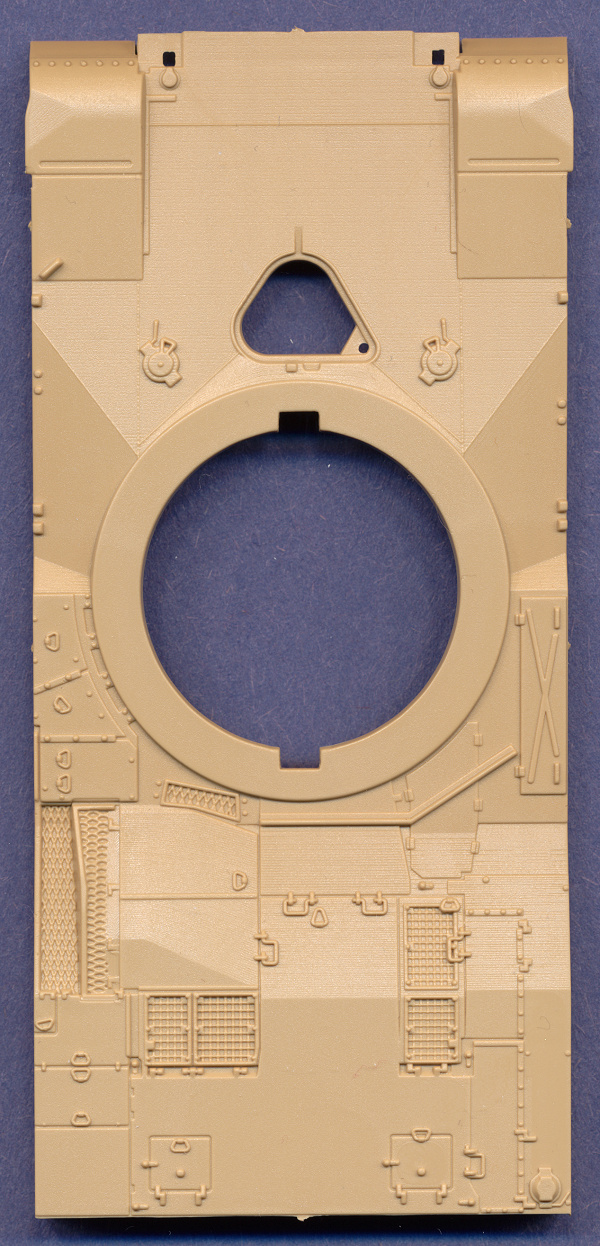
Dragon's M1A1 Abrams kit borders on the line between a toy and a scale model. Many of the kit parts are intended for use on Dragon's pre-built Abrams model, and has some design peculiarities and is over-simplified in its construction. The lower hull has a bulge on the belly to accommodate a motor (not included in this kit), and the wheels are intended to be movable so that the toy tank could actually drive on its treads. Of course it is easy enough to bypass these moving parts, but you may want to affix the model to a vegetated base so that the belly can remain hidden. On the positive side of things, the kit is very accurate to 1/72nd scale and has abundant detail, though it is molded a bit soft. All hatches are molded open, and the wheels are molded as separate parts. The tracks are a very detailed but flexible vinyl, which should look nice when painted, assuming they don't fold in the middle where they wrap around the sprockets. They are the T158 style, which was seen on late M1A1s. Two designs of the ammunition blow-out panels are included, one for the M1A1 and one for the later M1A2. The turret has very realistic weld lines etched into the surface, but there are very large locator holes on the sides for the storage bins and other items mounted there. The storage racks on the turret sides and rear are not very realistic. This same kit has been released with a Mine Plow (Kit No. 7213). Trumpeter M1A1 Abrams MBT (Kit No. 07276)
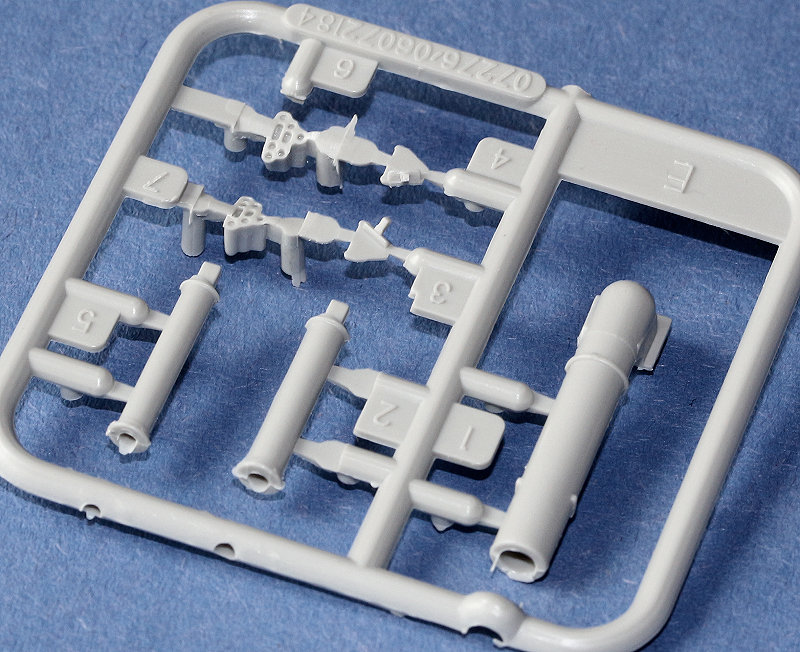
The kit pictured here is the M1A1 with Mine Clearing Blade System (Kit No. 07277), which has the complete M1A1 kit along with the mine plow. All the comments here are equally applicable to Trumpeter's standard M1A1 kit (no. 07276) and the M1A1 with Mine Roller (Kit No. 07278). Trumpeter's Abrams are pretty much the same as your typical Trumpeter kit: pretty decent, though not exceptional. All of the details are correct. It has the proper turret shape, the hull is just a hair large, about 1mm too big in both length and width; the NBC system is correctly depicted, etc. I really have no complaints about the kit's accuracy. But the molding quality is only average; while not as sharp or cleanly-molded as the Revell kit, it can stand up to comparison with Dragon and the others. The turret looked a little strange at first glance until I figured out why: there are no weld lines depicted on the turret roof, nor any sort of anti-slip coating, so the flat armored plates look completely bare.
Wheels are molded correctly, while the tracks are a soft vinyl T-158 style. They are nicely detailed and assuming they glue and paint well, will look pretty good. My major disappointment with this kit is that all of the crew hatches are molded closed. Even the turret hatches. This is the only kit in this entire line-up that has the turret hatches molded closed. Something to keep in mind if you want to place crewmen in your hatches. However, on the plus side, the Trumpeter Abrams kits (all of them), are the only kits in this comparison that include the deep wading stacks used on the M1A1(HC).
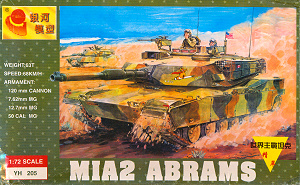
Galaxy M1A2 Abrams (Kit No. 205)
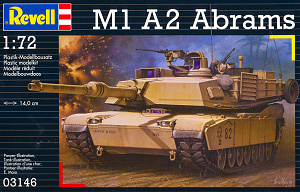
This kit was the first model sold to us labeled as an M1A2, but it is completely inaccurate. This kit is apparently a copy of the Hasegawa M1 kit. Not copied as in "making a mold directly from the other kit," but rather, it seems as though the Hasegawa kit was used as a pattern to make the masters for this kit. All of the details are the same, the dimensions are the same, even some of the parts layout on the sprues are the same. The only thing that Galaxy did to try to make this look like an A2 version, was they added a poor CITV housing in front of the loader's hatch. Additionally, the molding is very low quality, the details are soft, the decals/stickers are worthless, the wheels are very poor, and the tracks are a soft vinyl that in no way resemble Abrams tracks, and also eat away at any styrene that they touch. Thankfully, I think that this kit is long out of production. Revell-AG M1A2 Abrams (Kit No. 03146)
Revell's M1A2 kit is almost the same kit as their M1A1, but includes a few additional parts for the M1A2 version, such as the CWS and CITV. This results in an mostly accurate M1A2, but with the same size discrepancy as their M1A1 and incorrect tracks. This kit should have T158 tracks.
One could actually build an M1A1 from this kit, as all of the necessary parts are included. Dragon M1A2 Abrams (Kit No. 7516)
Dragon's M1A2 kit is almost the same kit as their M1A1, but some of the spare parts that were not used in the M1A1 kit are used here (such as the later blow-out panel design), and a few additional parts are included for the CWS and a very poorly shaped CITV. This results in an accurate M1A2, but with the same deficiencies in design and molding as their M1A1.
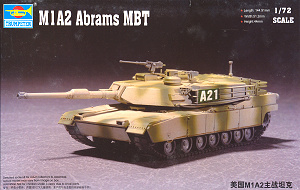
Trumpeter M1A2 Abrams MBT (Kit No. 07279)
All of my comments for Trumpeter's M1A1 apply here as well. There just truly isn't anything remarkable about this kit. All of the pertinent M1A2 details and modifications are included. The M1A2 parts are on an additional sprue and all of the M1A1 parts are included as well, so one could build either version from this kit. Bottom line is that if you have no intention of modeling a tank with open hatches, you will do perfectly fine with these Trumpeter kits. Fully accurate and with adequate details, but with only average molding quality.
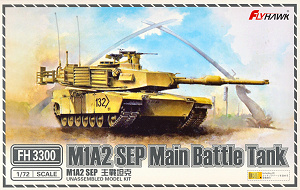
Flyhawk M1A2 SEP Main Battle Tank (Kit No. 3300)
If you want to build only one Abrams model, look no further than this kit from Flyhawk. Writing about this kit is an exercise in coming up with new superlatives to describe it. Many of you may be familiar with Flyhawk's earlier releases, and you know what to expect here. Not only is this far and away the best Abrams kit available to us, it is one of the finest small scale tank models ever produced. According to my references, it is perfectly accurate in scale and details. Molding quality is second-to-none with a level of detail that needs to be seen to be believed. If I had to find anything to criticize (which I guess I do, so you know I'm not just simply in love with this kit), Flyhawk took a shortcut with the tracks by molding the track runs complete, but in two halves (inner and outer). While it is still pretty amazing how much detail they were able to accomplish given such a molding shortcut, it should be pointed out that replacing these tracks with some resin aftermarket parts will result in even greater track detail.
This same tank has also been released with the mine clearing blade system (kit No. 3301).
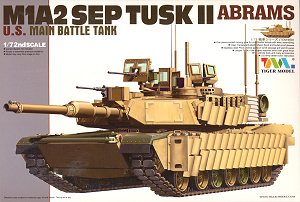
Tiger Model M1A2 SEP TUSK II Abrams (Kit No. 9601)
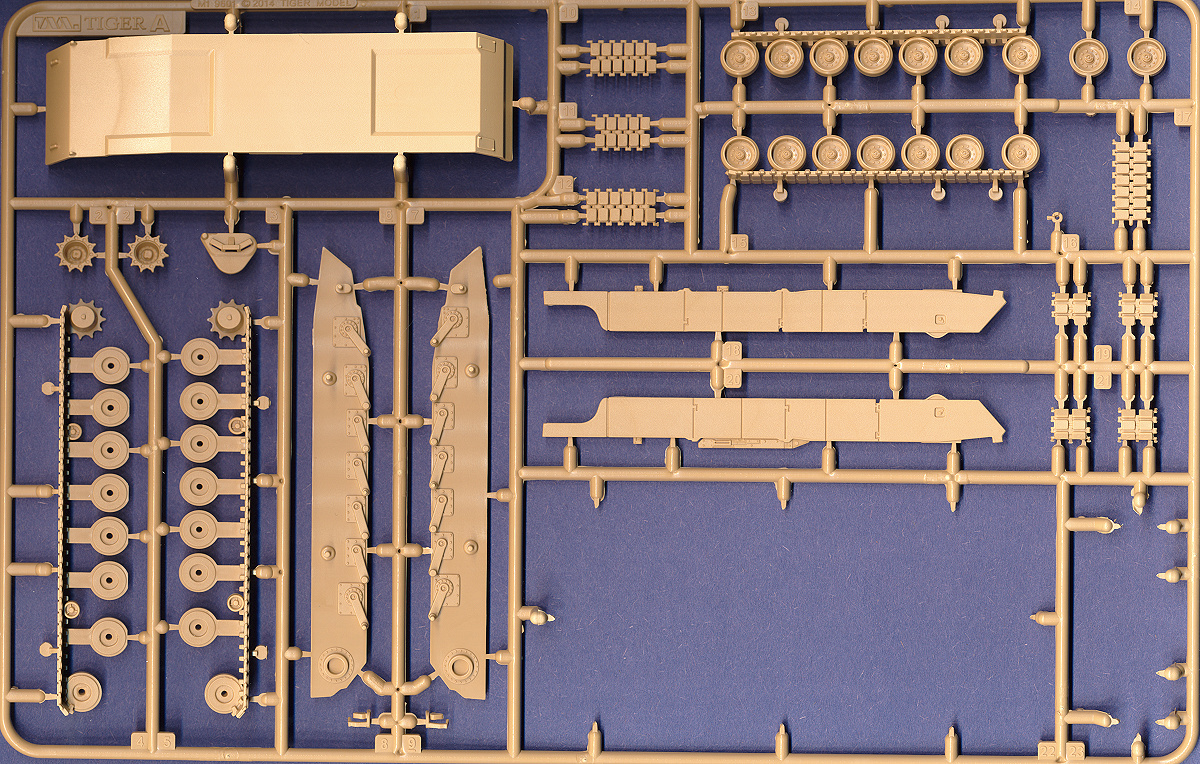
This is the newest Abrams kit to be released, and if it wasn't for the impossibly well done Flyhawk model, this Tiger Models kit would be a solid contender for best Abrams available. I have to say that the molding quality and sharpness of detail is not to the highest caliber (i.e., it's not as good as Flyhawk), but it is still perfectly acceptable, better than most of the other available kits except Revell. Like Flyhawk, this kit is highly accurate and extremely well detailed. One thing I don't like is that the panel weld lines on the turret roof are very prominent. I think the most impressive thing about this kit is that modeling the TUSK II upgrade package in small scale was a very ambitious undertaking, and Tiger accomplished it very well. A couple of things to note, like almost every other Abrams kit marketed (though not all), shortcuts were taken with the running gear. In this case, the tracks' upper and lower track runs were molded onto the wheels. Again like the Flyhawk kit, the amount of detail accomplished in spite of this shortcut is impressive, (considering that the front and rear portions of the tracks that wrap around the idler and sprocket wheels are the only portion of the tracks that will be visible anyway), although aftermarket tracks would be even more impressive yet.
The other thing is that even though the TUSK II upgrade was applied over the top of the TUSK I upgrade, due to the way Tiger molded the parts in this kit, one cannot build a TUSK I tank with this kit without having to scratchbuild much of the armor.
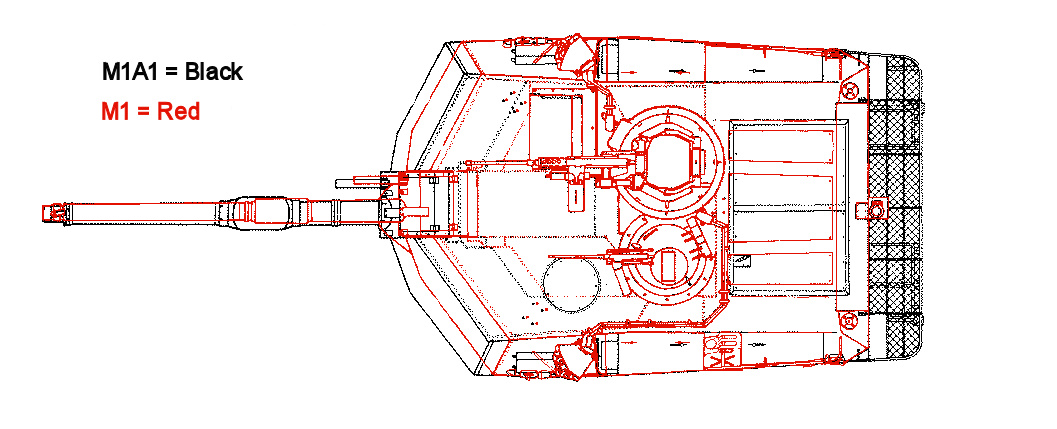
In this section I will show some comparison scans for a few of the more prominent kit components, such as hull and turret. I cannot do an all-in-one, side by side scan due to the large number of kits we have available, but I tried to be consistent in the individual scans as far as size and proportions of the images are concerned. Regarding the kit measurements, it is difficult to judge precise accuracy for several reasons. First, Some of the measurements are possible to make only after kit construction. I have had to calculate some dimensions for the unbuilt kit parts through extrapolation from other measurements on vehicle drawings. Additionally, I don't have any decent scale plans for this tank. Very little is available on-line, and the published reference books that I have checked show only generalized drawings and specifications. I've combined these numbers with the drawing that Simon Barnes provided in the Dragon Abrams preview article, and have come to the following conclusions:
So as you can see, as far as hull size is concerned, all of the available kits are very close to one another, and would be perfectly compatible for use together in a diorama, just so long as you don't park them next to each other. The "Wheel Base" measurement in the table below is measured from the center of the axels of the front and rear roadwheels. The measurement in 1/72nd should be 63.5mm.
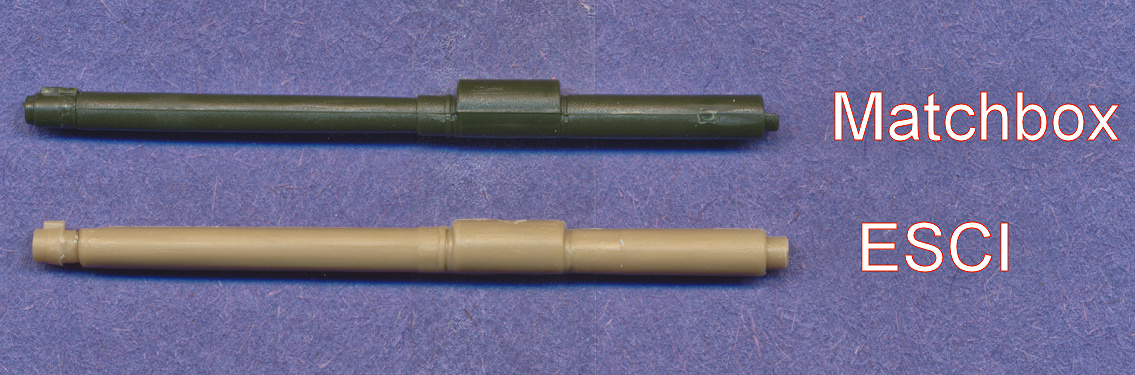
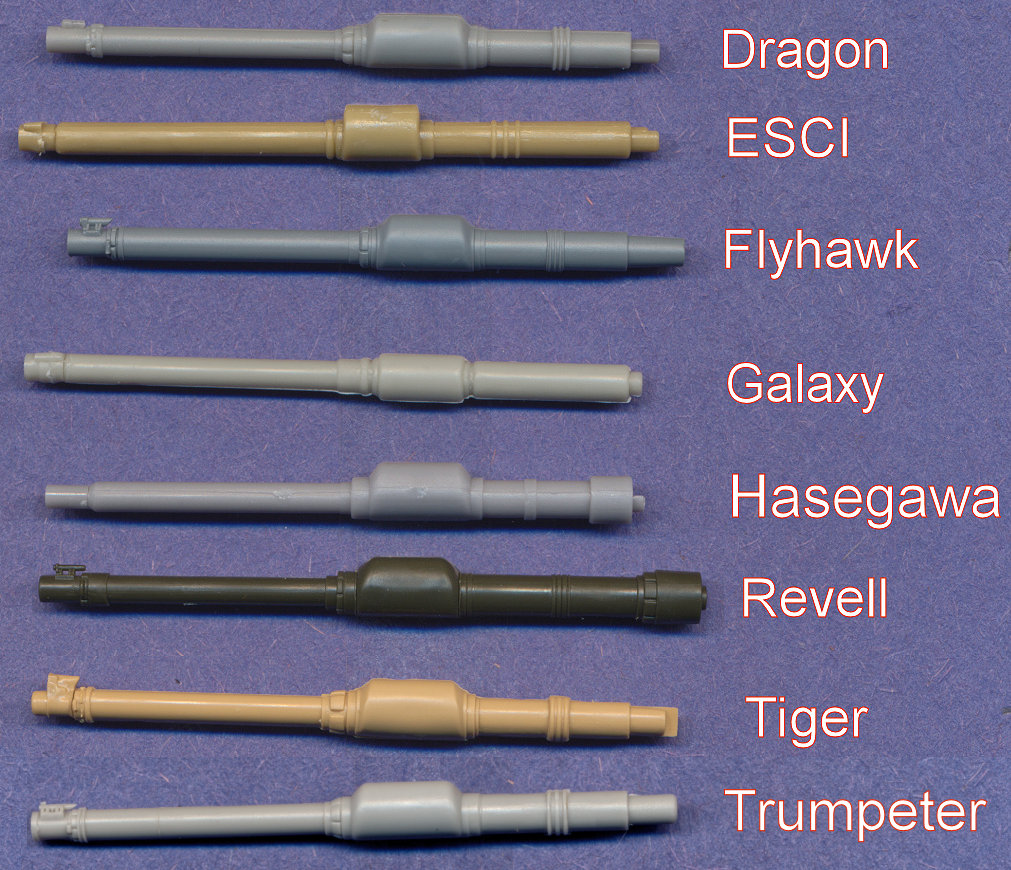
I have not measured the gun barrels because the amount of the barrels that are recessed into the armored gun housing is variable between kits. But I've included a side-by-side scan here so that you can at least see a comparison of the kit parts to judge level of detail and general barrel dimensions against each other. Suffice it to say that the Flyhawk barrel is the standard against which the other 120mm barrels should be compared. Also, those kits that require you to glue on the tip of the barrel to the main barrel segment, well, that was not at all fun, and the results in all cases were disappointing. 105mm Gun
120mm Gun
There are a number of items available from the aftermarket industry that can go a long way to improving most of the kits described in this article.
Ummm... not sure what else to say here. Flyhawk is by far the best, and Galaxy is by far the worst. Everyone else is in between. That's about it. Well, OK, I'll try to summarize some other considerations:
References used:
|
Back to Articles Page |
| Article Last Updated: 29 March 2018 |
Back to Home Page |