|
A Brief History
This gun was a hybrid of the 12.8cm Pak 44 gun (also designated the 12.8cm Pak 80 [7]), the main armament on the Jagdtiger, now mounted on the
ex-French 155mm GPF-T carriage. According to [6], "Equipment numbered in the 8x range were temporary items usually issued in small
numbers and not regarded as standard issue service weapons.", thus the K81 gun series (which included this gun as well as the 12.8cm K81/2 built on
the ex-Soviet 152mm howitzer model 1937 carriage) was not built in any significant numbers, so few examples would have reached fighting units by the end of hostilities.
Building the Model
As far as I know, there are no 1/72 scale model kits of this gun. The only way to make one is to perform a kitbash. As such, I used the following in my build:
- barrel & breech pieces from the Ace 12.8cm K81/2 kit (reviewed here)
- carriage & mount from the RPM GPFT kit (reviewed here)
- conversion set from Modell Trans (reviewed here).
- metal replacement barrel from Aber.
For those wishing a brief overview of the above reviews, the Ace kit & Modell Trans set are both marginal, while the RPM kit is very good. With that
said, let's look at what was done to build this gun.
Barrel changes
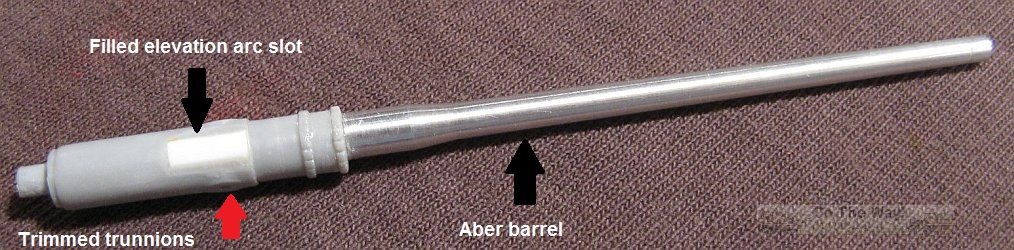
Fortunately with the example used for this build, Ace's barrel collar didn't have the large voids as
found in my previous K81/2 build, and once again the barrel was replaced with a turned aluminum piece from
Aber (item no. 72 L-19), designed for the Jagdtiger, but useful for this towed gun as well. This is a superb piece and
even contains rifling inside the muzzle.
The remaining plastic, the breech, barrel collar and recoil mechanism, still needed much sanding and scraping to be presentable. The slot for the elevation
arc (part 59) was filled. Detailing as performed on the K81/2 was again done here using small punched disks to represent various missing bolt heads. The Modell Trans
gunner's recoil shield was added at this point, after just a smidge of sanding needed to remove some resin to make it fit.
Cradle changes
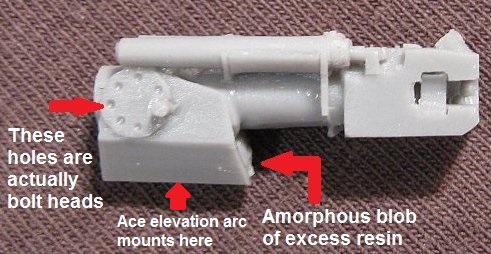
The Modell Trans conversion set (kit no. MT72399) provides an arc support and barrel molded to each other. As reviewed previously, there is also an amorphous blob
of resin between them that shouldn't be there. Thus the support
was removed, destroying the barrel in the process, but it was pretty much useless anyway. After much trimming, scraping, and sanding, the offending resin blob
was gone and the Modell Trans support was tested against the Ace barrel. This revealed a diameter difference
between the two pieces, so the trunnion mounts were trimmed almost flush to the Ace barrel. That didn't solve the issue completely, so further trimming and sanding
of the two parts eventually succeeded in getting them to fit together, though the fit was tight and care was needed to prevent damaging the
Modell Trans part. Just before painting commenced I discovered that the set of holes on Modell Trans' arc support
should actually be bolt heads. This was remedied with some punched disks glued over the holes.
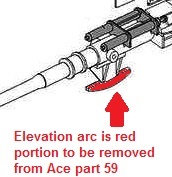
The final task involved adding the elevation arc gear to the new Modell Trans support. The arc was removed from Ace part no. 59 and glued to the support's bottom.
Mount and carriage construction
RPM's GPFT kit (kit no. 72602) supplied the carriage and mount. This was, as per the previous build, constructed without much ado. Parts were well molded, detailed
and fit together with little trouble. Only filling a few low spots on the trail legs slowed construction.
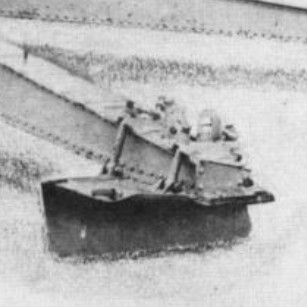
The kit's spades required modification
to match, as best as I could, the photo below from reference [1].
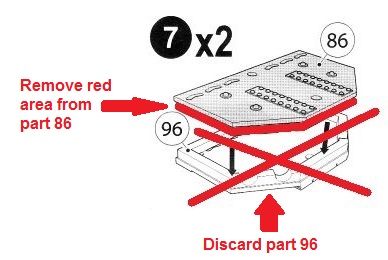
To do this, the upper plates (part 86) were sanded to remove a molded on ridge that runs around the underside of the perimeter. The lower part of the
spade (part 96) is unused.
Next, the top plates were shortened width wise to just outside of where the tie down rings (part 41) mount, then they were glued to the trail. There is an
alignment hole in the top plate that requires filling. A pair of rectangular pieces, slightly wider than the top plates, were fashioned from some plastic rod.
Their dimensions were based on a guesstimation. Then their lower corners were notched, and one plastic piece was attached to the front of each top plate.
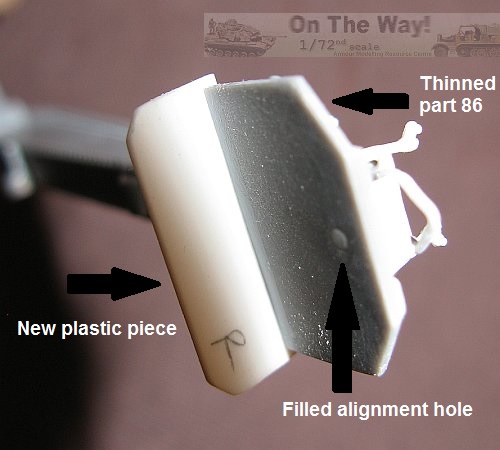
Above is the end result.
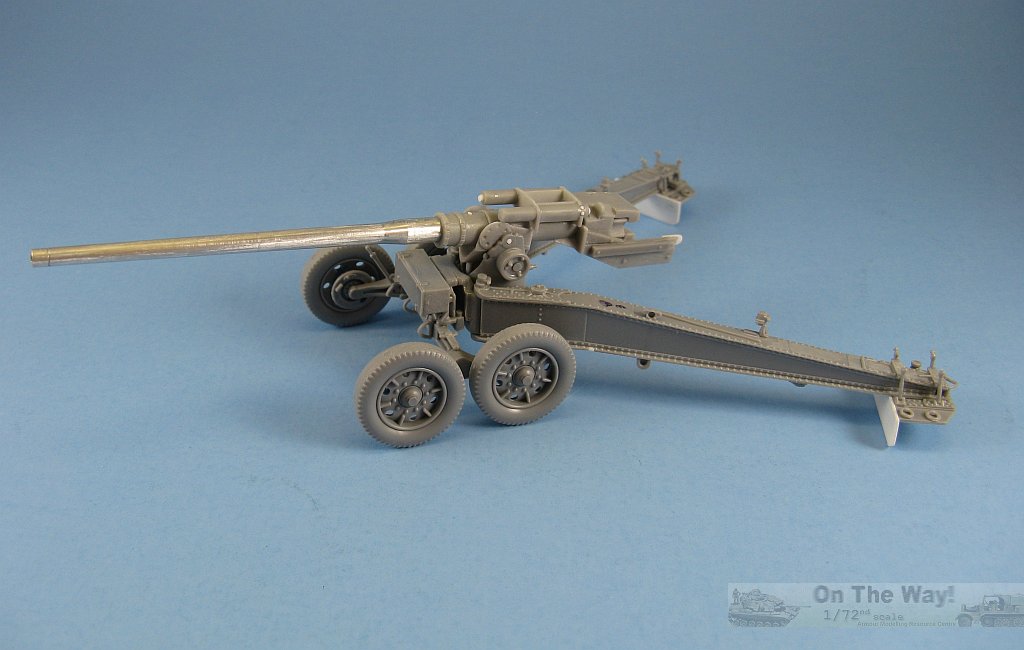
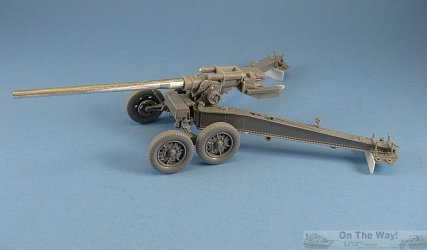
With that done, all the sub-assemblies were loosely assembled together to make one final check that everything looked acceptable before painting commenced (see below).
References
[1] Waffen Revue Nr. 50: III Quartal 1983, Journal-Verlag Schwende, p. 7963-7994
[2] Antitank Artillery of the Wehrmacht 1939-45, Maxim Kolomiets, MK Strategy, Moscow, Russia 2006 ISBN: 5-901266-01-3
[3] Wydawnictwo Militaria 258: Panzerabwehr Artillerie, Maxim Kolomiets, Wydawnictwo Militaria, 2006 ISBN: 83-7219-258-8
[4] Wydawnictwo Militaria 392: Panzerabwehr Artillerie, Maxim Kolomiets, Wydawnictwo Militaria, 2013 ISBN: 9788372193926 (a slightly modified reprint of [3])
[5] axisafvs.blogspot.com
[6] wikipedia
[7] Encyclopedia of German Tanks of World War Two: A Complete Illustrated Directory of German Battle Tanks, Armoured Cars, Self-Propelled Guns and Semi-tracked
Vehicles, 1933-1945, Peter Chamberlain & Hilary L. Doyle, Arms & Armour Press, London 1993 ISBN: 1-85409-214-6
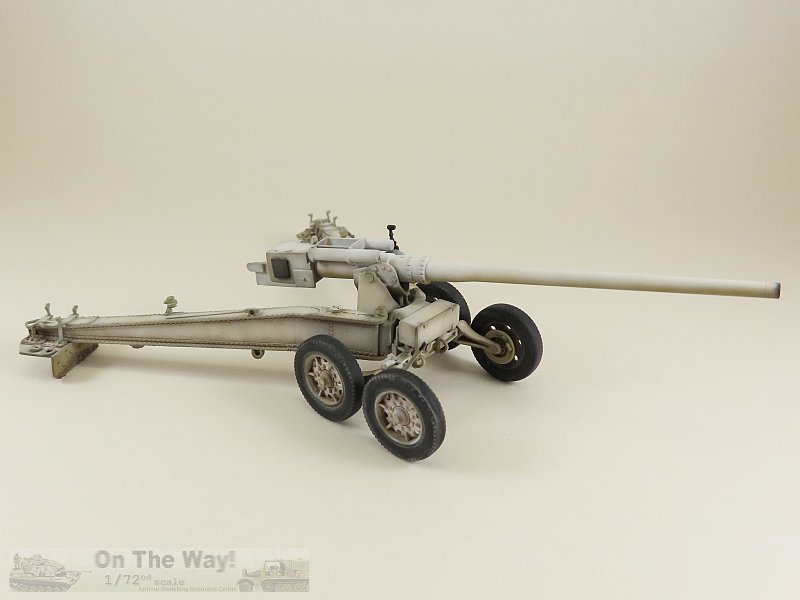
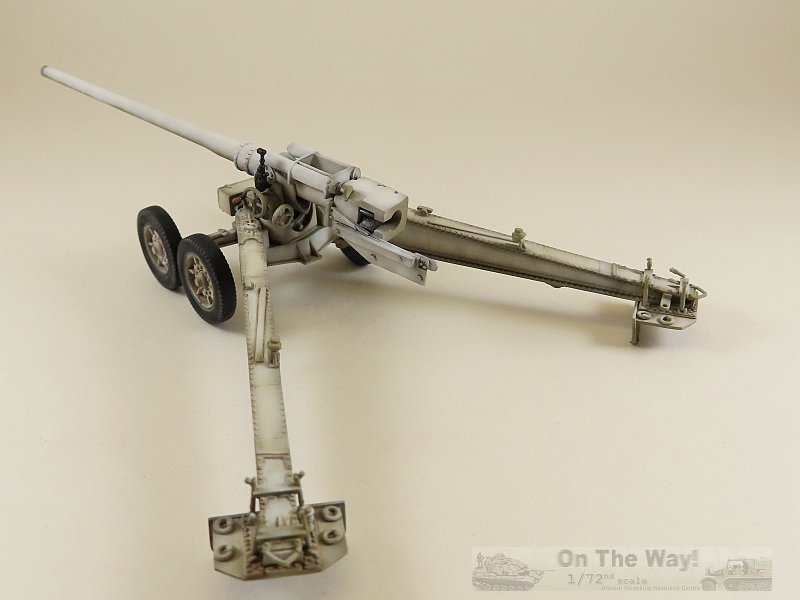
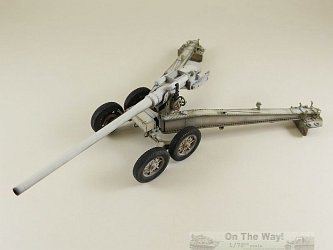
End result


|