|
Probably the most recognizable gun in the German arsenal at the start of World War Two, the 8.8cm FlaK guns have not been well
represented as injected plastic kits in the 1/72 scale modelling world. Circa 1970 there was the Hasegawa release of the Flak18 variant with a monoblock gun tube
and the Sd.Ah.201 trailer (On the Way! reviews of this kit can be found at Hasegawa review (1) and
Hasegawa review (2)). Later it was also
released as a FlaK36 variant with the only change being the inclusion of the 3-part barrel. Unfortunately a different barrel does not make a different gun. To make a
true Flak36 variant Hasegawa needed new parts for the cruciform platform and for the Sd.Ah.202 trailer, all of which are completely different from the Flak18
variant (more information can be found here (Revell
8.8cm Flak36) and here (Hasegawa Flak18 to Flak36 conversion).
Overall the Hasegawa kits are not bad efforts
considering the times, but they can only make the Flak18 variant regardless of what the box says, and should only be considered useful as a wargaming quick build nowadays.
The kit looks very much the part but detail is quite simplified.
Partly filling the 88mm gun void is the recently released 8.8cm Flak36 by Revell AG. This is an excellent kit. Detail is abundant and proper for a Flak36. It is
unfortunate that Revell
has not stepped up and also released a Flak18 version, which leaves us with two options for a detailed Flak18 - build the old Hasegawa kit and upgrade its detail, or
kitbash the Hasegawa kit with another kit. I chose the second option as it seemed to be the easiest. And I chose the Revell kit for the donor parts as I was more
familiar with it than the Zvezda or Italeri quick-build kits, neither of which I have seen in person, though web photos of their sprues show them both as being similar
to the Hasegawa kit in the level of detail.
So with a Hasegawa kit and a Revell kit in my possession I proceeded with the kitbash.
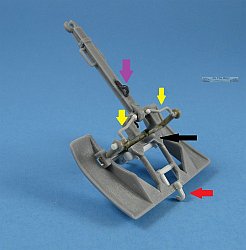
Gun changes
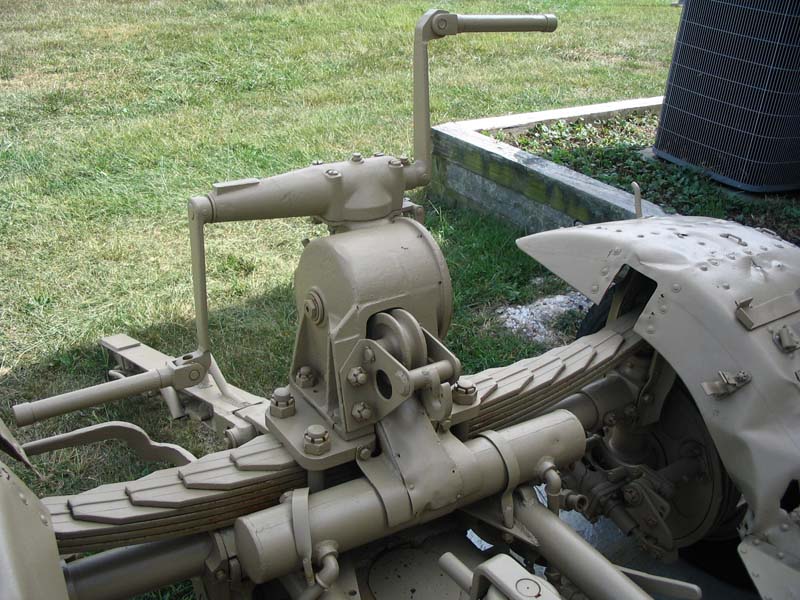
The gun was the easy part. Since the Flak18 and Flak36 used the same gun and data transmission system, the gun was built straight out of the box, with the only
changes being the cabling on the right side that runs from the round dials, and the lever (indicated by the yellow arrows in the phot above).
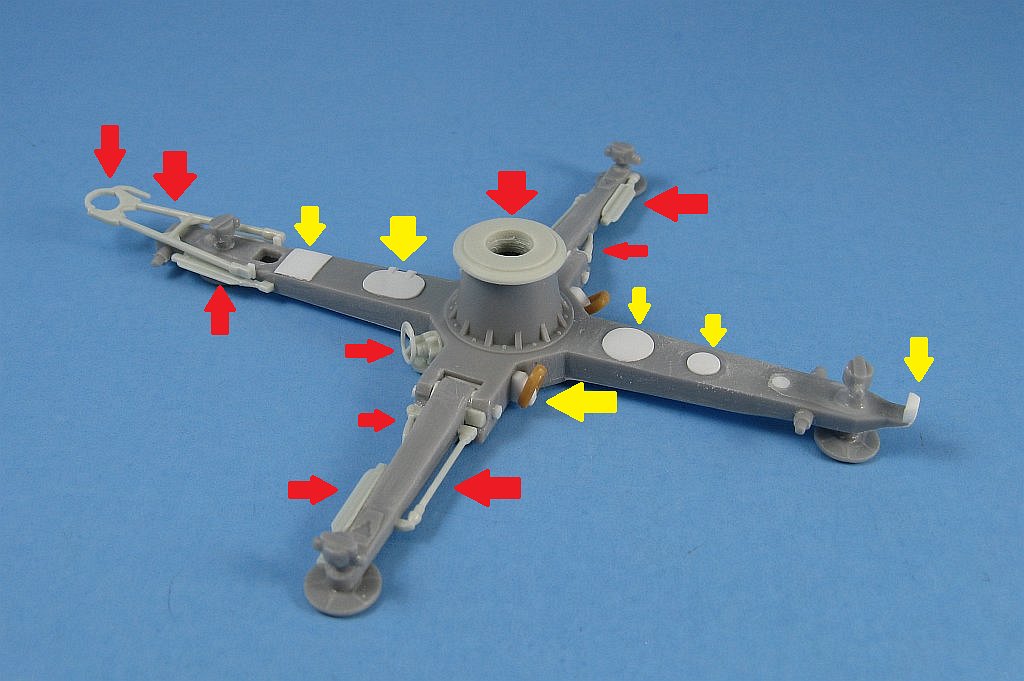
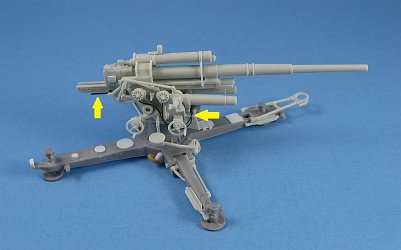
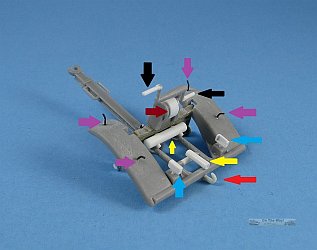
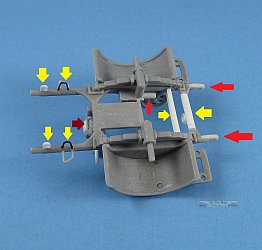
Mount changes
The Revell Flak-Lafette 36 mount is only valid for a FlaK36, so the Hasegawa Flak-Lafette 18 mount was used as the starting point. Extra detail was added to it
through a combination of scratch built parts, pieces transfered from the Revell kit, and a few items liberated from the parts box. In the photo above arrows
point to the changes thusly:
- Red arrows: Parts taken from the Revell kit. These include barrel rest, ground anchors, levelling wheels, circular gun race and outrigger braces.
- Yellow arrows: Detail added for missing access panels and the mounting hooks for the trailer's rear bogie
unit (these being made from rectangular plastic rod and towing loops (tan plastic) from a Esci Jagdtiger).
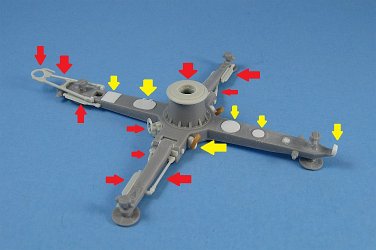
The two trailer bogies received the majority of the changes. Since virtually nothing from the Revell kit could be used, most changes required scratchbuilding. The
underside of the fenders on both bogies had ejector pin marks that required filling.
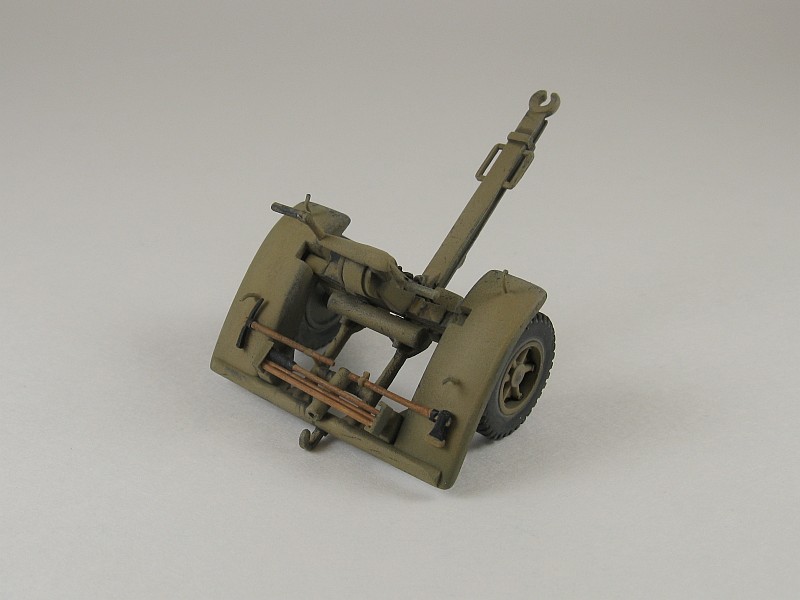
Trailer - front bogie changes
|
|
 |
|
 |
|
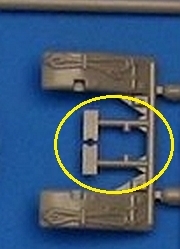
This is the front bogie for the Hasegawa trailer. The pioneer tools and tow cable are molded directly to the fender and were removed.
The yellow circle shows where Hasegawa simplified the attachment point for the cruciform mount. This had to be replaced with scratch built items.
|
|
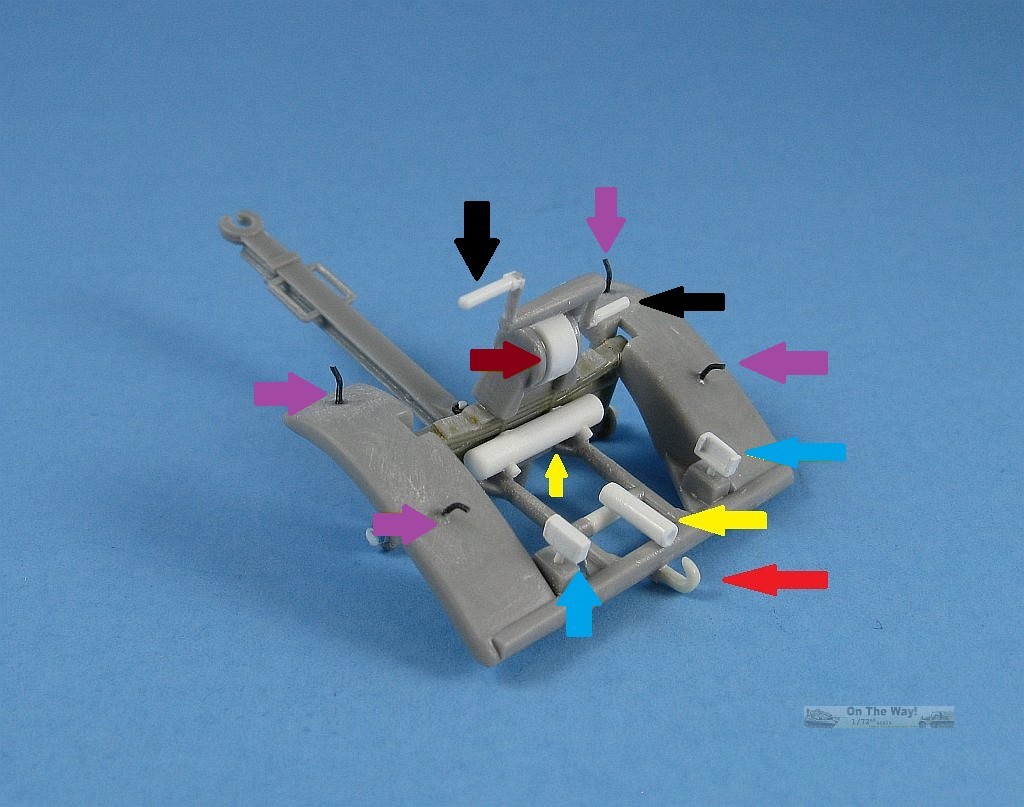
This photo shows the changes to the topside of the front bogie. The arrows show:
- Red arrow: Hook removed from Revell kit
- Blue arrows: scratch built cleaning rod holder
- Yellow arrow (large): Modified mount
- Yellow arrow (small): Reserve cylinder for brakes
- Black arrows: Crank handles
- Purple arrows: Fender hooks
- Burgundy arrow: Crank cover
|
|
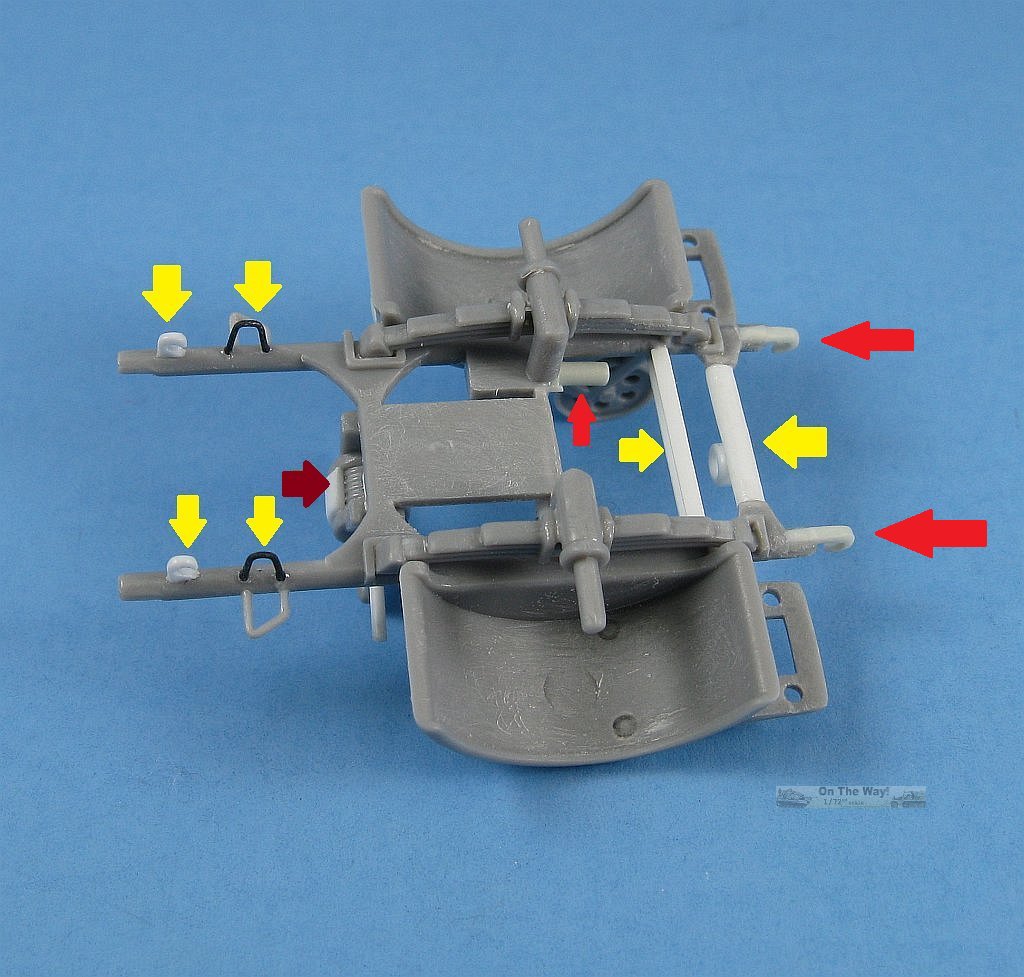
This photo shows the changes to the underside of the front bogie. The arrows show:
- Red arrow: Hook removed from Revell kit
- Yellow arrows: Suspension anti-sway (stabilization) bars
- Black arrows: Pin
- Purple arrows: Loop
|
Trailer - rear bogie changes
|
|
 |
|
 |
|
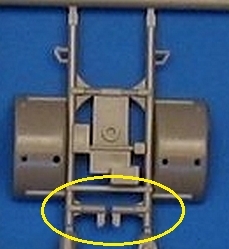
This is the rear bogie for the Hasegawa trailer.
The yellow circle shows where Hasegawa simplified the attachment point for the cruciform mount. This had to be replaced with scratch built items.
|
|
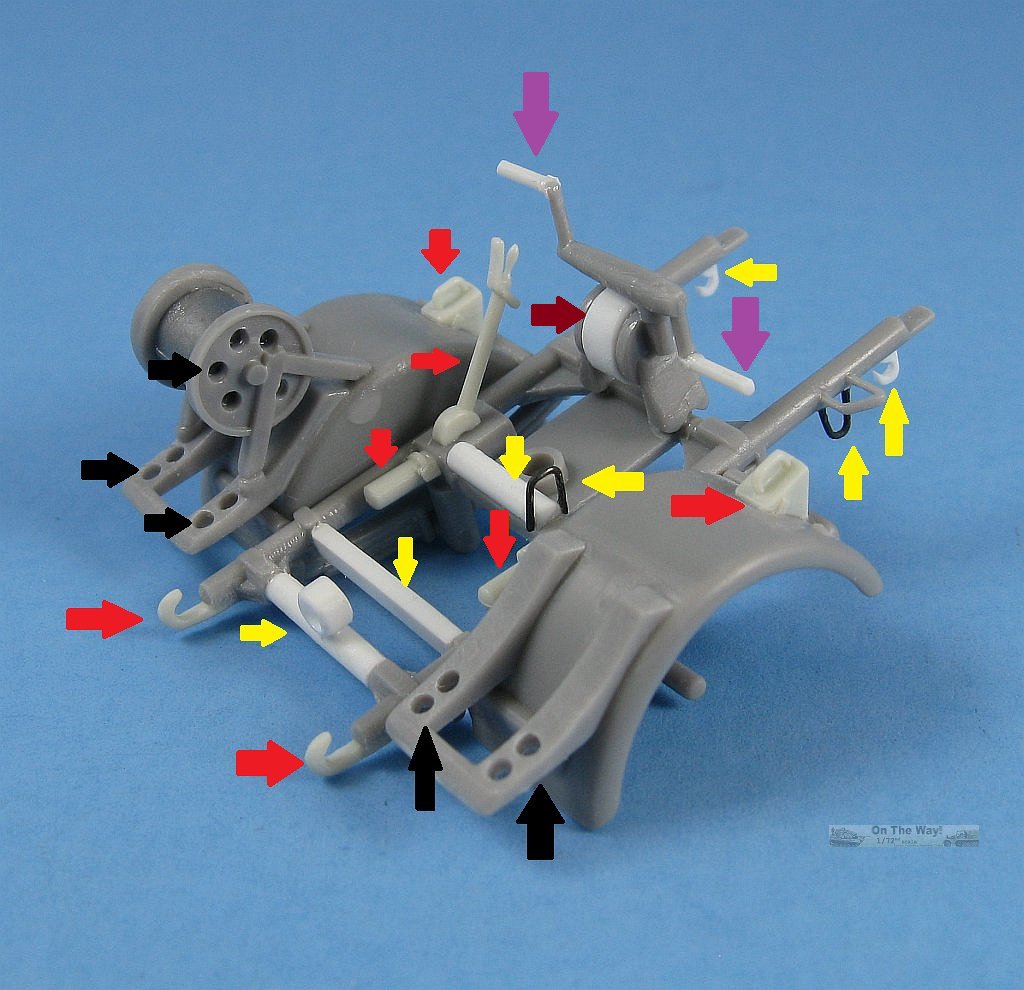
This photo shows the changes to the topside of the rear bogie. The arrows show:
- Red arrows: Hooks, hand brake, and fender canisters, all taken from Revell kit
- Blue arrows: scratch built cleaning rod holder
- Yellow arrows: Modified mount, reserve cyclinder for brakes, hooks, handles and loops
- Black arrows: Various places where holes were drilled
- Purple arrows: Crank handles
- Burgundy arrow: Crank cover
|
|
This photo shows the changes to the underside of the rear bogie. The arrows show:
- Red arrows: Hooks taken from Revell kit
- Yellow arrows: Modified mount, reserve cyclinder for brakes, hooks, handles and loops
- Burgundy arrow: Crank cover
|


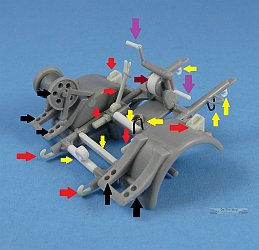
If you compare the above pictures (from [1]) of the cranks located on both the front and rear bogie units you can see that the Hasegawa versions are much simplified.
These weren't replaced as my lazy streak got the better of me and I decided to leave them as is. I would have liked to run brake lines but was unable to get a
definitive answer as to how they were routed. The Hasegawa kit is missing the tri-lobed ground anchor slots on two of the legs - not an easy fix so they too were not added.
I was unable to find a suitable sledge hammer, so I guess my gun crew keep it on their towing vehicle instead of the gun. Hasegawa wheels were used.
Other detailing included:
- Holes were drilled in the passenger seat on the rear bogie
- Wire was wrapped around one spool. The other spool was not added.
- Pioneer tools (axe & pick) were liberated from the Revell kit
- Cleaning rods were scratch built and added to the holder on the trailer's front bogie unit
- Short lengths of chain attached to the cranks
References
[1] Silicon Valley Scale Modelers (8.8cm Flak18 walkaround)
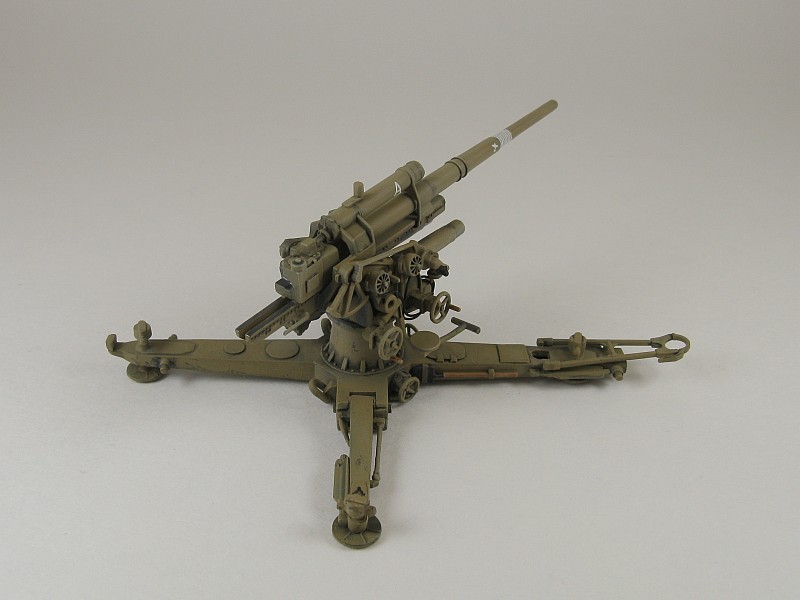
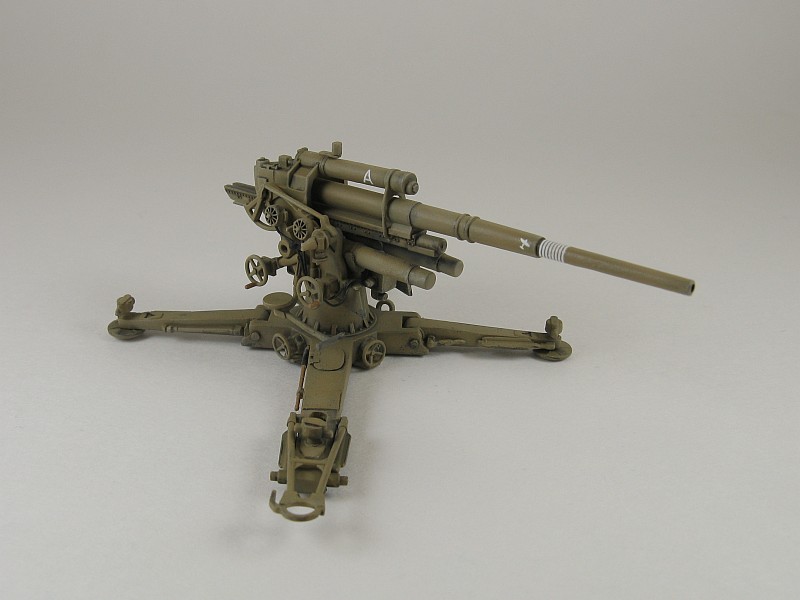
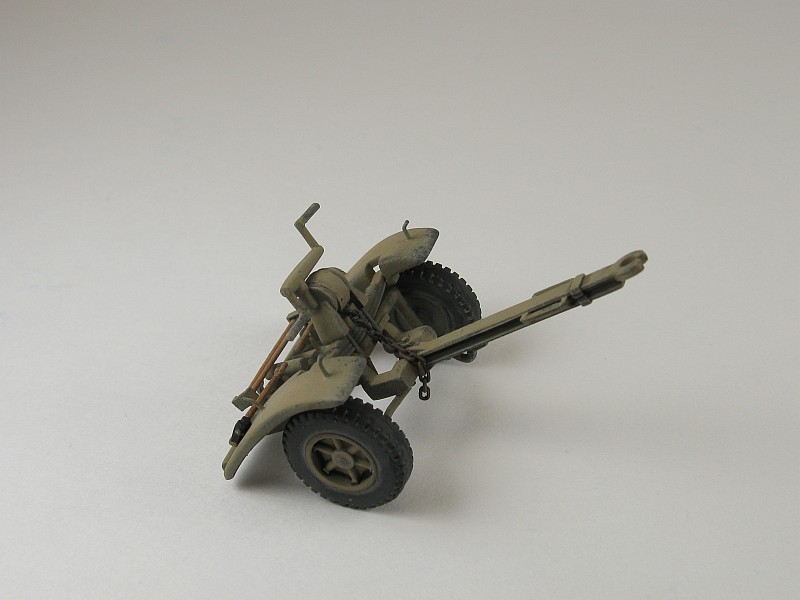
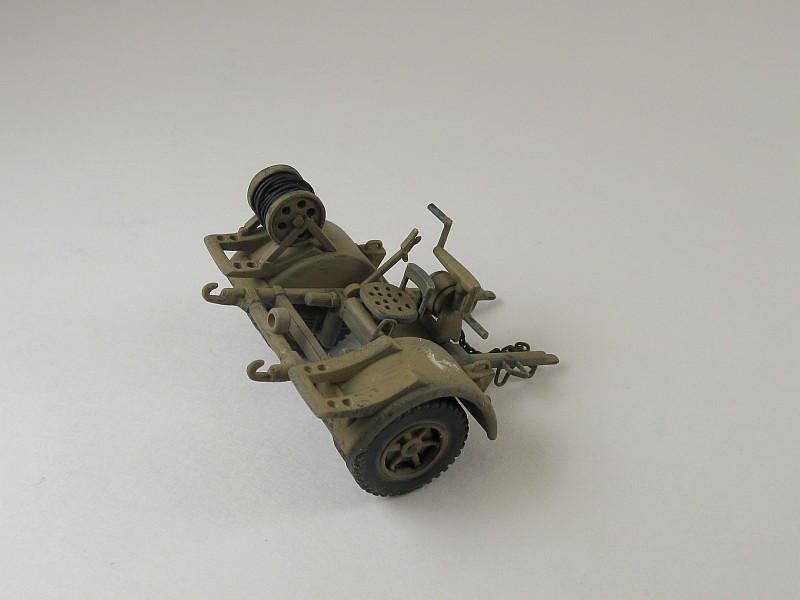
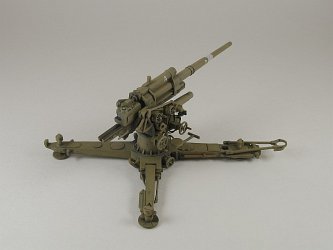
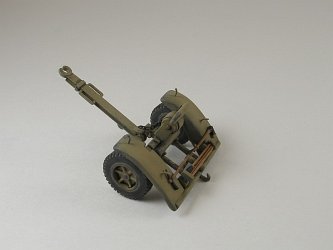
Finished Gun & Mount


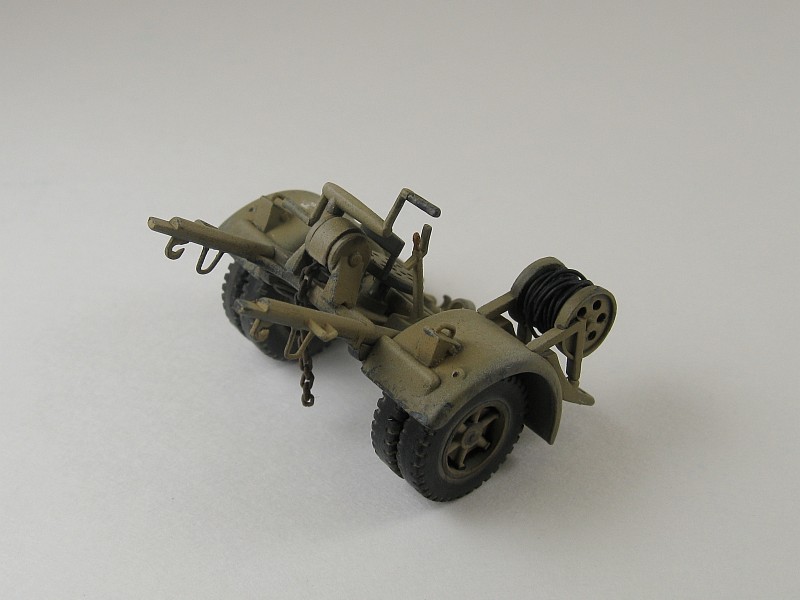
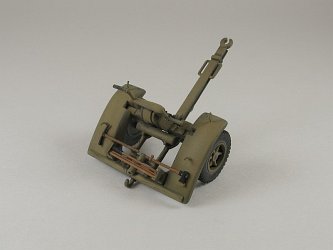
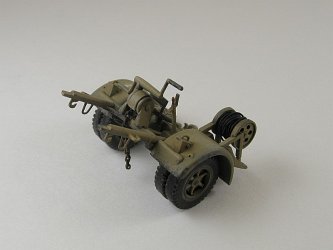
Finished Trailer - Front Bogie Unit
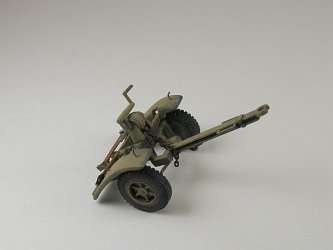
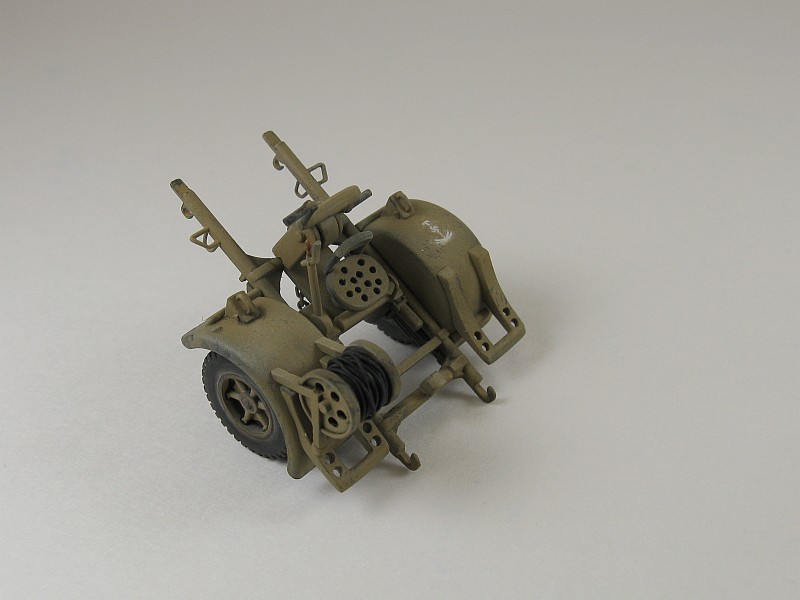
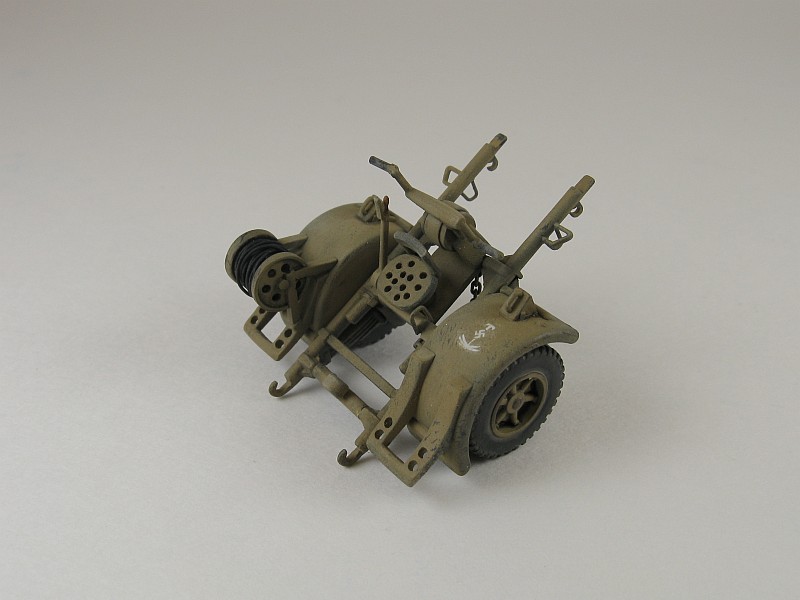
Finished Trailer - Rear Bogie Unit


Dragon & Hasegawa products are available at

|