To
make a Sherman III / M4A2 I tested the UM kit. I was already aware
that both Heller and Dragon are superior in quality, but for the sake
of adventure and in the prevision of having a dozer blade, a 17pdr
barrel and a Firefly radio box for other projects I bought one. The
moulds were in the same pine green I found in the M10 and M4A1 kits.
Some moulds are shared by these kits, because UM smartly adopted a
modular philosophy in making the Sherman tank variants.
The kit is composed of seven green plastic mouldings marked by letters,
two identical “A” for the wheels and the tracks, “B”,
“C” and “E” for the hull, “D”
for the turret while “K” is the dozer blade. A little
PE fret marked “F” has the bogies skids, the brush guards,
the inner sides of the fenders, the plates for the dozer strut and
the transmission cover bolt heads strip.
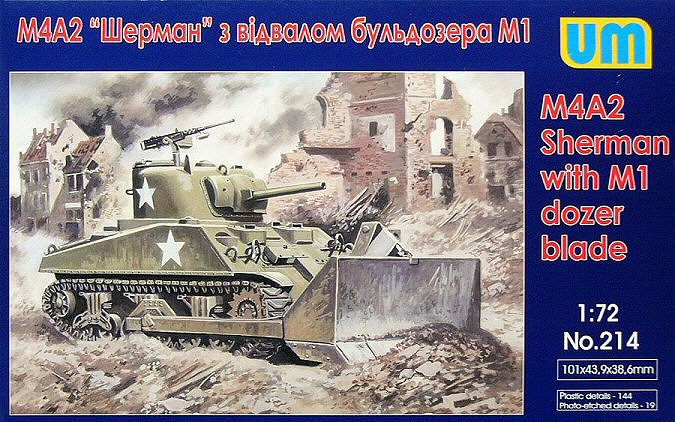
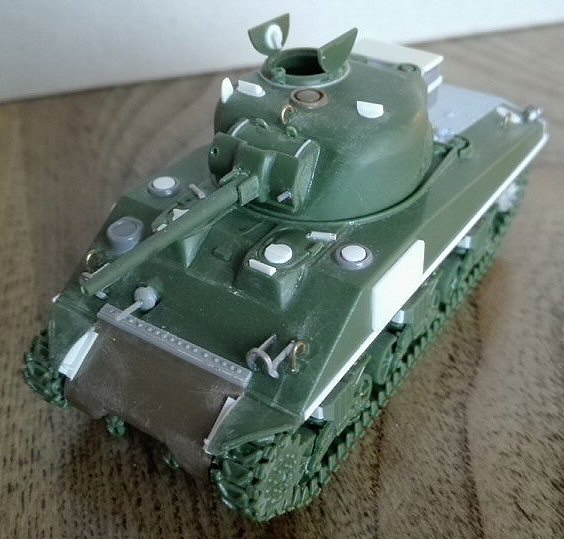
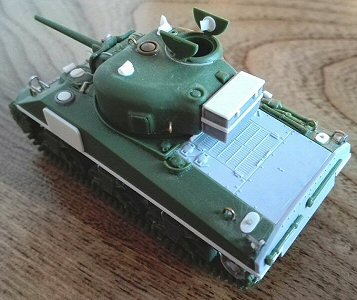
The variant proposed is a mid/late production M4A2 75mm, as built
by Federal Machine Works or Pullman. At this production stage, the
Fisher plant already had transitioned to the fabricated glacis hoods
and antenna bracket, while the ALCO and Baldwin M4A2 had the early
standard DV hoods and M34 gun mount.
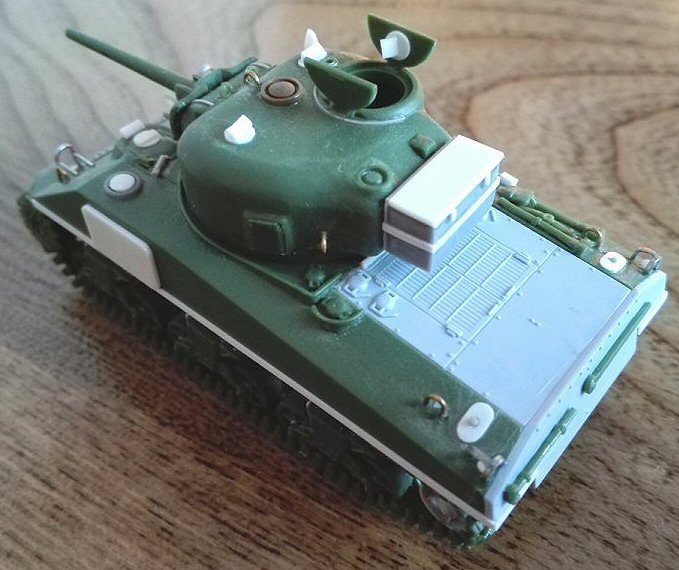
At the first glance, the kit could give a good impression. The tools
are positively moulded as separated parts and not solid on the hull.
Other, useful, nice spare parts are the ones needed to convert a normal
turret in a Firefly turret. Closer observation points out the problems
of this kit are in the transmission cover (which is much too thick
on the edges), in the engine deck and the rear plate/exhaust layout
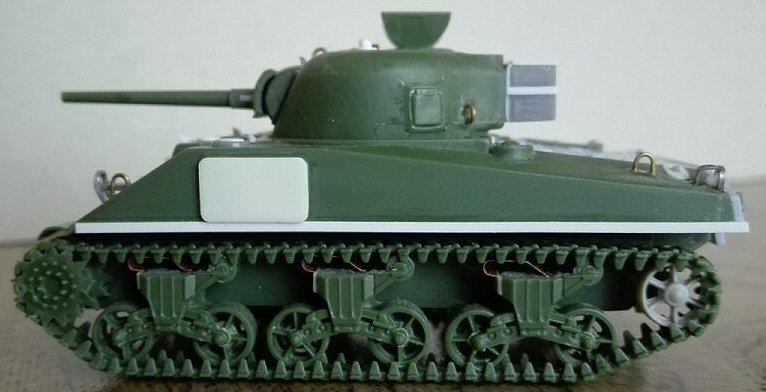
(which are wrongly depicted). The dimensions are quite correct, if
the transmission cover is changed or corrected. If left as it is,
this M4A2 is a couple of millimetres too long with the transmission
cover wrongly overhanging the tracks. Other critical points are shared
by the cast hull kit and the tank destroyer kit I made, like the wheels,
the sprockets, the tracks, the bogeys and the fragile lower hull construction.
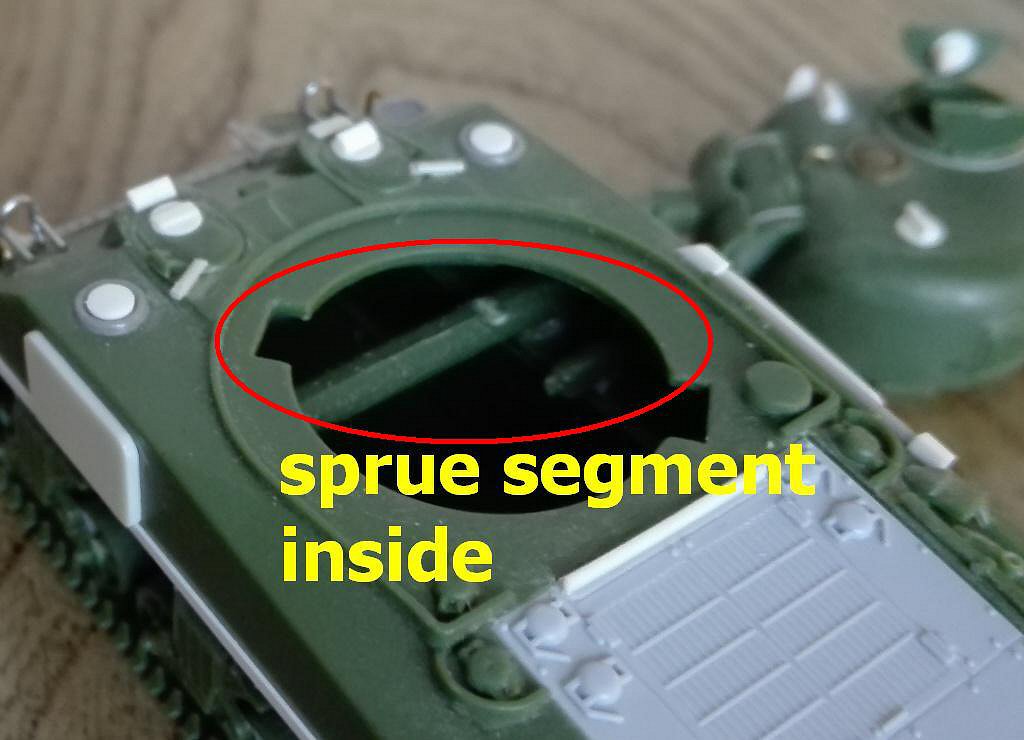
Additionally, a lot of pin ejector marks need to "disappear"
by either filling or sanding.
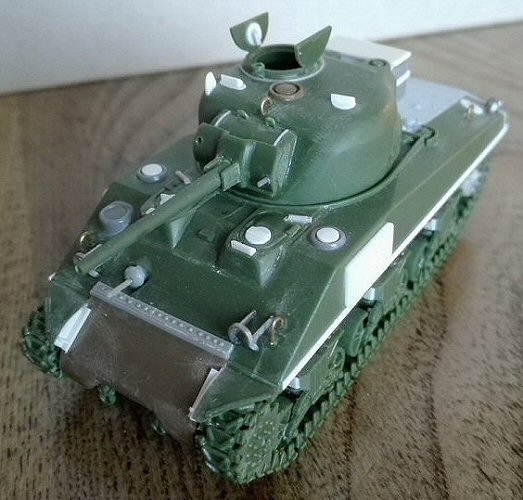
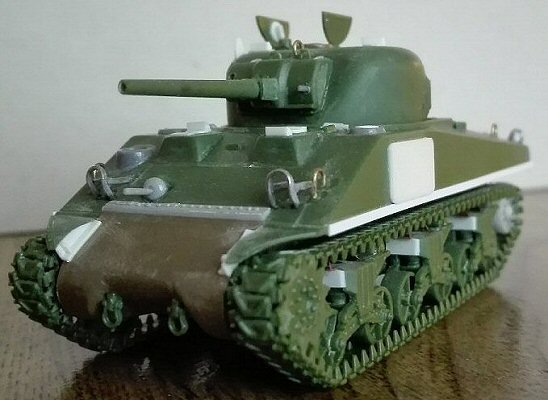
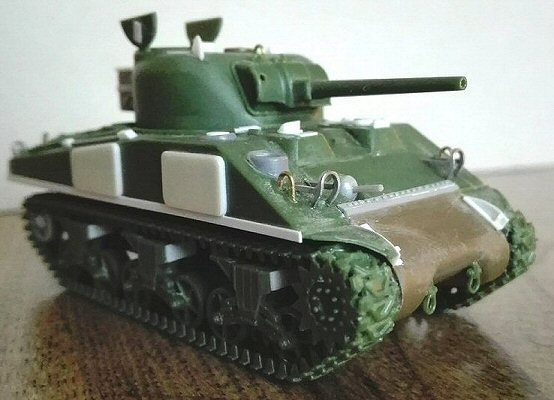
I choose to make a Sherman Mk III in NWE. I used the following references
to get everything correct : the Hunnicut book and the Squadron Signal
booklet, while on the net I used http://the.shadock.free.fr/sherman_minutia/index.html.
|
Here
is what I did :
Hull
|

|
- The
transmission cover shape is wrong. Its correction is possible, but
having a spare ESCI/Italeri piece at hand I used this one, adding
the bullet splash lip and new towing points. The PE bolted stripe
is not well made and I had some problem trying to use it. I replaced
it with a spare part.
-
The rear edge of the crew hatches piece need to be worked to
have a clean interlock. Its sink marks need to be filled. Paying
attention I filed the curved side until the sloped side was
flush with the glacis plate. The joints were filled with cyanoacrylate
glue. The periscopes, damaged during reshaping, were replaced
by triangular plastic rod segments.
-
The
hatch hinges were adapted to allow the hatches fall flat in the
oval holes. Very simplified, I replaced the periscopes after having
glued the rotating base made by plastic sheet. I added also the
counter balance springs by solid stretched sprue; they are too
small to be made in metallic wire wrapped around a rod (at least
for me).
-
The 56° glacis upper hull is shared by both M4 and M4A2
kits. Whatever Sherman mark one chooses, the antenna bracket
needs to be replaced being not well done (Tip : each Heller
kit gives you a spare one). In this case, the donor was a spare
PSC M4A4 upper hull. To ease the job, this replacement needed
to be made after the hatches placement.
- The
.30 MG and its ball mount were replaced by a scratch build part.
- The
smoke extractors (placed just outside the crew hatches) are undersized
and not well placed. I replaced them, taking two from the PSC M4A4
upper hull (they needed to be corrected with a larger centre).
- The
lifting points were replaced by metallic wire bent over a template.
|
|
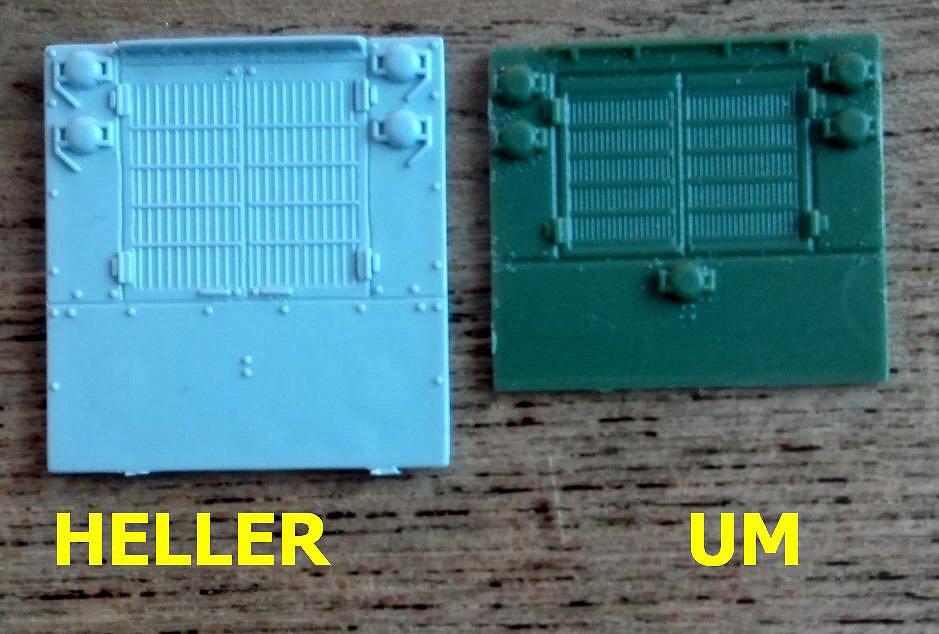
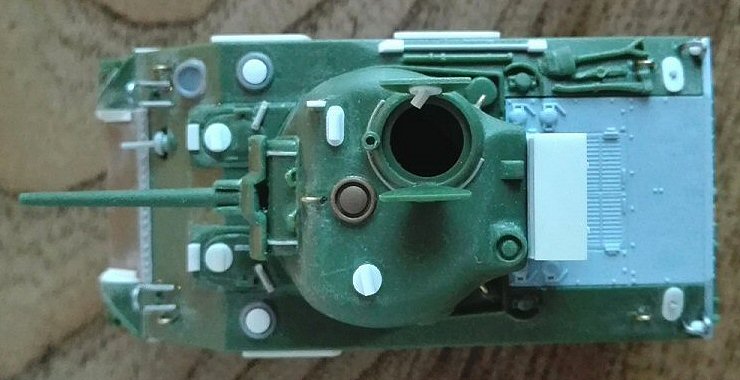
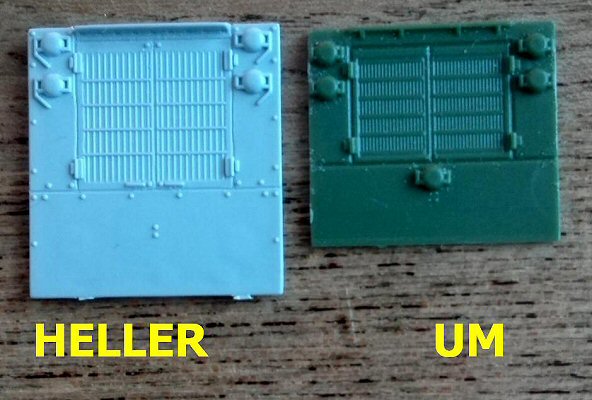
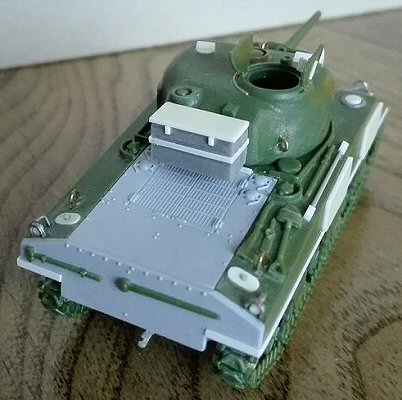
- The
engine deck is not well done. I had a Heller M4A2 one (which is
correct) in my spare box, so I replaced it moving the bullet splash
backward to make room for the turret (there were more patterns,
so I don’t mind losing the bolts housings). The engine deck
correction is very hard and replacing it is a better way. Other
alternatives are simply ignoring that error or making a different
variant.
|
 |
-
The
fenders inner wall and details were made by plastic sheet.
-
The rear lamps were made by shaped plastic rod segments,
while I omitted the forward ones because usually removed.
The brush guards were replaced by scratch build ones.
-
I omitted also the horn because, in the photo I’ve seen,
it seems to be removed by the Brits.
-
Placing the shovel showed the handle length is 1 mm too
long. I cut it to length and reshaped the blade a bit.
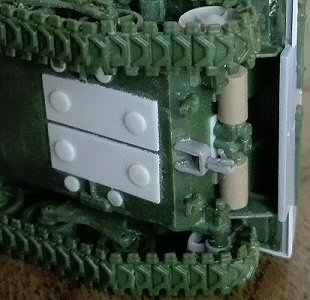
-
The oversized metal bar (a tool on the right side of the hull)
was replaced by one having the correct length. The square housings
holding it in place were made by plastic rod segments.
-
The grouser vane caps were made by plastic sheet. The M4A2 ones
didn’t have the air scoop.
|
 |
|
 |
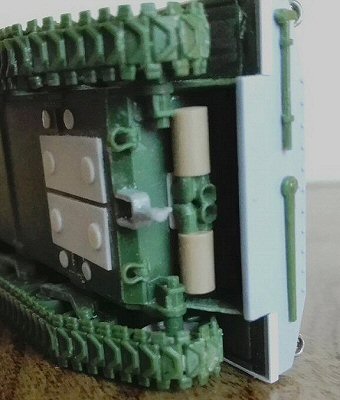
-
The
exhausts are done very badly. I used two large sprue segments
for the mufflers and four thinner corners to make the bent pipes.
After having built these pieces from scratch, I glued them in
the correct layout and then opened the exit ends. The flange was
lowered with plastic sheet because it is placed much too high.
|
 |
|
|
 |
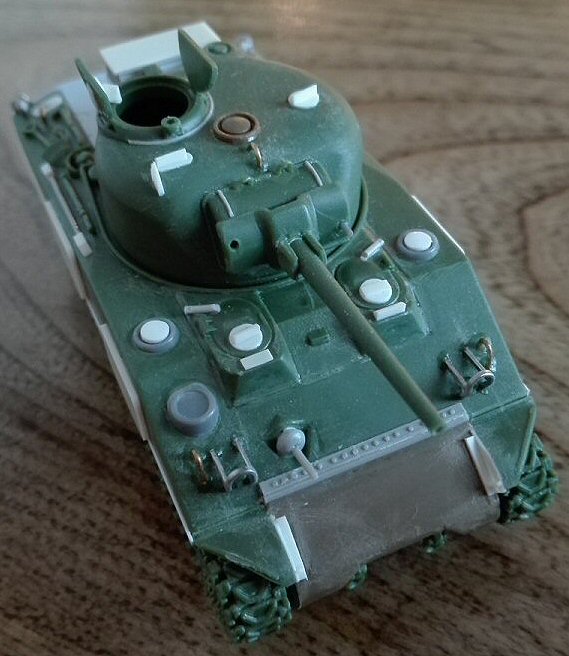
-
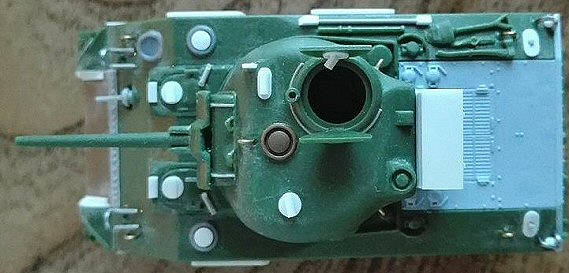
The bustle bottom was horizontal; I filed it to the correct shape.
-
The antenna socket splash guard was cast integral with the turret
and is not a rounded piece welded on it. I filled the base with
cyanoacrylate glue and then smoothed the joint.
-
I used sand paper to round the forward bulges.
-
The smoke extractor diameter is a millimetre too narrow. A spare
Italeri turret to be scrapped was the source to have another one.
-
The M34A1 gun mount is totally flat, I added the vertical reliefs
casted on by thin stretched sprue, the little lifting points were
added using the unused 61B pieces. For a M34 gun mount the specific
pieces are supplied; although they need a bit reshaping (always
refer to photos).
-
The gun barrel end was drilled open.
-
The mantlet sides overlap too much the mount. I filed the sides,
narrowing the mantlet to 13.5 mm. The co-axial .30 barrel was
added by stretched sprue and the gun sight hole was drilled open
on the opposite side.
|
 |
-
The
periscopes were replaced by plastic sheet and triangular rod segments.
-
I added the aiming blade with 0.5 mm plastic, thinned in place.
- I
added the NWE turret bin, making it from scratch.
- The
lifting points were replaced by metallic wire.
- The
location for the pistol port on the turret is a big hole. I therefore
attached a plastic piece on the inside of the turret and filled
up that hole before I glued the pistol port in a raised position.
Externally the edges were filled with cyanoacrylate glue and shaped
with file and sand paper (see here: http://the.shadock.free.fr/sherman_minutia/turret_types/75mm_turrets.html
).
|
 |
|
Wheels
and tracks
- This
is the third UM kit of a Sherman based vehicle I bought and reviewed
(I already made the M4A1 and the M10) and it's the first time I
had a couple (just one) of sprockets without the deep sink in the
centre. This time I used them, although the details are still shallow.
- The
pressed wheels are, in my opinion, not usable, while the open spokes
wheels are better made, so I used these.
- The
idlers are supplied only in the pressed type. Having a spare couple
from Trumpeter I replaced them.
- The
bogeys details are shallow as well, but the shape is quite correct.
Only the bogey fronts need to be reshaped after having glued on
a piece of thin plastic.
|
 |
|
 |
|
Decals
The set provides the markings for only one tank: A-6, APACHE, of the
746 TB. The bumper codes are missing. This is not the worst news.
APACHE was a well known M4, not a M4A2 (!!!). The registration number
3036904 given by this kit is for a Baldwin tank, while the photos
of APACHE clearly show an ALCO or a PULLMAN tank. Not only the registration
number is incorrect, the original APACHE had the bolted transmission
cover and the full appliqué armour set. A full decal set can
be found in the Bison Decal set 72009, which I hope will be re-printed
by the new company Star Decals.
The
kit set gives also the name ALLEY OOP and the individual bumper code
A10; I didn’t find photos of this tank. The “A”
name corresponds to the A Company, accordingly to the normal practice
it should mean an Independent Tank Battalion or an Armoured Division
with the new TO&E standard. The 1st, 2nd and 3rd Armoured Divisions
had the former “heavy” TO&E and their A, B and C Company
had light tanks.
The
marking 8V14 and the segmented circle present in the set, look to
be part of markings used for tests in the stateside off which I don’t
have the photo.
Conclusion
The kit errors are not minor ones and correcting them is not an easy
job. If not corrected, this model hardly can be compared with the
better kits (such as a Dragon or a Heller) even if these are built
straight out of the box. The positive points are the presence of the
dozer blade and the Firefly spare parts.
If a spare M4A2 engine deck is not available, a good solution could
be to use the spare parts from a Heller M4, which give the option
between the deep wading set and the standard deck. But one will have
a M4 instead a M4A2…
Being a modular kit with most of the parts in common with the M4 kit
# 370, the generic correction described can be used also to improve
that M4 (paying attention to the M4 production plants differences)
and not only the other M4A2 kits (# 223 and 372).
Preview
sample purchased by the author.
This
model can be purchased from
 |