|
A Brief History
The 20mm Oerlikon gun in its various guises traces its origins back to the German 20mm Becker machine gun designed near the end of the First World War. Due to
restrictions imposed following the armistice in 1918, the design and patents for the Becker were sold to the Swiss firm SEMAG. When SEMAG failed the rights to the
gun were taken over by Oerlikon. During the 1930s when many nations were building their armed forces, the gun was manufactured under licence or purchased by a
number of nations, and employed by nations for anti-aircraft defence on both sides of the conflict during World War Two.
The USA and Great Britain were the largest users. The Germans bought a number of these guns (designated 2cm Flak 28 & Flak 29), as did the Italians. Many were
sent to the Soviet Union as lend-lease equipment.
The Kit

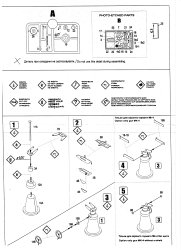
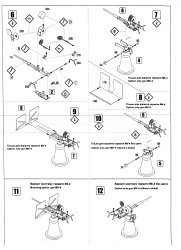

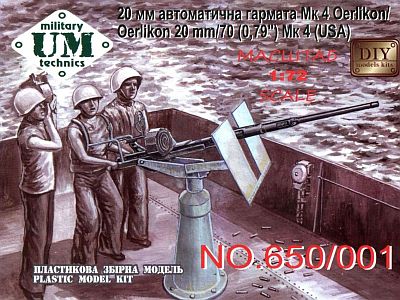
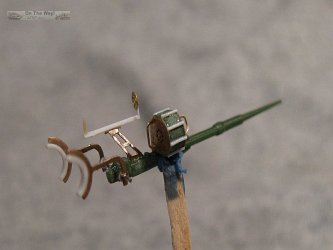
Inside the small box you get one equally small sprue of dark green, hard styrene like plastic, containing a grand total of 9 parts, two of which are not
used for this version. There is also a small fret of etched copper containing 22 detail parts, and an instruction sheet. A photograph of the sprue and etched fret can be
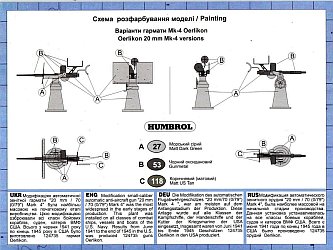
seen at Henk of Holland here. A simple painting guide is provided
in colour on the rear of the box, giving Humbrol paint references. No decals are included, which isn't a surprise. According to reference [1], the model represents
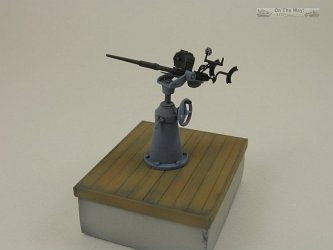
a 20mm A.A. gun on a Mk.4 Mod.3 mount with Mk.4 sights. (see below)

To say the least, this is a very basic kit. Parts are well enough cast as is the etched fret. The etched gun sights are chunky and the shoulder rests are
flat and one dimensional. The plastic parts have hair thin seams that are easy to remove. There are two build options - one with the shield, and one without.
Originally I had wanted this kit to put on a French Indo-China LCVP gunboat, but at the time all that was available was the absolutely atrocious Airfix kit,
which I reviewed
here. Airfix was planning a new tool release of the LCVP, which unfortunately came out long after I'd
given up waiting and had moved on to the thought
of using this kit on a rumoured Revell retool their PT-109. Alas that has not happened as of the time of this review, and when I really think it over, the odds are
the Revell version of this gun would probably be superior in detail. So I looked elsewhere for inspiration, and some research showed that with minor changes
I could build it as a German Kriegsmarine 2cm FlaK 29. Based on my reference pictures, I only needed to omit the shield and modify the sights slightly.
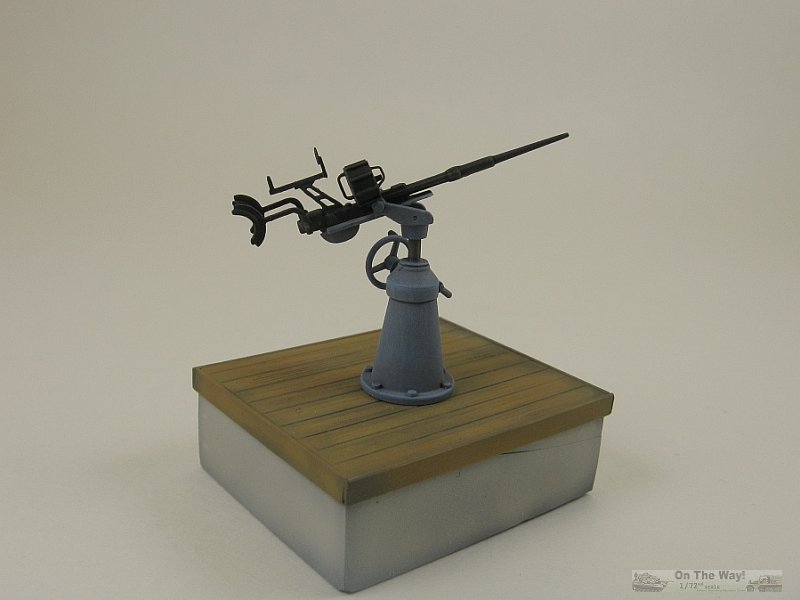
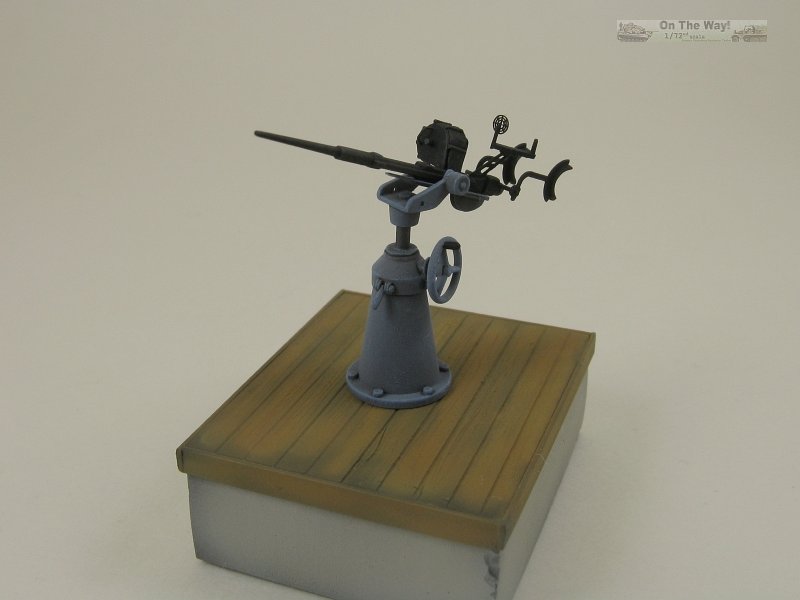
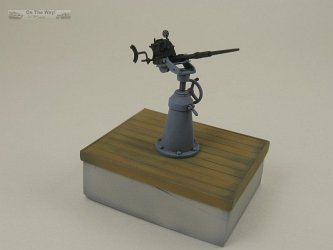
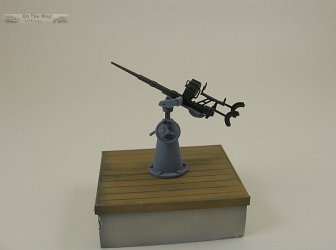
The Build
Construction was broken down into two parts, the gun being one, and its mount being the other. Both were worked on in parallel. First I'll describe building the gun,
which was the more difficult part of the build.
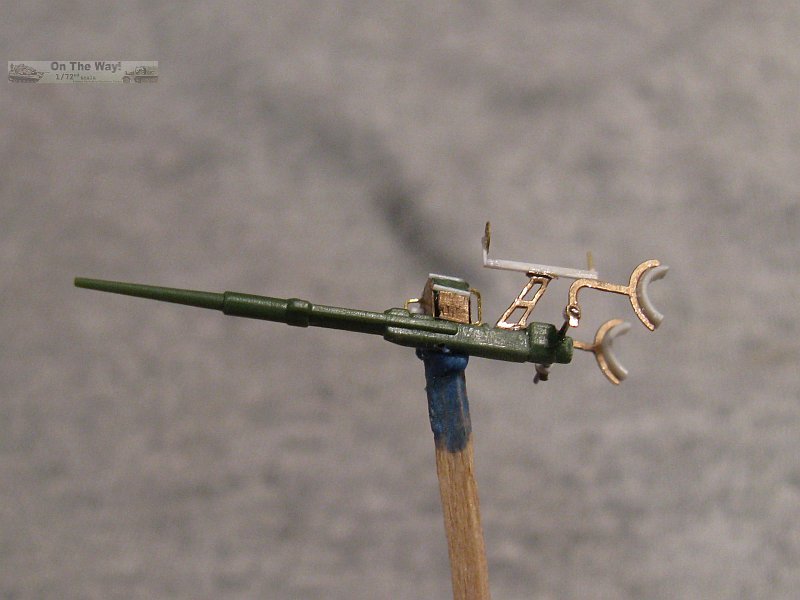
The Gun
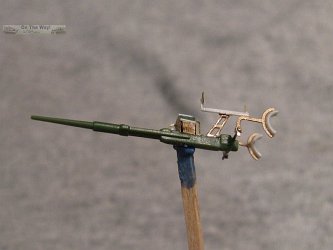
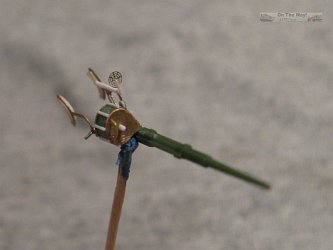
The gun is rather basic and doesn't have any of the recoil spring detail that's very obvious on the real gun and I decided to leave it as it came in the box. I didn't
drill out the muzzle. I figured this would just be tempting the modelling gods to punish me so I left that alone as well.
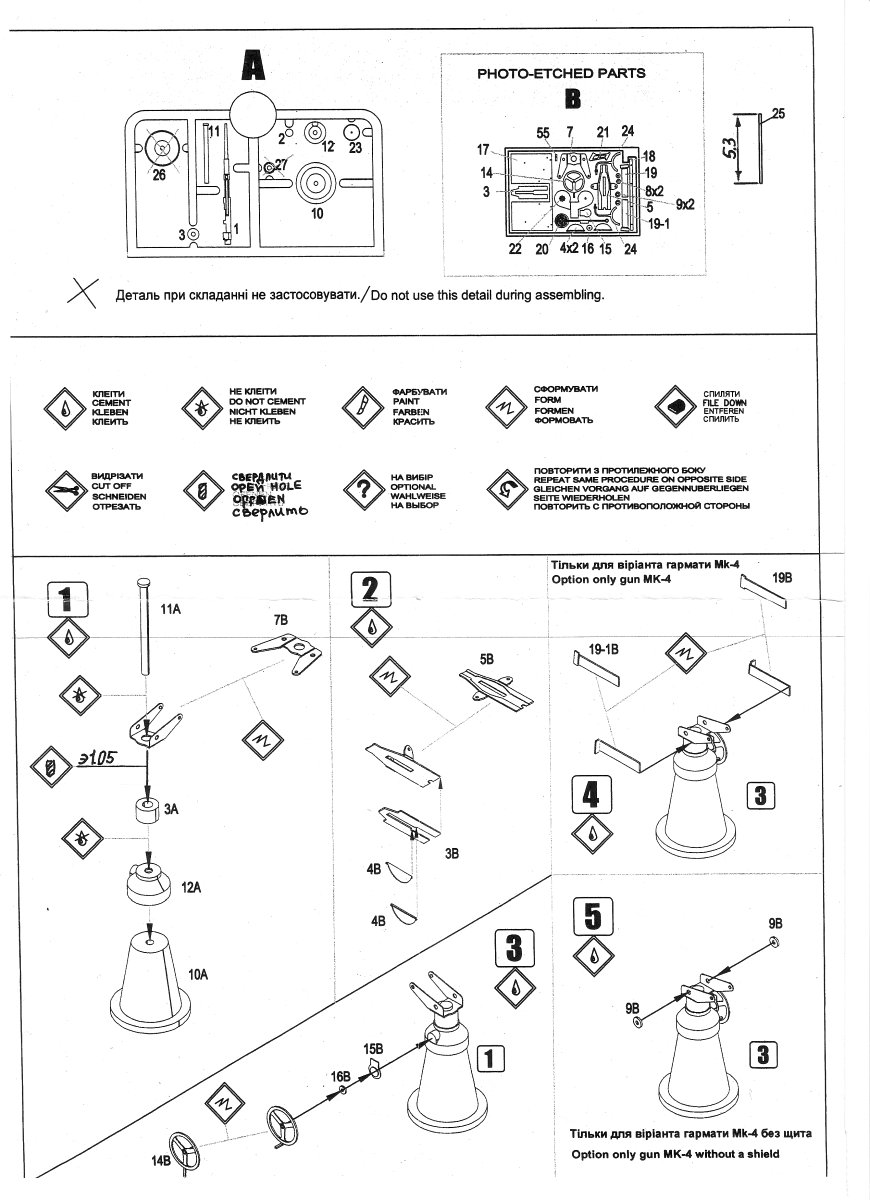
Thus, the first order of business was to detail the magazine. After folding the etched detail (part 22B) around the drum (part 23A) I added the missing ribs and
the spring axis that sticks out the front of the magazine. Two grab handles were added from my spares box, but only after the magazine was glued to the gun to prevent
their being knocked off while handling the magazine.
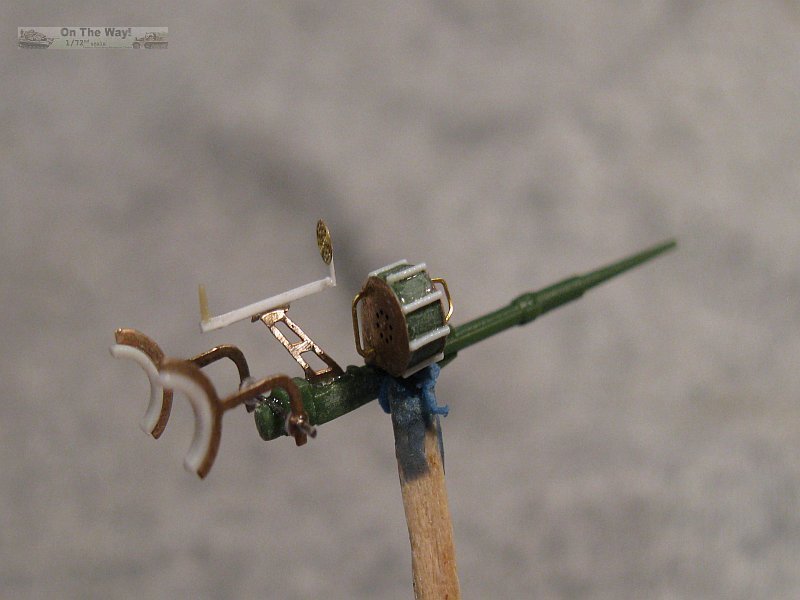
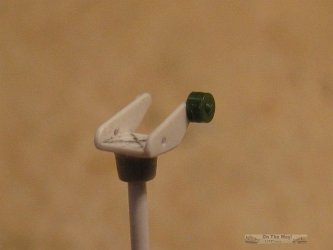
The shoulder rests require the builder to cut a 5.3 millimetre section of metal wire or plastic rod for the cross bar, which is somewhat disappointing as not
many modellers are going to be able to measure out to a fraction of a millimetre, let alone cut whatever they chose to that exacting a measurement. Anyway, I selected
some piano wire of a diameter that would fit through the small holes in the etched pieces (part B24) and cut it to about the specified length. UMmt really
should supply this as a pre-cut part and save the modeller a lot of grief.
The vague instructions are a let down here.
Looking at Step 6, one would think that the etched rests should be attached to either end of the rod, but inspection of diagrams in the subsequent steps shows that
the right rest actually sits up against the right side of the gun, while the left side is the only side where the rest sits on the end of the rod. The join where
the rod and the etched rests meet is not a strong one. I decided to sandwich the etched rests between small disks of styrene slid onto the rod. This would provide
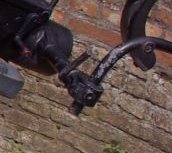
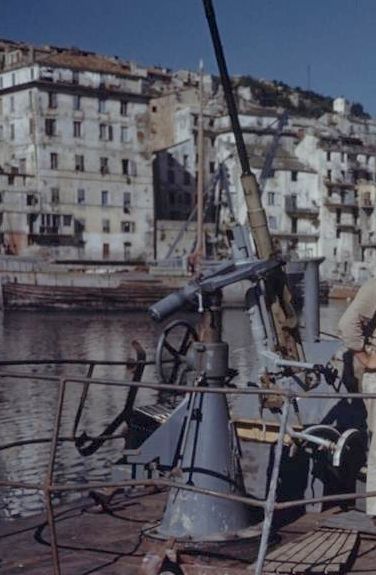
more strength and would to some extent replicate the small knuckles as seen in the picture of a real gun's rest below.
To add a touch of realism, cushions were fashioned from sections of styrene tube and glued to the etched rests. After dealing with the rests, I attached the ammo
magazine and then moved on to the sights. As I mentioned above, UMmt's sights are chunky and the bar spanning the front and rear sights is flat. The bar was
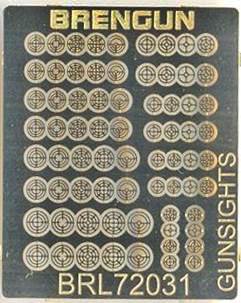
replaced with some styrene rod. The front sight came from Brengun set BRL72031, pictured below.
The kit's round rear sight was replaced with a
post sight fashioned from some stretched sprue.
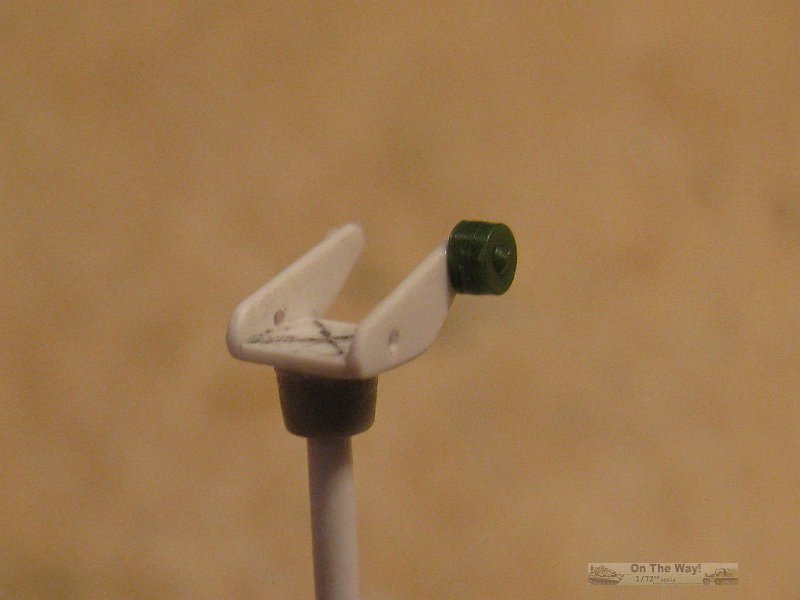
The Mount & Cradle
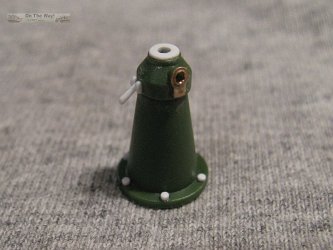
The mount and gun cradle were somewhat easier to build. A new cradle was built from styrene sheet using the kit's etched part as a template. This was done because the
fragile etched copper broke along the fold lines. In the end the new cradle looks better due to its thicker, more three dimension parts. The kit's column (part 11) was
replaced as it was not very round, and the missing column clamping lever detail was likewise added. A new column raising handwheel, obtained from the spares box
replaced the kit's etched piece (part 14B). A set of 6 mounting bolts on the baseplate finished the construction phase.
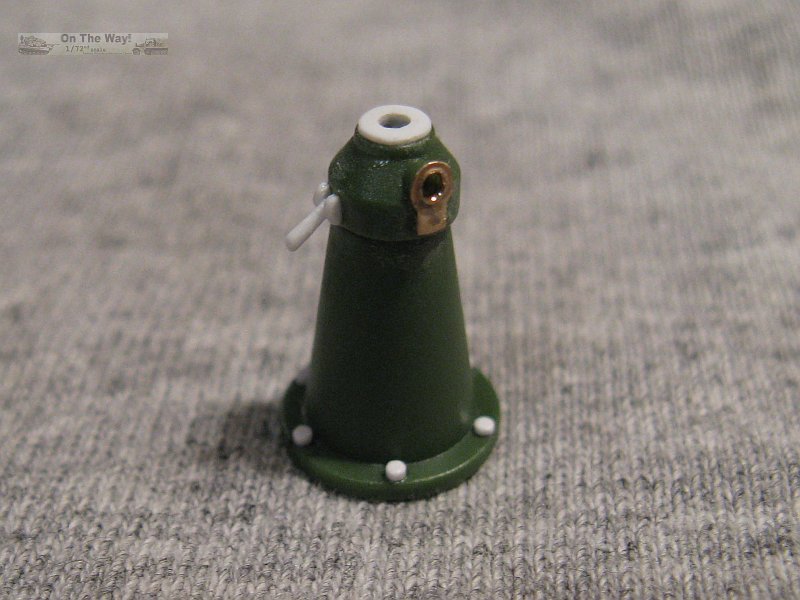
Painting
As a result of my decision to go with a German gun, the kit's painting guide was of little help. I had no idea of the colours used by the Kriegsmarine. I knew
that the gun & magazine would be black so it was painted as such, followed with a dry brushing of silver and Panzer grey to highlight the detail. The base
and cradle were painted a light blue-grey to match the picture below of a 2cm MG C/30 (or C/38).
Conclusion
Not the best of efforts. The etched pieces are not great and many would have be better replaced with plastic parts by UMmt. Overall detail is lacking, though
with some effort the kit can be made to look much better.
References
[1] Ordnance Pamphlet 911: 20mm A.A. Gun Oerlikon, U.S. Department of the Navy, Bureau of Ordnance, March 1943
[2] axishistory.com (forum thread)
[3] sauer-miltaria.de (2cm Flak29 restoration)
[4] navweapons.com
[5] wikipedia
Review sample purchased by the author.

Ukrainian Models Military Technics products are available at

|