|
T-Model
|
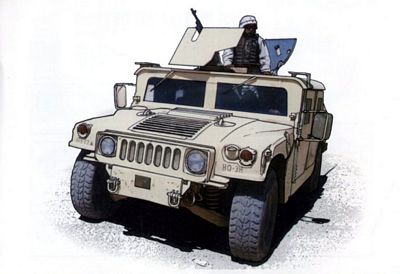
U.S. Modern M1114 |
|||
| Kit #: 7201 | Construction review by F. Giovagnorio | |||
|
T-Model
|
U.S. Modern M1114 |
|||
| Kit #: 7201 | Construction review by F. Giovagnorio | |||
 |
Having finished the building and painting, I can confirm my first impression (not that it was difficult to imagine): this is not a kit for beginners. Strong points: many beautifully executed parts, with an impressive array of details, even when they will be invisible: a rather complete engine, with the air cleaner, battery, radiator and hose, will be entirely covered by the hood, unlesss you plan to leave the hood open; the suspension members and the chassis frame are reproduced with maniacal attention, but they will be visible only if the vehicle is positioned upside down; the hood, the roof, rear door and the interior bulkhead are detailed on the inside, but it was not really needed because those details are almost impossible to see. Weak points: a vague impression of over-engineering here and there; the lack of some important parts which should have really been there, considering the astonishing amount of detail present elsewhere (notably, the navigation and communications devices, the adjustable stand for the machine gunner, the locking system for the rear door); the annoying error on piece B11 (AC grilles) which will be explained later. |
||
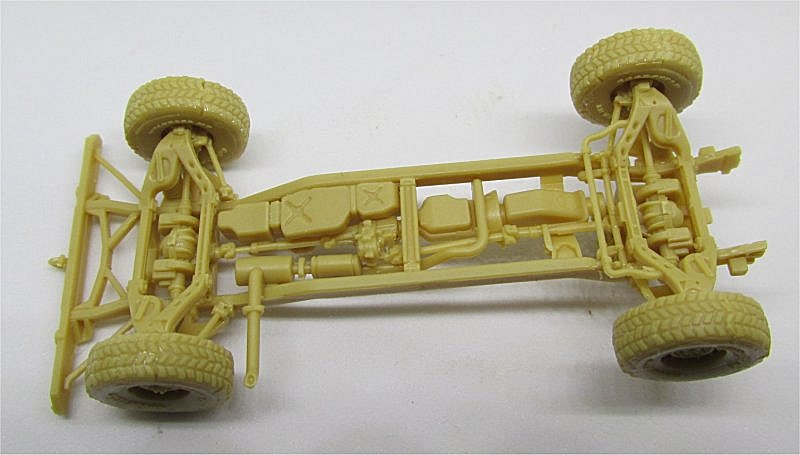
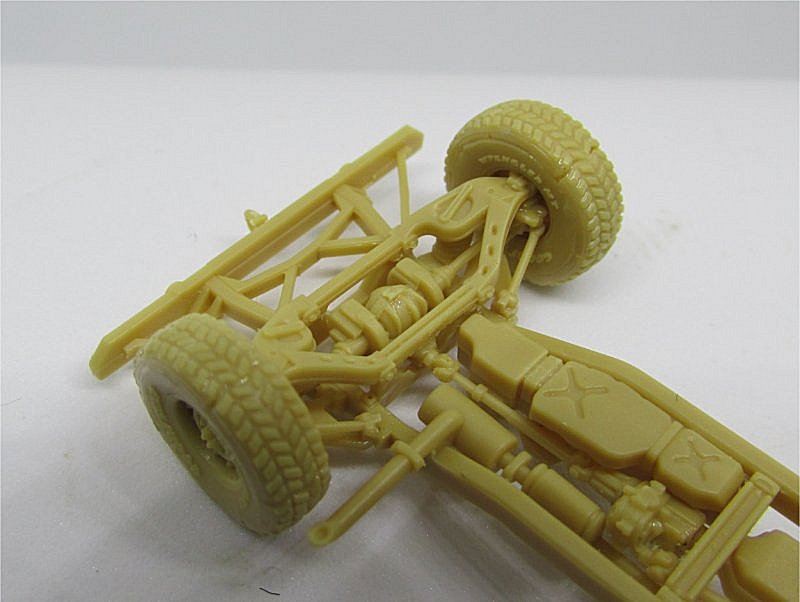
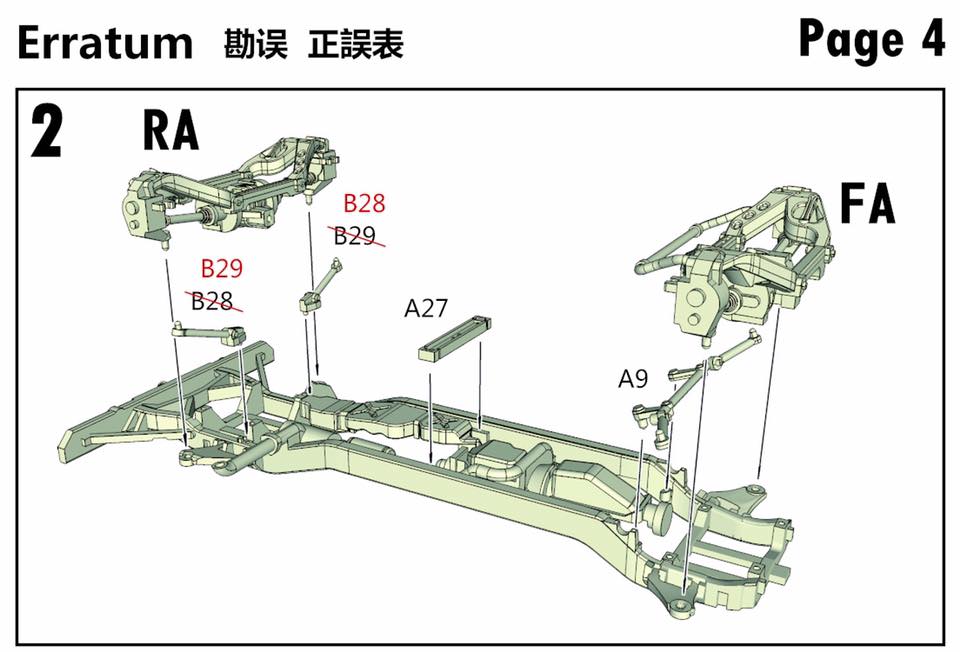
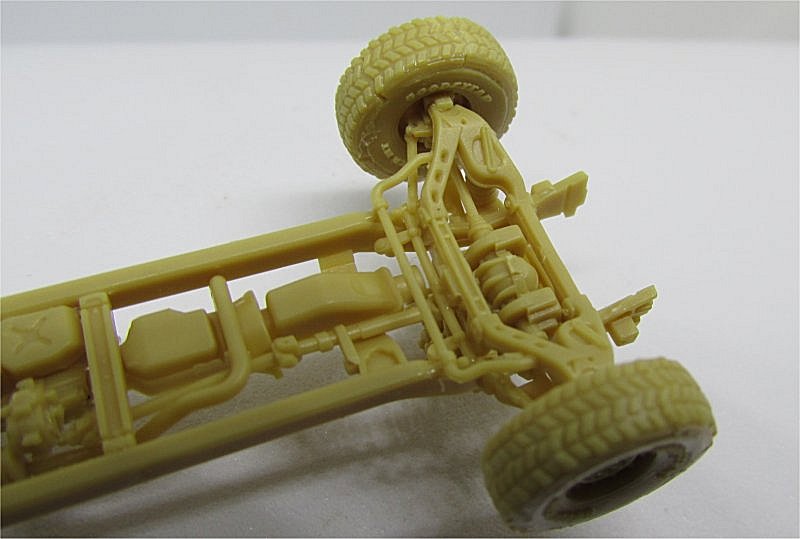
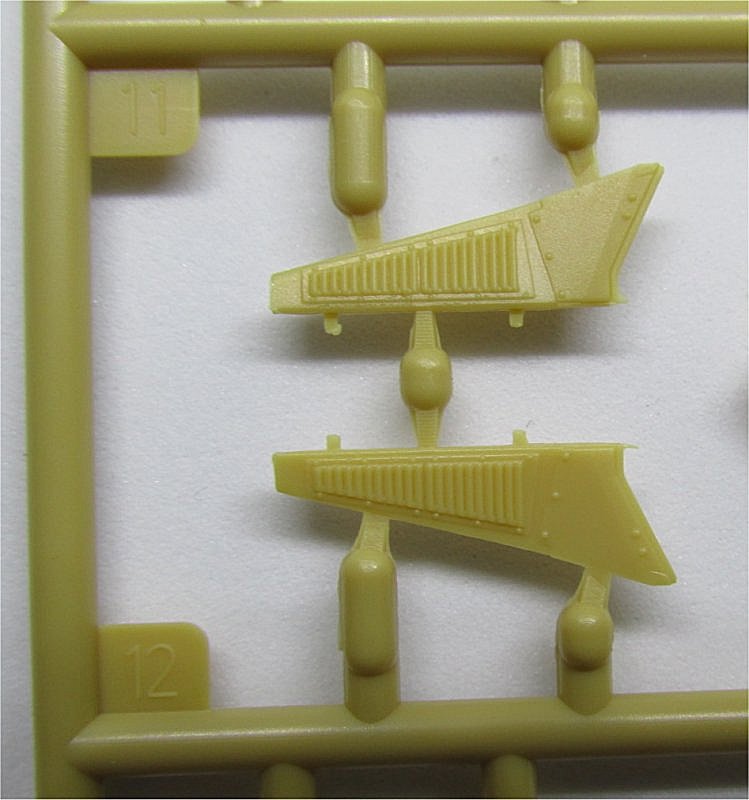
Chassis, suspension and wheels (steps 1-5) It is rather easy to put everything together, if you follow the basic rules: it is better to cut something less than something more (many pieces are long and thin - see A9, A10, A11, A21/23 - and it is easy to break them if you cut too close); never say "this must be the piece", but check the number carefully before cutting; always check obsessively the diagrams to understand the exact orientation of each piece. |
So, assemble Front Axis (FA) and Rear Axis (RA) in Step 1, while in Step 2 it is better to glue pieces A9, B28 and B29 before glueing FA and RA in place. Talking about pieces B28 and B29: there is an Errata Corrige on the instructions, because they must be inverted. In Step 3, positioning the front (A11) and rear drive shaft (a10) and the gearbox (B38) is rather fiddly, while the other pieces go in place without much work. | |
 |
|
|
 |
|
|
|
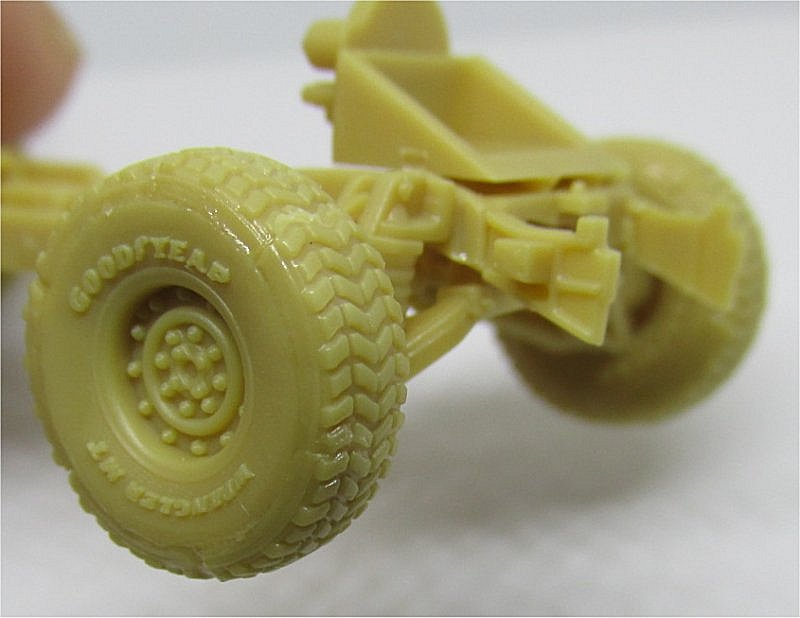
The wheels are considered the most intimidating part of the kit, but I think there is no better way than this to reproduce wheels in injection plastic without making any compromise on the complex thread pattern. Notice that the front and rear wheels are different (WA and WB) and that the chevron in the centre of the pattern points down on the left, up on the right (at least, this is the most frequent pattern on photos). |
Cleaning each little piece of the tyre (10x C7 and 2x C6 !) sounds boring, but you do not have to cut the small amount of flash when the pieces meet, because when melting with glue they will help in filling little gaps. Anyway, it seems there is no way to avoid some gaps, so extra glue and sandpaper will be necessary. Use them with extreme care, to avoid damaging the tyre branding (GOODYEAR -WRANGLER can be read). | |
 |
|
|
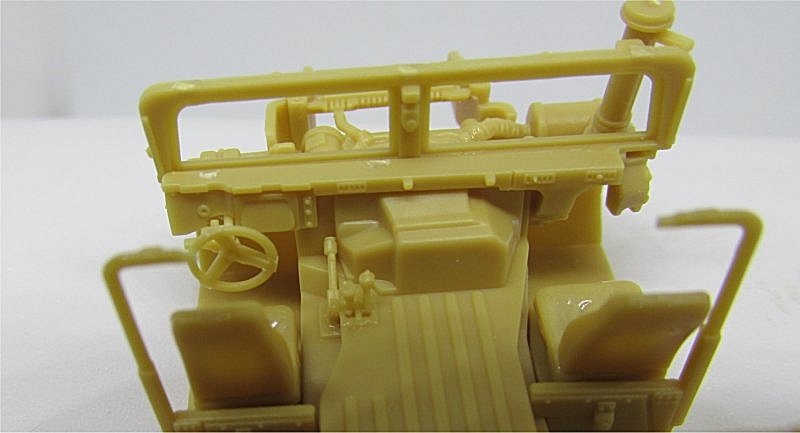
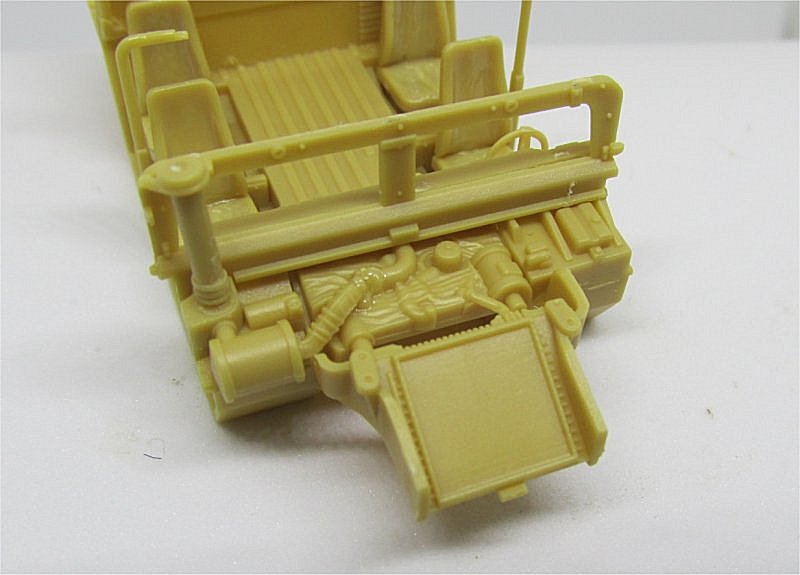
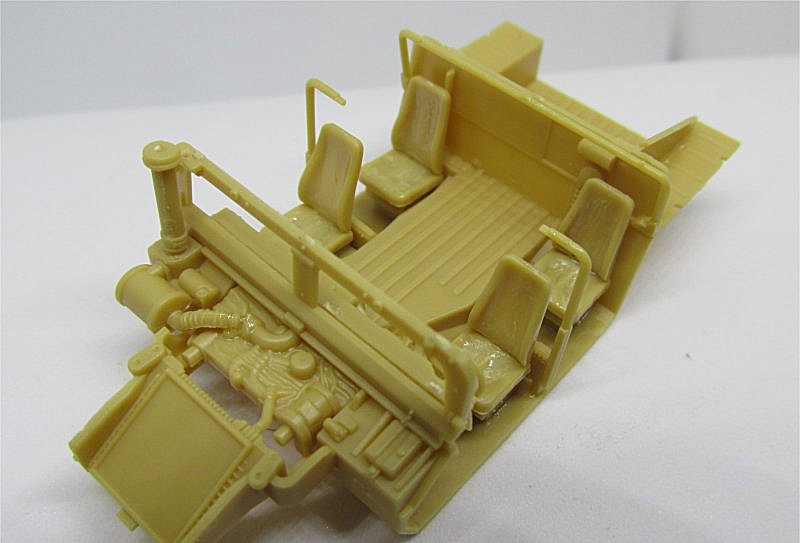
The crew compartment (steps 6-14) No real troubles in step 6 (seats), while some attention is necessary in step 7 with the piece A33 (attachment for the steering wheel), which is very small and needs a very accurate positioning, and piece A13 in step 8, the location of which the instructions totally fail in explaining (see the following pictures to see where it should be glued). If you position the transparent windshields now (G7 and G8) you will have to mask them later during painting. Step 9 is critical because if you do not position the windshield / dash correctly, you will have many troubles later in positioning the hood and roof, and unfortunately doing it wrong is very easy. Better dry fit the hood and roof (B43) to find the right place and angle. Also in step 9, you will never position the supports for the roof correctly (A7-8 and B20) without dry fitting the roof, which has grooves on the inside for them. |
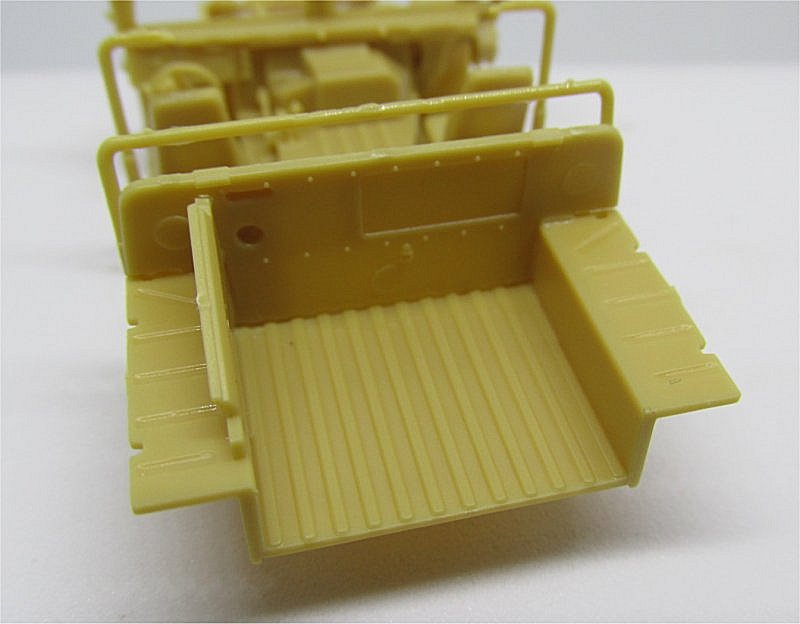
After glueing the brakes and levers in step 10, it is time to put everything together if you wish (step 11). In step 12, position carefully the body side panels, rear body plate followed by the tailgate and a PE part which is a plate to cover the fuel filler cap.
Step 13 lets you build the hood and the external front grille, which is transparent with a solid part inside (B42) containing both the internal radiator grille and the back of the headlamps. I suggest painting the internal grille black and the back of the lamps silver, so they will be visible when the external grille is mounted: naturally, mask the external lenses of the lights to protect them during painting. Step 14 lets you build the four doors, an easy step planned is a "sandwich-style" fashion, with the transparent windows inside. |
|
 |
|
|
 |
|
|
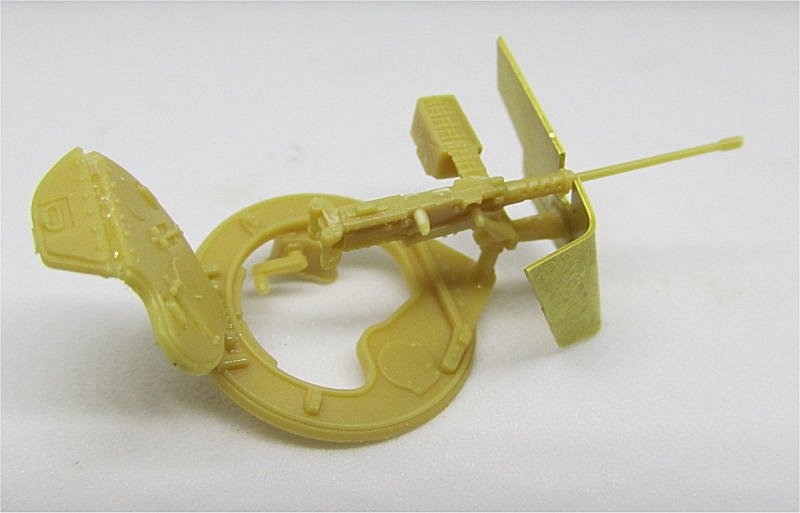
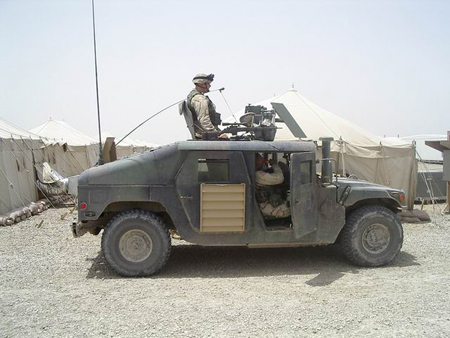
The turret (steps 15-17) The kit reproduces an M1114 with GSK (Gunner's Shield Kit). Later on, the M1114 received the GPK (Gunner's Protection Kit), with an added lateral and posterior protection, followed by the Improved Gunner Protection Kit (I-GPK). All of these can be seen in vehicles fighting in recent conflicts, but M1114s with GSK only are extremely rare, because GPK was distributed before the Iraq war started (2003). In the kit, you can choose between the classic 0.50 HMG or a Mk19 40mm automatic belt fed grenade launcher, both of which well represented. The roof hatch is correct in shape as the gun ring, but there are ejection marks in the lower side, as if it was never supposed to be mounted in open position. |
Putting the gun together is easy (I chose the HMG), but the gun shield is another thing. A rather thick PE part is provided and, while the idea must be praised because the thickness looks in scale, there is no guidance to bend the lateral part, so you are pretty much left alone with the diagram and your ability. Also, the attachment of the shield to the gun mount has no pegs, so you must rely on your eye when positioning the shield. | |
 |
|
|
Finishing (steps 18-21) Basically, you complete the crew compartment in step 18 and add the doors in step 19, but there are some words to spend for step 18. First, save the mirrors (A17/18) and antenna (A31) for as later as you can, because they detach very easily when manipulating the model (and you will). Second, the trouble with piece B11: as written in the preview, there should not be any AC grills on the passenger's side, hence piece B11 is wrong. I cut out the grills with a scalpel and sanded what was left, and the final effects is satisfactory. |
Steps 19-21 are quite straighforward. In step 21, notice that the two PE lifting hooks (PE2) should not be glued to the hood if you reproduce it in open position, because they are solidal to the inner part of the frame.
Almost forgot: naturally, you should paint the interior before adding the roof or it will be impossible to do it later. |
|
 |
|
|
Painting and markings An overall desert tan is suggested as the only paint scheme, which is certainly appropriate for Middle East, but many M1114 fighting in Iraq retained the classic NATO three-color camouflage, particularly in the early years of war, when the GPK was not mounted on every vehicle and some M1114s with GSK only could be seen. This is why I decided to go for the three-color camouflage, completely covered by a thick layer of desert dust. Although some vehicles had tactical markings, no decal set is included in the kit. |
||
 |
|
|
 |
|
|
 |
|
|
 |
|
|
Conclusions T-Model created the best 1/72 kit of an M1114, which translates into a model with every detail one could possibly imagine. However, some intervention is needed to eliminate the limited shortcomings of the kit, notably the wrong piece B11 and the absence of communication equipment and gunner's pad. Moreover, I believe that an M1114 with GSK only is not the best choice for Iraq war, where M1114s with GSK+GPK or I-GPK were far more diffused. |
||
| Review sample provided by T-Model |
||
Back to T-Model Kit List |
Back to Construction Review Page |
Article Last Updated: 22 October 2017 |
Back to Home Page |