www.onthewaymodels.com
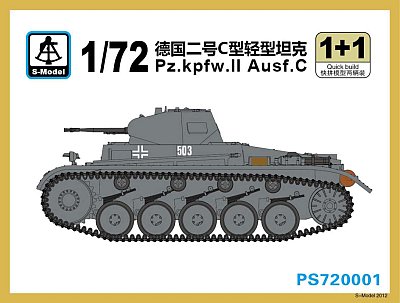
Pz.Kpfw.II Ausf.C

Kit # PS720001 Construction review by Rob Haelterman

For a preview of this kit, containing a scan of the sprues, decals and instructions see here.


History and version

The Pz.Kpfw. II Ausf. C (7.Serie/La.S.100) was built in 1938-1939, and was the most modern version of this tank at the time WW2 broke out.

The kit represents an early to mid Ausf. C:

  • with the up-armored (angular) nose introduced in February-March 1940, which is typical for the campaign in France, although not all vehicles were modified in time [2];
  • without the commander's cupola (introduced in October 1940 [1,2]). If wanted, this cupola can be taken from an Esci kit, although it might have been a nice option if it had been included in this kit;
  • with some extra armor on the mantlet (which you can sand away for an earlier model), but no flanges around the gun mount (which you might make from plasticard to make a slightly later version - it might be that these were only fitted by Pz.Rgt.5 );
  • without extra armor on the driver's plate (which, according to my sources was introduced in May 1940). I think this feature was introduced at the same time as the extra armor on the turret nose. Admittedly, this detail is difficult to tell, and might be realistically simulated by adding some very fine bolt-heads;
  • early type idler;
  • Notek. This was introduced in October 1940 [2]. It's easy to leave off, but take care if you want to use the vehicle in a France, May 1940 setting.

In summary, out of the box, this kit would represent a vehicle from just after the campaign in the West. I will be leaving the Notek off, to make it fit in with a France, May 1940 diorama, or a scene from shortly thereafter.


The kit

As this is a kit with a small number of parts, it won't come as a surprise that this will be a small construction review. Note that there are two identical kits included in one box.

I started by removing the bigger parts and cleaning them up. This was an easy affair with only the tracks demanding a bit more work due to presence of a seam on their centerline.

I glued the hull parts together. Fit was perfect. The only thing that needed to be remedied were two small "notches" in the glacis, apparently due to the plastic not reaching the very end of the mold. These are less than half a milimeter across, so not something that can't be remedied. (They are difficult to see in the pictures, as I had already primed the kit in black.)
After a first layer of primer, I attached all parts to the hull that would be painted in the same color as the hull, i.e. all parts except the jack. The fire extinguisher is nice, but doesn't have locating pegs, so you would need to check your references to be exactly sure where it goes.
It's a pity that S-model chose to mold the antenna folded down. If you want to model an antenna in deployed position, then you should remove it from the holder (part 8) by scribing in the recess, twisting the pivoting mount 90° and adding a 2m antenna from sprue.
The hull fenders have a section where you can see through the hull. A bit of plasticard will remedy that.

Next I assembled the turret. I chose to model the turret with the hatches closed, as there is no interior detail (not even on the hatches) and I was not going to put a figure inside. Note that you get parts for a closed hatch and for an open hatch.
I chose to use the plastic gun barrel, which is not bad at all, even though the metal one is better. The reason was that I wanted to speed up construction (the metal barrel would have needed priming) and that I wanted to keep the barrel for another kit.

It seems the tracks can be attached to the hull without glue, which will aid painting them enormously. The way they are engineered is a mixed blessing. It makes them very easy to install and keep straight, but I am a disappointed about the level of detail on the tracks. The leaf springs are also way too far out from the hull. Obviously, they should support the axles, not the wheels themselves.

At this point the kit is almost finished. I only need to add the jack, the PE for the exhaust and possibly part PE2, which is a removable metal plate for the identification number of the tank in the unit. More about it later.


I started looking at the accuracy of the kit, and this were the nits I chose to pick:

  • A fuel filler cap is missing on the right front of the top hull plate. I will not correct this.
  • The lifting hooks on the nose, as well as the driver's visors, and the radio-operators visor (which is at the rear) are either absent or under-defined. I have corrected this.
  • There is a vent mising on the right side of the engine compartment. For a quick build, this will take me too much time to correct, so I've let it be.
  • A spade is missing. This is easy enough to fix, but I thought it was a shame to hide the nice axe on top of which it should be placed.
  • The horn is missing. I guess this might happen in a combat situation.
  • The towing pintle is not there. I have salvaged one from the spare's box. Above this, I've added a small inspection hatch cover.
  • A spare wheel was often seen on the nose, but not on this kit.
  • The headlights need either to be hollowed out, or (for a least-effort approach) a slit made in the front to simulate a blackout cover.
  • As mentioned earlier, the leaf springs for the suspension should be a lot closer to the hull.
  • Compared to the scale drawings in [1] the hull length and width scale out to 1/72, given a measurement tolerance of 0.5%. The hull height scales out to 1/74 compared to the drawings, but I have the impression that the suspension in the drawings is not as compressed as that of most vehicles seen in wartime pictures. I would thus give the benefit of the doubt to the kit.


For those who are wondering why there is a section on the right rear fender where the fine threadplate pattern is missing, well, it seems this corresponds to the actual vehicle.

For a quick-build kit it is remarkable that there is a metal barrel and PE included. I didn't use the PE barrel, as the plastic part is fine in its own right. The PE rhomboids are for the vehicle number, but not all marking options show vehicle numbers on these plates. I decided not to use them. Note that you would need three rhomboids per vehicle, while you only get one.
The PE part for the muffler is nice, but just a tad too small. When you bend it around the muffler, it will not touch the hull. On the top of the muffler I was able to cheat half a milimeter, due to the hull overhang, and I figured the 0.5mm gap underneath won't be readily visible. The muffler body (the part hidden by the PE screen) is nice though, so one might go for a meshless configuration. Note that if you bend the PE part to a slightly narrower diameter, it will stay in place without glue, thus reducing the risk of marring the fine detail.

I pondered on the subject of the tracks for a very long time. Overall, the kit is extremely well-done (even if it hadn't been a quick build), but the quality of the tracks is a disappointment. If S-model would just add a tad more detail to the face of the tracks (like they did to the rest of the running gear, inlcuding the guide horns) and re-engineer the leaf springs, this kit could stand any level of scrutiny.
After some soul searching, I decided that I could not entirely live with the state of things, so I sanded and cut away the track face in the most visible parts (around the sprocket and idler) and replaced them with sections of PE tracks that I had still lying around. These happened to be Panzer 38(t) tracks from OKB Grigorov (set 72089), but they looked sufficiently like Panzer II tracks to me, and were the exact width of the plastic parts.


Before


After


From left to right: kit part, kit part sanded down and end-result.


Camouflage and markings

You get 4 marking options in this kit, all in overall grey:
- 4th Panzer division, with the unit insignia used in 1940 (and between 1943 and 1945). You get 4 divisional insignia, while the instructions only require 3.
- three unidentified options without unit insignia.

There are enough decals to do each of the four vehicles. The black and white Balkenkreuze show some slightly jagged edges.

Note that the first option (4th Pz.Div.) has a rhomboid marking at the rear, but not on the sides, which is an unusual (?) combination. The side markings are on the turret, but you get enough small vehicle numbers to cover three rhomboids if you fashion them yourself.
The third option has a rhomboid at the rear, but the hull numbers are painted directly on the side, which would probably not have been the case.
Note that two of the marking options do not show the rhomboid, while the instructions don't point out that they are optional parts.
For the record: by the time the Panzers reached France, only part of them used the rhomboid system.

I originally planned to do a vehicle for the campaign in Belgium and France, but after having sprayed the vehicle grey, and being pleased with the result, I was loth to add the brown disruptive pattern, which all vehicles (should have) carried prior to June 1940. As the French campaign lasted until June 22nd, I imagined my vehicle would be a replacement sent during the campaign, or shortly thereafter.
I chose the markings for the 4th Panzer Division, which fought in France from the start, and only moved out of the country by November 1940 [4].
Unfortunately, the yellow decals suffer from bad opacity. The "216" was uneven in opacity, the 2 and 6 being far brighter than the 1, and then only in a very uneven fashion, so I replaced them with the "312" from another marking option. The "312" and the 4th Panzer Division unit sign, both yellow, are still not very opaque, but at least look like having the same color between them. I believe they could pass for dulled down markings, although, in hindsight, I think I had better replaced them with aftermarket decals. The decals are very thin, by the way, and a joy to work with.

Often when a Balkenkreuz was painted on the hull, it was "repeated" on the antenna trough. As S-model does not provide enough decals to do this, I sourced one from the spare's box that was "close enough" and cut it to shape.


Problem with decal opacity


Post Scriptum

With all the work I went through to embellish the tracks, I might as well have gone the extra mile and remove the leaf springs from the roadwheels and glue them to the hull instead, so that they no longer sit proud of the latter. It might be that this wouldn't work without actually scratchbuilding new springs though. (Thanks to Andy Lang for drawing my attention to this.)


Extra

As mentioned in the preview, a very nice MG34, used as a sMG, is included. I will definitely use that one at a later date for a diorama. Why it is included is anybody's guess, but I am not complaining.


References

[1] Achtung Panzer No7, PzKpfw I / PzKpfw II; M. Bitoh; Dainippon Kaiga; 2002. (Japanese text, with traces of English)
[2] Panzer Tracts 2-1, Panzerkampfwagen II; T.L. Jentz & H.L. Doyle; Panzer Tracts, 2008
[3] Pz. Kpfw. II Vol. I; J. Ledwoch; Wydawnictwo Militaria; 2002
[4]
http://en.wikipedia.org/wiki/4th_Panzer_Division_(Wehrmacht)


Review sample provided by the Hobby Den.

Back to S-Model Kit List Back to Construction Reviews

Article Last Updated: 21 August 2016

Back to Home Page