|
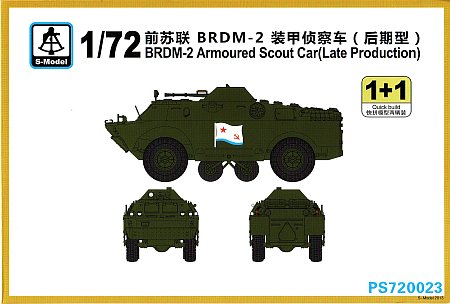
The Kit

(Before proceeding, please check out the excellent Ace versus S-Model BRDM-2 comparison by Simon Barnes here.)
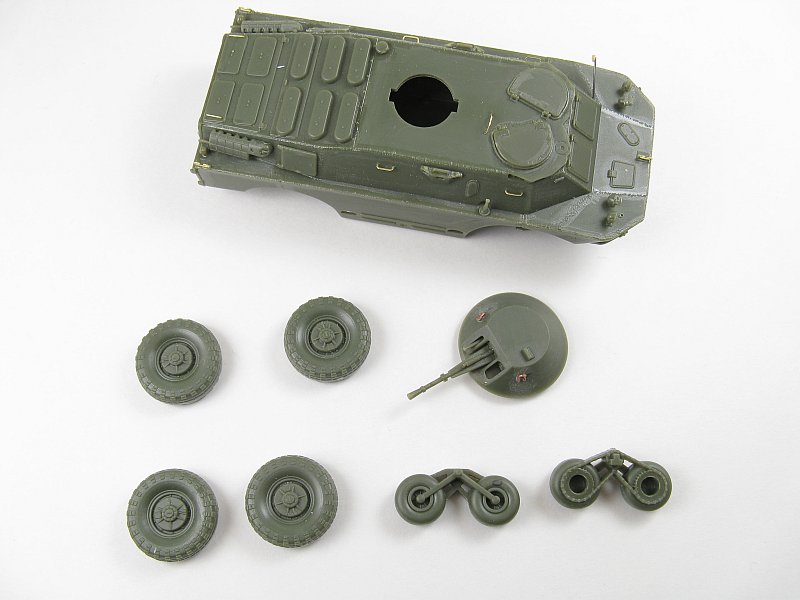
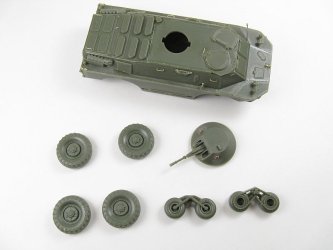
The kit comes in the now familiar end opening box used by S-Model. Inside the box are a pair of identical sprues containing 56 parts in dark green injected
styrene plastic. Parts exhibit no flash and virtually no seams. The few seams to be found are very fine. The surfaces of the plastic parts are a mixture: some have a
slight pebbly finish (e.g. body shell & upper hull) while other pieces are mirror smooth (e.g. rear panel, splash board & turret). It's nice to see the shovel
as a separate item. Wheel rims look very nice detail wise, and while the tires have some tread pattern it's not very close to what's normally seen on Soviet BRDMs.
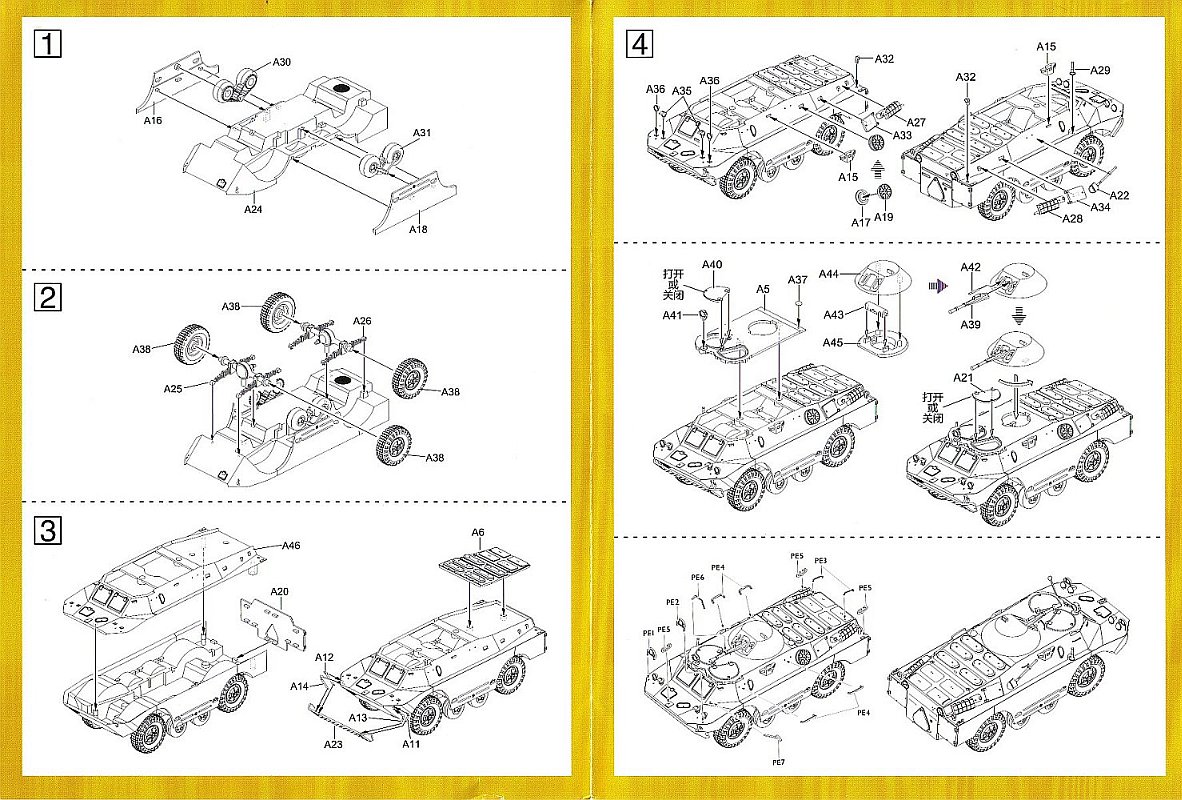
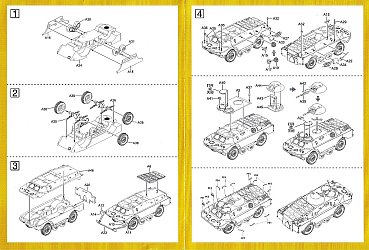
The instruction sheet guides the builder through four steps (the fourth step is actually composed of 3 sub-steps) showing the suggested build sequence in the typical
exploded views. There are a variety of parts on the
sprue intended for the ATGM BRDM-2 (parts A7 & A8 - round hatches; parts A9, A10, A1, A2 - sights, and part A3 - 5 x missile tubes) not referenced in the
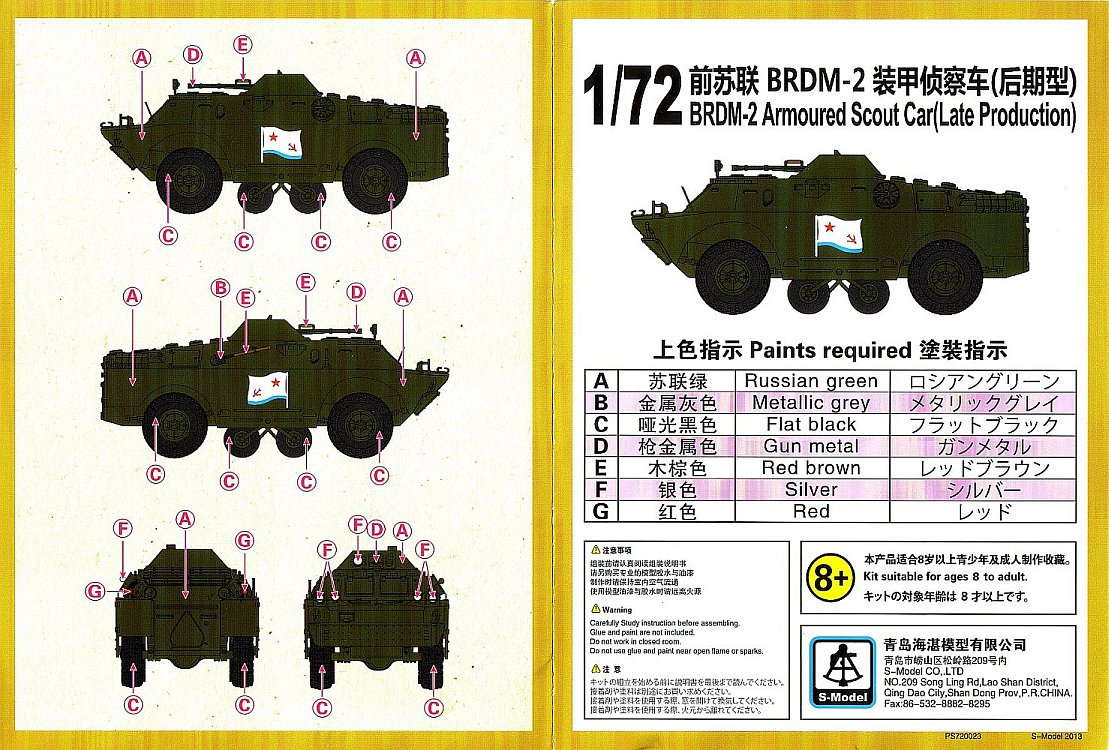
instructions. It would have been nice if there had been a sprue layout with these parts somehow marked as unused. The painting and marking guide only illustrates a
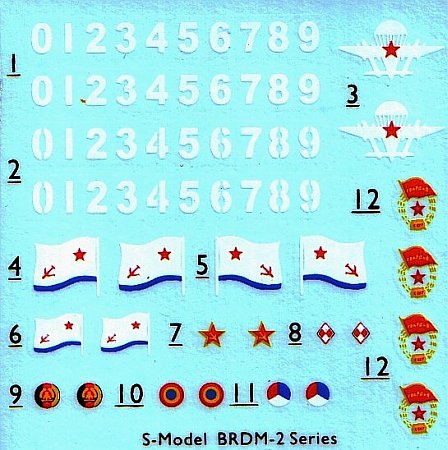
Soviet Naval vehicle in overall dark green camouflage. Paint colours are not matched to any specific manufacturer being just generic call-outs like "Russian Green".
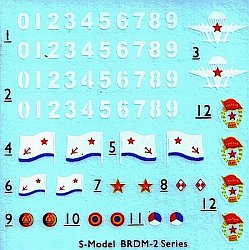
There is a nicely printed decal sheet with national and service markings for Soviet (Guards, Naval & Airborne), Polish, East German, NVA, Czech and Romanian
vehicles. The sheet also contains a set of white vehicle numerals that come in both solid and stencil styles.
Rounding out the package is a nice fret of photo-etched brass containing handles, tow points for the upper hull and brush guards for the lights.
Accuracy
Vehicle Dimension
(from reference [1]) | 1/72 scale | Kit |
As can be seen to the left, the kit's dimensions scale out quite well to 1/72. |
| Length: 5.75m | 7.98cm | 7.95cm |
| Width: 2.35m | 3.26cm | 3.28cm |
| Wheel Base: 3.10m | 4.30cm | 4.28cm |
| Track: 1.84m | 2.56cm | 2.56cm |
Simon Barnes article does show that for the most part the upper hull of the vehicle is
quite well done. Unfortunately the same can't be said for the underside. Here we find a couple of bad errors.
|
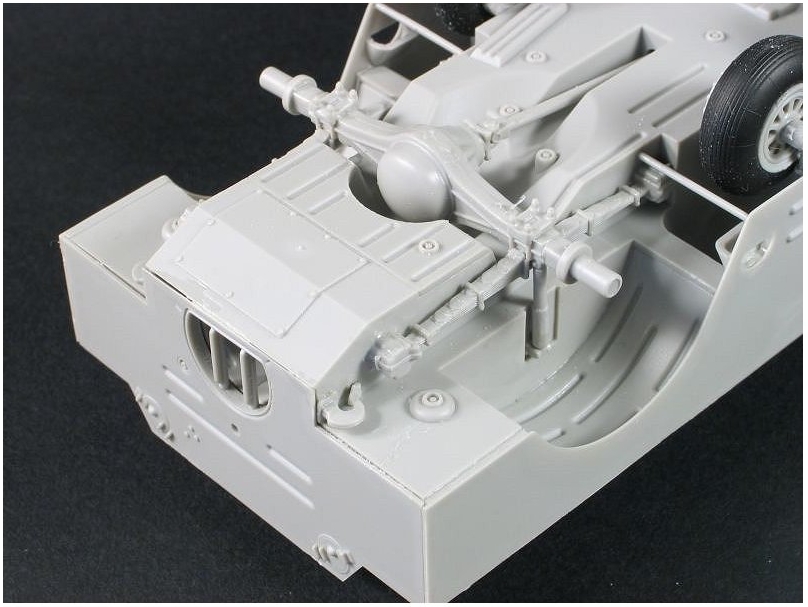
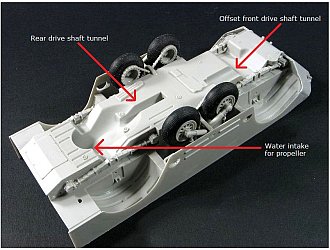
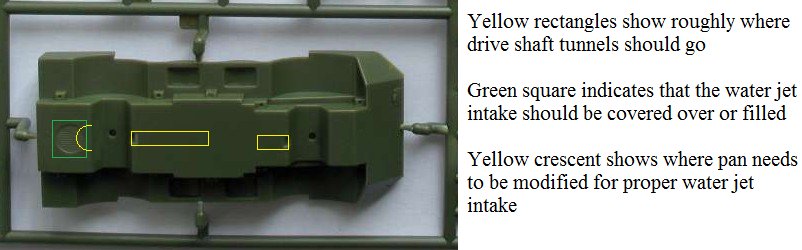
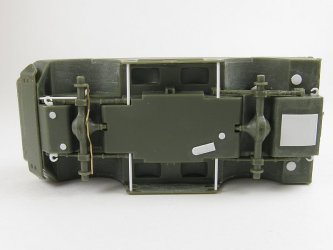
First is the incorrect drive train, specifically the location of the drive shafts and the shape of the belly pan to accommodate them.
On the real vehicle the drive shafts
are located in deep tunnels. Compounding the problem is that the tunnel for the front shaft is offset from the center line which results in an asymmetrical axle
with the differential housing being offset to the left side of the vehicle. On the S-Model BRDM-2 the tunnels are missing with the drive shafts being little stubs
and both axles having the differential housings placed directly in the middle.
The second big mistake is with the water intake for the propeller. On the real vehicle this intake resides behind the rear axle. On the S-Model kit it is a circular
opening molded flush to the bottom of the belly pan with a screen cover reminiscent of what you see on something like a BTR-60.
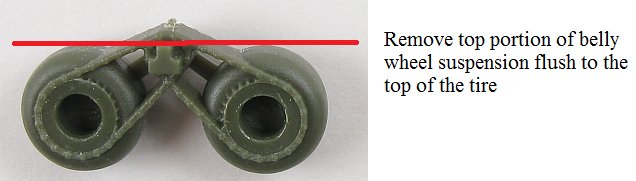
Lastly you can also see that the belly wheels should be slightly offset from each other instead of being in-line as molded by S-Model.
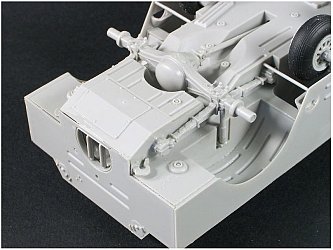
Take a close look at the pair of photos of the Trumpeter 1/35 scale BRDM-2 at left which better illustrate the problems. I've also attempted to illustrated the changes
on a photo of the S-Model belly pan piece.
According to reference [1] the rear deck (part A6) is that of the 3rd BRDM-2 production run, which jives with the S-Model description on the box top.
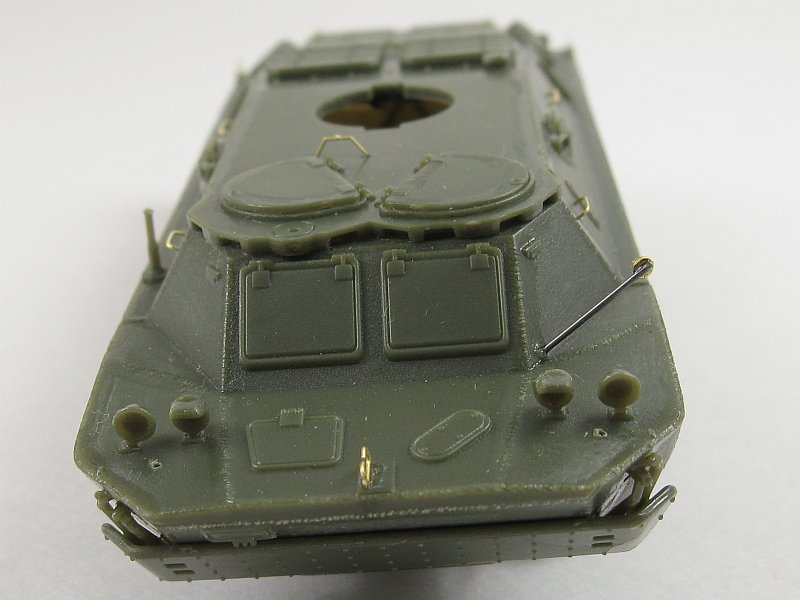
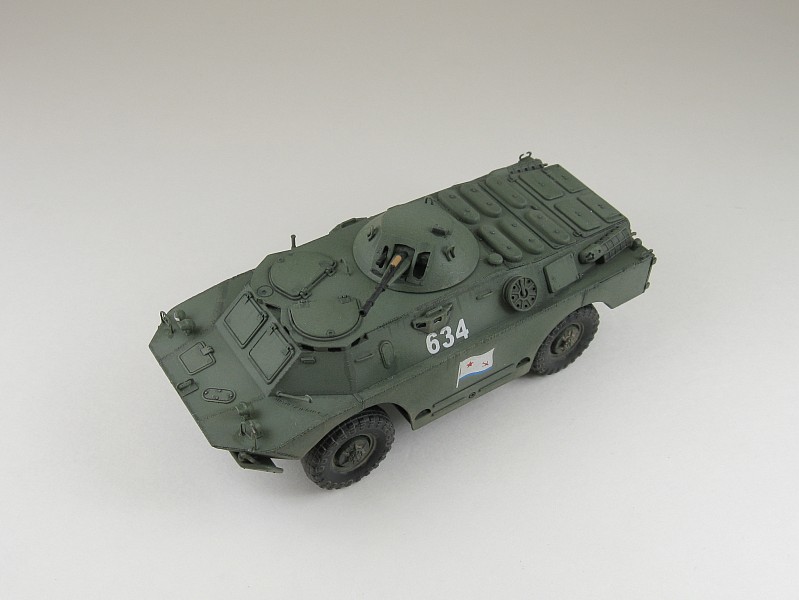
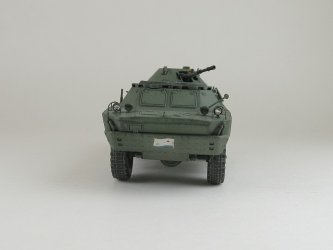
As far as detail is concerned the kit is a mixed bag. For the upper side many of the small details are present, such as lights, tow points and handles, either as
plastic or photo-etched metal parts. The underside is much more spartan, lacking many of the suspension parts like shocks, braces, sway bar and tow hooks.
|
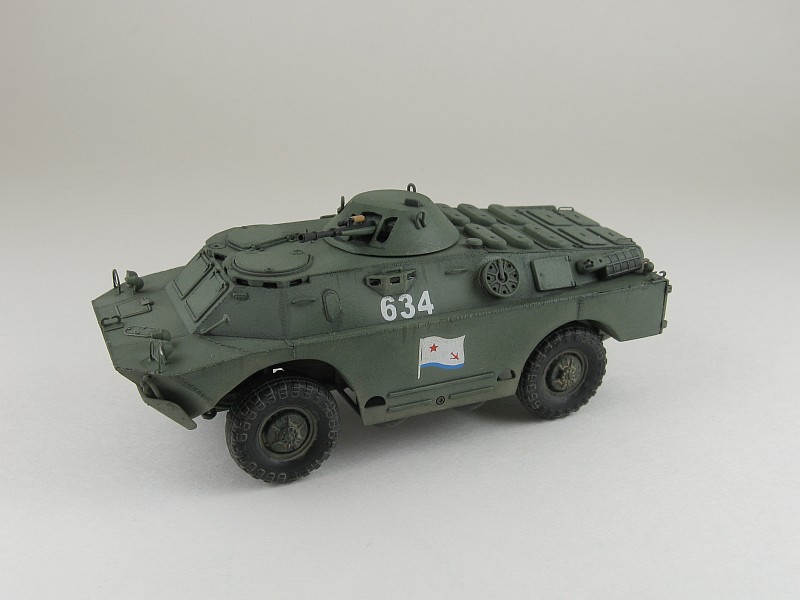
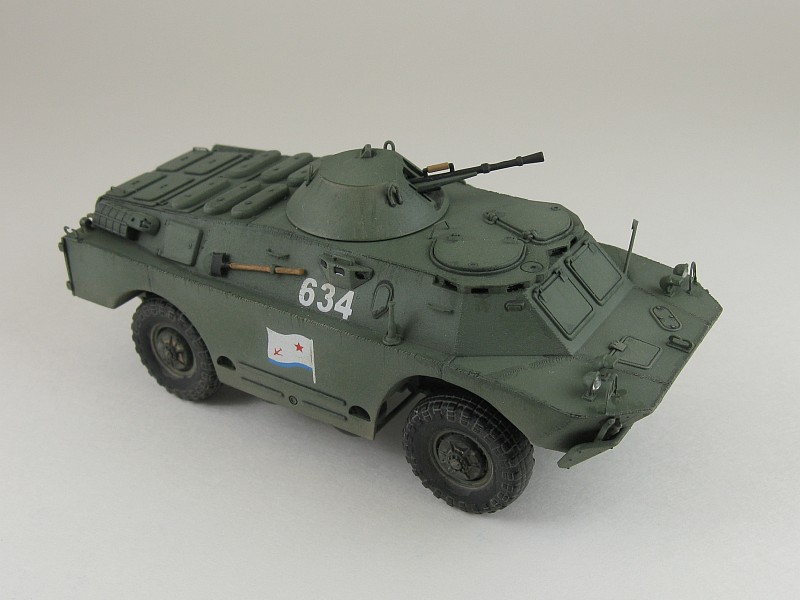
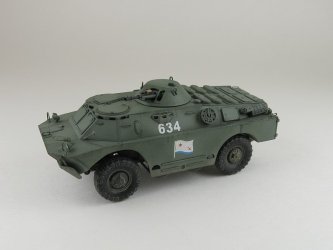
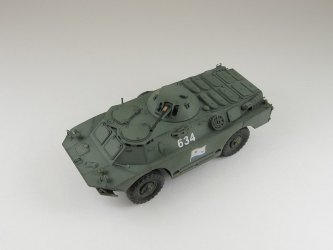
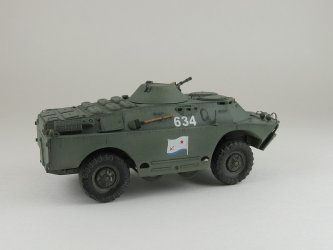
The Build
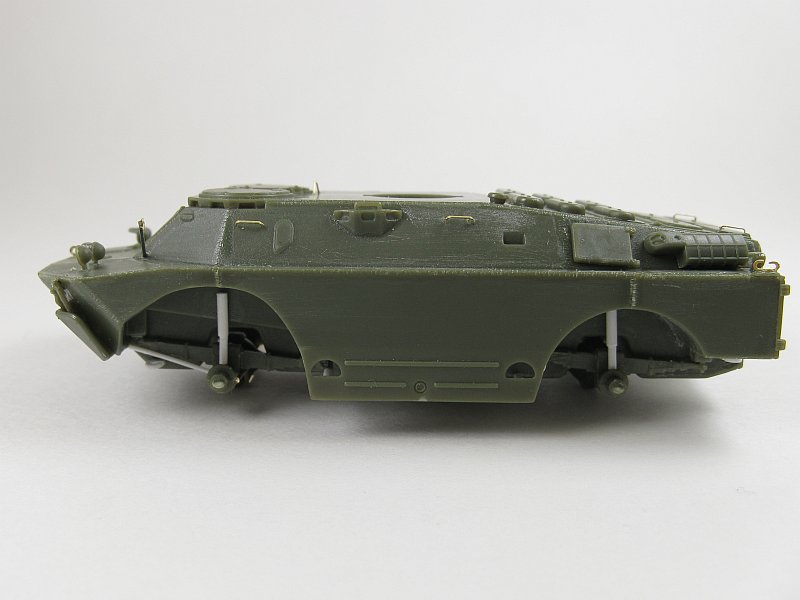
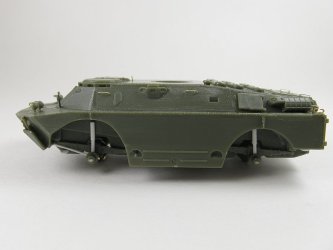
Overall the parts fit was excellent. The one-piece upper and lower hull parts fit together like a glove making the body construction a snap. For the most part the few
ejector pin marks that are present are well placed. I only found a couple of low spots, one on each of the rear stowage bin covers. Most of the build time
was directed to adding or refining detail, as follows:

|
- Deepened the holes in the wire spool (parts A17 & A19)
- Sanded the bottoms of the two hull top inserts (parts A5 (crew compartment top) & A6 (engine cover)) to get a flush fit with the edge of the one-piece body.
- There were small gaps around some of the vision blocks where they meet the hull. I filled these with thin cyano glue applied from inside the upper
hull.
- Suspension units are molded as nice solid one-piece units and S-Model added locating pins to the differential housings to help with alignment. The locating pins
were cut off and used to fill the corresponding hole in the bottom of the hull and the housings were smoothed off. I strongly suggest that the wheels be dry
fitted after the suspension units are glued in place to ensure a level stance with all the wheels touching the ground.
- Trimmed the top from the suspension arms of the belly wheels to get them to sit up higher behind the side skirts. This is the position they'd be in
while the vehicle is travelling over good surfaces. Otherwise leave them as is if you wish to model the vehicle in cross country mode in softer terrain.
- Added shock absorbers, a control link (left side only) & a front sway bar to the suspension.
- Added braces to the side skirts. There should be one on each end of the skirt and one located in the middle running between the belly wheels.
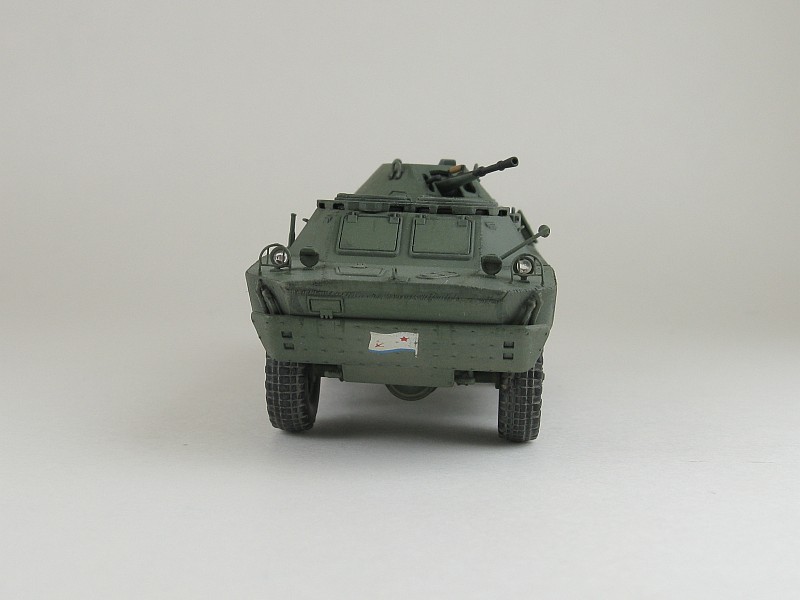
- Scratch built some tow hooks and covered over the incorrect water intake.
- Sanded off as much of the pebble texture as I could.
- Added weld seams by brushing liquid cement along the joints and scoring with the tip of a hobby knife.
- Added lift loops to the turret from bent copper wire. There are three of them: on the left, right and rear.
- Drilled out the end of the main gun's barrel.
- The etched parts have little nubs on them to fit into corresponding locating indentations on the kit. I found the indents just a tad too shallow and deepened them
some by gently pushing the tip of a sewing pin into them.
- Replaced the flimsy etched-metal rear view mirror support with a sewing pin shaft. The mirror portion was cut from the kit's support and glued to the replacement
shaft.
- I found the locating depressions in the hull for the trim vane supports to be indistinct making the placing of the supports fiddly. I eventually glued a small piece
of thin plastic sheet to the backside of the vane to make it sit proud from the prow and then added the supports after gluing the vane to the hull. I found this
easier than trying to get all of these parts to align and stay in place when glued together at the same time.
- Thinned the edges of the side skirts.
- I drilled out the faces of the rear lights. Following painting they received a dab of gloss red paint and when that dried a drop of 1-minute epoxy replicated the lenses.
|
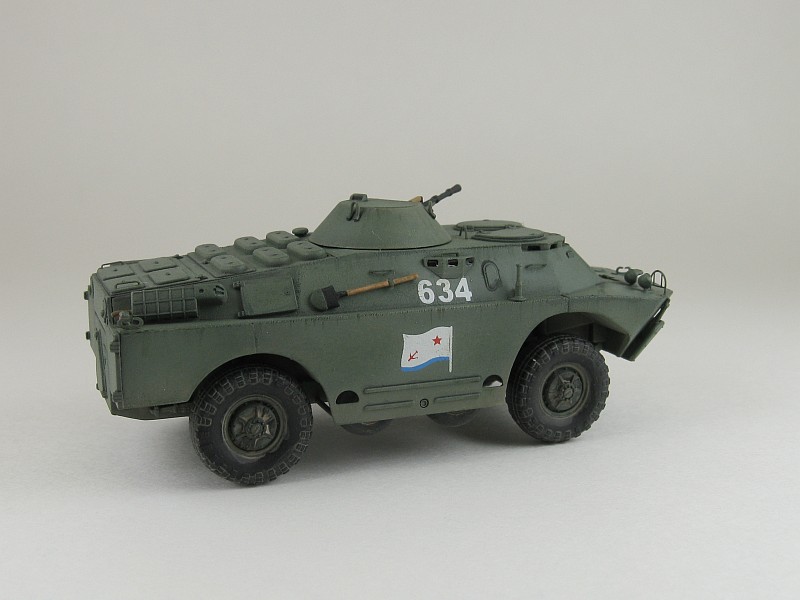
Markings
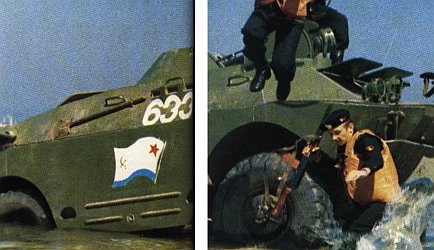 |
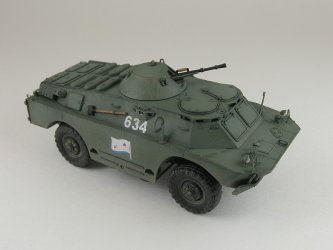
It's odd that you get so many marking options on the decal sheet but only a single choice is used on the instruction sheet. Even then the suggested markings are
incomplete when compared to the reference picture I located on the web (see photo at left of an early production BRDM-2).
To that end I added numbers to the hull and an extra naval flag to the trim vane. As for the decals themselves, the images are excellent. They are very thin and
quite opaque. There was no bleed through of the underlying dark green camouflage on the white portions
of the decals. A few applications of Microsol got the images to snug down nice and tight, even over the rivets on the front of the trim vane. No silvering
was encountered. |
Conclusion
Out-of-the-box, this is a nice kit. Parts fit is superb and the detail on the top side of the vehicle is first rate. Alas,
the underside is a big let down. Grievous errors with the prop's water intake and the drive shaft locations and tunnels will require the builder to make extensive
modifications if they wish to build an accurate model top to bottom. But for all its faults it
still makes into a decent replica and it's also a kit that's just fun to build.
References
[1] Russian Armored Cars 1930-2000, James Kinnear, Darlington Press, Darlington 2000 ISBN: 1-892848-05-8
[2] primeportal.net (variety of BRDM-2 walk arounds)
[3] IPMS USA (Trumpeter 1/35 scale BRDM-2 (early) review)
[4] wikipedia
Review sample received from an independent third party donor.
|