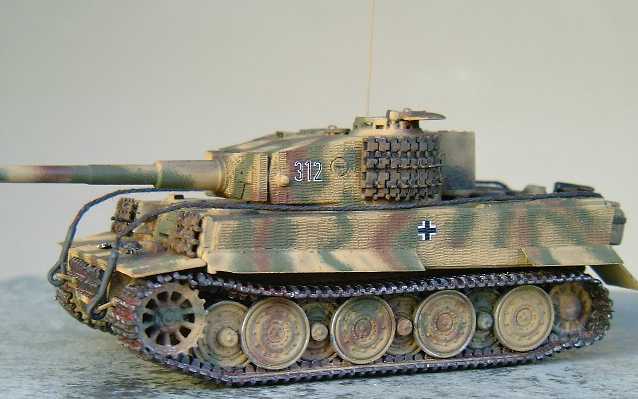
Tiger I Ausf. E
Manufacturer: Revell AG.
By Michael Hatch and Stephen Hodge (photographer).
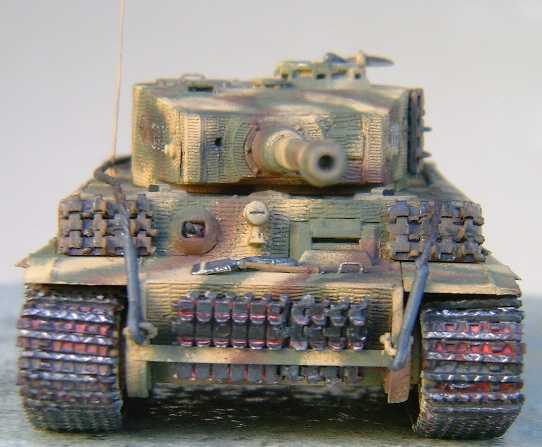
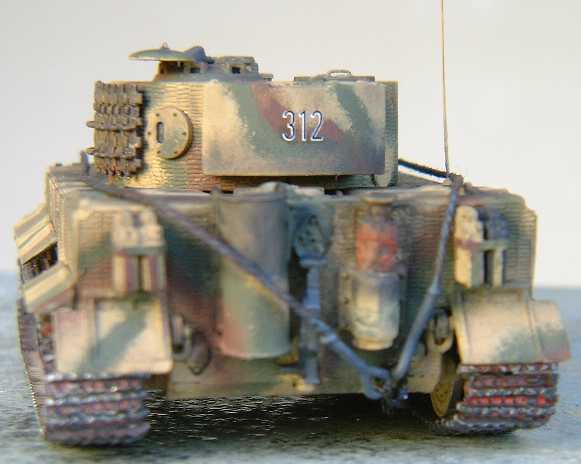
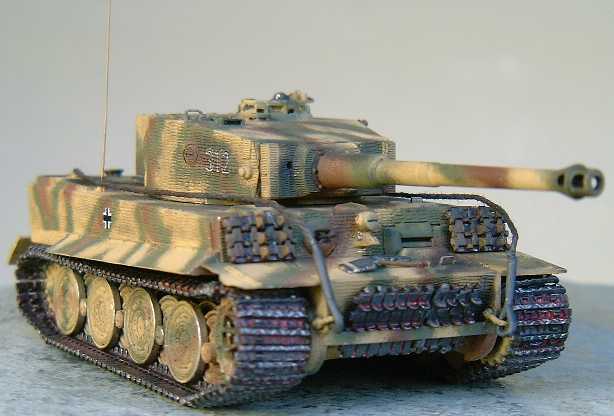
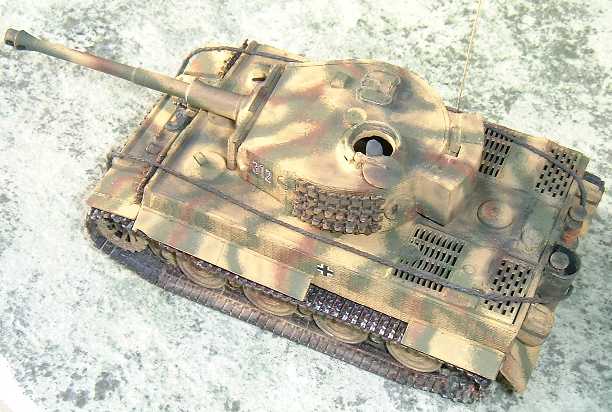
This is my second of two Revell-Germany Tigers using Part's photoetched Zimmerit. I built this 'Ausf. E' as a late production, steel wheel machine of some unknown unit that could have been deployed on any front the Germans were fighting on during the summer of 1944.
Checking the parts fresh out of the model box, everything looked good. One tree of parts contains the later parts necessary for a mid-production vehicle and an extra fifth tree has the steel road wheels. The other three trees are the same as provided with Revell's Ausf. H.
The Part Zimmerit Sheet (I used #027) is one of the less intimidating photoetched sheets I've seen. Use of this set looked like it would be fairly straightforward and it was. Its was only necessary to remove some molded on details from the kit's hull back plate. Again, you want to test fit the various zimmerit components before gluing anything.
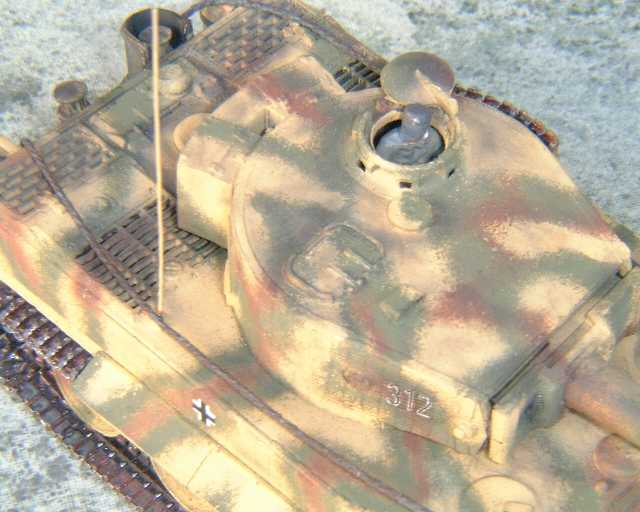
Before I started assembly, I shaved off the necessary details from the hull's back plate and the molded on tools from the hull's top plate. I then put the basic hull and turret parts together leaving off the exhaust system, running gear, mud flaps and guards, turret storage bin, and other fiddley bits. I filled the tow cable assemble mounting holes with crazy glue gel and sanded smooth. I then started to attach the zimmerit using crazy glue gel. I used the gel because it takes a minute or so to set, giving you a little bit of time to adjust the positioning. As an alternate you could probably use 15-minute epoxy. With either adhesive, you want to spread it fairly thin, place the component, and let it dry thoroughly before moving on to the next one. The hull side sections turned out to be a couple of millimeters too short. I mounted mine flush with the rear of the hull and after painting the gap at front of the hull's side it is hardly noticeable. I also mistakenly glued kit part #34 (the mantle's reinforcing bar) onto the mantle before applying zimmerit part #19. I recovered from this by cutting zimmerit part #19 in two and trimming down the upper and lower sections to fit around kit part #34. It took an extra five minutes or so and was the biggest problem I had with the entire project. I then finished off the remaining hull and turret details excluding the running gear. I added the loader's turret roof hatch hinges and handles to the various hatches and to hull glacis plate in front of the driver's visor. I used a piece of the zimmerit's photoetched frame to make a spare track holder on the hull's lower front.
I then hand painted the base coat using Humbrol Panzer Yellow. The mud flaps, mudguards, muffler shield, drive sprockets; rear idlers and road wheels were painted off of the model. At this point I checked the edges around the zimmerit sections and the hull top were I had removed the molded on tools from. Any gaps or pits were filled with crazy glue gel. The tracks were painted Humbrol Gunmetal and when dry, given an orange watercolour wash. When that was dry, they were rubbed down with a silver pencil crayon.
I then assembled and painted the drive sprockets. Five individual track links were test fitted and then glued to each sprocket. Only when I was ready to install the already painted, inner road wheels (parts #58) did I mount the sprockets on the model. At this time I did not glue the sprockets in place, relying on the road wheels to hold them in place but allowing them to rotate. The rear idler wheels were then glued into place, followed by the middle row of road wheels. I lightly glued the mud flaps and guards into place in preparation for spraying on the camouflage. Humbrol Panzer Red Brown and Panzer Dark Green were sprayed on and touched up by hand to remove any overspray. When dry, the mud flaps and guards were removed to allow more room to attach the tracks. I cut segments from both mudguards and left these aside until I was finished with the tracks. The tracks were assembled by first placing track part #18 off the bottom of the drive sprocket and working back toward the rear idlers ending with track part #17. I then started track part #16 off of the top of the drive sprocket and worked my way back to the rear idlers again. Uneven gaps were the tracks met were hidden on the top of rear idlers by cutting the individual links down to fit. After the tracks were in place I finally installed the outer road wheels and reinstalled the mud flaps and segmented side mudguards.
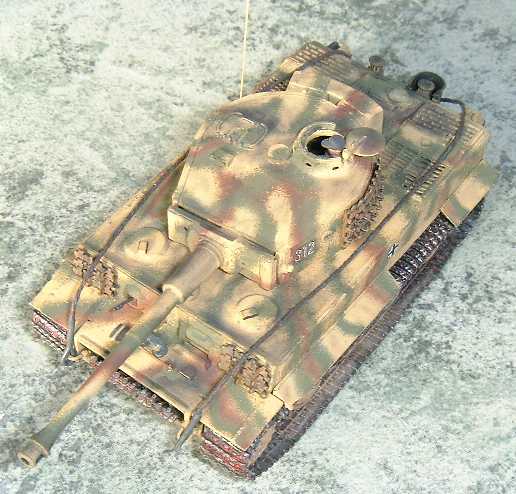
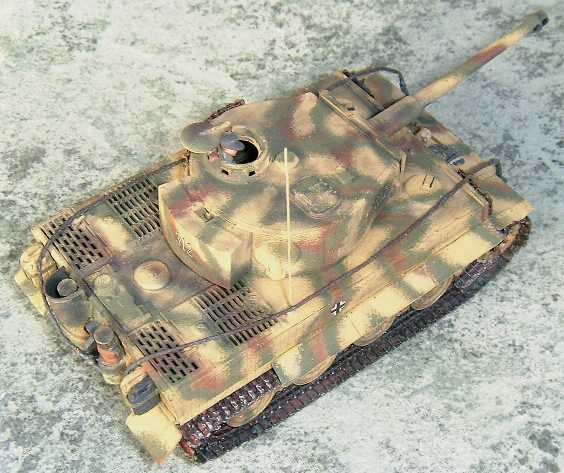
I used the kit decals that were only slightly off register and these were applied onto wet Future floor wax and allowed to dry for 24 hours before decal setting solution was applied to them. The jerry cans are Leva resin, the tank commander is a soft vinyl figure and the antenna was made with soft steel wire. Spare track was taken from my earlier Ausf. H kit and from a second Ausf. E kit I bought for spares. These were attached around the turret sides and on the hull front as applique armour. I repositioned the jack into a vertical position between the mufflers and added a shovel to hull glacis from the spares box. For the tow cables I cut the ends off of the kit supplied ones, drilled out their ends and crazy glued thick thread that had been dipped in Humbrol Gunmetal paint into the holes. This was positioned in a 'ready to tow' configuration being already attached to the front tow shackles.

Weathering was done with brown, pastel chalk dust on the running gear, black on the engine deck and dark grey on the main armament's muzzle. The molded in vision ports were filled in with black paint and the faces of the periscopes were also painted black. This gives the elusion of depth and makes them more noticeable. The mufflers were first paint with Humbrol Gunmetal and while the paint was still wet, baking powder was sprinkled on them. The excess was blown off and they were allowed to dry. A wash of light brown watercolour was then applied for that rusty look.
I really enjoyed this kit and am very happy with the way the zimmerit turned out. I would recommend both the kit and the zimmerit to anyone.
Like my Ausf. H, I still plan to add wire screens across the engine compartment intakes. If I had to build this model again, I don't think I would change the way I built it very much. I still need to practice putting on individual track links though.
References include Squadron's 'Tigers In Action', 'Panzer Colors Vol. 1 2 & 3', 'SS Armor', Osprey's Vanguard 'The Tiger Tanks', and various Concord publications on the Russian Front.This site: http://www.panzerdiesel.com/eng/e27p6.php has some nice pictures of Zimmerit on Tiger I's and this site: http://www.track-link.net/articles/vArticle.php?aid=15 has a good history of Zimmerit in general.
| Back to Kit Reviews | Back to Home Page |
| Back to Revell AG. Kit List |