|
Revell
|
www.onthewaymodels.com |
Tiger I Ausf. H |
|||
| Kit #: 03108 | Construction
Review Piotr Pyrczak
piotrpyrczak(at)gmail(dot)com Edited by Francesco Giovagnorio |
||||
|
Revell
|
www.onthewaymodels.com |
Tiger I Ausf. H |
|||
| Kit #: 03108 | Construction
Review Piotr Pyrczak
piotrpyrczak(at)gmail(dot)com Edited by Francesco Giovagnorio |
||||
 |
Revell's Tiger I is one of my favourite kits of all time. Nowadays there are better representations of the early version in 1/72 from Dragon and Zvezda, but the old Revell kit is still usable. With plenty of those hiding in modellers stashes one might be tempted to make an accurate Tiger with a bit of effort. In this build review I'll try to show how to get the most out of this kit. |
|
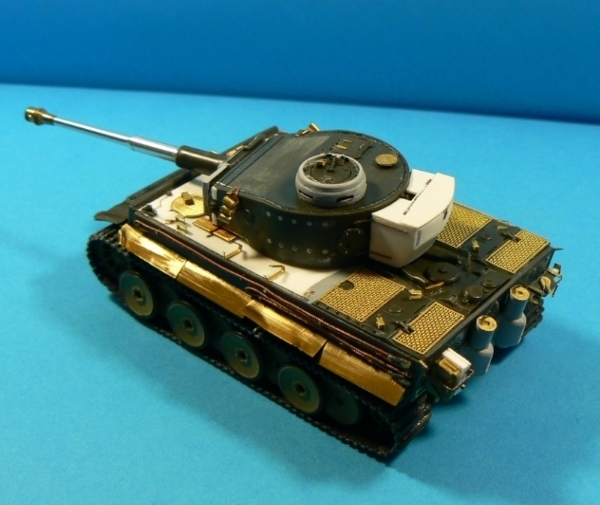
On the turret, The first problem one notices is that the kit has the initial two pistol port configuration without the escape hatch. I drilled out a hole in the right half (pic. 1) and made my own escape hatch. It's possible to obtain the part from Dragon's Fehrmann Tiger as it has two on the sprues, but it's easy enough to make it on your own. I used a Trumpeter late Tiger commanders cupola hatch as it's just the right size. |
 |
Another
matter to address is the overall shape of the turret. The original
one was asymmetrical - that's why the gun doesn't go through the middle
of the mantlet. I cut out a wedge shaped bit (approx 1mm) on the right
half bottom and glued it in the left one. Same was done to the turret
roof (upper picture). Lower picture shows the turret assembled with
the asymmetric shape visible. Probably making new turret sides would
make it all more accurate but this method is fast and easy, with a
decent end result. |
  |
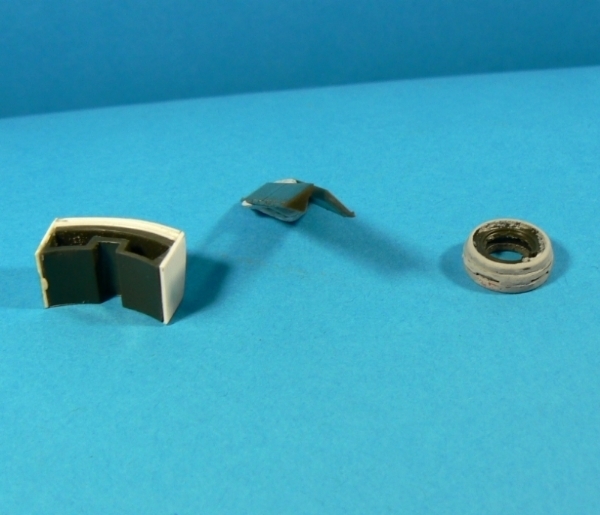
The
turret stowage bin is also incorrect for initial and very early Tigers.
The sides of the early bins ran parallel to the lengthwise axis of
the turret and the whole thing was fixed to the turret sides. My build
required a very peculiar bin shape. I decided to use the kit bin as
a skeleton - I flipped it upside down to have a solid bottom and cut
the sides off to get the right angles. The whole thing was covered
with layers of sheet plastic. Thanks to the plastic skeleton it didn't
warp and fitted the rear of the turret perfectly. Scrap PE and wire
was used for all the small bin fittings. I replaced the fan cover
and smoke dischargers with PART PE, added hinges to the loaders hatch,
filled the spare track locating holes in the left side turret wall.
The gun barrel is too thick on the business end and was replaced with
RB Model one. The tank I'm modelling has a peculiar mantlet so I had
to modify the part, the kit allows making both reinforced and earlier
mantlets. I also added an MG in the opening which need to be almost
flush with the mantlet. The assembly instructions tell us to attach
spare track links and a loaders periscope but those were not present
on early tanks and would be more correct for the Zvezda Tiger I version. |
 |
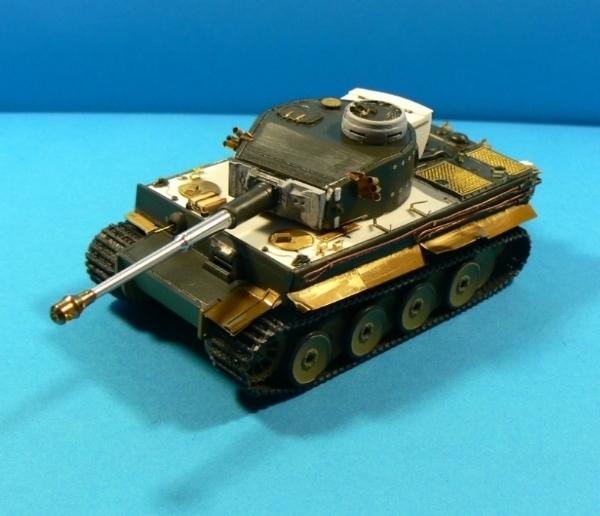
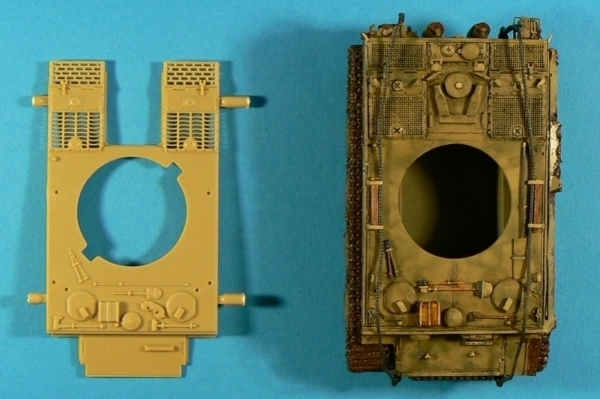
About
the hull, the most obvious change on thepicture is
the replacement of the hull roof with sheet plastic. This was done
due to the fact that the tool layout and front light connection point
presented on the kit part is suitable for the late Tiger. Picture
5 shows the comparison of my early tool location and the original
part. The moulded on bits could be shaved off and rearranged but I
decided to use aftermarket pieces and Part PE. The jack block was
cut out from a popsicle stick and got scrap PE braces. The light sockets
were attached on top of the hull with supply cables added from fine
wire. The five mounting points for S-mine launchers were made from
wire and scrap PE and added in the right places. Revell did not provide
the launchers which didn't bother me as my Tiger did not have the
launchers installed. The tow cables provided with the kit are moulded
together with the brackets for gun cleaning rods. Earlier Tigers carried
5 rods and the kit part has 6, I had to rework that anyway to fit
the tow cables accurately for my build. I drilled and sealed the holes
for K.F.F.2 above the drivers visor as seen on early tanks (should
be left open for initial tanks). The kit has initial style front mudguards,
those had to be replaced with PE ones. The track pulling cable that
goes on the left side of the hull is arranged in a later manner and
had to be replaced. The rear mudguards would work on an early Tiger
but my tank had those removed. This part is not accurate for an initial
vehicle. The kit comes with early style Feifel air filters and square
exhaust shields as seen on African Tigers. I didn't have to use any
of those parts but they need to be replaced if used for a non-African
(shields) or later period (air filters) build. I reworked the exhaust
by cutting off the moulded on top covers and used PE with flappers
made from scrap and wire. Early Tigers (from December 42 onwards)
had a track toolbox over the left rear mudguard which is not provided
in the kit. My vehicle had an improvised jerrycan rack in that place.
The C hook on the rear plate is not correct for the early Tigers and
was removed. The side mudguards provided in the kit are of the later
type - blanked off at the ends, with segments of the same length,
all in a straight line. Those would be usable for my build but all
the damage is easier to reproduce with PE fenders. Since I had the
kit parts unused I made an experiment to see if those could be reworked
to use on an earlier vehicle. Cutting the part in half to recreate
the bend and shaving off the triangle blanks at the ends works quite
well (right picture). The difference in length between the front and
rear segments is not represented that way but it's the easiest way
without replacing the whole thing. Other enhancements to the hull
include Feifel pipe brackets, mesh grill covers and MG mount waterproofing
cover bolts taken from a Part PE set and an Aber MG barrel. As a side
note: if this kit is used to make an initial Tiger (like the African
#142 provided in the decal options) the starter plate on the rear
should be cut off and glued back in a "slanted" position and the tow
cables should be arranged with the eyes pointing backwards. |
 |
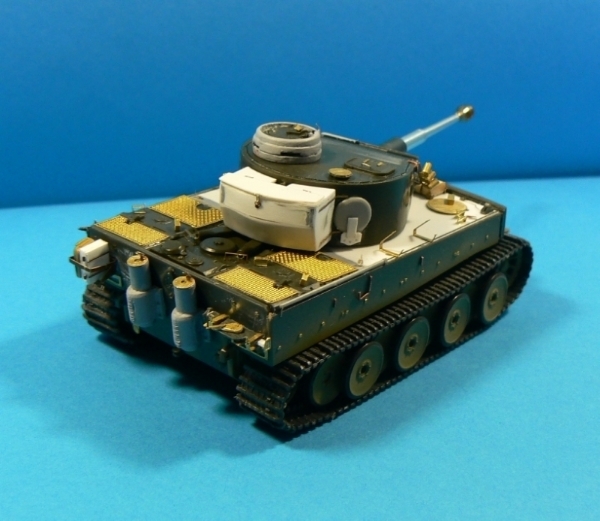
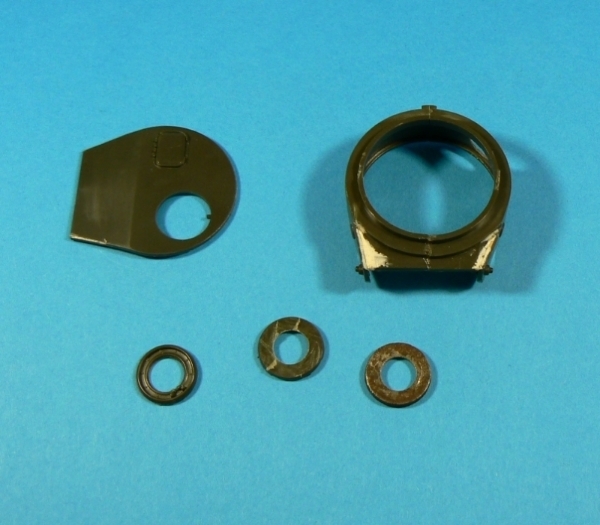
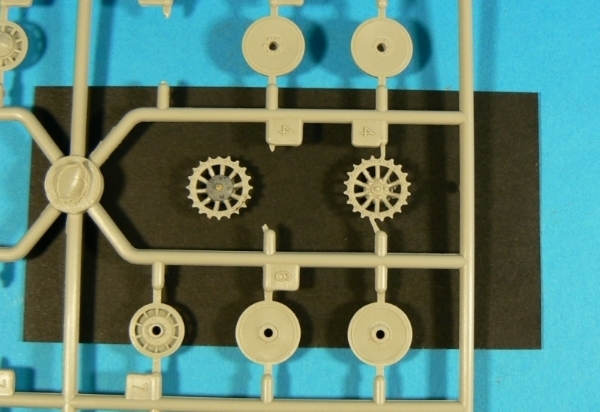
About
the running gear, for me the hardest problem to fix
in this whole build were the sprockets. The ones provided are of the
late type, without the cast hubs. The only kit on the market with
early sprockets is the Dragon initial Tiger, so I had to make some
myself. I drilled out the sprocket center and glued in a homemade
hub. I used a round bit of scrap plastic, covered it with putty, sanded
until I got a rounded shape and made the bolt heads with 3D paint.
The end result could look better. I decided to experiment some more
- I cut the hubs off from some spare Tiger idlers, sanded them and
drilled bolt holes. Picture 6 shows the modified sprocket next to
a Trumpeter original I used for the experiment, it will be used on
my next Tiger. The kit tracks are of the later type with chevrons
on each link. Those were filed away and three notches were cut in
its place. The guide teeth on the tracks are moulded solid while there
should be holes in them. My previous experience showed that drilling
them all is a waste of time as most of them can't be seen after everything
is back in place. That's why I drilled the guide teeth only on the
short lengths and the single links going around the idler. As you
can see the effect is satisfactory. |
 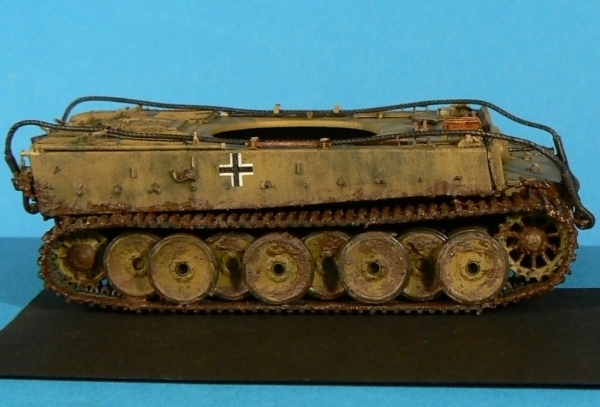 |
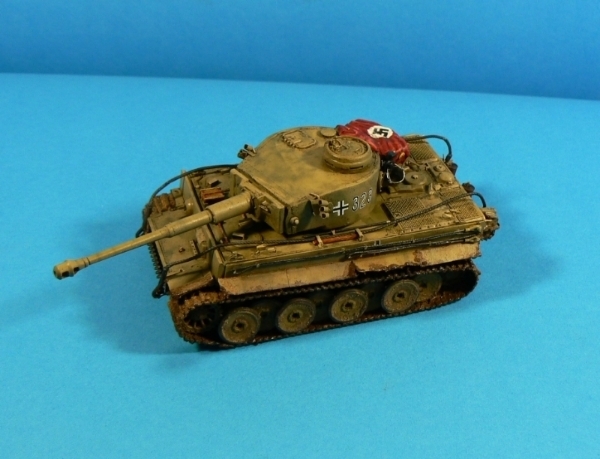
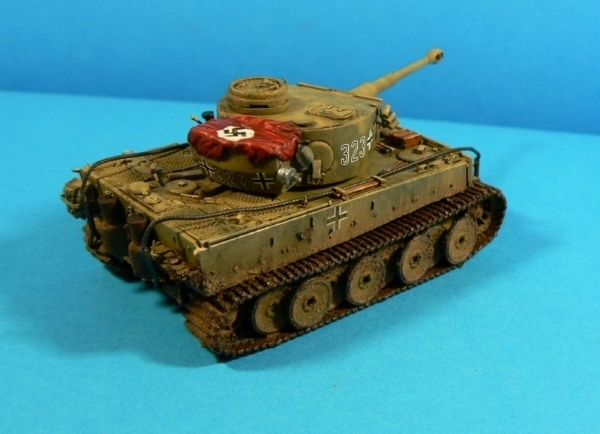
Here's my build all together and painted as Tiger 323 from SPzAbt 503 in August 1943. | |
Back to Revell Kit List |
Back to Home Page |
Article Last Updated: 22 May 2015 |