RPM
|
Ford Tfc |
|||
| Kit #: 72100 |
Review by
- Al Magnus
|
|||
RPM
|
Ford Tfc |
|||
| Kit #: 72100 |
Review by
- Al Magnus
|
|||
 |
|
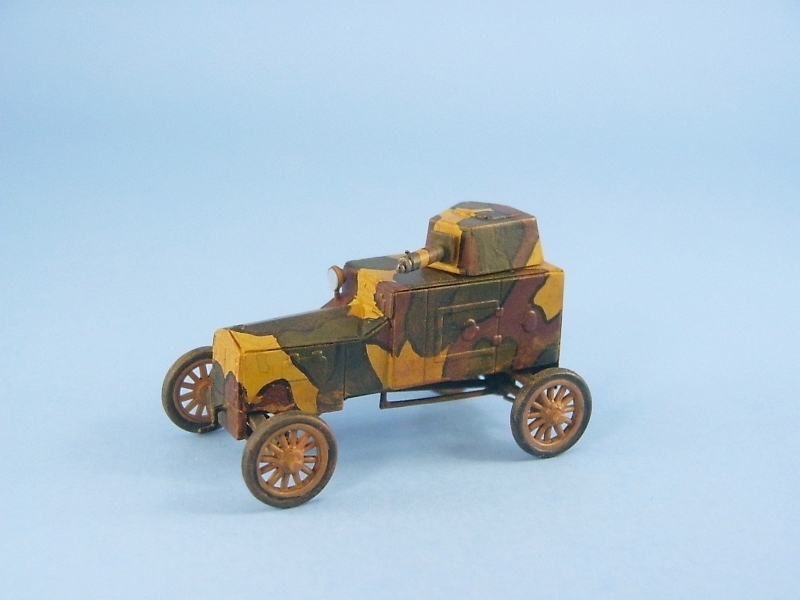
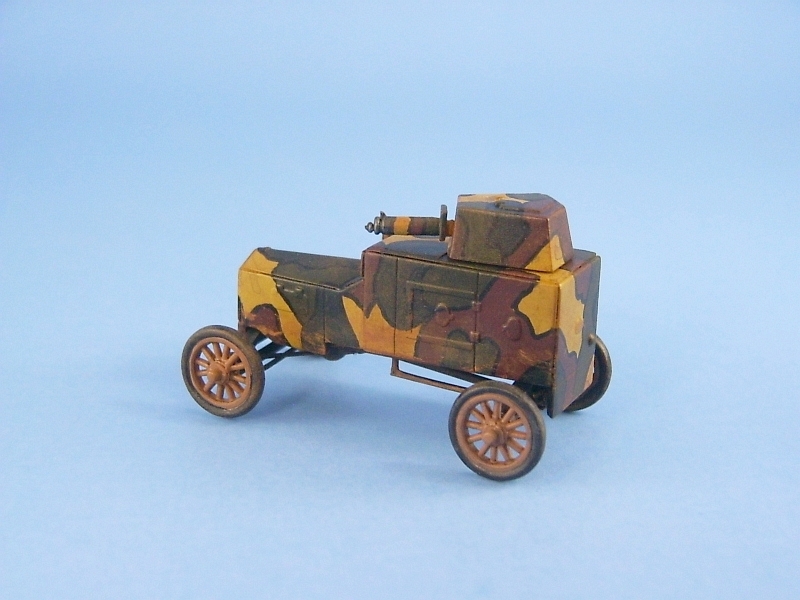
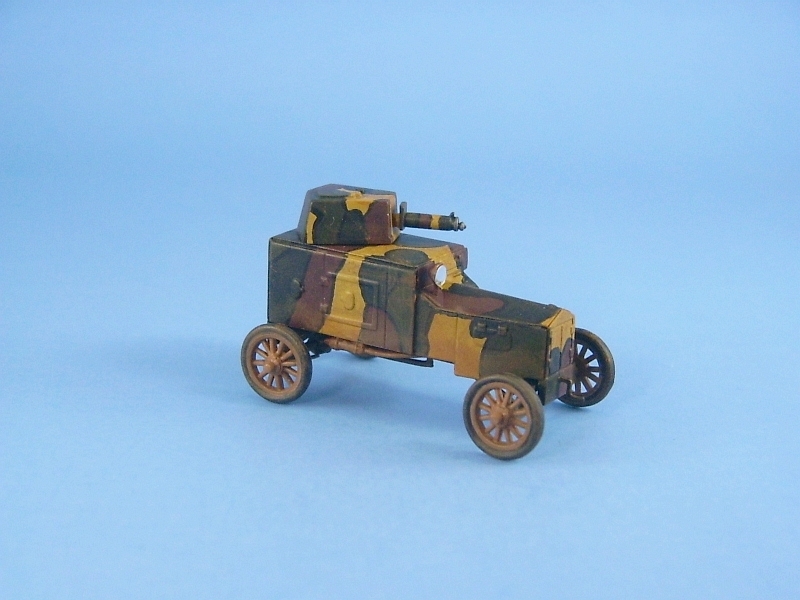
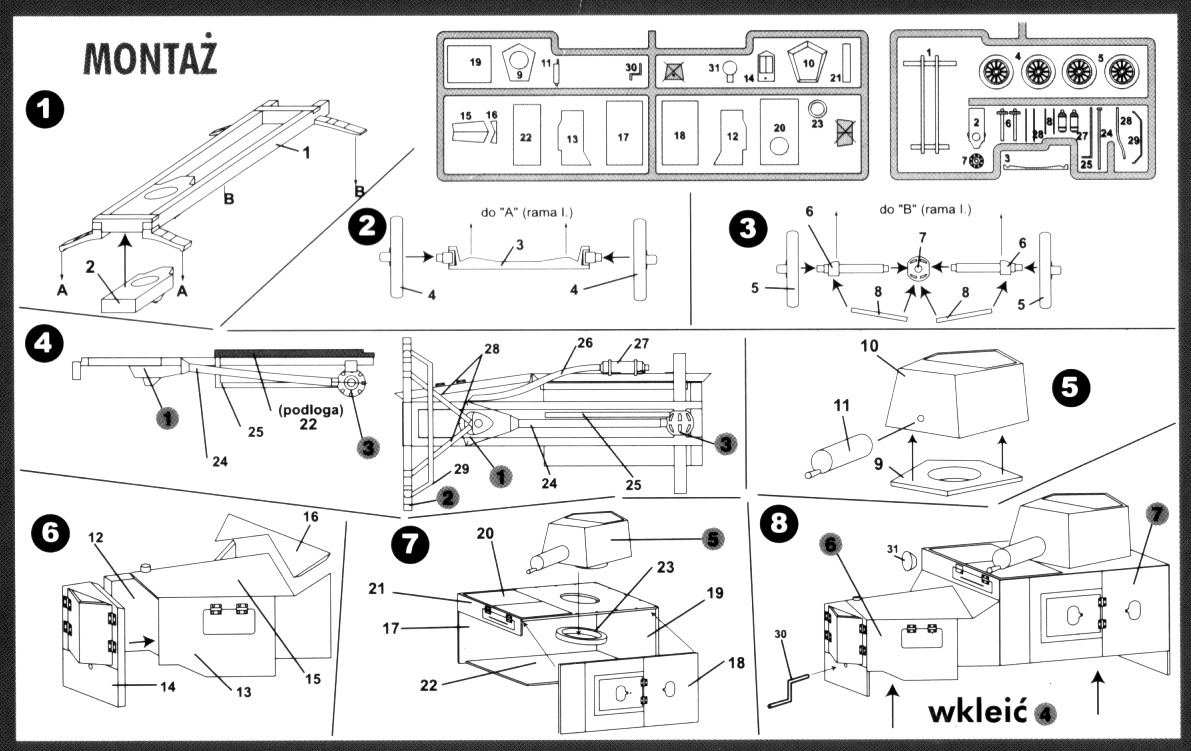
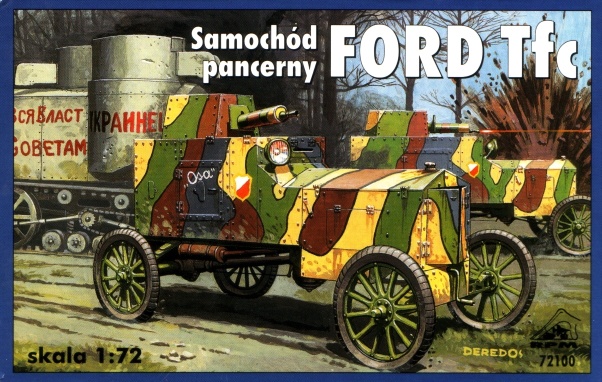
I knew nothing about this vehicle before I bought it from Squadron a few years ago. It was the filler kit in my order... the one that costs only a couple of dollars and you add it to your order to make sure you meet the minimum purchase amount. I had to browse the web to get any useful information on this vehicle. The Ford Tfc (aka Ford FT-B) came from a project in 1920 to design a home grown Polish armored car. It was based on the Ford Model "T" frame on which the Poles built an armored car body. The chassis was strengthened and the body was built up from surplus steel plates that were bolted together. It was very cramped inside, and the driver had to steer from a squatted position. Overheating engines occurred often during long cross-country runs or when the radiator armoured plates were closed. Also, the springs were overloaded in spite of the strengthening, but the vehicle was urgently required which offset its defects. Production was approximately 16-17 units. They were used during the Russo-Polish War, partaking in numerous skirmishes and a few major battles in late 1920 at Warsaw and Kowel. This kit consists of 38 pieces in light tan plastic spread over two very small sprues. The plastic is fairly brittle and the parts are mainly flash free. On the larger pieces there is a distinct pebbly finish that needs to be sanded smooth. Detail is reasonably good but the panels and things like the doors are a bit soft. The box top shows the car festooned with rivets, but none of these are to be found on the kit parts. Too bad, because it would make the kit look a lot better. I suppose you could try to add them yourself, but I didn't bother, mainly because I didn't have any idea how to do it easily. A small decal sheet is included and the instructions are found on the back of the box. I found construction to be very straightforward as long as you don't mind working with small parts. The kit was built basically straight from the box. I split it into three sub-assemblies - turret, body and chassis. The fit was excellent for the chassis and turret, but a bit marginal for the body. I left off adding the wheels and muffler/exhaust pipe until after the painting was complete. There are a few things to look out for. The front suspension arms (parts 28 & 29) should probably be round, but they are molded half round. I replaced the two part 28 pieces with some round styrene rod, but retained part 29 because it was not a simple straight piece. The drive shaft (part 24) is too short, so it too was replaced with some plastic rod. The angled piece that the light mounts to had to be trimmed slightly to fit. I replaced the machine gun (part 11) with a substitute from my spares box. The original gun was a bit of a blob. I also replaced the two suspension arms on the rear axle (part 8) with styrene rod. The muffler comes as two pieces (part 27), but the instructions show it as a single piece, giving no indication that the two parts need to be joined. Also, the instructions would have you mount the exhaust pipe and muffler on the left side of the vehicle, but they should really be on the right side (see box top picture). Painting was the most challenging part of the build. As can be seen on the box art, the camouflage consists of coloured patches, all separated by a thin black line. How to apply the thin black line was my major painting concern. This is a tiny kit and I didn't want to try painting the line with a brush as it would make the lines way too wide. My solution came in the form of a very thin tipped permanent black marker I found at Staples. With the pen I now had everything I needed to paint the kit. First the chassis was sprayed flat black and the body and turret were sprayed with a coat of Aeromaster Midstone tan. The coloured patches were applied by brush using Gunze acrylic paint. Once thoroughly dry, I outlined the patches with the black marker and the kit was given a coat of Testors Glosscote. I sprayed the wheels with Testors Wood and I masked the centers and sprayed the tires flat black. The muffler and exhaust pipe were brush painted with Testors Leather. I did not use the kit decals as I was unable to find any pictures showing the vehicle carrying any markings. The only decals I did use were for the floorboards, which were apparently wood, so I cut out a couple of rectangular decal pieces from my Superscale wood finish decal sheet and applied them to the underside of the body. Once everything was dry the chassis was joined to the body and then the muffler, exhaust pipe, and hand crank were added. Next I weathered the kit a bit with some dry brushing of tan and brown paint over the undersides and sides of the body, the wheels and the chassis. This was followed by a coat of Aeromaster Acrylic flat. The final touch was adding a lens to the spotlight. Copying a trick from my helicopter building, I punched a small circle from a silver sequin and superglued it to the front of the light. Not totally convincing but a lot better than trying to use silver paint to replicate the light's lens. All in all a reasonably quick kit to build, and not too difficult. The small parts need care in removing from the trees and during preparation, but with a little patience a cute little armoured car can be built without too much effort. Only the lack of rivets detracts from the completed kit.
Review sample purchased by the author. |
| Back to RPM Kit List | Back to Construction Reviews |
Article Last Updated: 22 January 2009 |
Back to Home Page |