|
Pegasus Hobbies
|
www.onthewaymodels.com |
German Army Trucks |
|||
| Kit #: 7610 |
Review by
Danilo Carli
- 172normandyafv(at)gmail(dot)com
Edited by Al Magnus |
||||
|
Pegasus Hobbies
|
www.onthewaymodels.com |
German Army Trucks |
|||
| Kit #: 7610 |
Review by
Danilo Carli
- 172normandyafv(at)gmail(dot)com
Edited by Al Magnus |
||||
 |
| Making
the Italeri Opel Blitz, I considered the possibility to use it to improve
the Pegasus Mercedes L3000 S. I had already seen the preview (here)
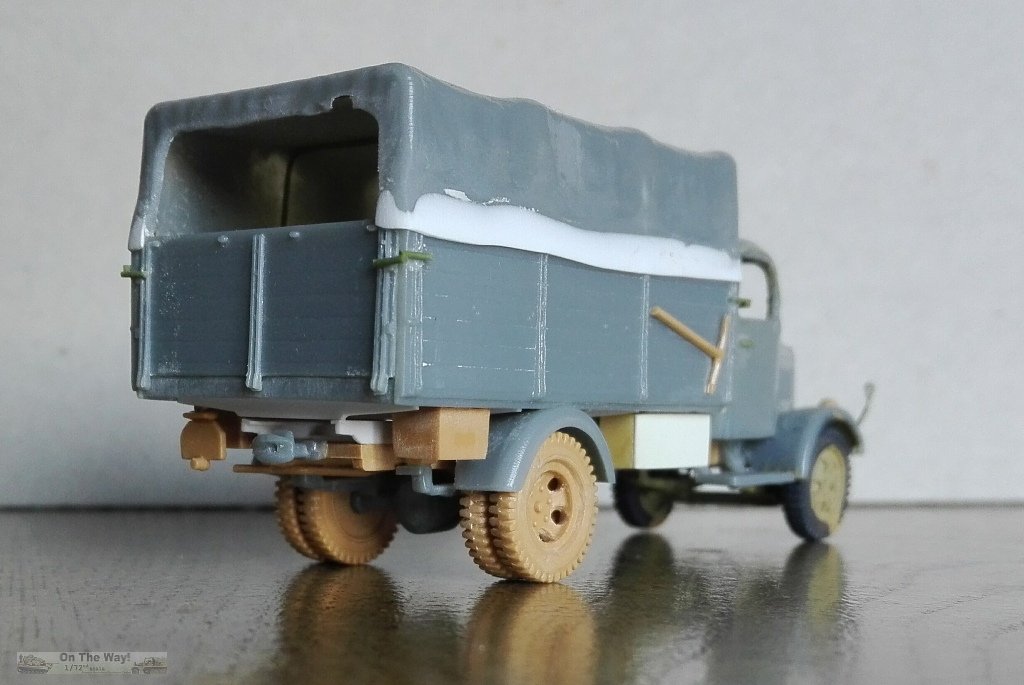
and I was aware of the features of this quick building kit. The kit is composed of two twin moulds and an instruction sheet. There are no decals nor any transparencies, but each truck has a driver. In a very simply way, just two pieces compose the whole vehicle; the solid chassis and the cab with the flatbed. A few other pieces are given to complete it. Before starting modifications I dry fitted the model and it didn't look bad, although the eye of a display modeller immediately notes how it needs urgent intervention. The smaller details are missing (lights, tools, dashboard) but the general look is well represented. Two faults can be noted almost immediately: the wheels of the two axles, though quite well done are a little undersized, are wrongly different. The front axle are the 8 holes/8 bolts type, while the rear axle are the 6 holes/6 bolts type. On the basis of the photos I've seen, the L3000 wheels were of three types which had 2, 4 or 8 holes. The second fault is with the chassis. As with the Blitz, the L3000 had two types of flatbeds. The first was fixed to the chassis and the second was elevated over it, but (as far as I know) in a very different way from the Opel truck. This feature can be barely seen in the WW2 b/w photos, but looking at the photos of a restored truck the thing is well visible. Pegasus moulds have the spare wheels on the right side of the chassis. I can't tell if this is really wrong, but in the photos I've seen, it was fixed on the left side. In some way this kit looks to be directly inspired by the 1/35 Italeri kit. On the L3000 were placed most of the closed bodies styles seen for the Opel Blitz (see article), giving us a wide range of conversion possibilities. The Blitz and the L3000 were dimensionally similar and this suggested me that parts from Blitz kits could be used to improve the Pegasus kit. Measurement comparisons indicate the Mercedes was 15.0 cm (2.1 mm) longer, 2.5 cm (0.3 mm) narrower and 20.0 cm (2.8 mm) higher. The wheelbase was 20.0 cm (2.8 mm) longer compared to the 4x2 Blitz. The cab is 26.4 mm wide. Compared to my drawings it is slightly wider (+/- 1.4 mm). This is not serious, because the rear edge is moulded vertical and straight. The real truck had domed sides and the thickness of the plastic will allow filing without causing other problems.
As told, the L3000 was produced as a 4x2 chassis (L3000 S) or as a 4x4 chassis (L3000 A). Unlike with the Opel Blitz, its wheelbase remained the same. If the front axle is not visible the difference between the versions can be seen by the space between the wheels and the mudguards. From the photos I've seen, the front axle looks to be different from the Opel counterpart so the Airfix part wouldn't be useful. I found very little info on the net. No dedicated sites or restoring forums. Useful walkarounds can be found here and here, but these vehicles have some modern details missing on the WW2 trucks, such as the rear bumper. With this little information and some photos here is what I did. Cab
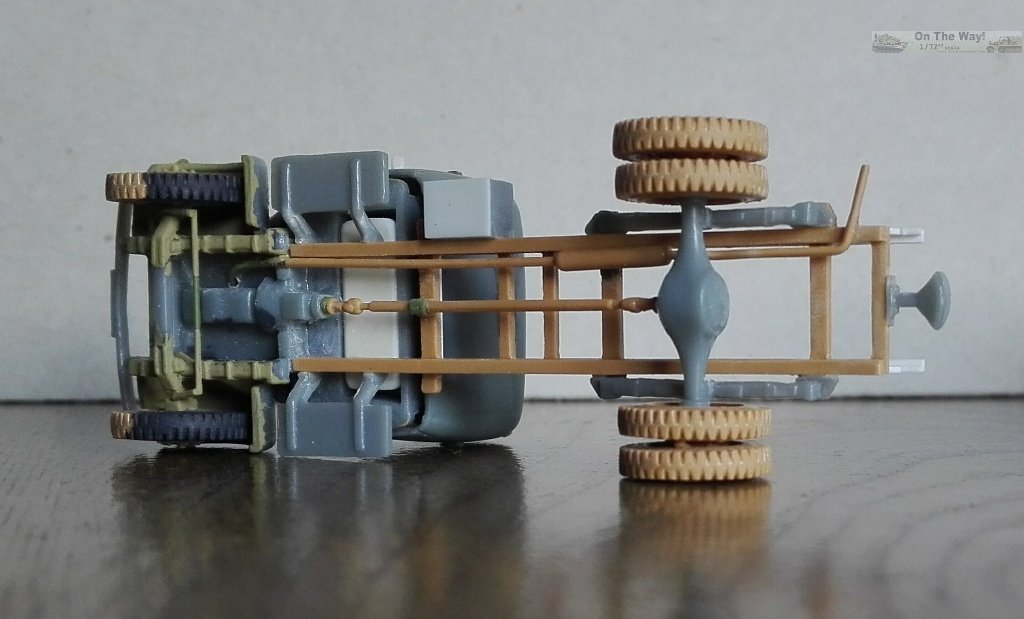
Chassis 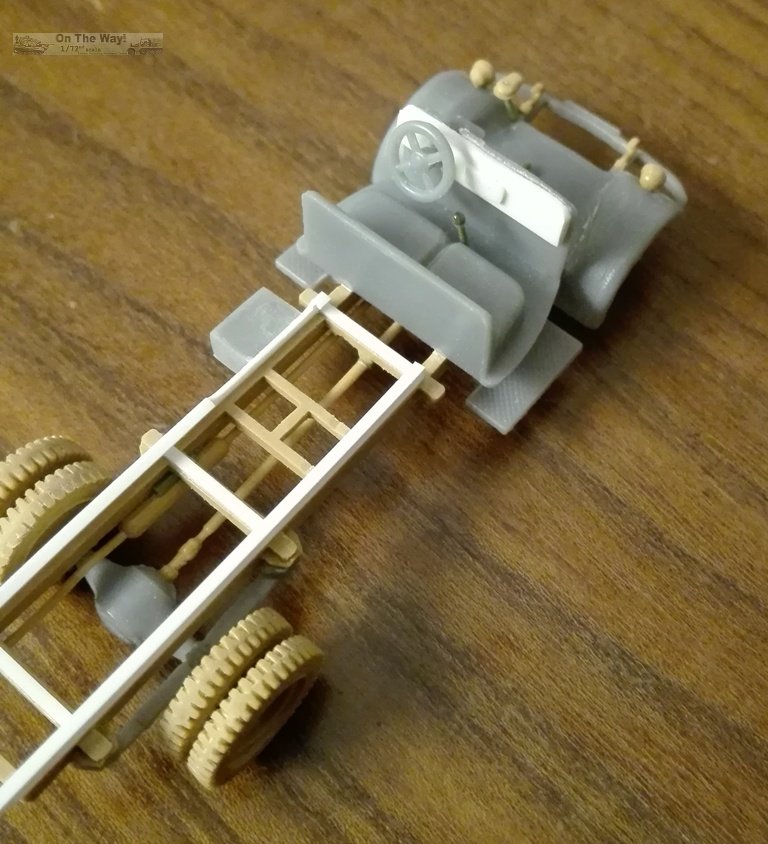
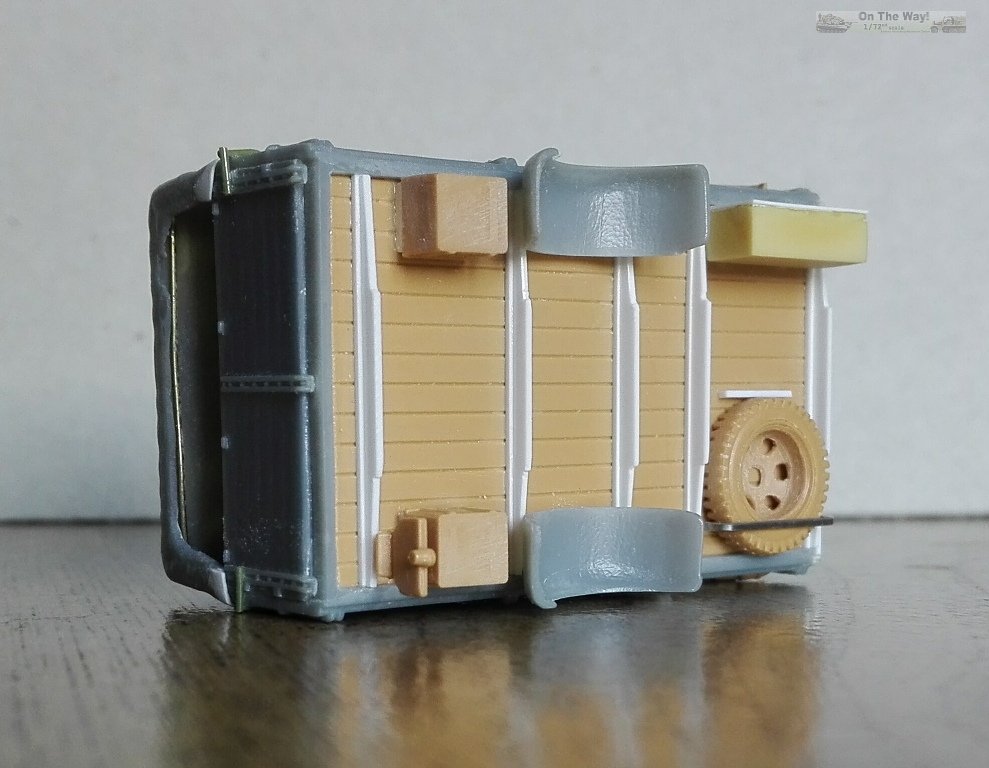
Flatbed 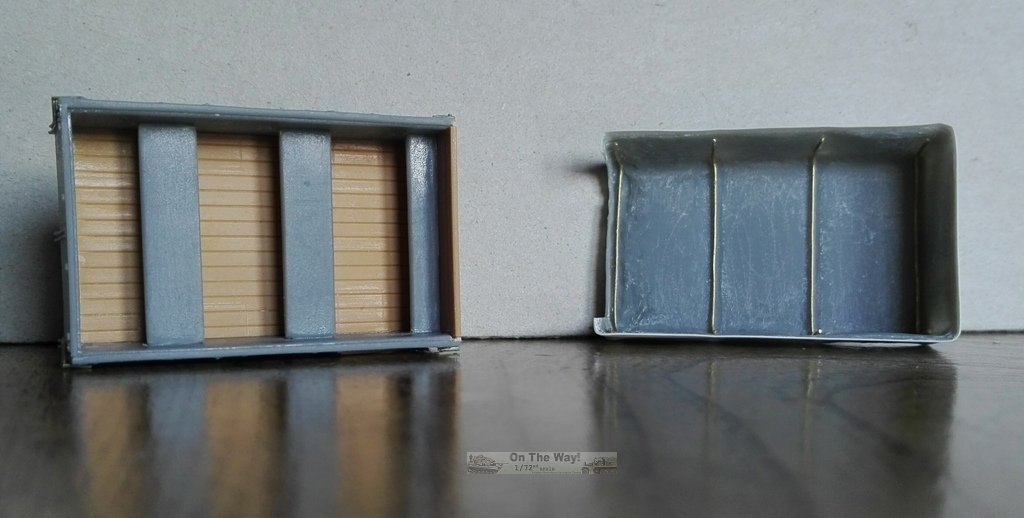
Conclusions As for other quick building, this is a very good choice for war gaming. In my point of view it is a good base for inexpensive conversions. I mated this kit with a flatbed truck, but I'd could have used an "ambulance" kit as well, to make one of the many closed body variants. Seen in this way I consider it a very good modelling opportunity. Review sample purchased by the author. 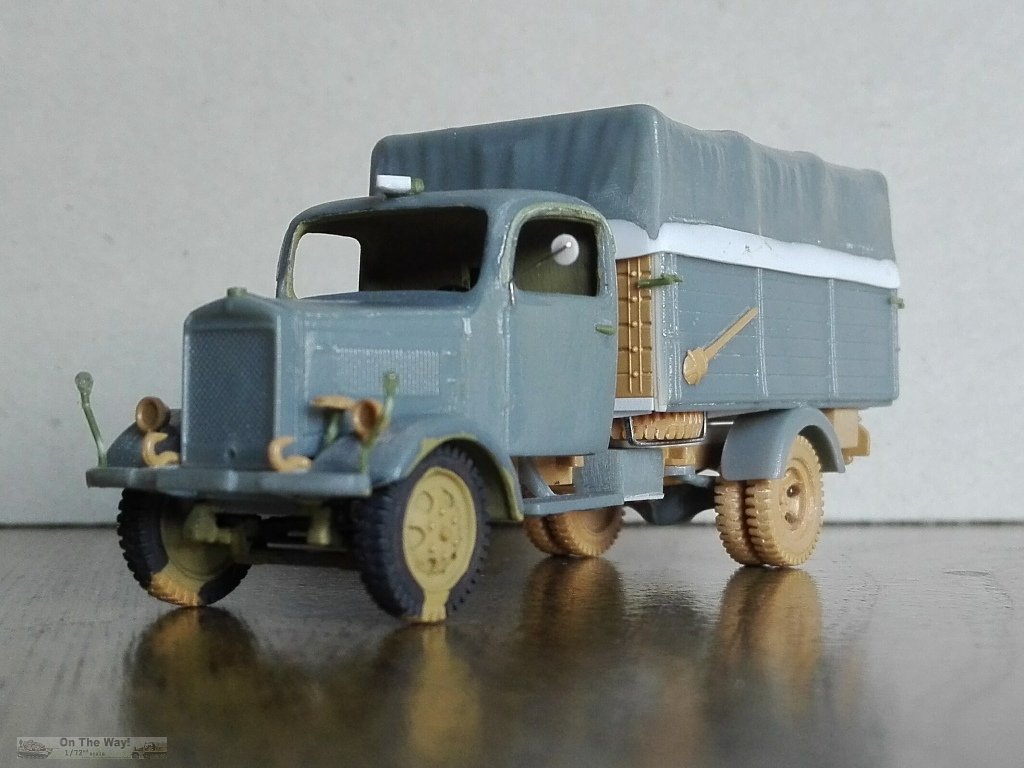
Pegasus
Hobbies products are available at
|
||||||||||||||||||||||||||||||||||||
| Back to Pegasus Hobbies Kit List | Back to Construction Reviews |
Article Last Updated: 16 October 2018 |
Back to Home Page |