|
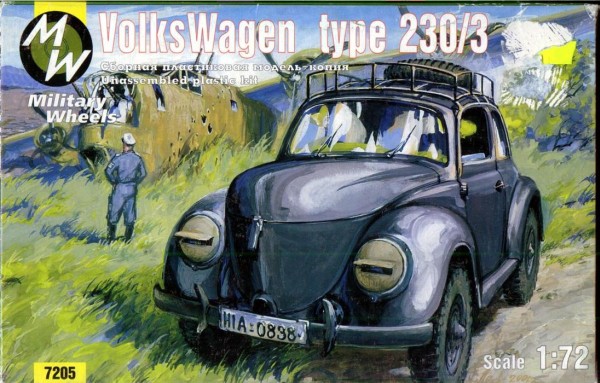
Military Wheels (MW)
|
Volkswagen Type 230/3 |
|||
| Kit #: 7205 | Review by Neil Lyall - nlyall(at)bigpond.net.au | |||
|
Military Wheels (MW)
|
Volkswagen Type 230/3 |
|||
| Kit #: 7205 | Review by Neil Lyall - nlyall(at)bigpond.net.au | |||
 |
|
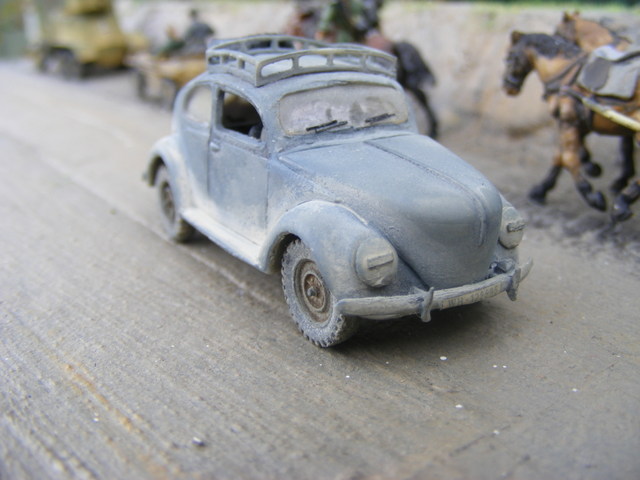
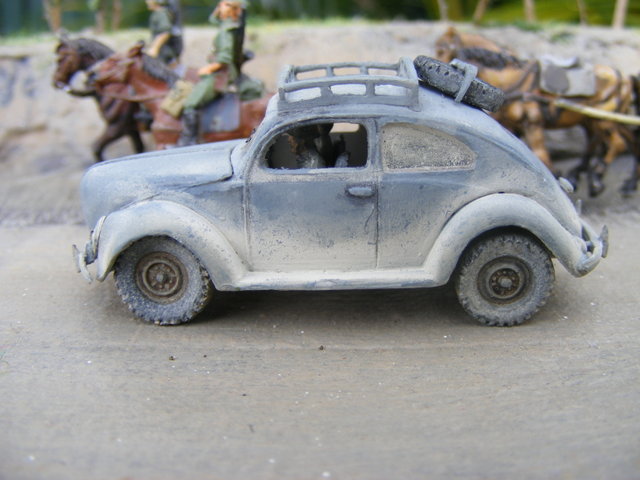
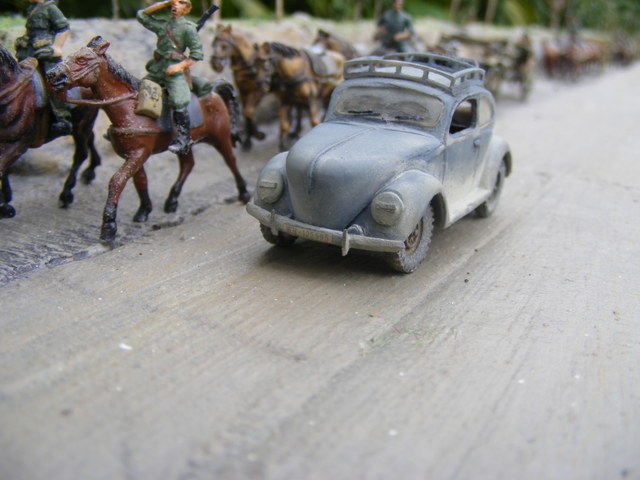
The only outwardly visible difference between this VW and the common Type 60 VW Beetle is that this one has a long straight bonnet (hood) , which bulges slightly outwards at the front and greatly changes the frontal appearance of this Volkswagen. The MW kit instructions has half a page write up about this vehicle, but it's in Russian. Best I can find on the web is that this may have been a gas powered version, which is why it has a larger bonnet, to store the gas equipment. I don't know if this is true as I have no Volkswagen reference books, but it might explain why the spare wheel is mounted on the roof, instead of under the bonnet as on most Beetles, and also why this one has a roof rack - for stowage that might otherwise be under the bonnet. Around 40 parts make up this kit. It's cast in white polystyrene, whereas the other MW Volkswagen series I have bought have been cast in a pale grey. The plastic is a little harder and less flexible with this kit, more similar to what you get from the more mainstream manufacturers. The casting issues are the same though, the body is cast in two halves, as if cut down the middle and the roof is a separate piece, and again these don't fit very well, requiring careful sanding around the windscreen aperture and a lot of filling after the roof is fitted. The engine access door also needs filling, where it joins the body. There are also gaps where the body meets the chassis which require light filling. Some sanding and filling was also needed for fitting the bonnet (hood). For the major filling on the roof and the rear engine access door, I used Tamiya tube putty, let it set and sanded it carefully back to flush, and for the rest of the filling I used Model Master 'Clear Parts Cement and Window Maker'. This is an excellent filler as it has a long thin application nozzle, and it is much like thinned white adhesive, sinks into the cracks, dries quickly, and can be painted straight over. Casting lines need to be filed off the front and back bumpers, the roof rack components and the wheels. Most other parts have some flash. I thinned the roof rack as best I could as it was very thick, as was the bar that holds the spare wheel. Curiously no external rear view mirror is supplied nor is there one on the box art, or in the instructions. All the windows come supplied in a thick clear plastic. I calculated it's a few inches thick when scaled up, and looks very thick on the model, so I prefer to avoid it. Model Master 'Clear Parts Cement and Window Maker' will do a good job of the side and back windows, I also tried it on the front windscreen but it dried with some air bubbles, and due to the size of the opening (15mm x 5mm) I had to apply it quite thickly. I pulled it out, and fitted the supplied windscreen, then gave it a thin coat of the Window Maker. This fills the hairline gaps, and actually makes the window appear to be less thick. I made the window wipers out of cut bristles off a house paint brush, glued together and attached to the windscreen with Window Maker . The rest of the kit is straight out of the box, except for a driver and officer passenger which came from the spares box. I sprayed the model with thinned Humbrol Enamel HF4 (Blue Grey) This is a very old tin and I don't think it's sold anymore. I then sprayed a light dried mud, heavier around the lower areas, which was a mix of Humbrol White Enamel with a bit of Matt 29 Brown added. I then very lightly sponged a little of the base colour at the edges of the dried mud. If you are a VW fan, or a fan of the more uncommon soft skin vehicles, this kit is worth the bit of extra effort.
|
| Back to Military Wheels (MW) Kit List | Back to Construction Reviews |
Article Last Updated: 03 February 2009 |
Back to Home Page |