 |
Sd.Kfz. 234/2 | |||
| Kit # 7047 | Preview by Doug Chaltry - doug(at)172shermans(dot)com | |||
|
Sd.Kfz. 234/2 | |||
| Kit # 7047 | Preview by Doug Chaltry - doug(at)172shermans(dot)com | |||
 |
| It
has been seven years since I have completed a model. I
know . . . pathetic, right? I've been working on a couple
of projects on and off for the past couple of years, but
I seem to have a serious motivation problem. Early last
year, the Braille Scale Monthly Competition site was
sponsoring a "Group Build" project, with the
venerable Panzer IV chassis as being the subject. I got a
lot of inspiration and enjoyment from watching as various
modelers posted their works in progress on-line, but for
whatever reason, I wasn't yet ready to commit to working
on another tracked vehicle, as I currently have several
Sherman tanks in progress as well. What I really had an
inkling to build was a wheeled armored car. Knowing that
I could use a little extra motivation to get me moving, I
asked a couple friends of mine if they would be
interested in joining me in a very small group build
project, with armored cars being the theme. After some
discussion, the topic was narrowed down to the Sd.Kfz.
234 series, and we all got to work. I have now developed
such enjoyment out of building this chassis that I was
motivated to put together the special Sd.Kfz. 234 page
for On The Way. This Puma is the first one I've [almost]
completed, though it has only served to whet my appetite
for the vehicle, so I now have another two underway.
Hopefully reviews for them will follow soon. But my life this past year involved major turmoil, with my wife injured in a car accident, we moved across the country, I started a new job, and we also bought a house. That's reason enough for not finishing this article in a timely manner, yes? The model is ALMOST complete. I need to add a bit more weathering to it, and I need to finish the figures and mount it on a base. The figures seen in the photos are not done yet, so no criticizing! I will take new photos and update this article once I finish painting them. During construction, we kept each other appraised of our progress, and I laid out the sequence of my build as sort of a build log, which I have cleaned up a bit, and present here. (All photos are thumbnails; click on them for larger images.) OK, so beginning with the hull, there is a ridiculous step in the upper hull armor from where the upper hull plate (part 6B) meets the sidewalls of the upper hull. This is a terrible design flaw, meant to save tooling costs in order to make several versions of this vehicle with a minumum of new parts. This step requires filling and sanding smooth as depicted in the following drawing:
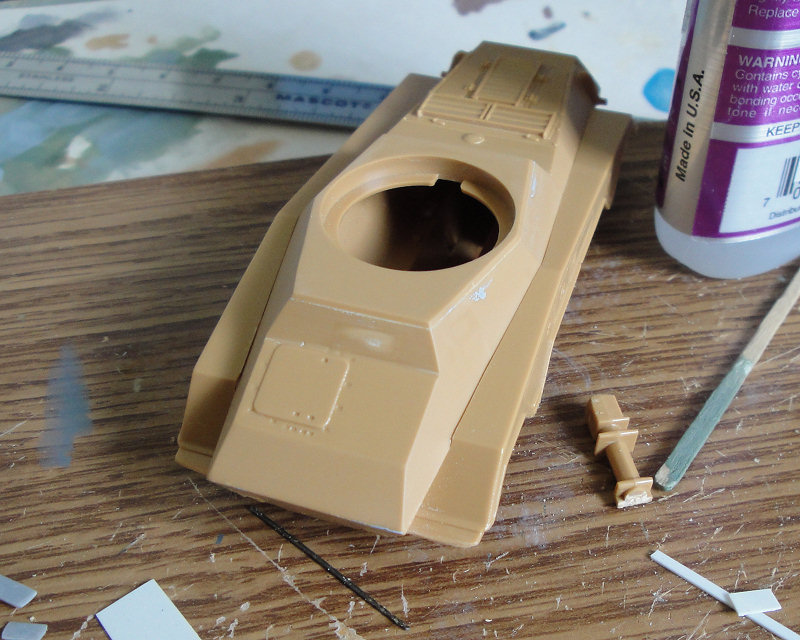
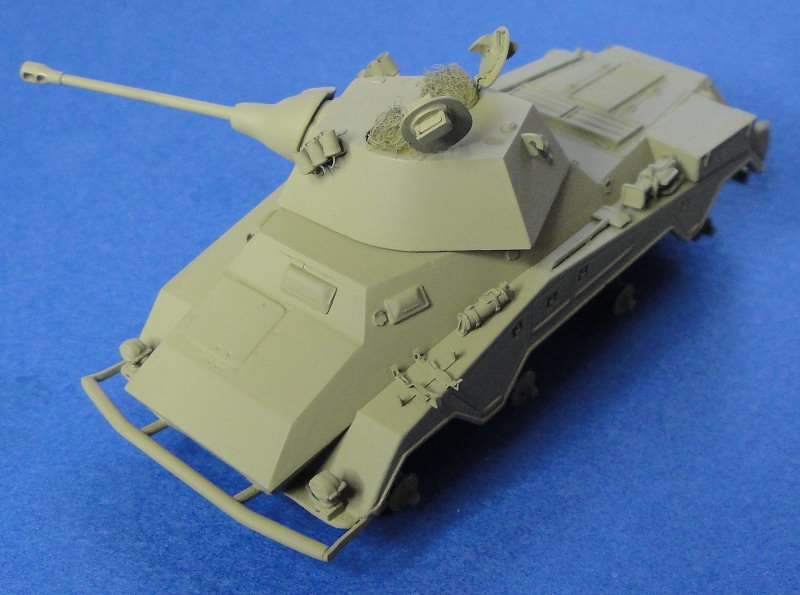
This photo shows the completed smoothing job. I ended up damaging the armored visors during the process, so I cut them off completely for later replacing. Also lost were the very poor metal lift hooks that were molded on all corners of the hull. I was going to make replacements from styrene, but etched parts are included in the PART photoetch set, so I used those instead (they're not yet attached in this scan).
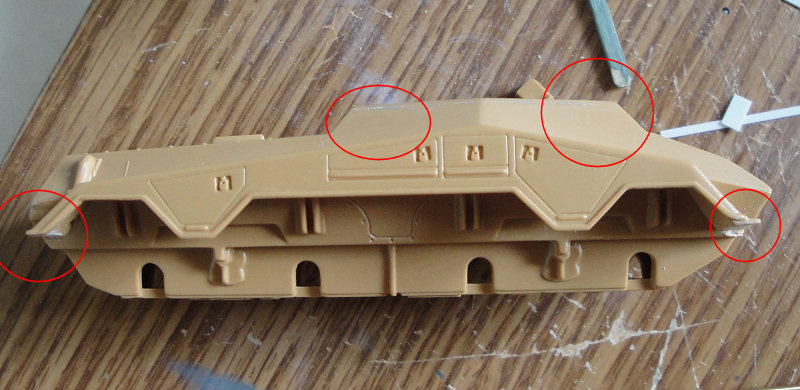
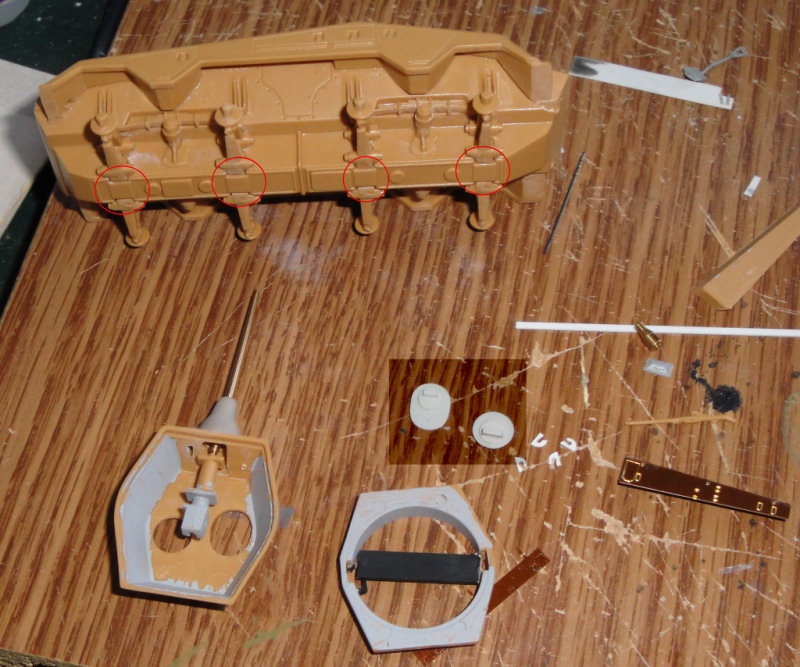
Side view showing the sanding of the hull sides. I circled the corners where it was particularly tough to smooth away the step. I ended up gluing a piece of sandpaper to a block of wood and used it to sand the side armor plates smooth. Also shown here is how I modified the front and rear fenders. On each corner was a flat, fender extension, front and back. The rear ones should be removed completely, but the front ones remain (the headlights are mounted on them). But they needed to be thinned quite a bit; I think they were just sheet metal. I probably should have thinned mine even more than I did.
This is a composite scan showing the removal the turret hatches, so that I could add figures. I had to scratch-build replacement hatches, as none are included in the PART photoetched set I was using for the project.
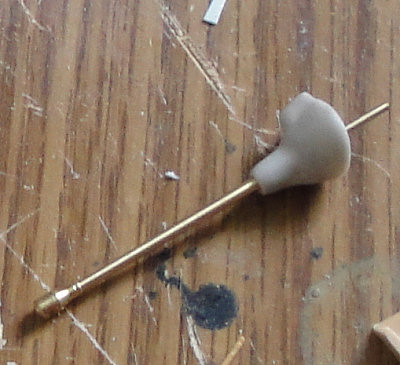
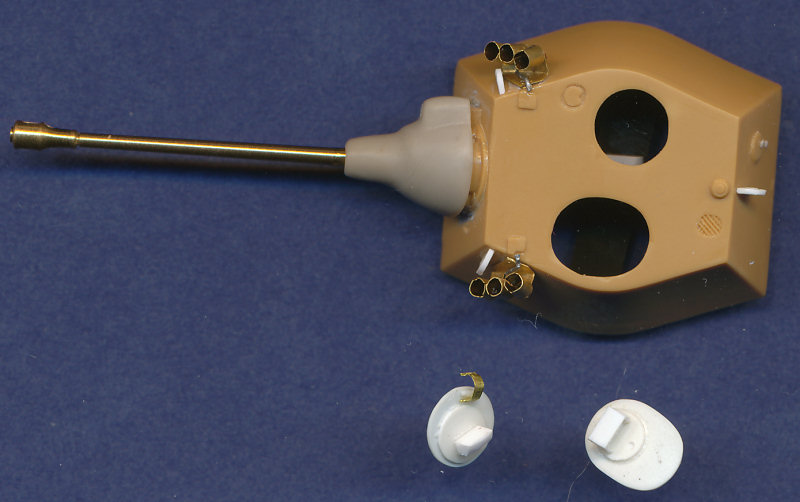
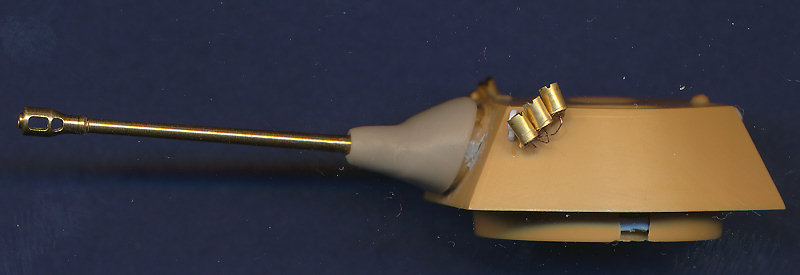
The brass replacement barrel from RB Model (the only Puma barrel available) is far too large. It looks as though they used the Italeri barrel as a pattern, not realizing that much of that barrel is supposed to be hidden inside the turret. So I decided to try and use this brass barrel the same way, by hiding much of it inside the shield. It looks OK, but if you compare it to scale plans, you realize that there no longer is any taper to the barrel. Since I hated the gun shield that comes with the Italeri kit, I decided to use the Roden shield, but only after carving it to a better shape.
Here's an in-progress view of the various parts. You can see the replacement hatches that I scratch-built, as well as one of the lift hooks (in white styrene) that will be attached to the turret. Also seen here are the gray plastic armored visors from a Hasegawa kit, which I am using to replace the Italeri ones. The Hasegawa parts had some locating tabs on their rear faces, which were difficult to remove. I glued the gun breech from the Italeri gun onto the end of the gun barrel inside the turret, because I thought it possible that it may be visible through the open hatches past the figures. The plastic strip along the turret floor is a platform for the figures to stand on, painted black to hide it once the turret is closed up an mounted. You can also see the gaps in the undercarriage where the suspension arms meet the bottom hull. Very difficult to fill.
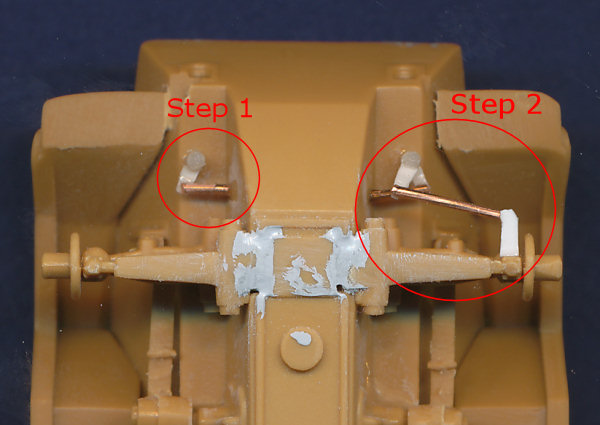
Here I added the steering rods for the wheels, because the front and rear ones will be visible when the model is complete. I used the 1/35th Italeri kit parts as a pattern. Hope they're accurate. The front and rearmost four wheels have more complicated rods than the interior four. The left side shows Step 1, the lower rod that enters into the hull, attached to a post with a styrene flange. Then in step 2 I added a second flange above the first, and another rod out to another plastic flange behind the wheel mount. (Just so there's no confusion, I did Step 1 on both sides, but Step 2 is done only on the right side in this scan to illustrate the process.) The middle four wheels have only the long rod connecting to the wheel (basically, just Step 2). Just ignore the horrible putty job. That's what mud is for.
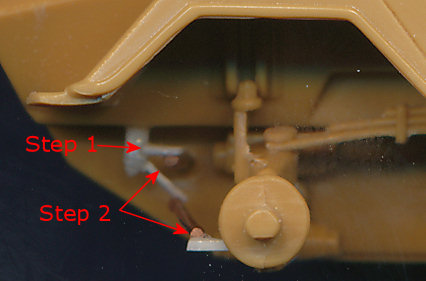
Side view, a little blurry, but hopefully it better illustrates the two part assembly of the front steering mechanism.
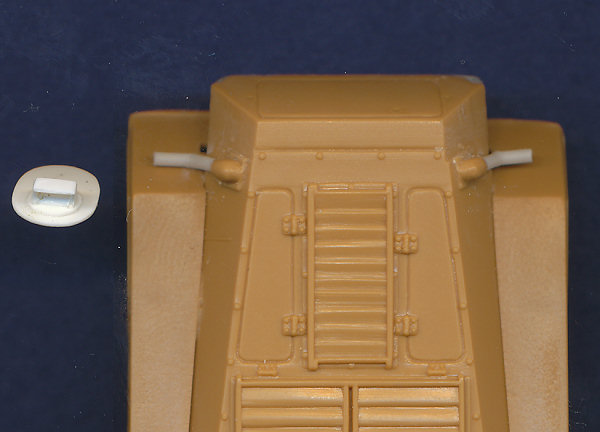
Replacement tail pipes. Note: carve off the kit pipes from the hull BEFORE attaching the fenders. That would have been much easier.... On the left is a close-up of the periscope and armored cover I added to the commander's hatch.
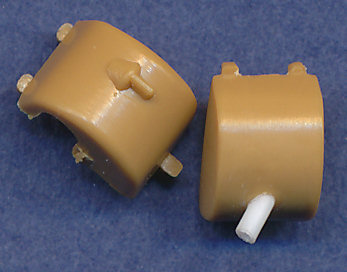
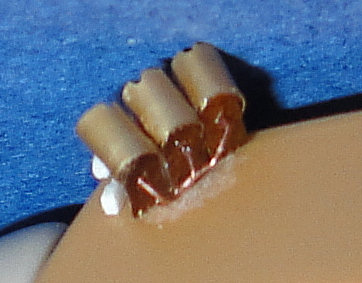
The muffler cans needed a bit of work as well, specifically the exhaust pipe coming out of the center of the can. I have no idea WHAT Italeri thought they were depicting with their kit parts, but it looks rather silly to say the least. Here are the mufflers: one original, and one modified to show the improvement.
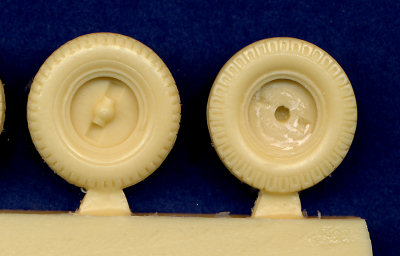
Now to the wheels. When I scanned these parts for a preview of the Attack wheel set for OTW, I noticed that the rear hubs are designed for the Hasegawa kit. As you can see in the scan following this one, the Italeri kit has pegs that the wheels mount to. So I took my Dremel tool to the rear of the wheels to remove the ball socket there, and then drilled a hole with my pin vice. Of course, the closest drill bit I have is slightly smaller than the size of the mounting pegs. So I did a combination of enlarging the holes with a knife, and also sanded the peg a bit to reduce its diameter. But.... when I test fit the wheel, I found a different problem. The rear of the Italeri wheels are set deeper into the tire than the rear of the Hasegawa wheels, so when I mounted the wheel on the axle, it stuck too far out from under the fender. Crap.
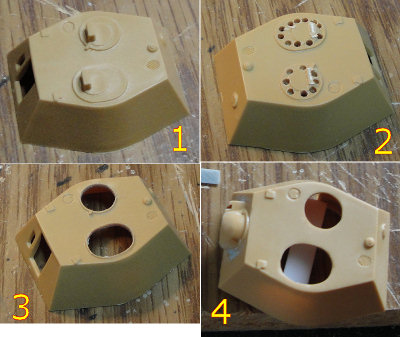
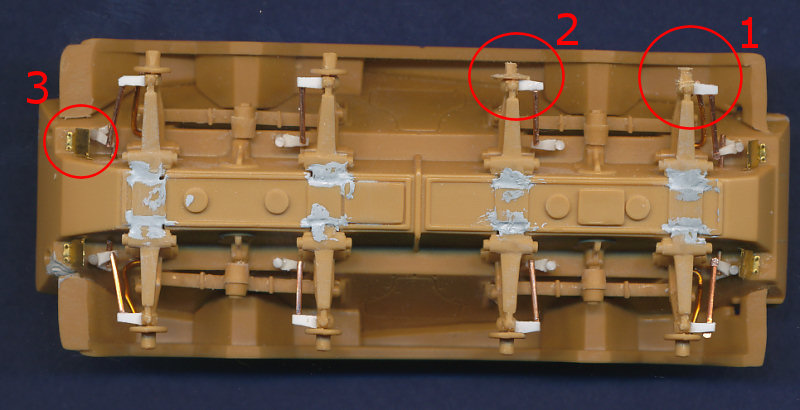
So my first attempt at fixing this is shown as number 1 below. I used my Dremel to grind off the backing plate that was molded as part of the wheel suspension unit, and then I had to reduce the length of the mounting peg as well. This was very delicate work, considering the steering rods I spent so much time adding to the suspension. It worked, but then I wondered if I had to remove the backing plate entirely, and number 2 below shows that I only thinned this backing plate, while also reducing the length of the peg, and this seemed to be enough. I wanted to keep that backing plate on there, to give more of a gluing surface and increase the strength of the mounted wheels. I had to custom modify each axle to adapt it to each wheel, since it was difficult to drill each wheel hole to the same depth. Finally, number 3 in this scan shows the photetched brass mud flaps that came in the PART set (they are not included in the Italeri kit, though they are in the Hasegawa kit). I actually scratchbuilt one of these in styrene, before I thought to check the PART set to see if they were included. D'oh!
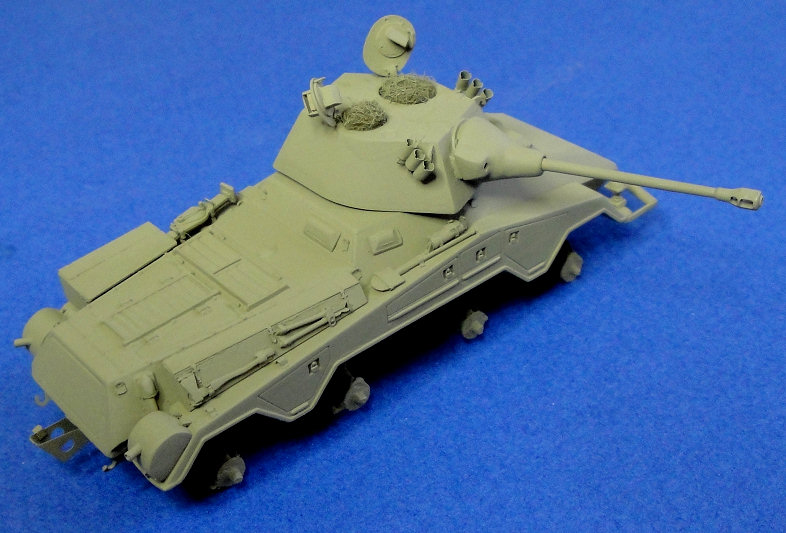
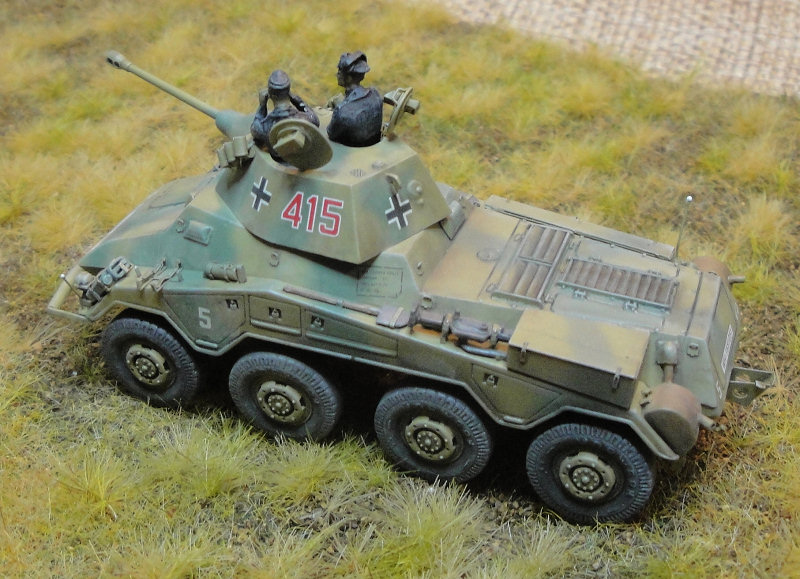
Here's the turret pretty much complete. Just need to glue on the hatches and add figures. After the model was complete, I remembered that I wanted to add the targeting gunsight in front of the gunner's hatch, which is not included in this kit. Was this periscope retractable? Because I've seen photos of the Puma turret without it. I hope so, since I forgot to add it. I guess this is something I could always go back and add.
I think the smoke grenade launchers are too big. They interfere with the lift hooks, and based on photos I've seen, they just seem a little too massive, like they're 1/60th scale or so. They also may be too far forward on the turret side. I simply put them where the kit showed them to be, without double checking scale plans or photos. Oh well. I'm just hoping that people will like the looks of them enough, that they will ignore their large size. One other item I realized that I forgot to add until after photographing the completed model is the casting seam along the sides of the gun mantlet. Here's the wiring I added on their backside with some fuse wire. It just about drove me insane adding these, even with needle-nosed tweezers.
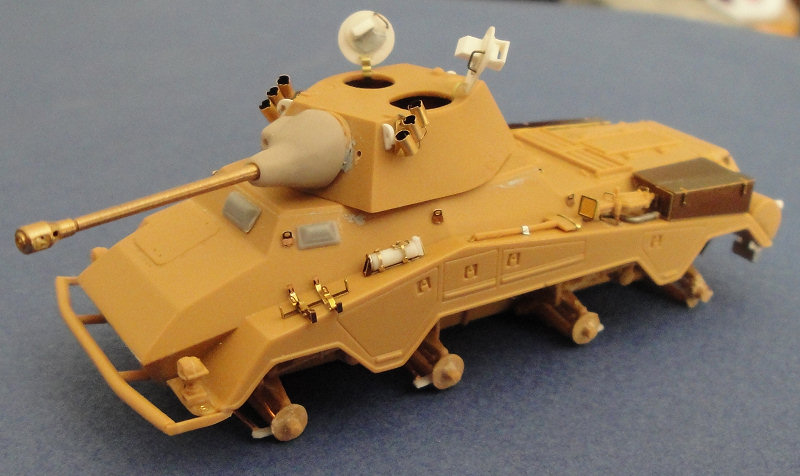
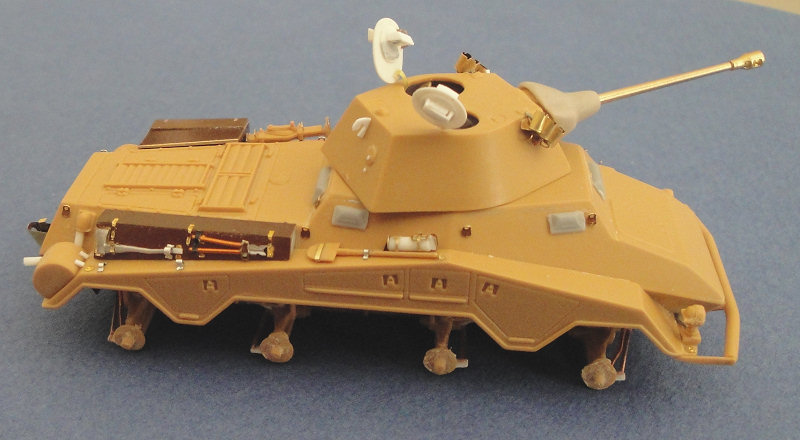
Here are two shots of the Puma with construction complete (except the wheels) awaiting paint. I normally don't mount the pioneer tools onto my models until after it has been painted. However, I've seen so many modelers completely build their models before painting that I thought it would be worth a try to see what is the appeal. Frankly, I don't see it. All of these delicate little details really complicated the painting of the model, so I think this is that last time I do it this way.
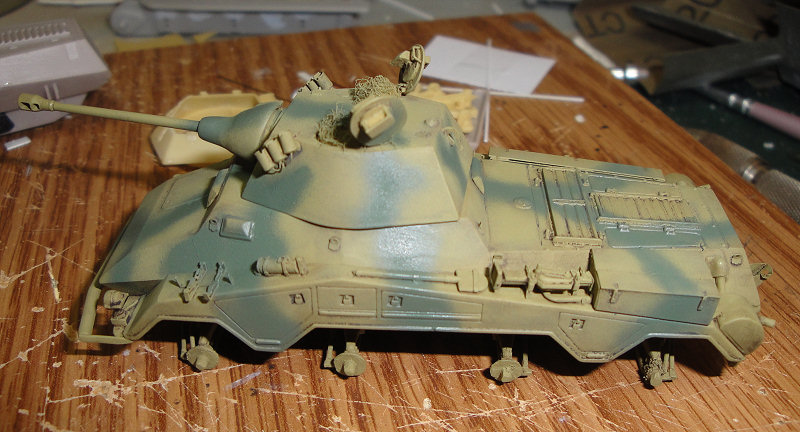
The first coat of paint was Model Master Acryl Panzer Yellow. A very nice paint, easy to spray, but it has a very greenish cast to it that I think is incorrect. But after camouflaging, I think it looks pretty good.
And speaking of camouflage, here it is after I sprayed on the Panzer green, which has a slight shine to it. My Iwata airbrush is on the fritz, so I had to use my Paasche brush for this, which is quite difficult to do. The problem is that the acrylic paint dries so fast that it quickly clogs the airbrush nozzle, making it very difficult to spray. There's a lot of overspray and splotches that I had to clean up.
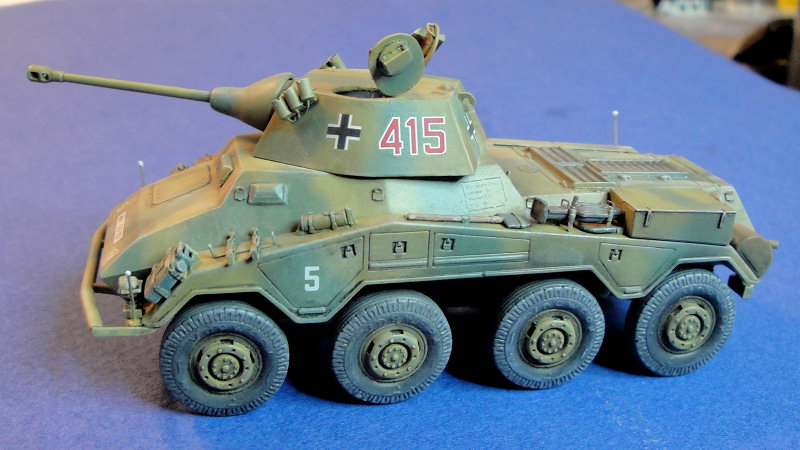
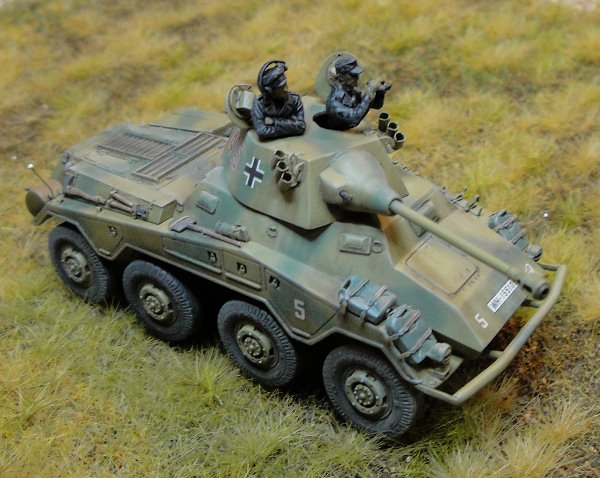
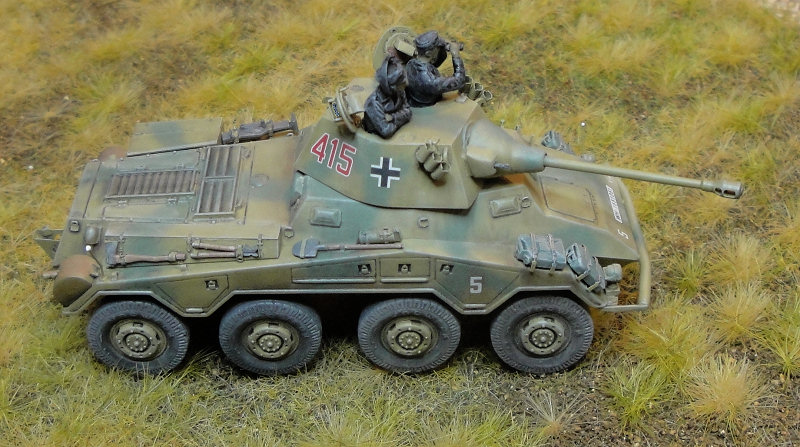
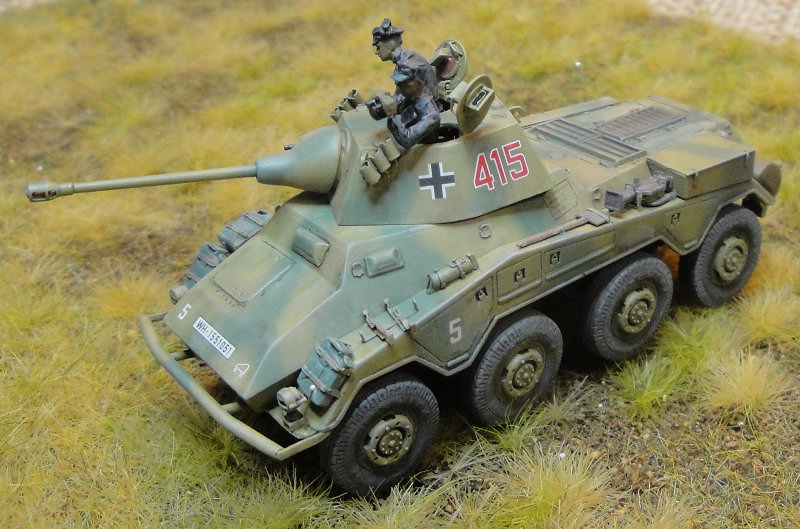
This photo shows the Puma when I thought it was complete. But after looking closely at the scan, I noticed several things that needed to be done, such as painting in the periscope lenses, improving the look of the tires, and just adding some more overall weathering. The decals were from the Kagero Photosniper book. They are extremely thin, and the black square of vehicle data on the hull side below the turret was so thin, that I ruined three of them trying to get them onto the hull. Luckily the fourth attempt worked, though it's a little crooked and I couldn't straighten it out. I should have just used the one that came with the Italeri kit, as those decals are a but thicker than the Kagero markings. Aside from that, I think the Kagero markings came out great. Liberal use of Microset and Microsol made the decal film completely disappear, and the decals' shine was dulled by the clear flatcoat.
Post-Construction Evaluation As most of us are aware, close-up photography can be most revealing for viewing small subjects, such as 72nd scale tanks. While building this model, I recognized a few things that I felt weren't worth detailing/correcting at the time, and now once I view the photos of the completed project, I regret not fixing some of them. There are also several flaws and flubs that are more obvious in the photos than they are with the model in-hand.
Construction Choices In my eyes, the most glaring deficiency of this model is the engine deck. Of the four manufacturers of 234 armored car models, I think Italeri has the worst representation of the air intake vents on the engine deck. The PART photoetched detail sets contain replacement parts for these vents. I looked very closely at these parts during construction, and decided that the amount of effort needed to build them would not be worth the return. I now think the exact opposite. For my next 234 model, I will definitely try out these brass vents. The lift hooks I added to the turret I think are much too large, and I think the smoke launchers are too big as well. Since the launchers are etched parts, there's nothing I can do to change their size, and they are light-years better than the kit parts. I am not sure if the etched parts in the Eduard set are any smaller, but I will find out for my next Puma. I should have opened a few of the armored visors. While I think the model looks fine as it is now, it seems logical that if the crew are lounging in the open turret hatches, chances are that some of the view ports would be open as well. I am not happy with the oversize gas can storage racks. Perhaps the racks in the Eduard set are smaller. I also should have replaced the shovel blades with etched parts.
My Technique My painting skills are a little rusty, and hopefully with a little more practice, I'll improve. Similarly, my weathering skills are very rusty and need improvement. I need to be more careful in trimming the photoetched parts before attaching to the model. The small lift hooks around the hull in particular, really show the nubs where they were attached to the photoetched fret. These parts are REALLY tiny, and I'm not sure how easy it would be to better clean them up, but these photos make it obvious that I need to try harder. I also need to work on my tire painting/weathering technique. I am not happy at all with the tires. Finally, I just need to form better visions for my models. I usually approach models with one of two goals: either as a quick, out-of-box project (with perhaps just a couple improvements), or as a major correcting/detailing project with photoetched, after-market and scratchbuilt parts. But I always seem to end up with something in between. I know that I need to lighten up about it, because nothing says that every model has to be a prize-winner, but I can't help but be disappointed when I put so much effort into a project like this, and then realize that the whole thing is let down because I didn't take it far enough (specifically, the engine intake vents in this case). As always, I'll just try harder next time.
|
| Back to Italeri Kit List | Back to Home Page |
| Back to Modeling the Sd.Kfz. 234 Article | |
| Article Last Updated: 9 January 2011 |