| The box contains a couple of tank and actually no decals. I say "actually" because the last re-edition of the Fast Assembly Tiger I has the decal set while the former had not and this opens the possibility to have a decal set in future releases. Composed by twelve pieces each (ten on a mould and the two hull halves), the Italeri simplified cast depict two late batch Panther Gs for wargamers or beginners.
They have the chin mantlet introduced in September 1944 and the October
1944 production changes (the raised engine deck fan for the crew compartment
heating and the exhausts with the flame suppressors). The exhaust
covers are of the cast type, instead of the squared ones introduced
by May 1944.
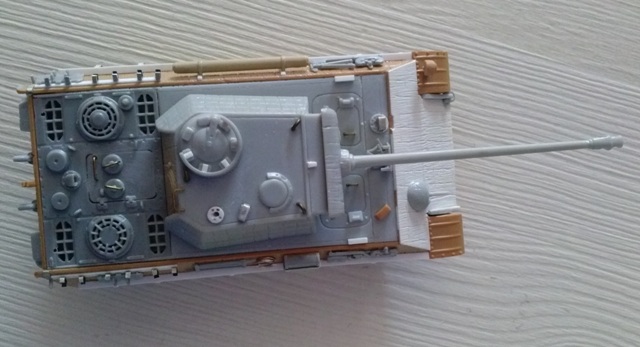
On the upper hull sides there is every item needed already moulded
on with the exception of the gun cleaning set tube. This is moulded
on the upper edge of the rear plate. This position was a field modification
used by the I./24 PzRgt, the 654 sPzJgrAbt and the GD PzDiv.
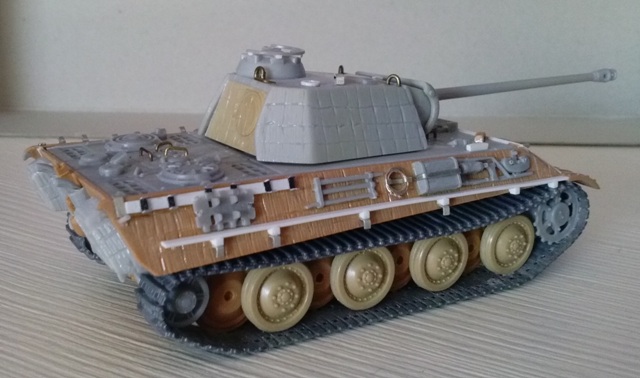
The tank is quite well rendered in its shape and when assembled it
looks well, generally speaking. I suppose it is inspired by the Dragon
Panther, having the same general dimension and some details (like
the Nahverteidigungswaffe in the wrong position).
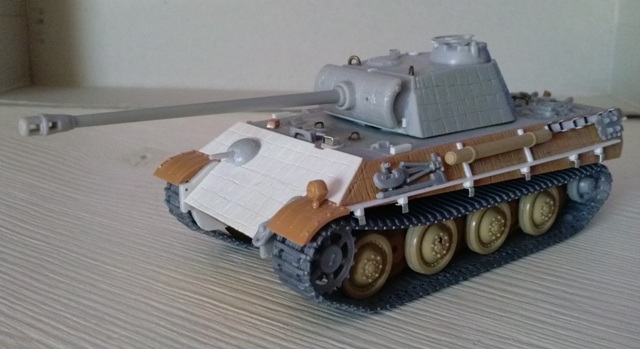
Unfortunately the slide moulding system is horizontal where the upper
hull sides are sloped. This means that the horizontal details of the
items are not perpendicular with the hull sides. I've attached a pair
of photos of an "out of the box" model, to show what I mean.
Another point where the moulding system gives the same problem is the rear turret plate, where the circular hatch and the lateral plate's protrusion are not well rendered.
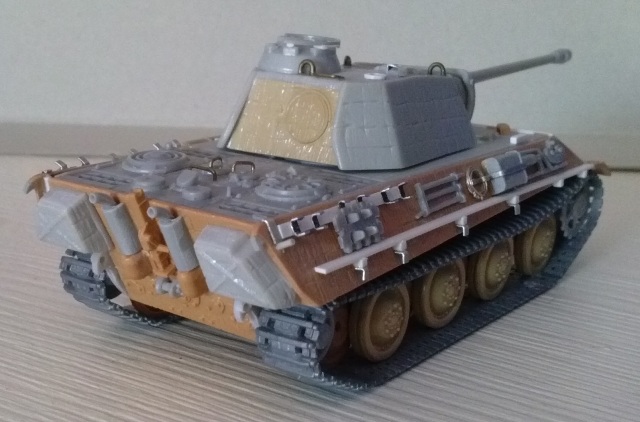
The single piece wheel sets are quite well done (especially if covered
with the Schürzen, not provided) and only the sprockets
need to be detailed to be useful (it is a wargamer model). However
the tracks are smooth with only a sort of transversal rounded stiffener
on the external surfaces and seem like rubber bands around the wheels
sets. Some modellers make a large use of mud to hide this kind of
problems and generally it works if the tank is placed on a muddy ground.
Being a simplified kit, some details are clearly very weak, however the Revell and the Dragon Panther G kits have some useful spare parts for replacement.
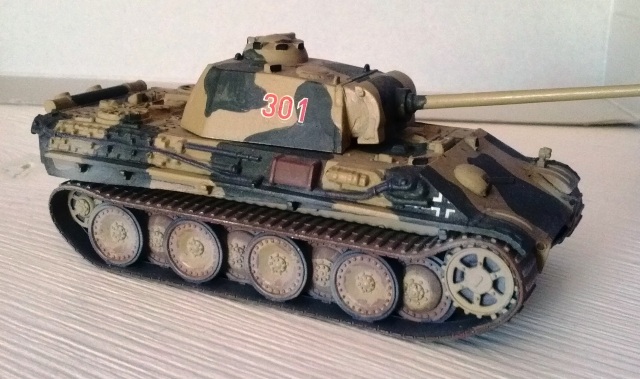
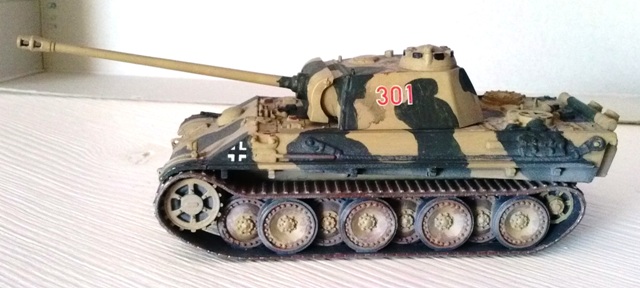
Having some of these spares, caught by a raptus I decided to detail one (don't ask why). Compared with a Dragon "G", it looked well. Compared with a Revell "G", the hull looked a bit narrower. So I "Revellized" the dimensions shimming the upper and lower sides using a spare Italeri Jagdpanther hull parts: in this way it could stand side by side to my Revell "G" without looking slim. This job wasn't really necessary; it was only my needing as well as the engine deck replacement (from Dragon), the mantlet correction and the surface engraving, made to obtain an early "zimmerited" MAN Panther G. If someone want to depict a late "G" the kit engine deck and mantlet are useful.
On the contrary, aiming at my target, the replacement job of the single
piece wheels and tracks sets (from Italeri) and rear turret plate
(Italeri) was necessarily made being as these parts are far from acceptavle
for display use.
I have to tell you that I made this job just because I had some unused
spare parts resting in my attic. I don't want to tell you to do the
same work to have a display Panther: there are already dedicated kits.
However, if someone wishes to add some details to his kit, he can
find an inspiration choosing from the following list:
Turret
- I replaced the rear plate with
an Italeri Ausf. A one (the rest of that turret is scarcely useful:
the only other well done part is the cupola). As an alternative,
the rear plate can be scratchbuilt quite easily.
- The Nahverteidigungswaffe position is wrong. It was erased and made new.
- The fixed periscope was modified
to separate the item from the guard.
- The cupola (which is correct) received its AA mount from Dragon.
- I added the mantlet stoppers.
- The turret lifting points were made with metallic wire.
- I made new lifting points with
metallic wire.
- With metallic wire I also made the roof handle for the rear hatch crew access.
- My tank doesn't have the pilzen crane points, the rear hatch handle and the gun mount debris shield. A late Ausf. G needs these three details.
Hull
- The side details were erased and on the flattened plates every rack, tool and track link was replaced (as already told the shimming job is not really necessary).
- Also the Schürzen racks were
made with plastic strips and thin metal foil.
- I replaced the driver periscope guard, because it is a little undersized.
- The fixed co-driver periscope was
modified to separate the item from the guard too.
- I replaced the hinged gun barrel
holder (from Dragon) to make them stand out.
- Next to the crew hatches I added
their stoppers with plastic rod.
- The two crew hatches and the three engine deck hatches received metallic wire handles.
- The little central air vent on the engine deck was opened.
- If your "G" has the gun cleaning
set tube in the standard position (see intro), it must be carefully
cut off and glued on the left hull side with two thin 1 mm wide
plastic strips rack.
- The jack isn't well rendered and its replacement is a must.
- I've added the horizontal rods
to the front light brush guards.
- The exhausts piece has a base which
is too much thick. Furthermore the pipe covers are the rounded cast
type and the flame suppressors top are flat where they should have
a fan. The replacement of these parts is recommended. Anyway, if
used, the base piece needs to be thinned with a file. The central
towing point has the solid bar which can be replaced with a little
stretched sprue rod.
- The Schürzen are missing.
If the kit wheels and track sets are kept; adding them is highly
recommended. The 1/72 plate dimensions are 17.36 x 8.68 mm each.
When installed they overlaps and the full set length should be around
81.mm.
Wheels and tracks
- Having chosen to have a display
model I replaced the sets with Italeri and Dragon spare parts. Having
two sets I coupled the inner row wheels. I know, the Italeri tracks
are missing the guide horns
The single piece sets are useful for
the kit finality (especially with full Schürzen sets). Anyway,
if used the parts which are worth the replacement are the solid
sprocket.
Conclusions
For a wargame purpose they are completely
acceptable and for a beginner they are an easy and cheap way to learn
this hobby like any other model of this class. A decal set would be
welcome. For display use there are surely easier ways to have a Panther
G. However I want to suggest another couple of use for this kit:
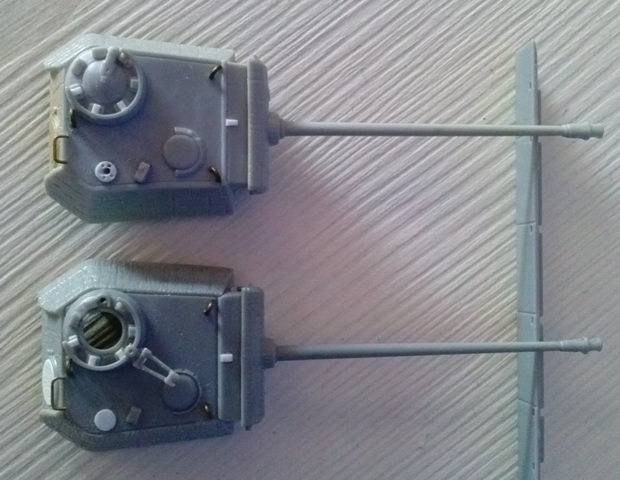
The turret is well done (see comparison
photo with a Dragon G turret) and the cupola has the correct periscopes
number and position. It can be used to replace the Italeri Panther
Ausf. A turret, which is too wide and unusable (for my tolerance range).
The hull can be used to replace the
old Dragon white metal one, if someone still has one of them. (My
experience with it was really frustrating because they crumbled during
the assembly and my kits became an expensive spare part source.)
Review sample purchased by the author.
|