|
Introduction
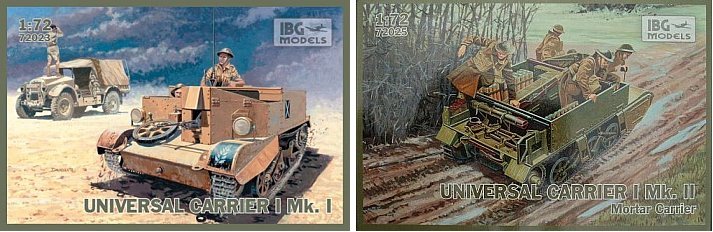
I was interested in getting a Universal Carrier model kit, and so IBG became my first choice. I wanted to depict a vehicle in British 8th
Army markings.
I was lucky enough to be able to check them prior buying, in my local hobby shop, where they had all 4 versions (kits 72023, 72024, 72025, 72026).
My budget (and time) is limited but I bought 2 kits instead of just 1, due to their excellent quality.
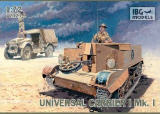
I chose kits 72023 & 72025 because of the extra sprues included
and decal options.
 |
Vehicle background
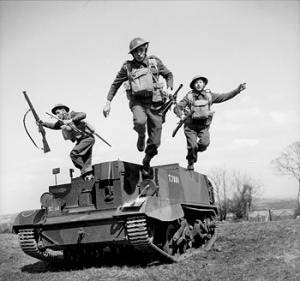
Carriers were an instrumental part of the British army throughout the Second World War being used for just about everything.
The origins of the Universal Carrier family can be traced back generally to the Carden Loyd tankettes family which was developed
in the 1920s, and specifically the Mk. VI tankette.
Initially, there were several different types of Carrier that varied slightly in design according to their
purpose: "Medium Machine Gun Carrier" (for the Vickers machine gun), "Bren Gun Carrier", "Scout Carrier" and "Cavalry Carrier".
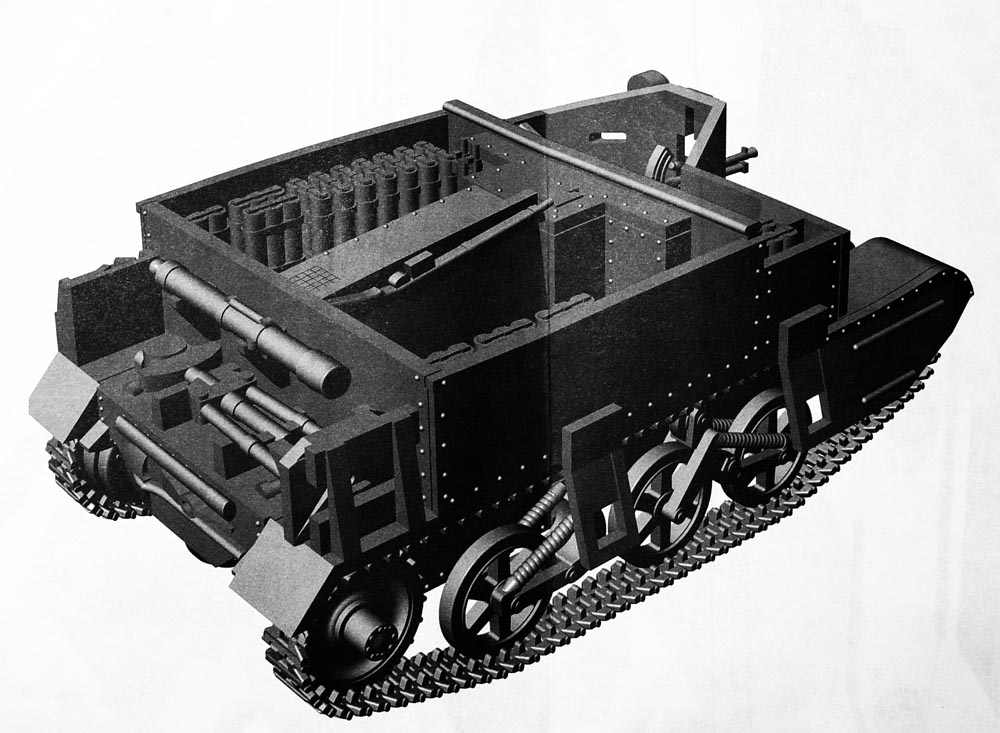
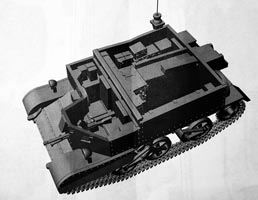
However, production of a single model came to be preferred and the Universal design appeared in 1940; this would be the most widely produced of the Carriers.
It differed from the previous models in having a rectangular body shape in rear section which provided more crew space.
The Universal was produced in Great Britain. By 1945 production amounted to approximately 57,000 of all models, including some
2,400 early ones. The Ford Motor Company of Canada manufactured about 29,000 of the Universal Carriers. Smaller numbers of them were also produced in Australia
(about 5,000) and New Zealand (about 1,300). So, it was the most produced allied AFV of WWII.
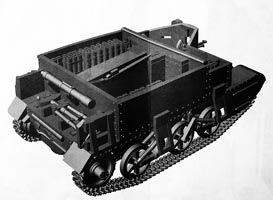
While both 3inch mortar version and towed 2pdr needed a deployment in order to be manned, the Australians managed to build
versions in which the 2pdr and 3inch mortar were "portee". The 2inch mortar could also be fired from within the vehicle. |
Historical use
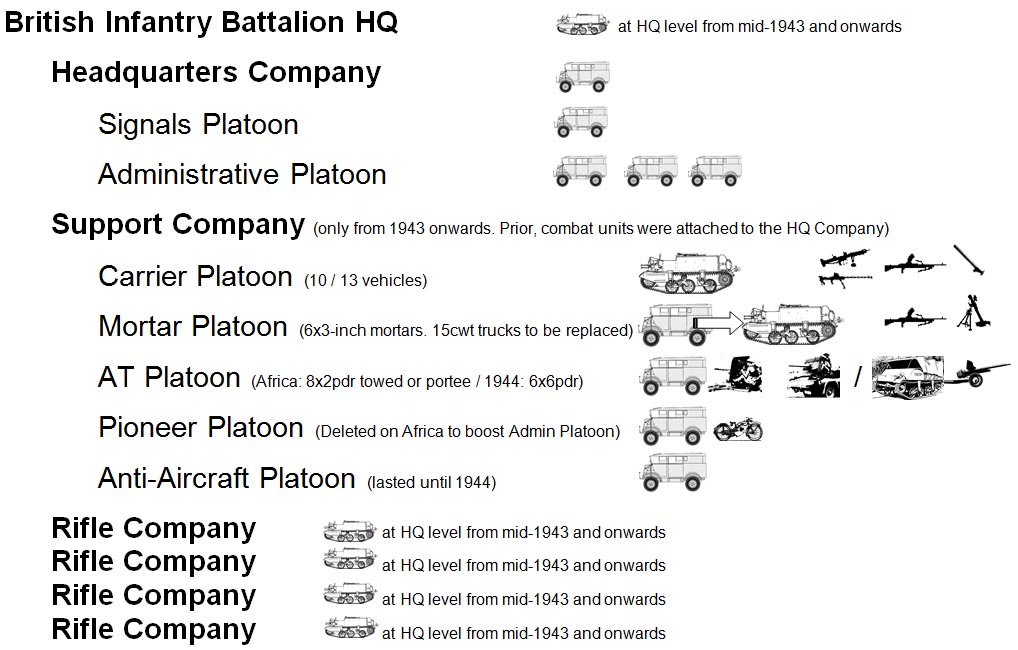
Universal Carriers were extensively used in all Allied armies, and all British divisions (motor, infantry and artillery) used them.
I have depicted the use of the Universal in a British Infantry Battalion, so you may find inspiration in how many and what type of
Universal Carrier you wish to get.
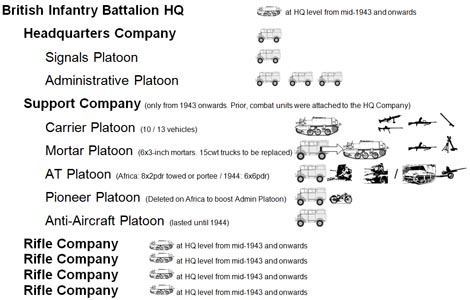 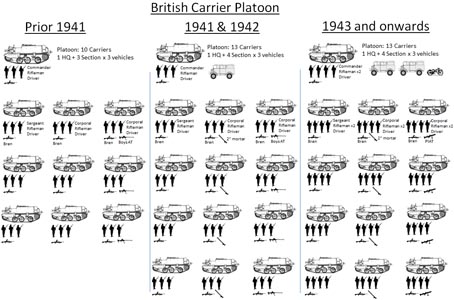
So, to sum up possible uses with British Infantry Battalions, kit 72023 (plain Mk.I) may be used at virtually any level.
Kit 72024 (Mk.II plain) will, moreover, be suited to tow a 2pdr or 6pdr, but this was not their official assignment on Infantry
Battalions. However Royal Artillery Regiments did dispatch the Universal carrier for towing the AT guns.
Kit 72025 (Mk.II Mortar) depicts a 3inch mortar, so it will be suitable only with Mortar Platoons, while 2inch Mortars were present with Carrier Platoons.
Finally kit 72026 (Mk.I Boys anti-tank rifle) was also usual with Carrier Platoons until 1943/1944 where they were gradually replace by PIAT AT launcher.
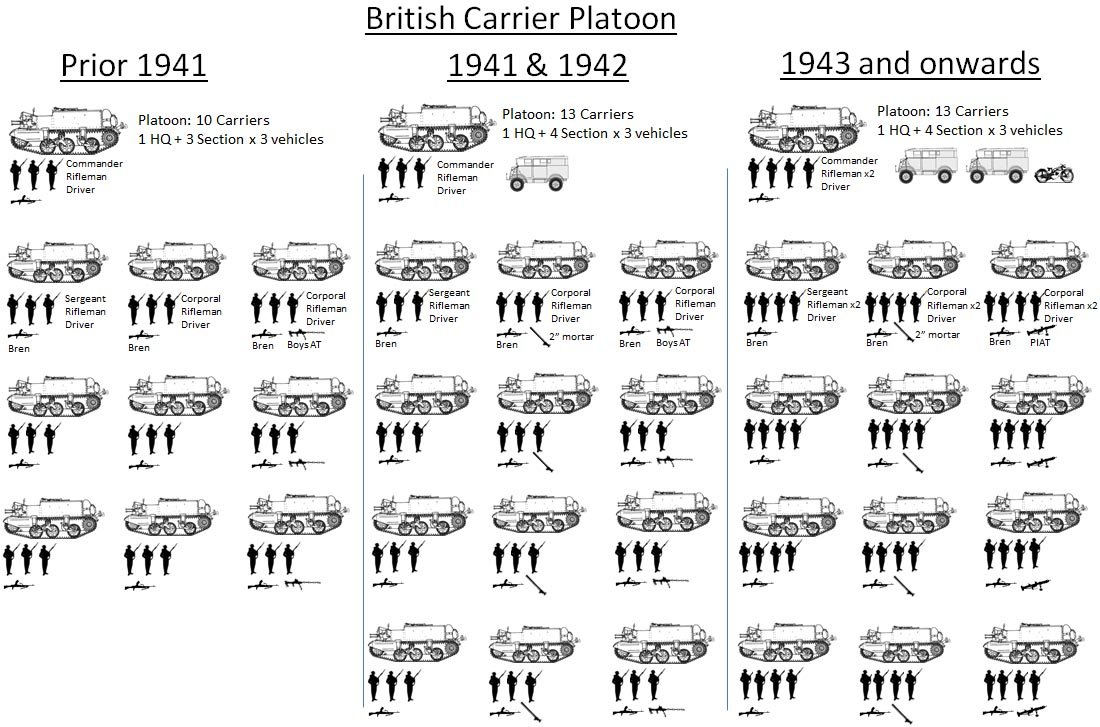
Carrier Platoons brought infantry a much needed firepower and versatility.
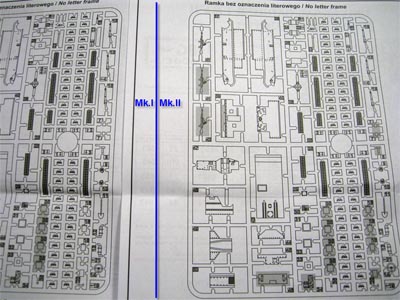
Differences in sprues among the 4 available kits
The breakdown of the IBG Carrier sprues for all 4 of their kits is:
Common sprues:
Sprue "A": vehicle chassis, tracks and most of the vehicle parts
Sprue "X": running gear and template for assembling the tracks
Unique sprues:
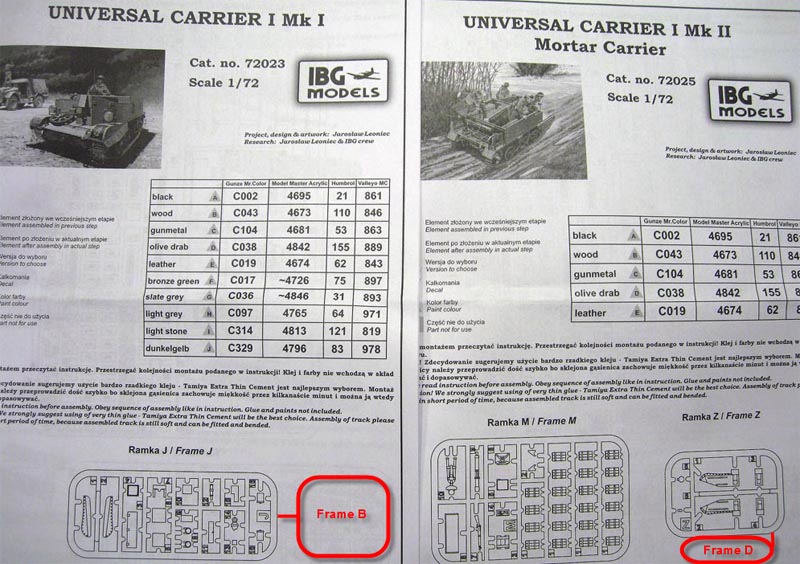
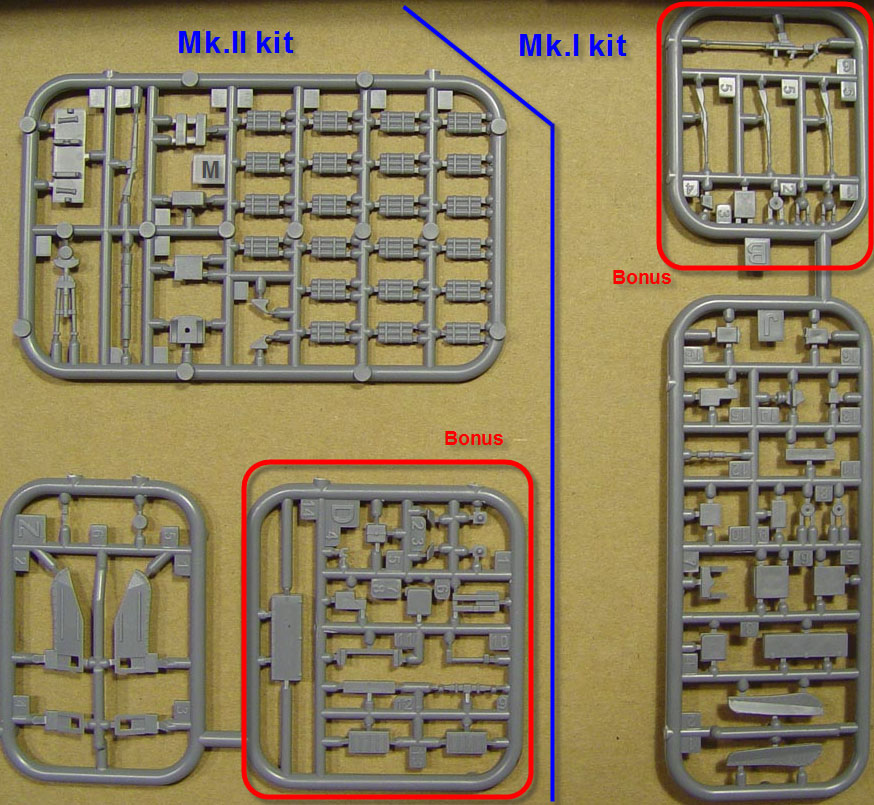
72023 (Mk.I plain): Sprue "J" (Mk.I fenders and other bits) + bonus Sprue "B" (Boys AT + 3 Rifles + headlights)
72024 (Mk.II plain): Sprue "Z" (Mk.II fenders) + Sprue "D" (rear winch)
72025 (Mk.II Mortar): Sprue "M" (mortar and ammunition) + Sprue "Z" (Mk.II fenders) + bonus Sprue "D" (rear winch)
72026 (Mk.I Boys anti-tank rifle): Sprue "J" (Mk.I fenders and other bits) + Sprue "B" (Boys AT + 3 Rifles + headlights)
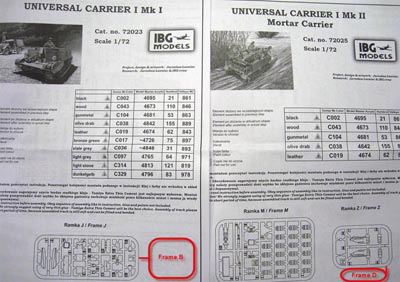 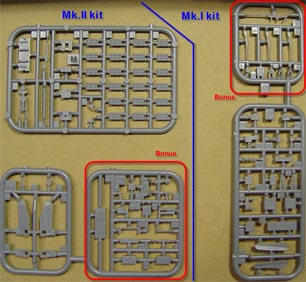
Note that with the Mk.I kit you get a free Boys AT (frame B), and with the Mk.II you get the rear winch typical of the Mk.II (frame D), although instructions do not depict it.
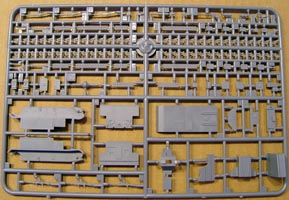
Sprues in detail
Detail is extraordinary, much like a Revell or a Dragon kit.
All the sprues are totally straight, though in my pictures below, the camera lens has introduced some distortion.
| 
|
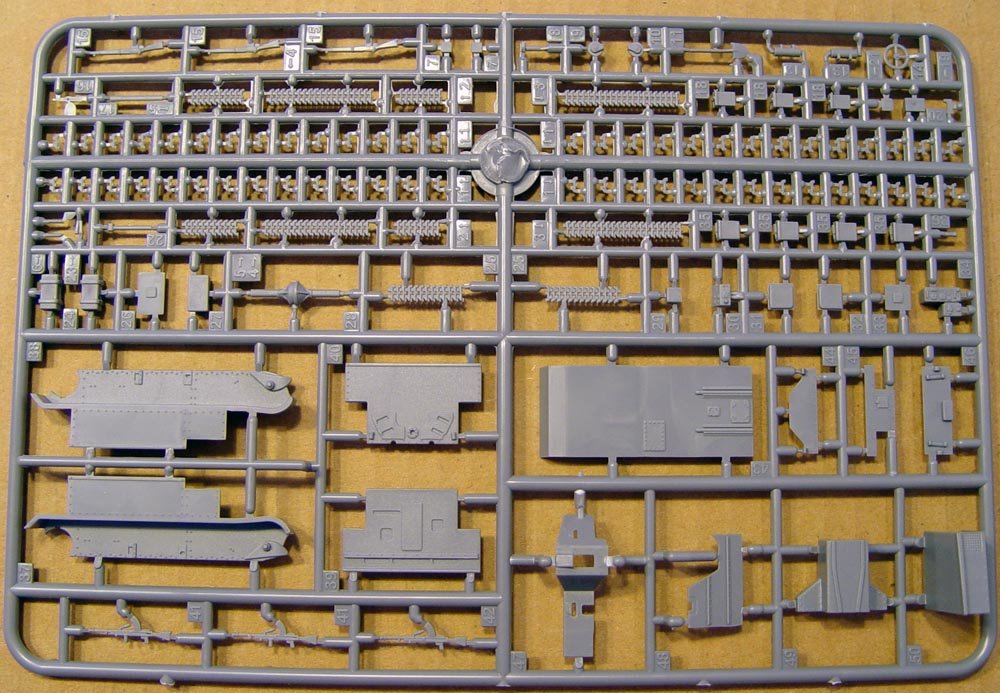
| Complete Sprue "A".
|
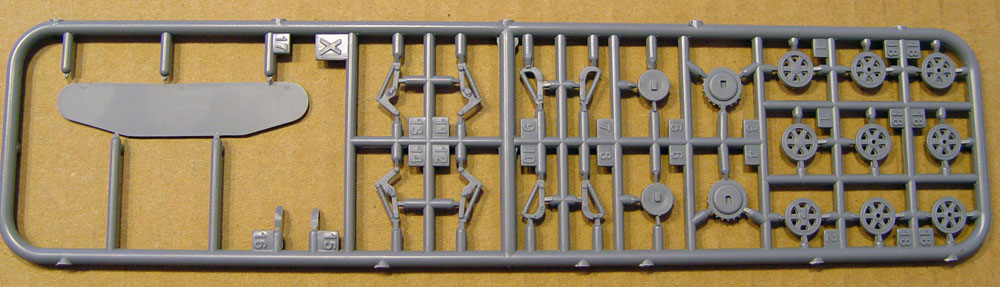
Complete Sprue "X".
|

|  |
|
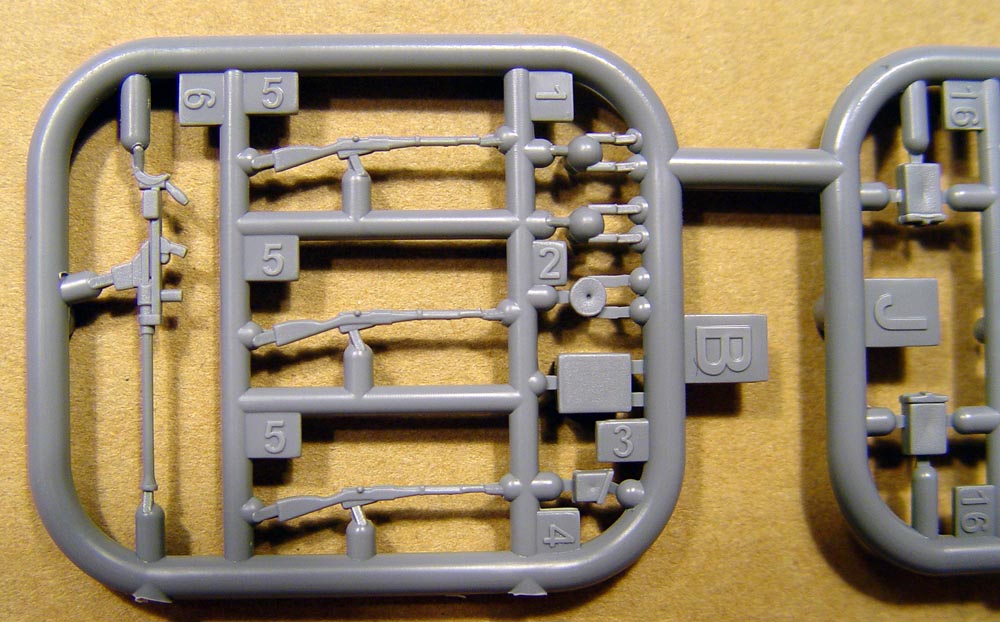
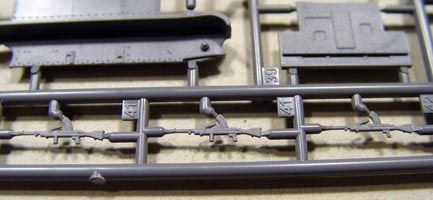
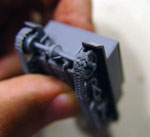
Detail of the "B" sprue.
I've yet to see a Boys AT Rifle as fine as is this!
|
Detail of the "A" sprue.
You get 2 fantastic Bren guns for spare parts. |
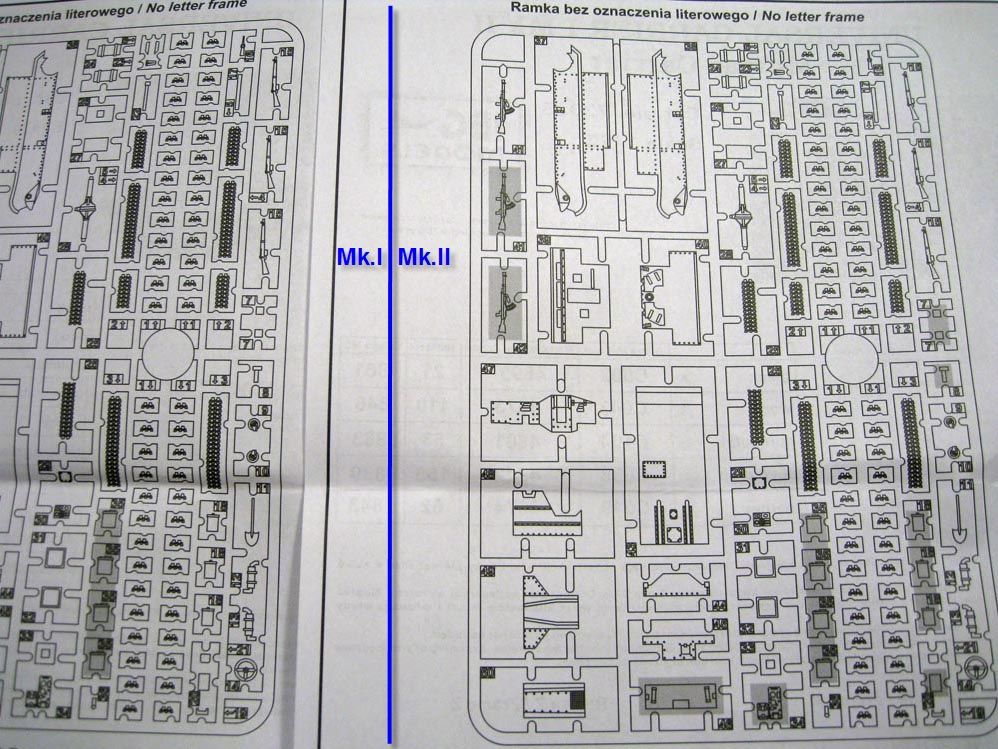
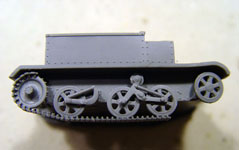
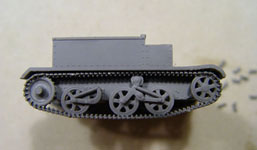
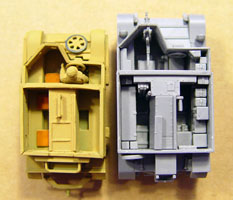
Differences between Mk.I and Mk.II
Use of sprue "A" parts differs between the Mk.I & Mk.II kits. Pieces not to be used are greyed out.
Note how in Mk.II construction, the rear chassis hull plate is omitted, as well as the radio and some other minor bits.
Also Mk.II side panels differ in shape with the Mk.I ones.
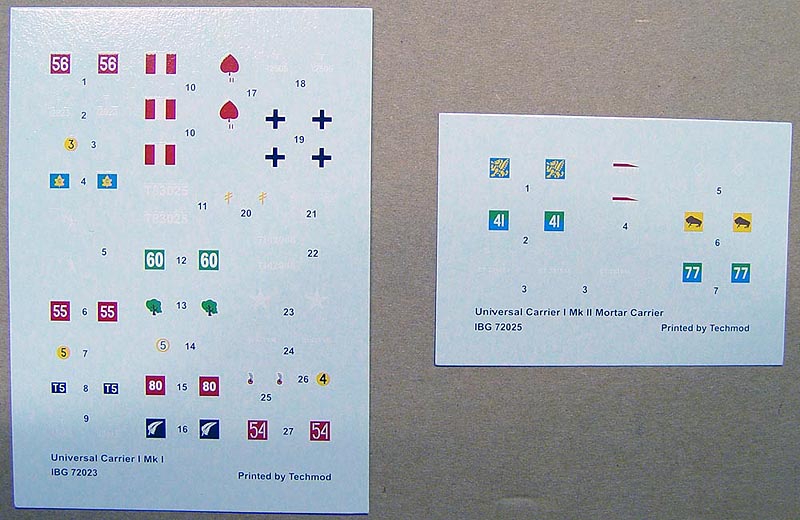
Decals
Decal quality is on par with the kit. Simply superb! The set for the Mk.I version, however, provides a lot more options.

Building the Kit
Building was very straight forward. The Carrier's size, while small, was comfortable. Plastic was hard and easy to work with.
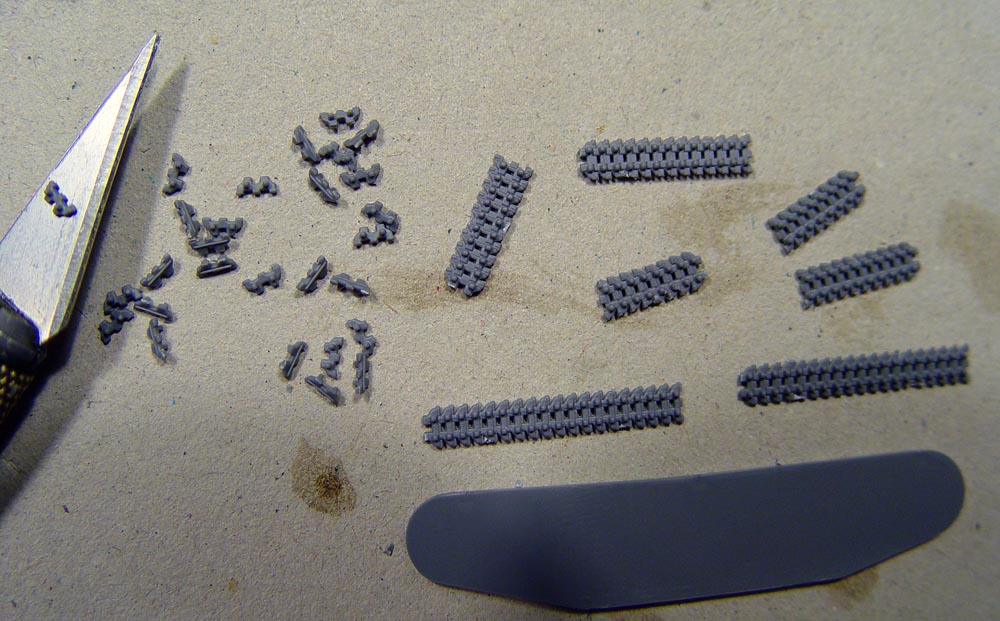
Tracks
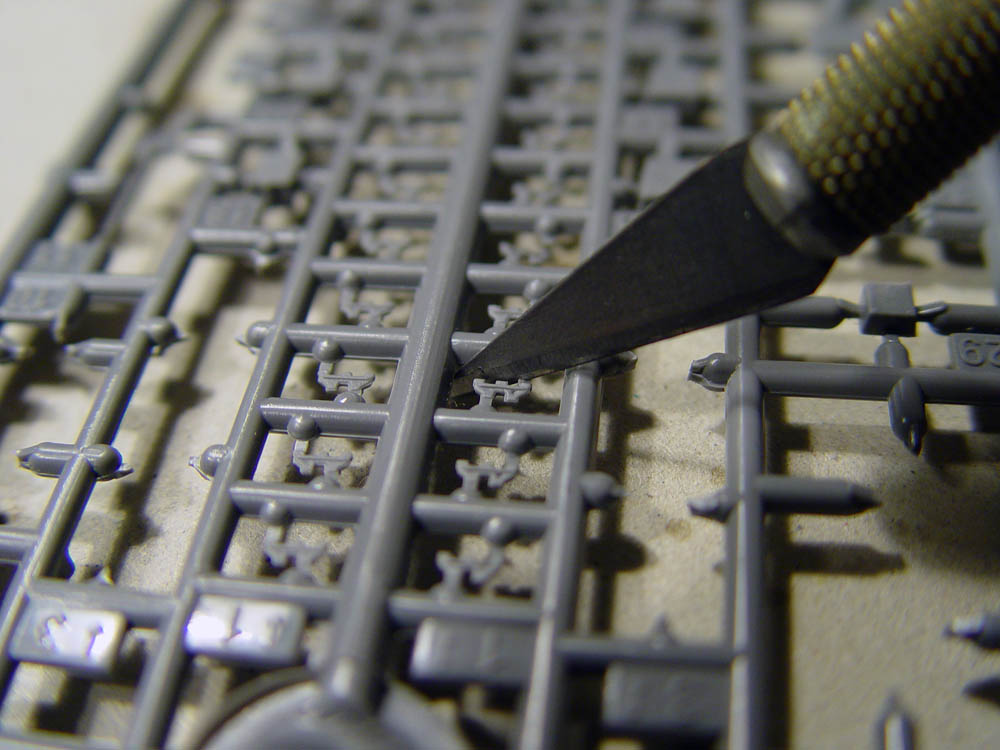
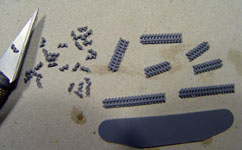
The track construction is a challenge because of the small size of the track pieces and their numbers.
| 
| 
|  |
| Tracks are miniscule! I can't remember having used such tiny pieces in the past.
|
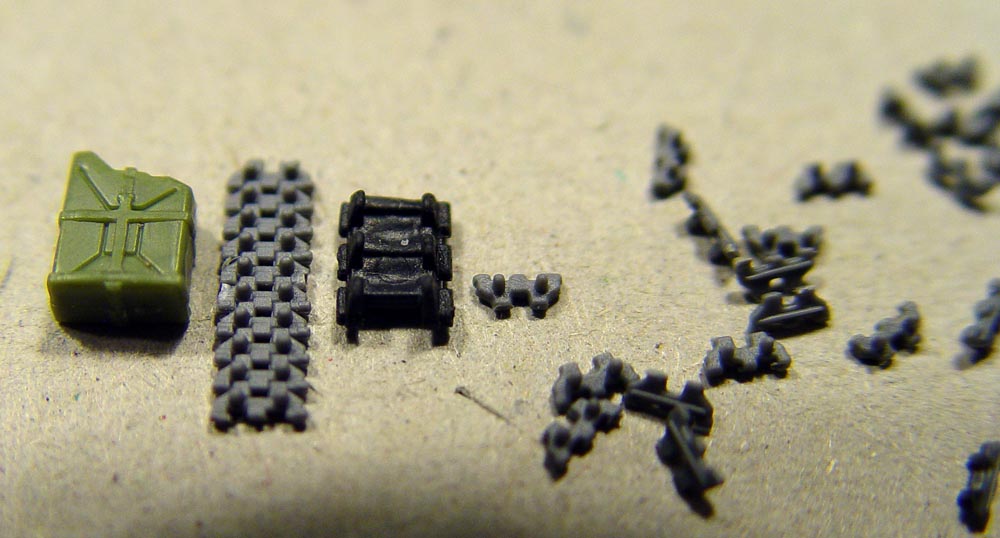
A section of Carrier track between a U.S fuel can (left) and a Grant track (right).
|
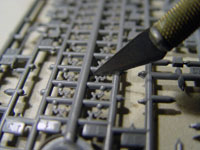
All in all separating the tracks from the sprue was rather straight forward, with the help of a sharp knife.
|
Rather than using the supplied track template, I preferred building the tracks in the classic way, adding them directly to the kit.
So I built the model up to the point where the running gear could be finished.
|
| 
| 
|  |
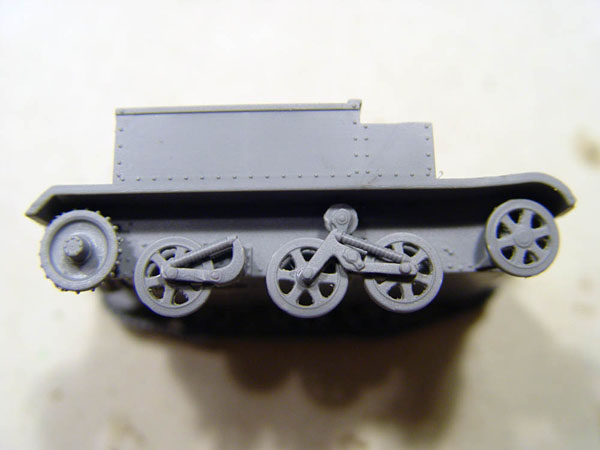
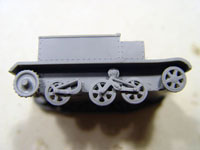
| I started putting on the tracks moving from the right most wheel to the left.
It's always easier to join the track ends together when they wrap around to meet at this point. |
Notice the drive sprocket,
awaiting the next track piece.
|
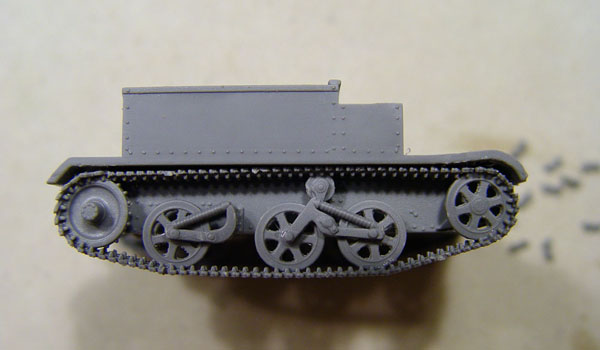
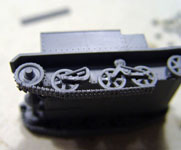
This building method is much easier than that proposed by IBG. Notice the steady progress, and how tightly the tracks fit together.
|
The completed track. In the background is the remaining surplus of individual links.
|
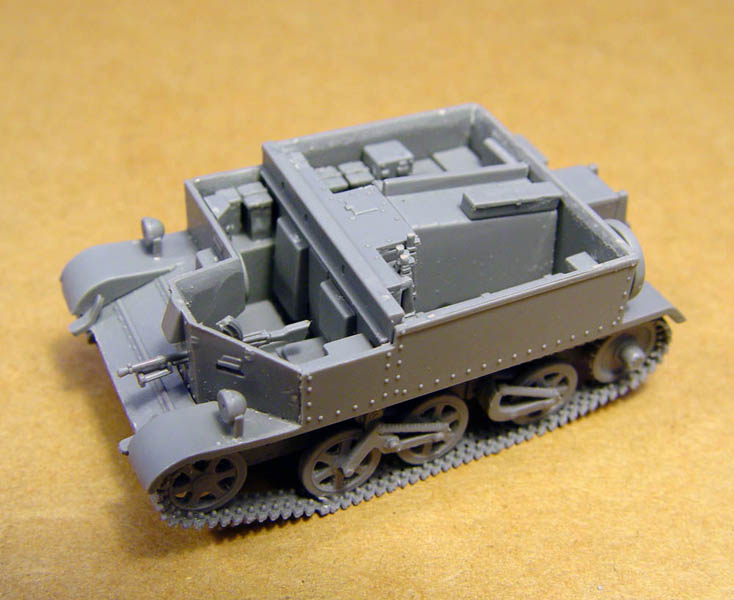
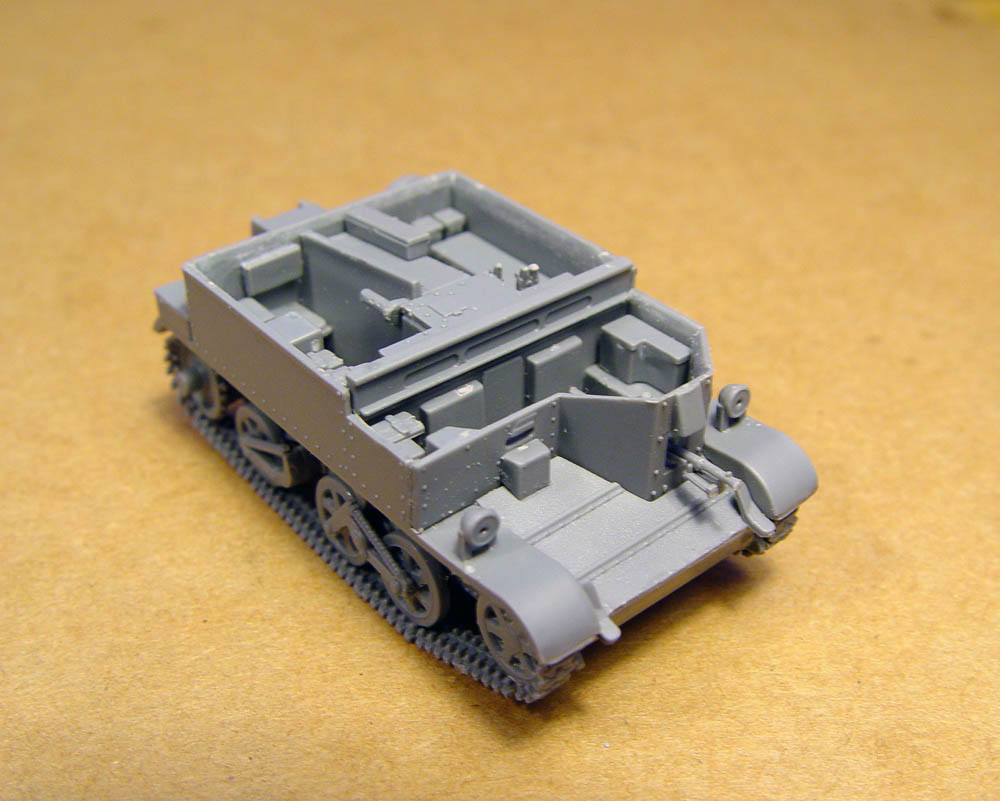
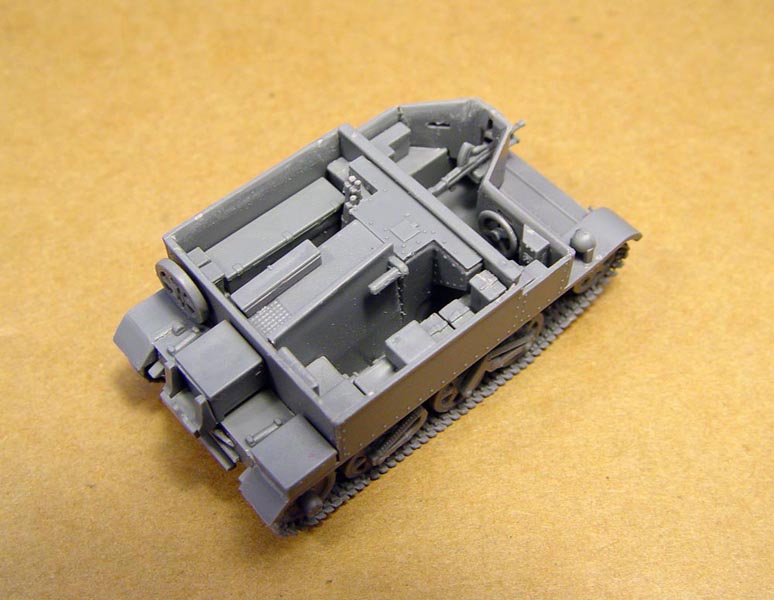
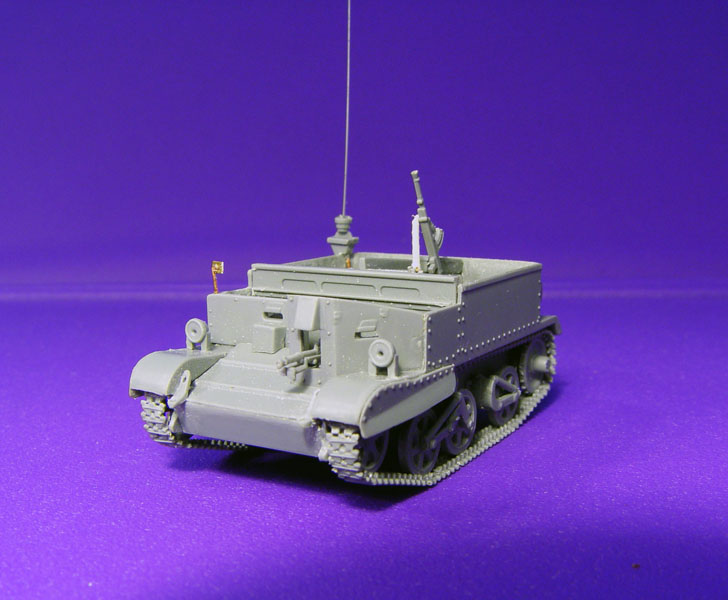
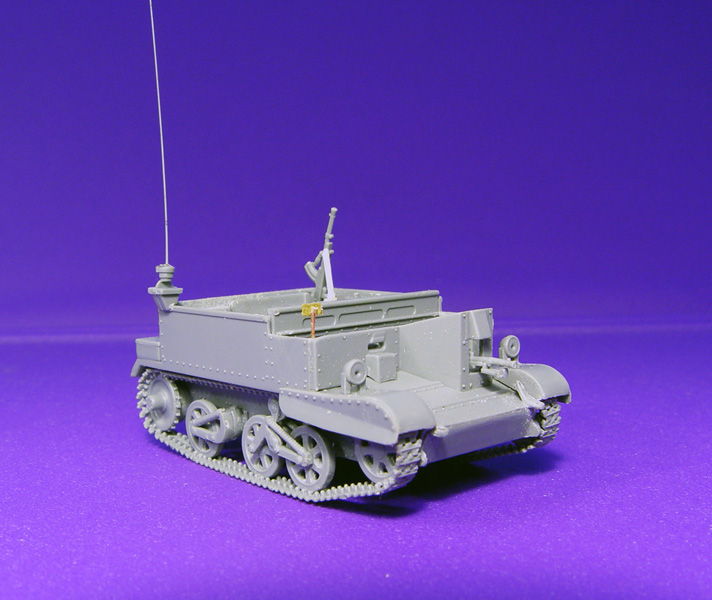
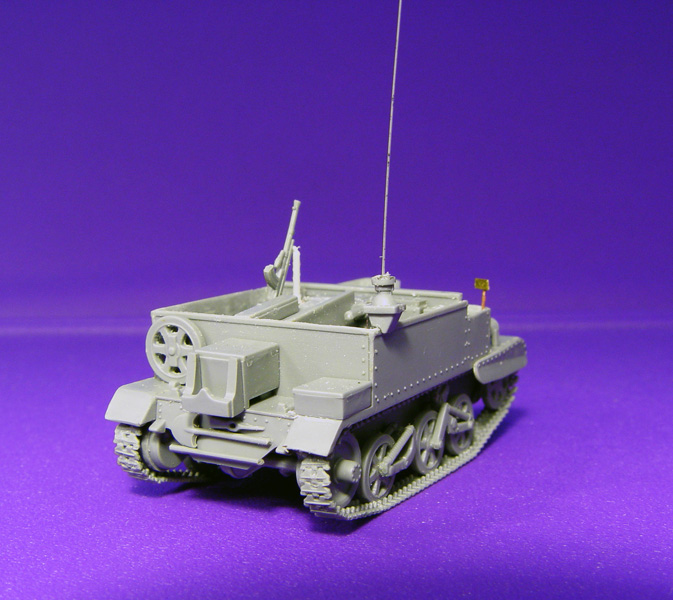
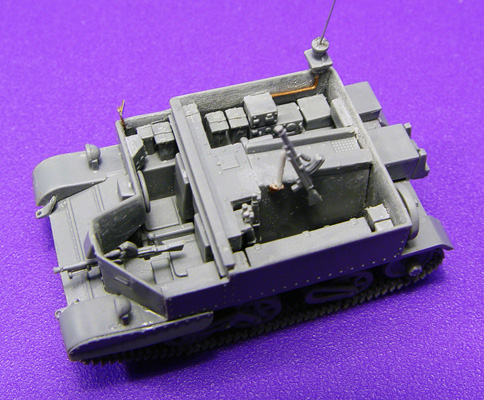
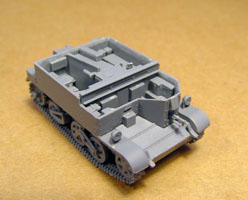
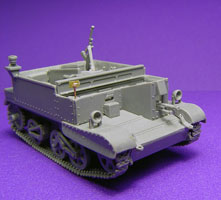
Finishing the out-of-the-box Mk.I kit
The model kit finishes into a beauty.

| 
| 
|
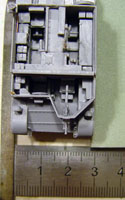
| The almost complete out-of-the-box model, with antenna base and fenders, still to be put on.
The four boxes and the 2 Bren guns are spare parts.
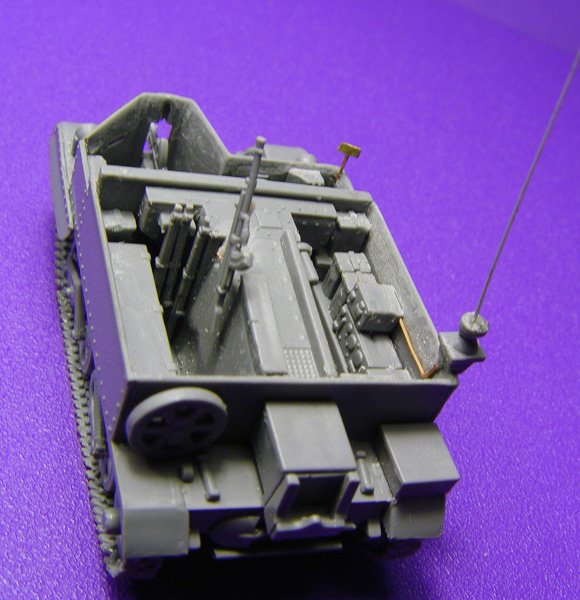
|
Detail is exquisite.
|
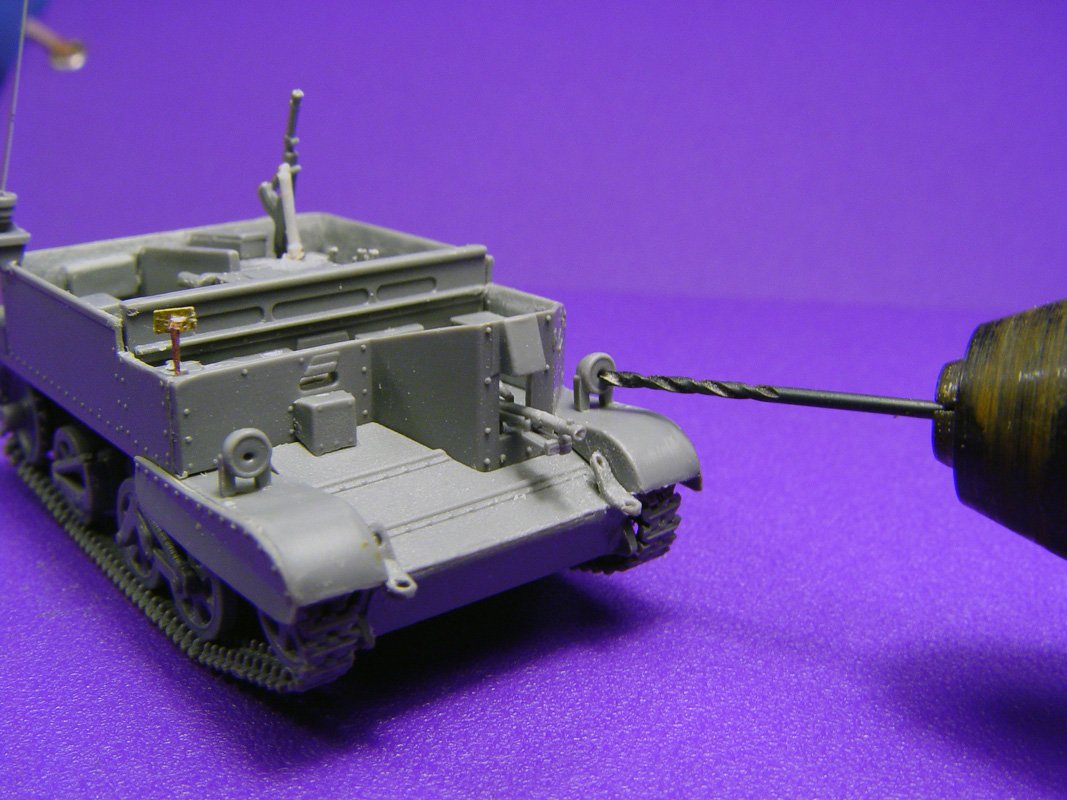
See how the front tow hooks and head lamps are crying out for some drilling.
|
 |
 |
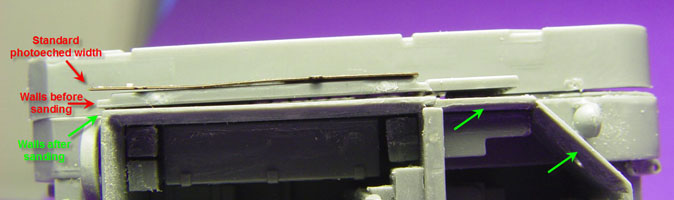
| Some wall thinning has been done at this stage. |
This picture shows the upcoming enhancements. The radio antenna base is fine but side walls require heavy thinning.
|
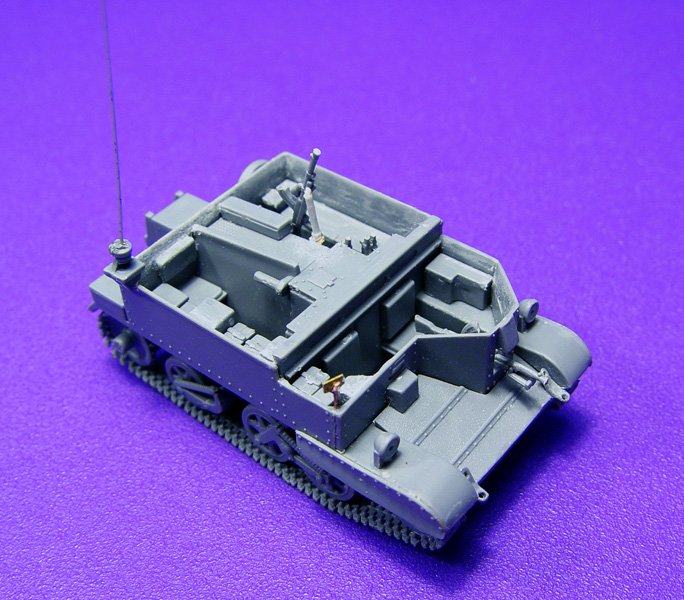
Extra detailing
To increase the detail level further I added some small modifications, although the kit itself is complete enough in this respect.
| 
| 
|  |
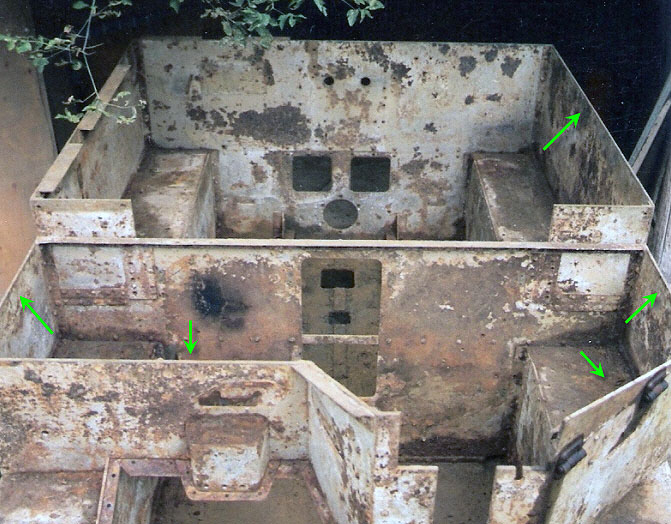
| Thinning the side wall is a must with this kit. For comparison purposes I put the unassembled side wall
from the other Carrier alongside the wall of the finished kit. While I achieved certain degree of thinness, it is still far from that of a photo etched piece.
However at this point the model looks good. The varying degrees of thinness (green arrows) are quite imperceptible on a naked eye. |
This picture shows how thin the wall is on a real vehicle.
|
In order to hollow out the headlamps the motor tool was very handy.
|
Finished headlamps, ready to be painted silver and filled with some glossy stuff to recreate the glass.
|
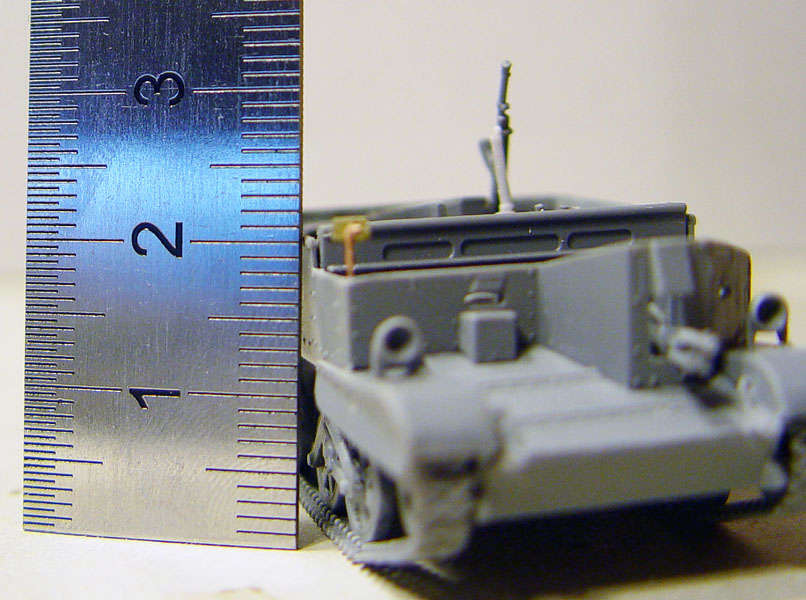
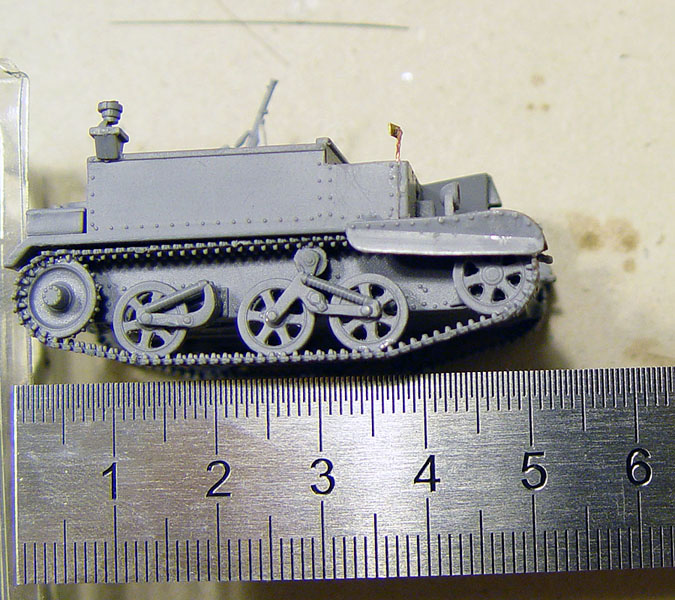
Size & comparison
The IMG scales to 1/72 quite well. Due to the difficulty in making a precise measurement, a half millimetre, plus or minus, would be more than acceptable.

| 
| 
|  |
 |
 |
|
Height: 2.2cm; 2.2*72=158cm
Real vehicle size: 160cm
|
Width: 2.85cm; 2.85*72=205cm
Real vehicle size: 210cm
|
Length: 5.2cm; 5.2*72=374cm
Real vehicle size: 375cm
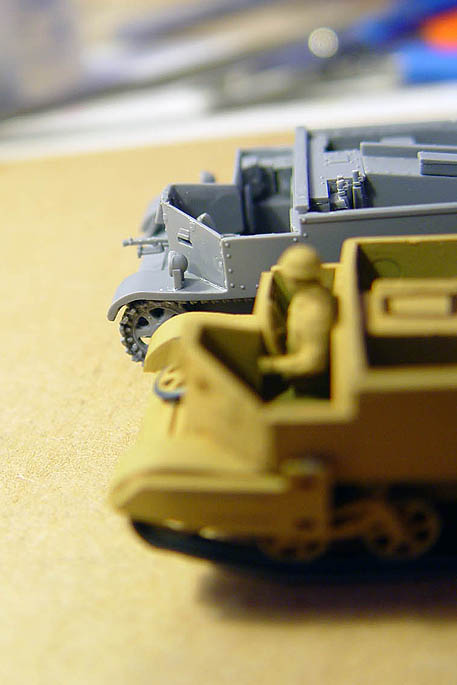
| As you can see the IBG newcomer is sensibly bigger than its 1/76 scale Airfix counterpart. |
I miss the bonus soldiers that came with the Airfix or Matchbox oldies. |
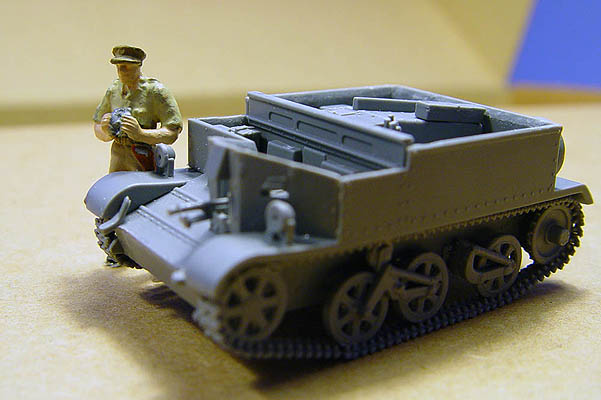
An officer from the ESCI 25pdr kit standing next to the IBG Universal Carrier.
|
Finished Mk.I model
I hope to soon have it painted in a desert scheme.
Conclusion
This is a must build for any modeller who enjoys Commonwealth AFVs. A vast improvement over the old Airfix kit, it depicts
with fidelity the ubiquitous Universal Carrier.
Pros:
- Excellent model with a fair price for its quality but maybe not so fair considering its small size.
- Good fit.
- Excellent box art, instructions and decals.
- Superb casting with almost zero flash.
- Many weapons for the spare parts box.
Cons:
- Fiddly track construction which will be time consuming.
- Side walls, as well as fenders and front hooks, are much too thick. Sanding them down will not be difficult but it will be time
consuming, even with the help of a motor tool.
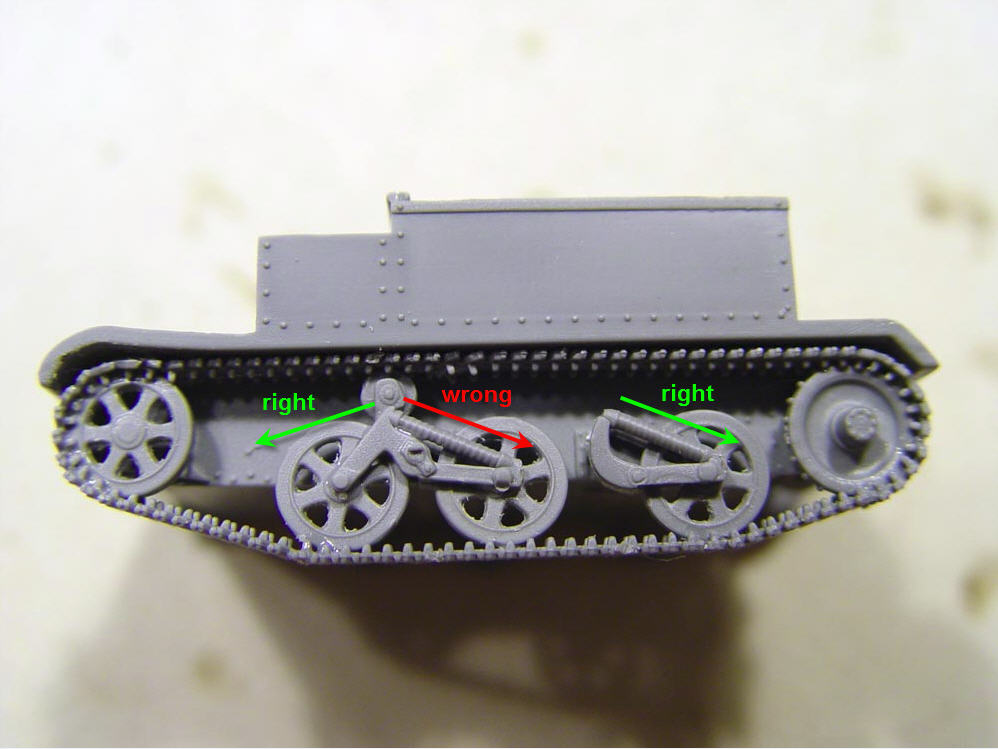
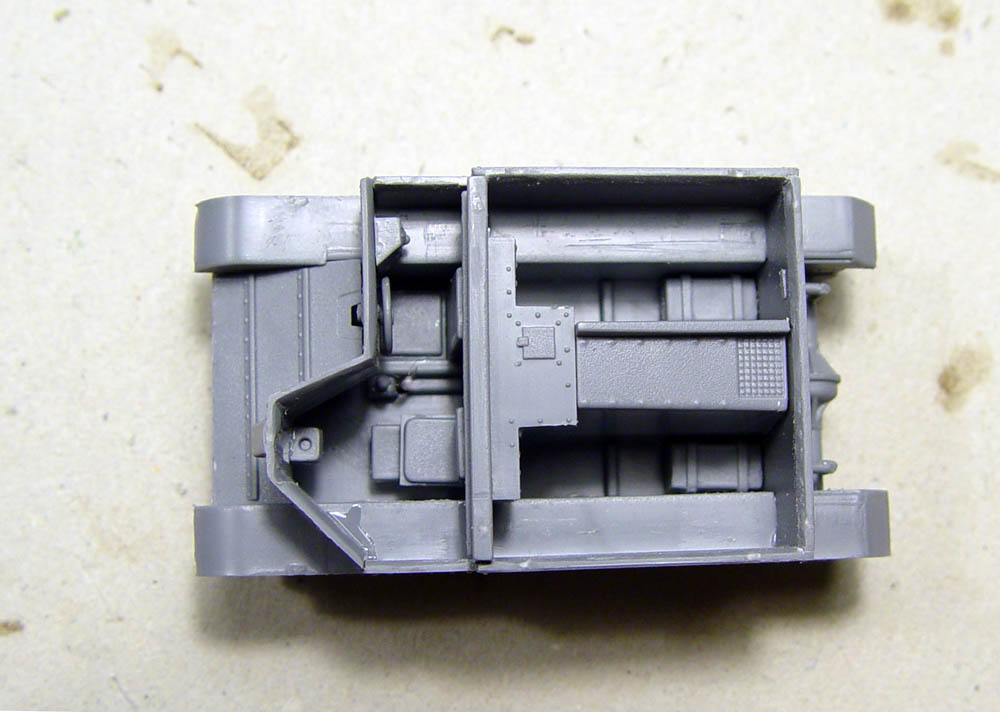
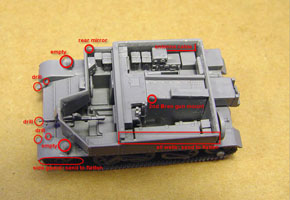
- Instructions may indicate what are the meaning of some pieces, since there are many boxes and other parts
inside the Carrier which are not obvious. Also box art on Mk.I is inconsistent with their instructions: it shows the antenna
and the spare wheel in a different position, both of which are correct and should be depicted as options on the instructions.
- No crew provided, which anyway will be difficult to insert, especially the driver. It will be interesting to see how the
1/76 scale MMS British Carrier crew will fit.
- While three Bren Guns are provided, only one is used. Since it was common to mount a second Bren on a AA mount, this mount should have been provided for one of the remaining guns.
I'll score these kits from IBG an 8.5 out of 10.
References
|