IBG Bedford QLD and QLT

Kit: IBG # 72001 - 72003
Review Danilo Carli 172normandyafv(at)gmail(dot)com
Edited by F. Giovagnorio


Picture from Henk of Holland website; used with permission.

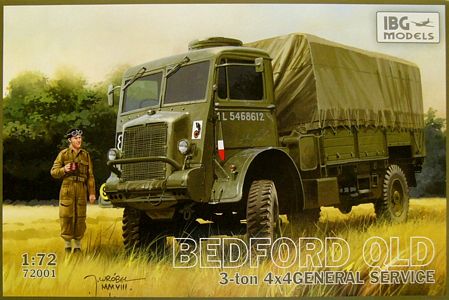
To have a 3 ton British lorry in my 1/72 scale plastic kit collection I had little choice. Between the types which were used currently there is just the Bedford QL, aka “Lorry, 3-ton, 4x4, Bedford”, made by IBG. It had a cab designed over the engine in a fashion still widely used today and common to the other lorries of its family, the Fordson WOT6, the Austin K5 and the Karrier K6. Behind the cab, different bodies for different purposes formed the QL family, sometimes identified by a third letter:

* QL 6pdr portee – it had a soft top cab. It transported a 
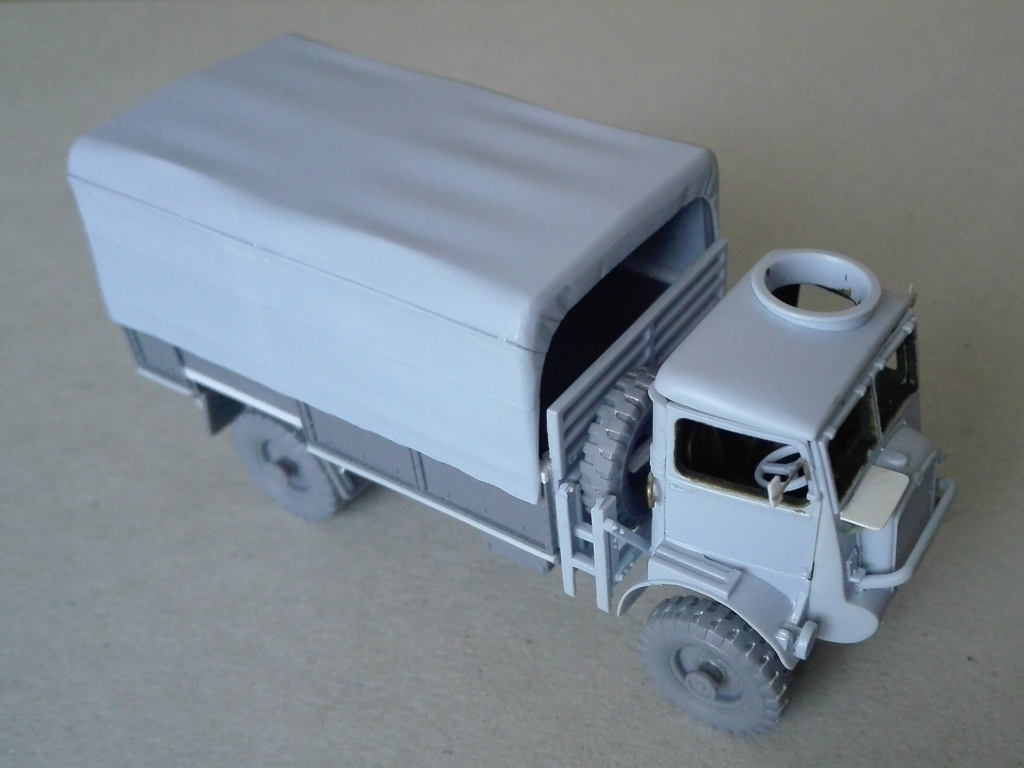
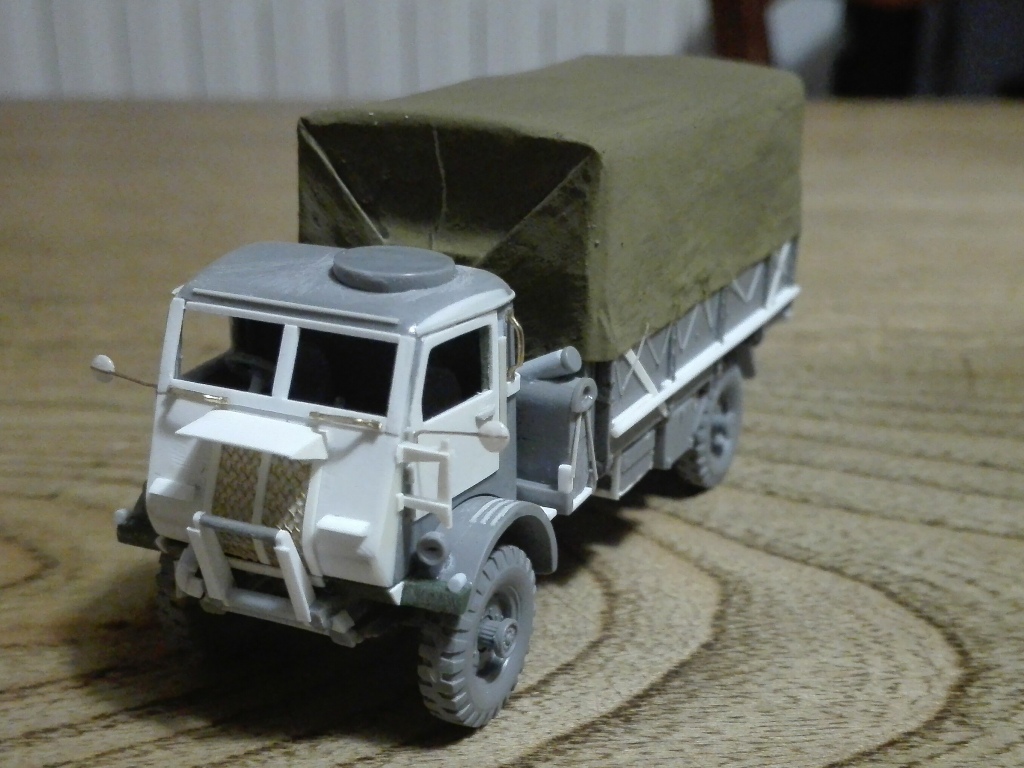
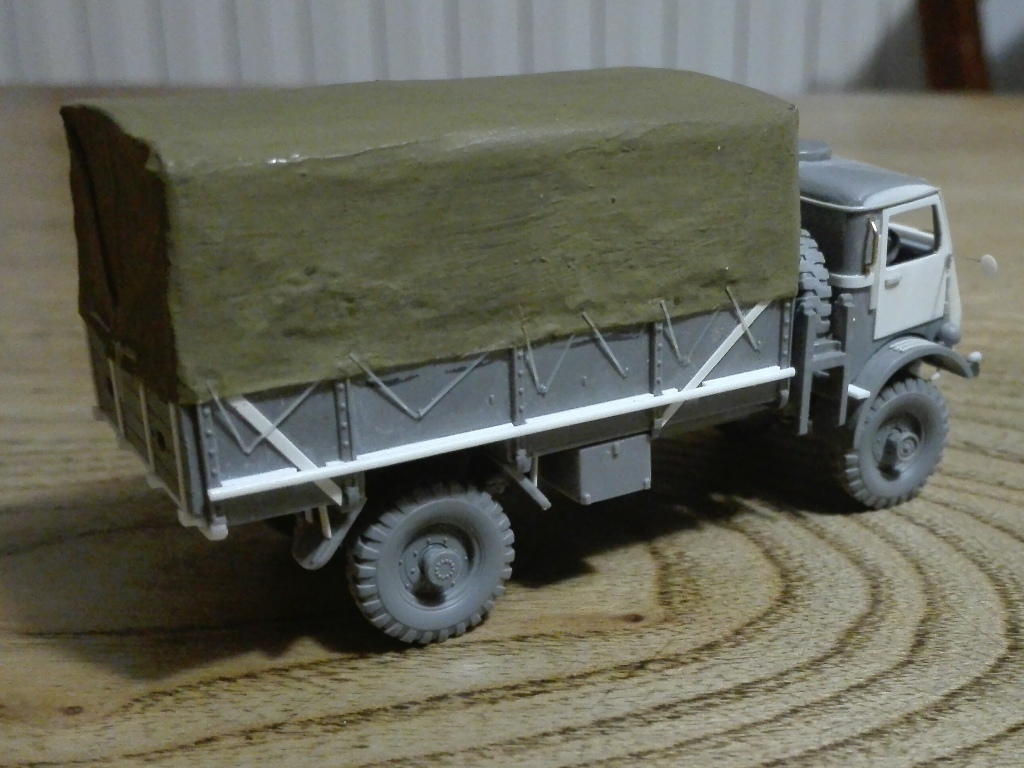
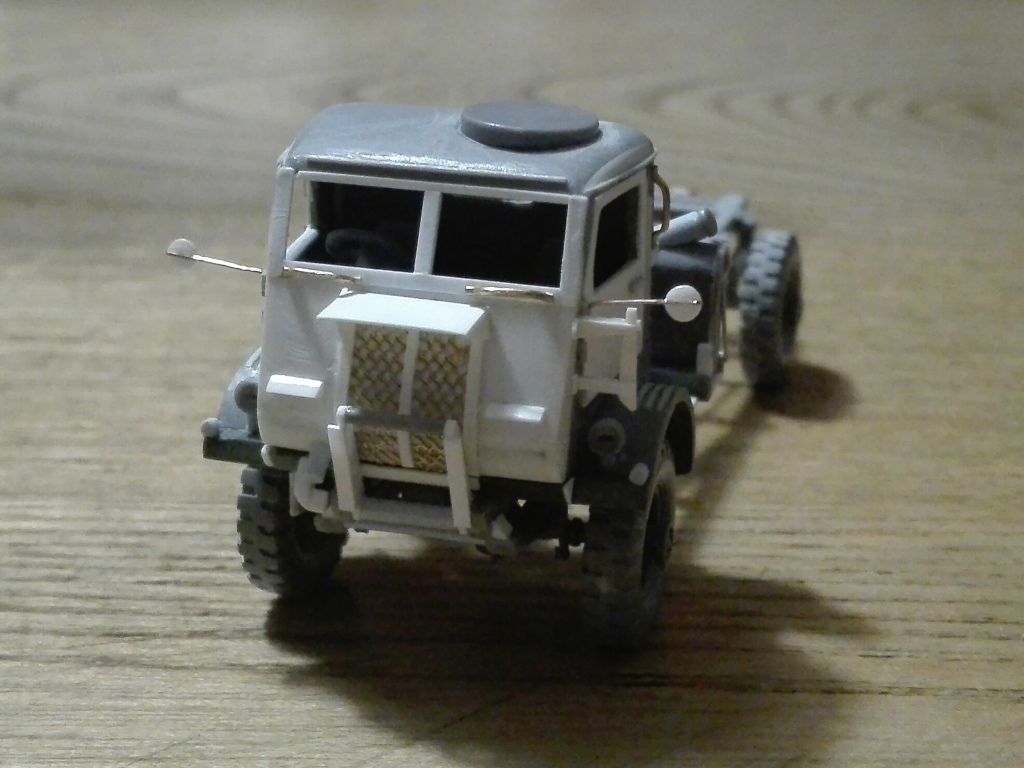
6pdr that could fire forward on a modified flatbed.
* QL fire tender (see IBG kit # 72005)
* QLB – was a partially closed body tractor for the Bofors Light AA. (see IBG kit # 72004)
* QLC – was used as tanker, for special bodies and to tow semitrailer as articulated lorry.
* QLD – was the General Service lorry. Is the kit # 72001.
* QLR – was a closed body radio vehicle. (see IBG kit # 72002)
* QLT – was a troop carrier, the flatbed was lengthened as well as the chassis. It the kit # 72003.
* QLW – it had a tipper flatbed body.

Note that:
* The QLB and the QLW rear chassis was shortened by 12” (304.8 mm = 4.2 mm) after the rear spring hanger, ending 4” (101.6 mm = 1.4 mm) after the rear spring hanger.
* Both QLB and QLW had the winch.

Being made by 1941 until 1945, this lorry can be found in North Africa (where it was used also as 6pdr anti tank gun portee), Italy and Europe in British and Canadian service. Some were sent also to USSR. At the first glance, as for the IBG Universal Carrier I had reviewed, looking at the tiny pieces number also this kit could seem a 1/35 scale model. The kits I’m writing about are composed by two dark grey moulds, a transparent foil with the windows shaped printed (nice!), the decals set and the instruction. A lot of pieces compose the cab and the chassis while minor attention was dedicated to the bodies. The first impression is very good and apparently everything is ok; anyway during the cleaning of the pieces something didn’t look well. Although the pieces are flash free, I found some ugly deep sink marks on the axles (which are a bit thin) and on the fuel tank. During dry fitting the “face” of the truck seemed to be stretched. Drawings and photos comparison enhanced the problem and the windscreen looks having something wrong. The cab rear corners looked little rounded, the doors are too much flat and the rear plate deepness is short, resulting in wider doors. Close observation revealed other critical points, such as: the radiator mesh, the seats (which need to be reshaped), the thick fenders without moulding and the shallow body sides which miss some details. I knew that only the IBG was available on the 1/72 plastic kit, but when bought them my supplier told me to take a look at the Airfix kit too: “it is in 1/76 scale, but look very nice!” effectively it was and I bought it too, thinking to make it despite being a little smaller. Nicely the Airfix kit contains both lorries: a QLD and a QLT. Examining them together, I could appreciate how most of Airfix details looked better to me. Furthermore almost immediately I realized they had some dimensions very close despite the different scale.


Bedford QL

1/72

1/76

Length

19’ 8”

83.3

78.9

Length *


81.7*

77.2*

Width

7’ 5”

31.4

29.7

Height

10’

42.3

40.1

Wheelbase

143”

50.5

47.8

Tyres

10.50x20

15.3x4.3

14.5x4.0


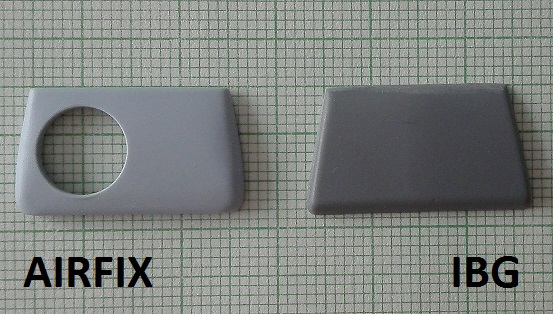
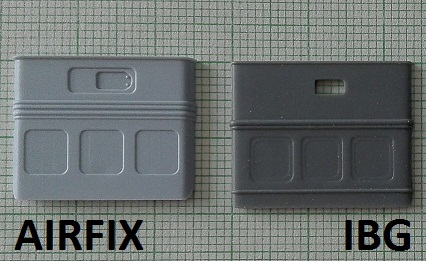
About the overall length measurements I took them on models still missing the radiator brush guard, which gave a little shorter length. According to the drawings I used, IBG resulted a bit short (not counting the rear chassis endings which wrongly slightly over hanged the tailgate) while Airfix resulted being slightly longer despite dry fitting don’t allows precise measurements.

The first surprise came when I compared the various parts taken from the two kits. Taking a look at the photos one can see the kits have close dimensions (and in some measurements Airfix is a little bigger!). I tried to understand if IBG was undersized or Airfix was oversized. Clearly the thing can be appreciated in larger measurements, because the 5% of 10 mm is 0.5 mm and smaller items are quite identical. So I took some measurements and compared to the drawings I had found.


Cab

1/72

1/76

IBG

Airfix

Length

20.5

19.4

20.2

19.8

Cab width

24.4

23.1

23.6

23.0

Width

30.5

28.9

29.4

29.0

Height

17.2

16.8

18.0

16.9


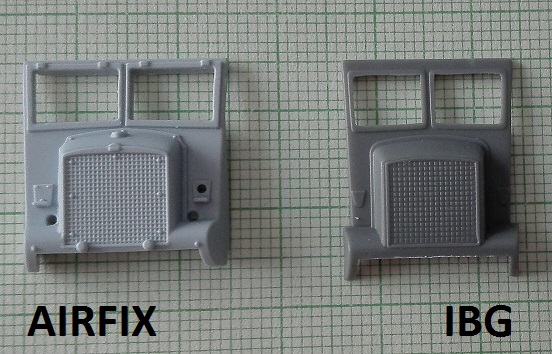
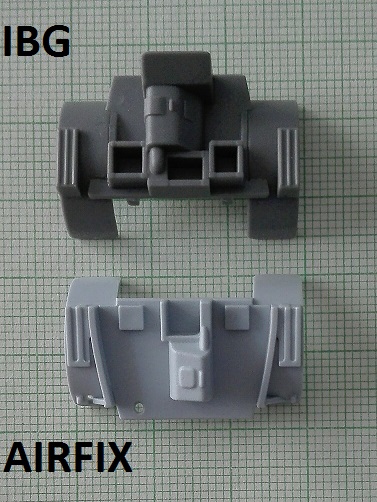
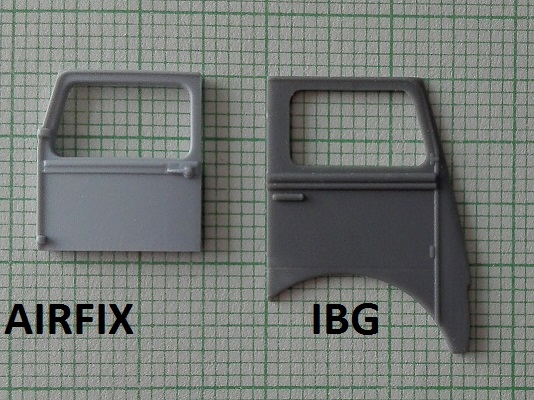
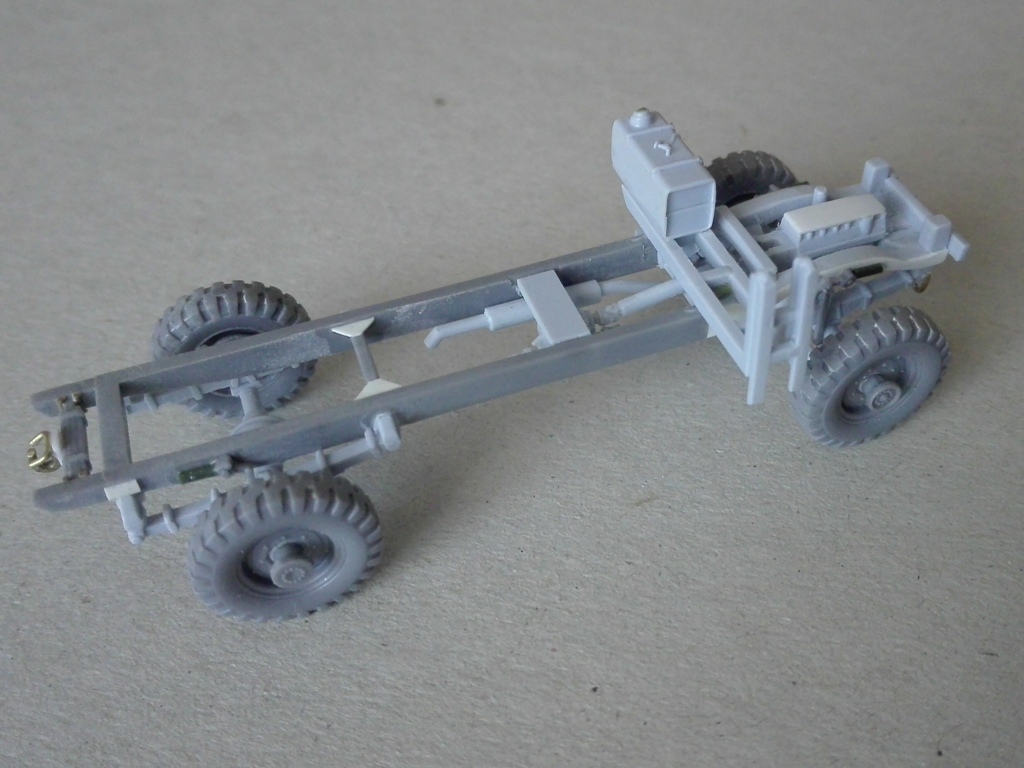
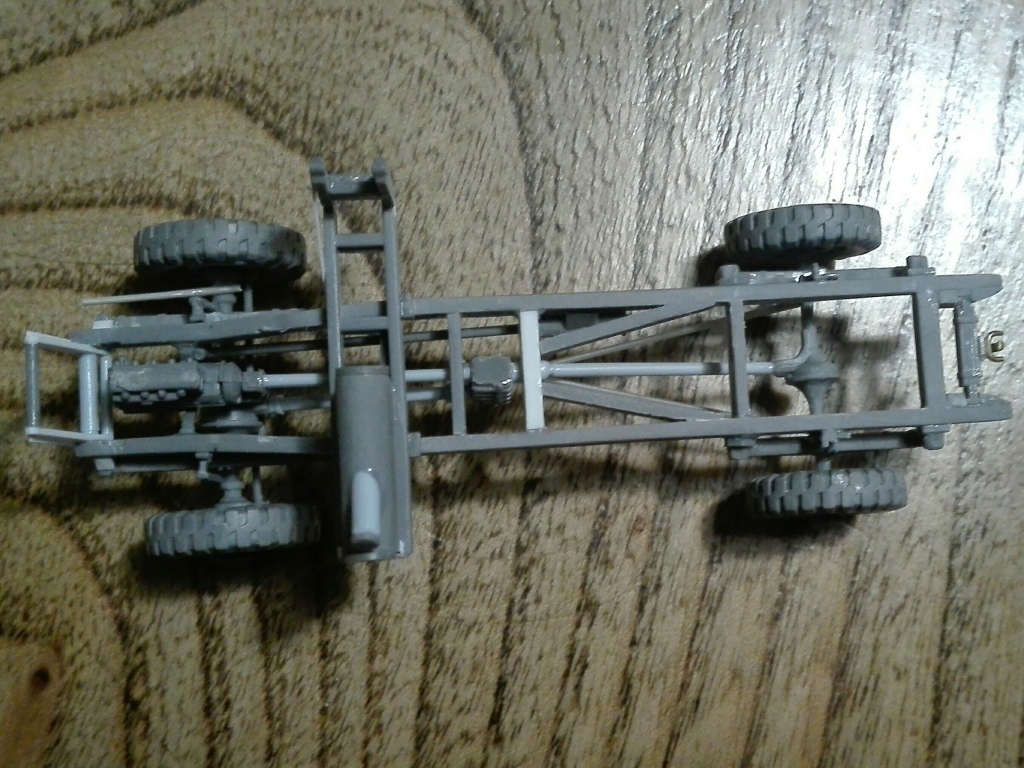
Measurement comparison told me the cabs were very compatibles (height was measured from the fenders top). While the Airfix was very close to 1/76, the IBG was about a millimetre narrower. Furthermore the IBG front is even narrower (19.00 mm, Airfix 21.00 mm) and being a millimetre taller its wrong look is enhanced. The other dimension differences between the two cabs were within the millimetre. Airfix cab is also more detailed, having the radiator cap, the Bedford badge, the windshield hinges and others.

Handling them, I found another critical piece was the chassis. Again the Airfix part looked better to me, but a dimensional problem arose. The width difference was about the 12.3%, too much for the scale differences.


QL chassis

1/72

1/76

IBG

Airfix

Length


78.3

74.2

Width

12.2

11.6

13.2

11.4

Wheelbase

50.5

47.8

50.0

47.7

Tyres

15.3x4.3

14.5x4.0

14.2x3.7

14.0x4.0


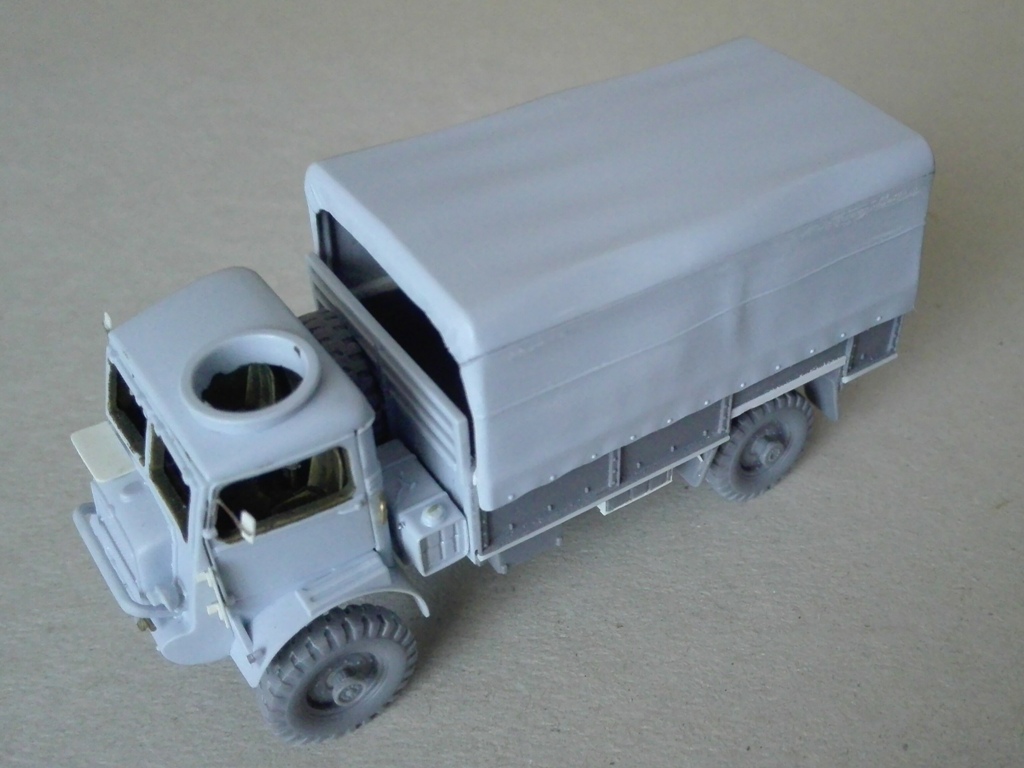
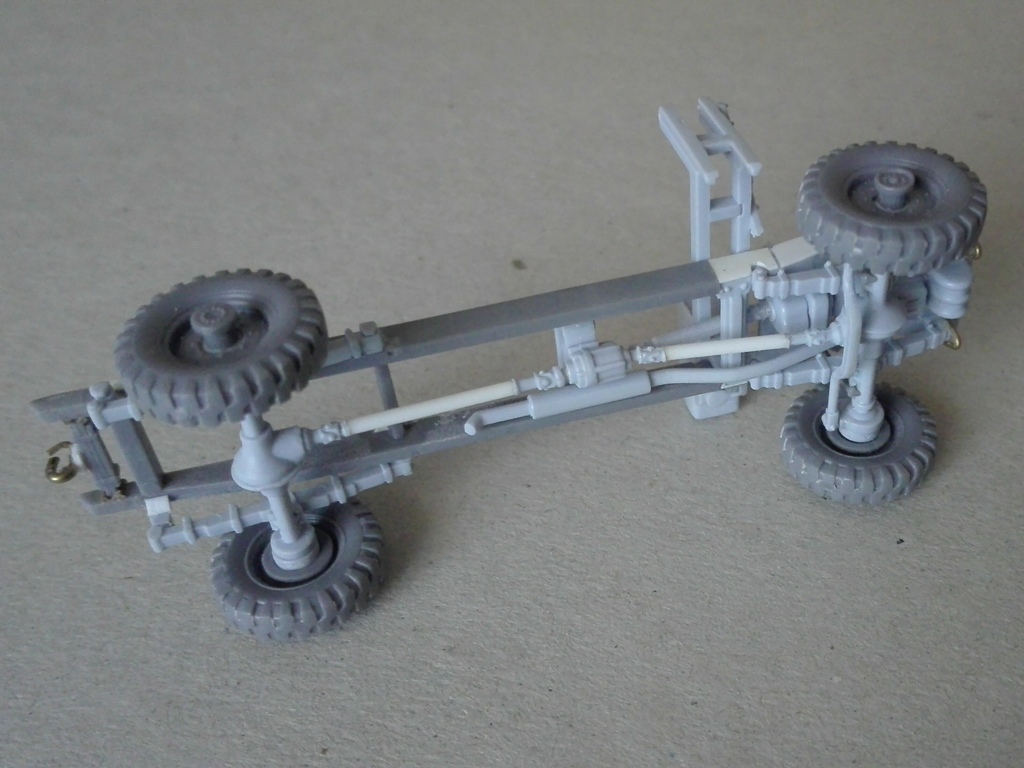
Although I looked for it, I wasn’t able to find the needed dimension. At the end I wrote to some restored QL owner asking to measure it for me (I don’t want figure what the reader of the mail could have though about me). Nobody but one answered me. Very kindly Mr. Ian GLOVER of The Bedford Enthusiast Club sent me the correct dimension: 34 5/8 (34,625) inches. The measurements gave the Airfix very near to the 1/76 and just 0.8 mm narrower than the 1/72, while the IBG width was 1.0 mm oversized.

The reason I was interested in such finicky matter was because also the IBG axles didn’t look well to me and had very ugly sink marks, while the Airfix one were nicely moulded and the conclusion of every comparisons led me to the idea to mate the Airfix kit and the IBG ones to have two models that can satisfy me.

I have to say that I don’t like this way to modelling unless I have to make a different variant not available in kit, anyway in this case I find compulsory the use of two kits to have one single model.

To make my lorries, an interesting info and very good photos of vehicles under restoring source can be found on HMVF site.

I’ve attached some photos of a third kit, a QLD I’ve converted in a Fordson WOT6, to shows how use the kit tarpaulin and also how to use the kit in an optional way (although not for beginners).


QLD


This was the GS variant. 25,704 QLD were produced out of a total of 52,248 QL. During production, some variations were introduced. From a 1/72 modeller point of view, the most notable I found are the following:

  • A tilt replaced the cab hard top for 6pdr portee use.
  • By mid 1942 the vertical rod present in the middle of the radiator inlet was discontinued.
  • By mid 1942 the circular name badge was replaced by a small rectangular one.
  • During 1942 the upper front mudguard supports were introduced.
  • By late 1943 (chassis # 26372) wheel hub sling flanges were introduced, but in 1/72 this detail can be ignored.
  • By late 1943 (chassis # 29117) was introduced the cab roof hip ring.

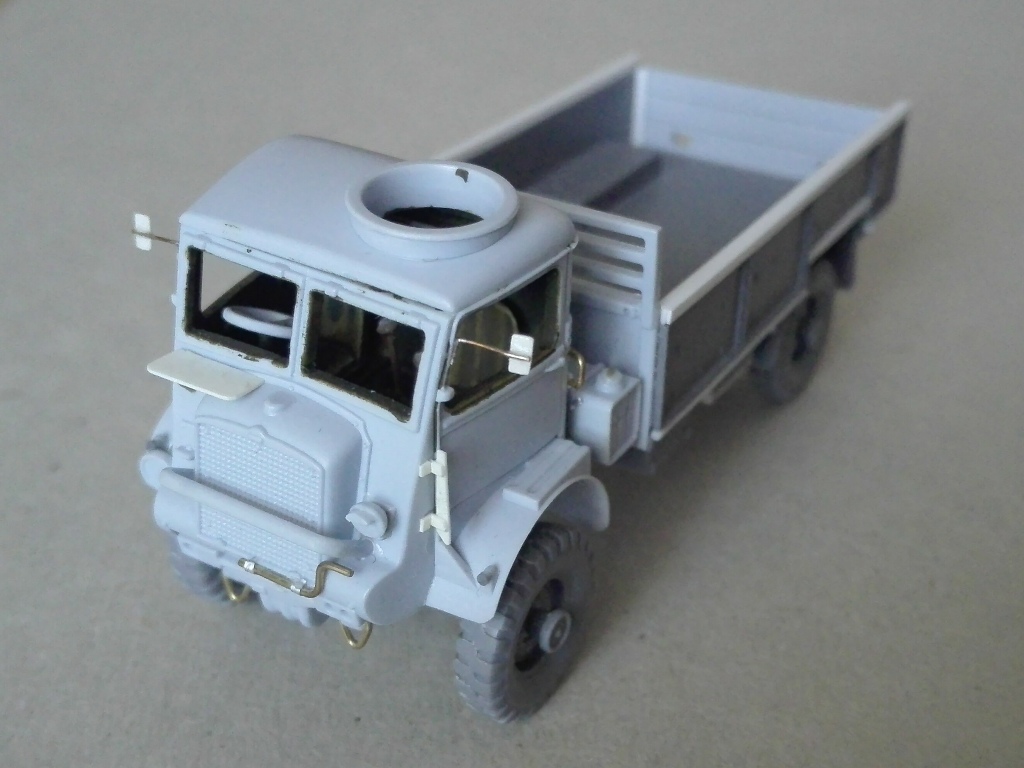
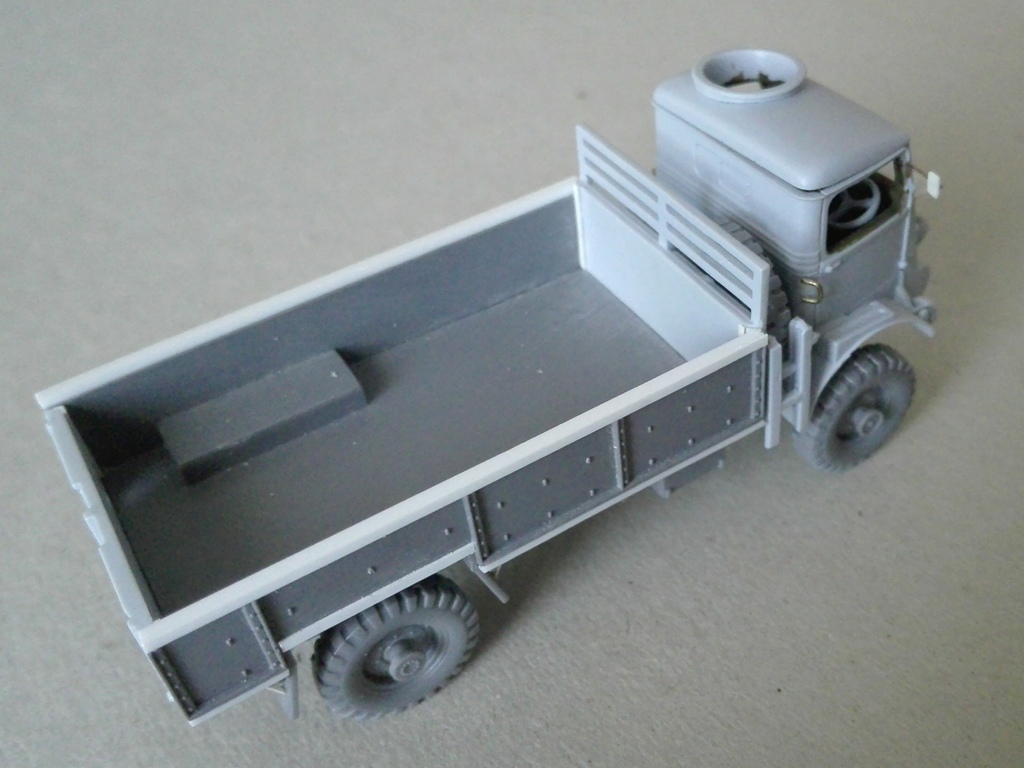
On the basis of these features, the IBG QLD looks to be a hybrid: it has the late flanged hubs and the early fenders without the supports. The hip ring (closed by the fabric cap) is supplied on a closed roof and it could be considered as optional.

The standard general service QLD had a flatbed body with squared wheelhouses protruding in the floor. Other variants had its own flatbed body, such as the QL gun portee, the QL fire tender (see IBG kit 72005) and the QLW. Aside the standard GS flatbed, a couple of variant can be seen.

  • The “US type steel” body fitted to 2.000 lorries. It didn’t have the wheelhouses and had higher tailboard (WD batch should be L5303008-5305007).
  • A lengthened wooden body was fitted to 388 ex 6pdr portee rebuilt as GS in 1944 (the cab soft top was retained as well as the double tanks under the flatbed, WD batch L4916925-4917312).

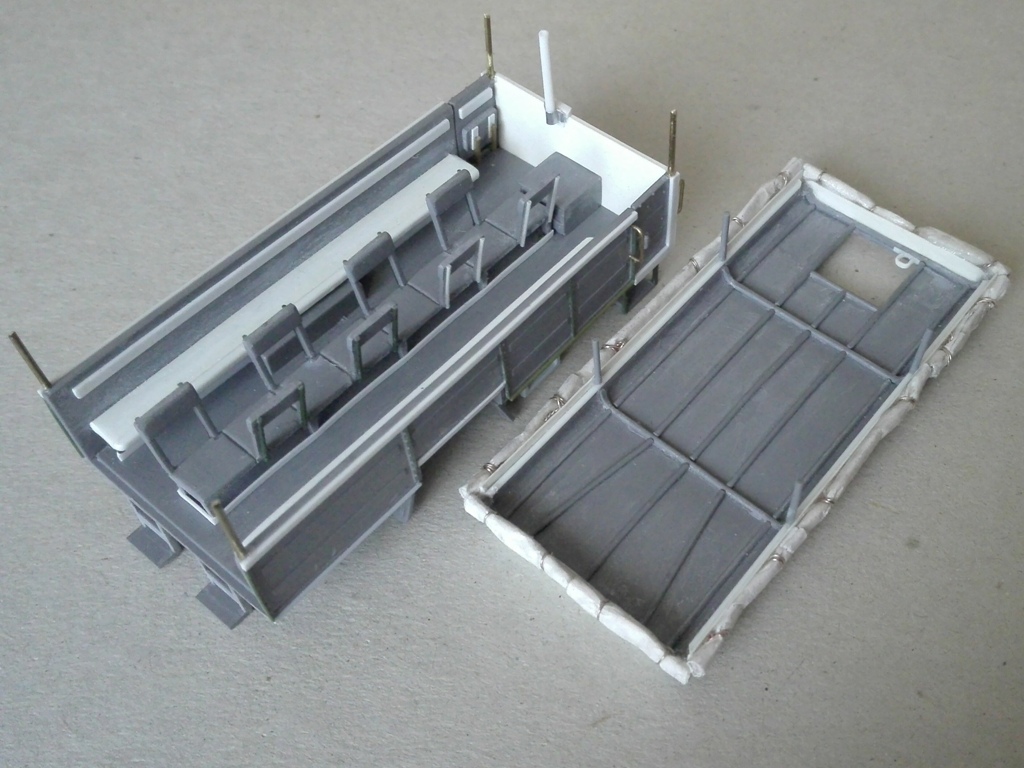
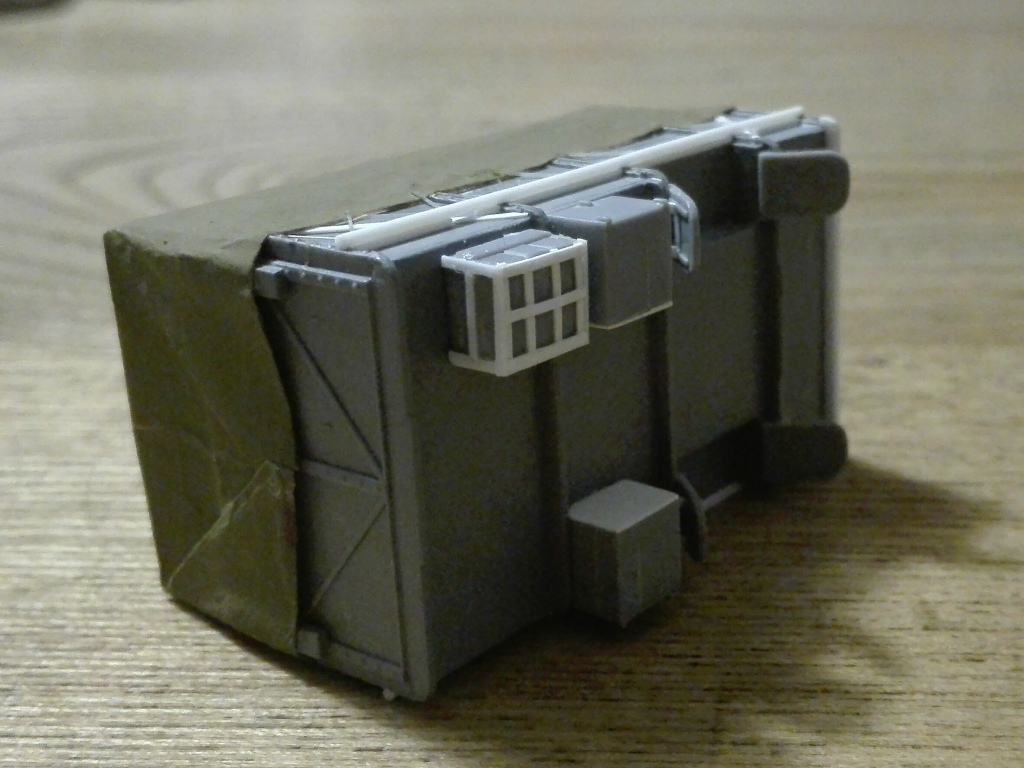
About the standard flatbed body, close observation of the details of  WW2 photos and of restored lorries photos I’ve could see, seem indicate some slightly different patterns were produced, I suppose because there were different makers. Apart the wooden bodies, I’ve seen the following steel body variants:

1.      Side frame made by raised vertical “L” rods and flat horizontal strips. The vertical rods run under the lower edge and had a rounded end.

2.      As point 1 with a diagonal strip in the first and last panel.

3.      As point 1 with a more raised horizontal rod which runs at the wheelhouses level with slots for the tie down rope.

4.      As point 3 with a diagonal strip in the first and last panel.

5.      Side framed by raised vertical “L” rods and horizontal squared section rods.

6.      As point 5 with the exception of the wheelhouse horizontal edge rod which was flat.

7.      As point 5. The lower edge rod had a groove.

8.      As point 5 with the exception of the lower horizontal edge rod which was flat.

9.      As point 5 with the exception of the lower horizontal edge which had an “L” rod (upper one hidden by the tarpaulin).

The tailgate could be wooden or metallic.

About the body, again the Airfix overall look appeared better to me.


QLD body

1/72

1/76

IBG

Airfix


Length

53.3

50.5

53.9

51.3


Width

30.5

28.9

30.3

29.8


Height

11.0

10.7

11.3

10.6


Wheelhouse length

14.8

14.1

14.6

13.9


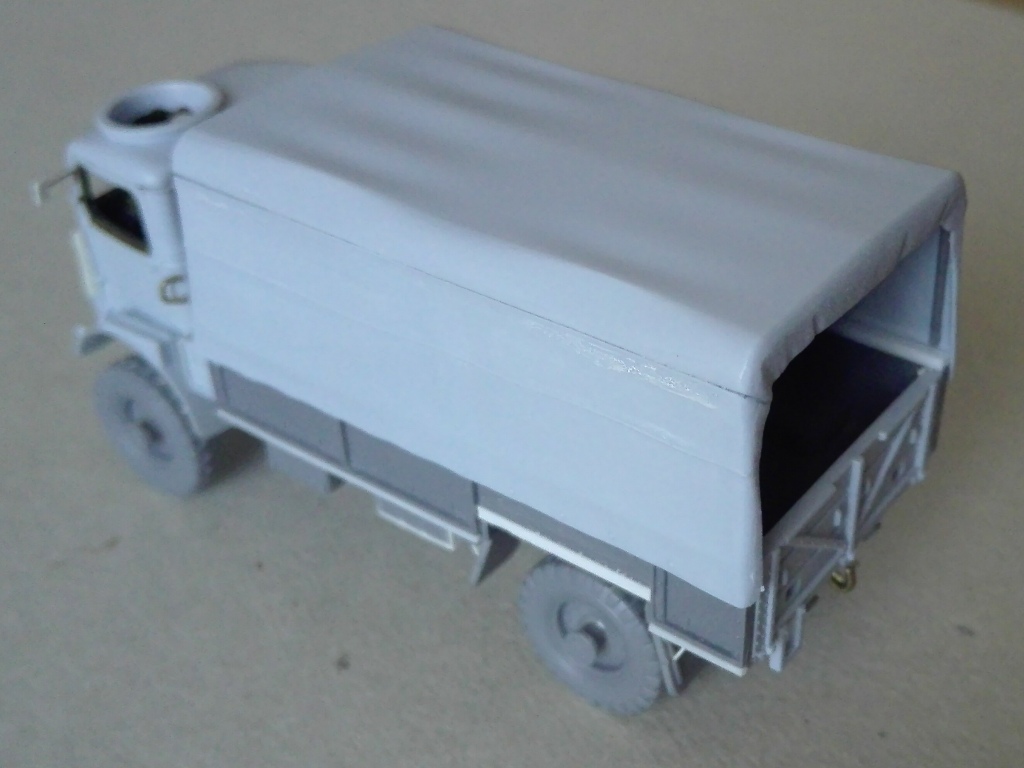
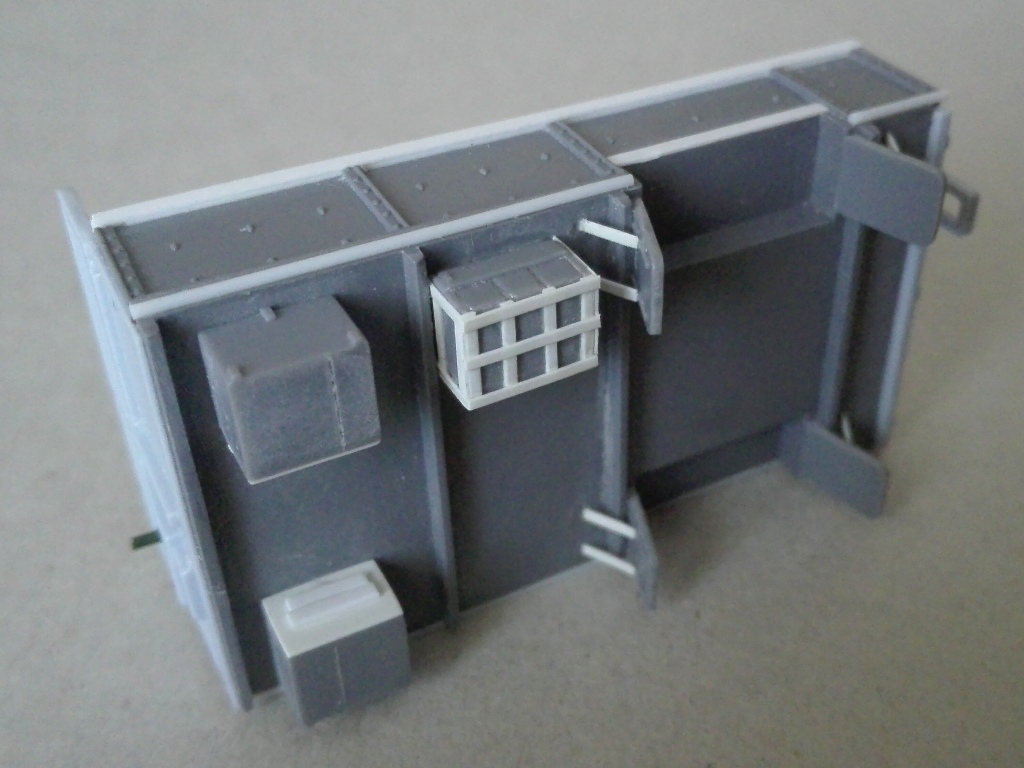
On the basis of my drawings the bodies are quiet correctly sized for both kits. The IBG tailgate is the steel type without the carved steps while the wooden Airfix one has them. The IBG body inside is totally flat, where Airfix depicts the floor planks (too much engraved) and the corner frame although the tailgate miss the inner planks lines. The details look better depicted by Airfix to me. I have to say few words about the tarpaulin too. No doubt, Airfix one is better. The IBG one looks very stiff and rigid, almost a hard top when it was a fabric cover on a “cage”. Furthermore is narrow, indeed it should overlaps the body sides while it has the same width of the panels and not of the raised frame. The front and the rear are flat without details of the openings.

I choose to make a late 1943 production QLD. Here is what I did.
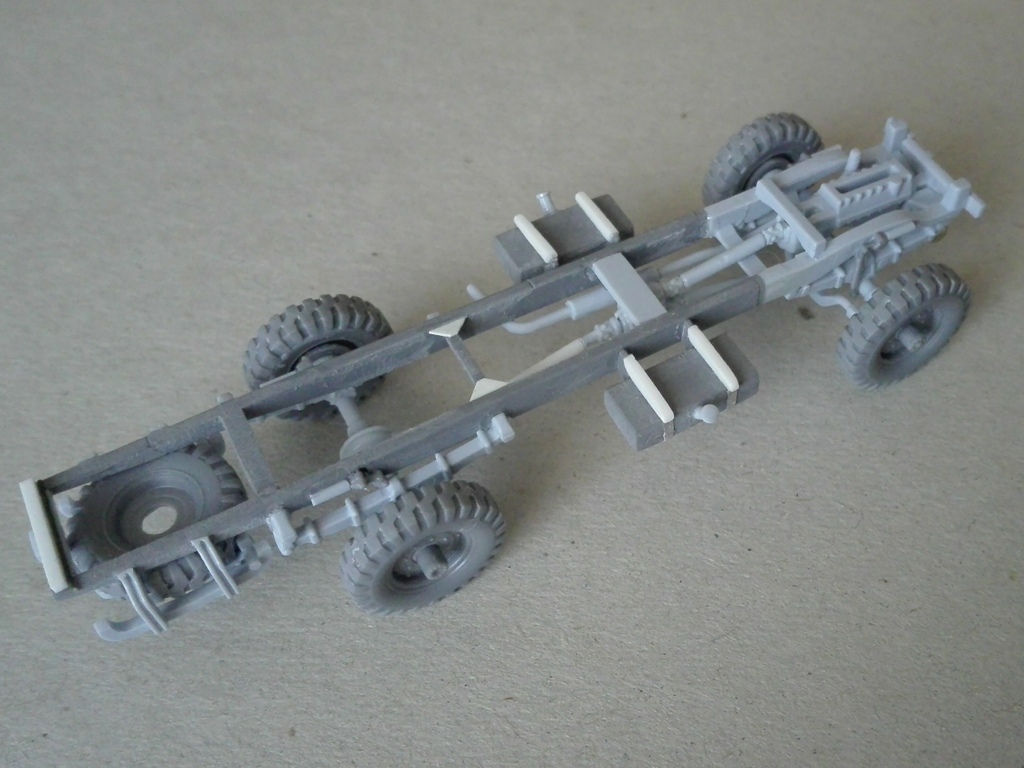
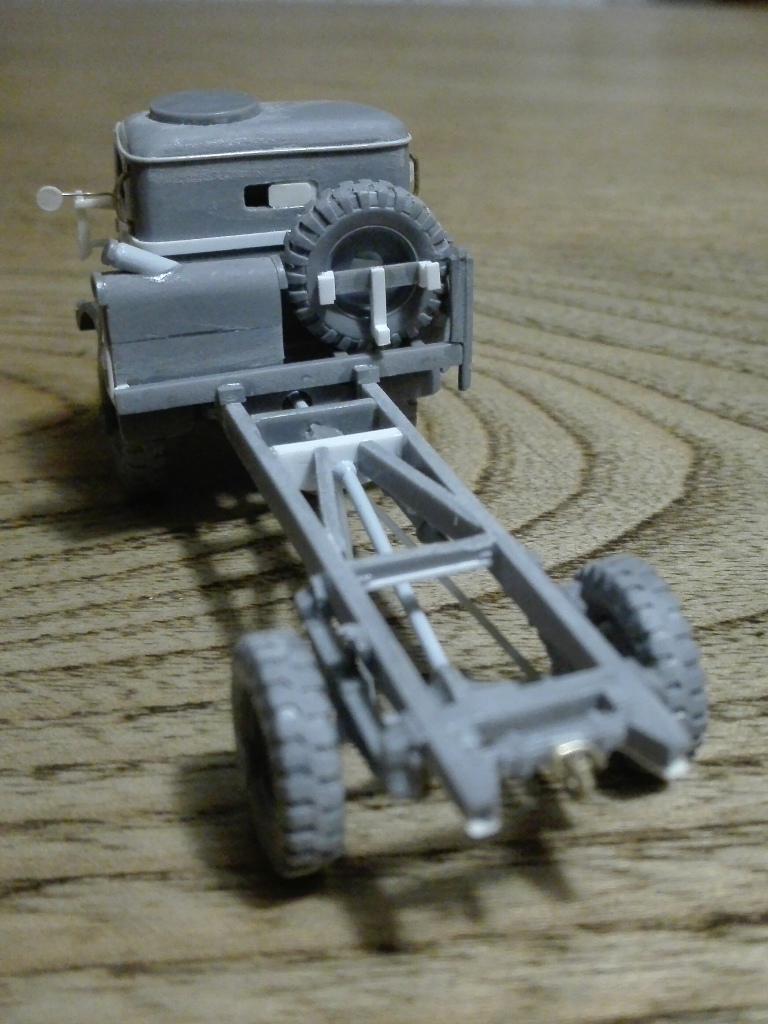
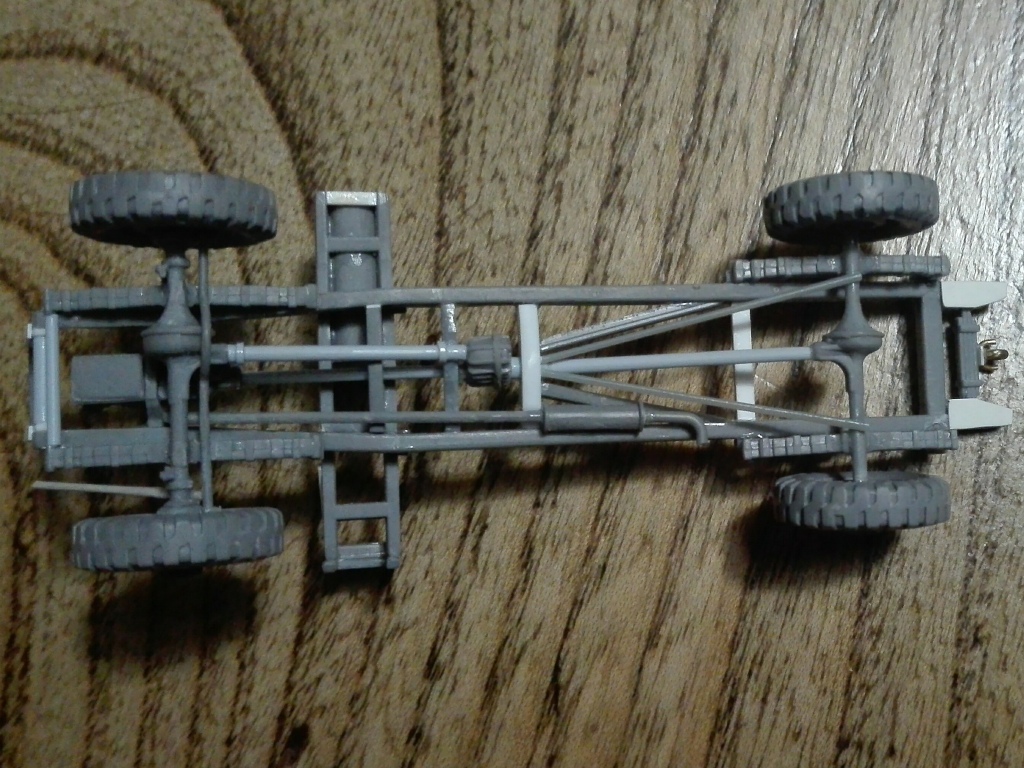


IBG/Airfix chassis

  • On the IBG chassis I cut off one of the two longitudinal rods and after having resized the width of the transversal rods to reach the wished overall width of 12.2 mm I glue it in place. Then I cut off the forward section shortening the chassis to 54.5 mm.
  • On the Airfix chassis I cut off 23.0 mm of the forward section widened it to 12.2 mm by thin plastic sheet.
  • I joined the two sections to have the full chassis. I choose this way because I find also the Airfix engine bottom better detailed and to save the way to assembly the chassis to the cab.
  • I choose the Airfix leaf springs. They don’t have side engraving; anyway look more realistic curved shape while the IBG ones are straight (and they looked a bit longer to me).
  • I shifted the transversal rod placed at the forward fixing points of the rear leaf springs. I replaced also the triangular stiffeners.
  • I added the front tow shackles using metallic wire.
  • The gear box was replaced by the Airfix part. The IBG is well made but I preferred the first one because the female interlocks for the drive shafts.
  • Also the drive shafts and the exhaust came from Airfix. They are thickest and look better  
  • I used the Airfix tank/spare wheel rack. The IBG one is simplified and is missing the folding part used to load or download the spare wheel while the Airfix one is well detailed.
  • Also the Airfix fuel tank is better made although the way to glue the two halves leaves a horizontal joint hardly to correct. However the IBG tank is very poor and has an ugly deep sink mark. I made the fasteners by thin metallic sheet.
  • In my opinion the Airfix wheels look better done, but they are undersized for the 1/72 scale. Also the IBG ones are not exactly scaled for the 1/72, but are a little bigger and have the flanged hubs introduced by late 1943 so I used them. To use them on the Airfix axles I shimmed them by punched diskettes. The spare wheel received its holder made by plastic rod engraved to have a “C” section.
  • The towing hook is badly depicted. I made it by metallic wire on a base made by plastic sheet. The “C” stopper was made by a thinner metallic wire.


Airfix cab

  • Having chosen to make a late production lorry, I used the Airfix QLD cab which has the fenders supports, the hip ring and the rectangular Bedford badge. The cab of the QLT that shares the box doesn’t and could be used for an early variant. Some ejector marks needed to be filled. As usual to me I used cyanoacrylate glue.
  • I thinned the mudguards. The reinforcing ridge near the edge is missing, but is very thin and I didn’t make it.
  • The gear and the handbrake levers are missing. I added them. I left closed the doors, but if someone wishes leave one or both opened, he must know that there was a fire extinguisher behind the driver seat. I have to point that Airfix kit has separated doors, while the IBG kit has them solid to the cab.
  • On the front right side there was a shelf where there was the gas detection panel. I made it by thin plastic sheet.
  • Just below the radiator mesh was stowed the crank handle. I made it by metallic wire and thin metallic sheet.
  • On the sides I added the handles by metallic wire.
  • On the left side there was a turn indicator. I made it by thin plastic sheet.
  • The rear view mirrors were smaller. I replaced them by plastic sheet and thin metallic wire.


IBG body

  • I choose to depict a body of the type described at point 6. I filed off 1 mm from above and glued a 1.0x1.25 mm plastic rod (1.0x1.00 + 1.0x0.25 mm) to make it.
  • As told above, I found slightly different variant of the side frame. I replaced the wheelhouses rod by   1.0x0.25 mm plastic rod while the side lower edge was thickened by a rounded one to make the pattern of the point 5.
  • The IBG steel tailgate is quite well done; anyway I replaced it by the wooden Airfix one, just to give a further personal touch. I engraved the inner plank lines and I glued the inner vertical edge plates
  • I replaced also the front side by the Airfix one which has the spare wheel holder moulded on.
  • The two belly bins rear was closed by plastic sheet.
  • The three jerrycans holder (# 54) was made by a cage which I replicated by thin plastic strips.
  • The mudguards supports were made by thin plastic sheet.
  • The frame for the tarpaulin is made by the three “C” transversal pieces and five longitudinal straight rods. The transversals would overlap the sides to go in their interlocks but are a bit tight. As far as I’ve seen the longitudinal rods must be glued inline to the forward and rearward the transversal “C” and outside the middle, not inside as depicted in the instruction. On restored QLDs and on drawings I’ve seen a bit different layout made by six longitudinal rods.
  • The tarpaulin, as already told, is unuseful as it is. After some measurements I choose to adapt the Airfix tarpaulin which compared to the IBG one is a bit shorter and larger. The results look better to me. The IBG tarpaulin can be used filing off the lower 5 mm. See the attached the photos of the Fordson WOT6 I’ve obtained converting the IBG QLD. After being glued (I shimmed it to reach the last frame position) I wrapped on it thin paper soaked by diluted white glue (I use the emptied tea bags) cut in the needed shape. Then I added the ropes by stretched sprue. The way shown was a real way to wear the generic tarpaulin proven by photographic evidence. The ropes are wrapped around the body sides in a casual way, common in many trucks.

Decal

The IBG kit depicts 6 QLD; very good but… only in Polish service! 5 are quite generic:

  • No WD number, 1st Pol. AD, 10th Mounted Rifle Rgt.
  • No WD number, 1st Pol. AD 2nd Pol. ARgt
  • No WD number, 1st Pol. AD 2nd Pol. ARgt
  • No WD number, 2nd Pol. ABde
  • No RAF serial, unidentified Polish Sqdn

Just one has a specific identity:

  • L5468612, 1st Pol. AD, I didn’t find its photo. The WD looks likely to me.

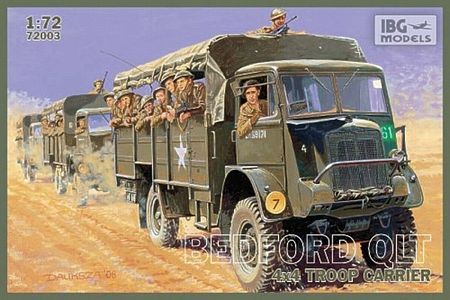
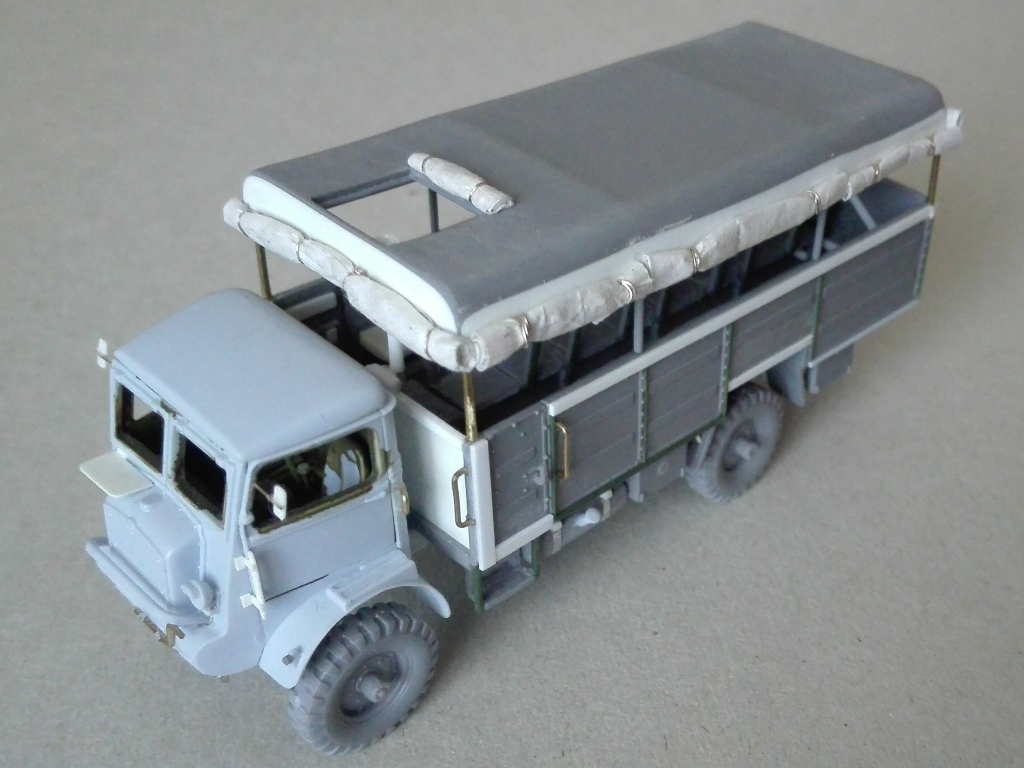
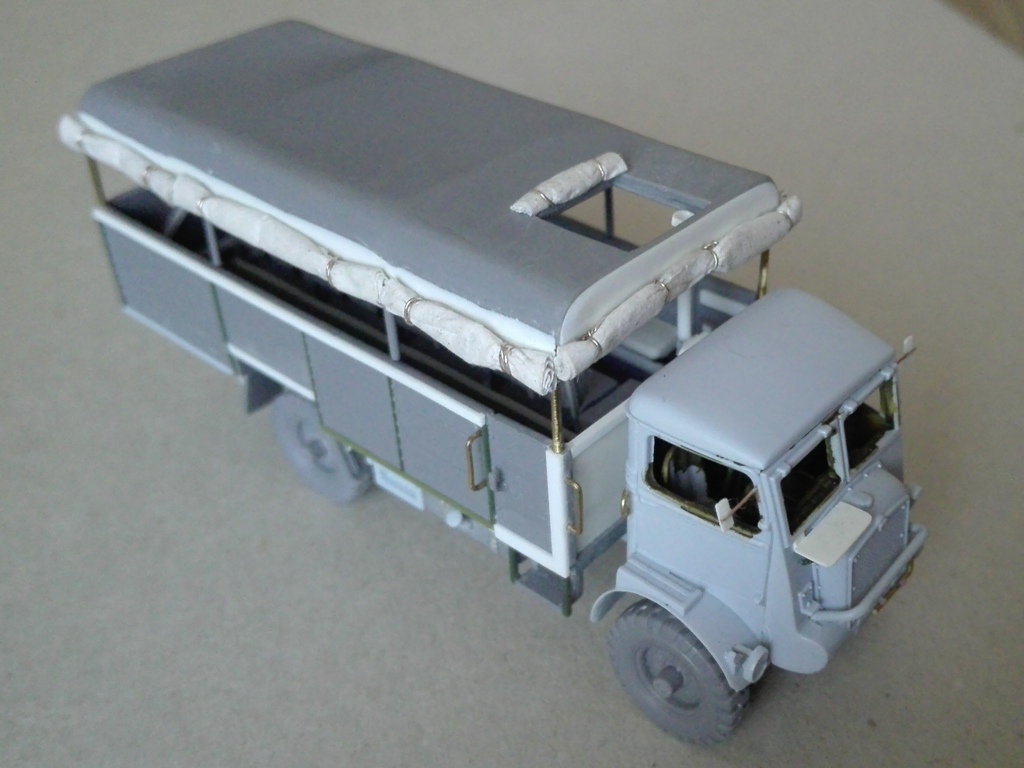
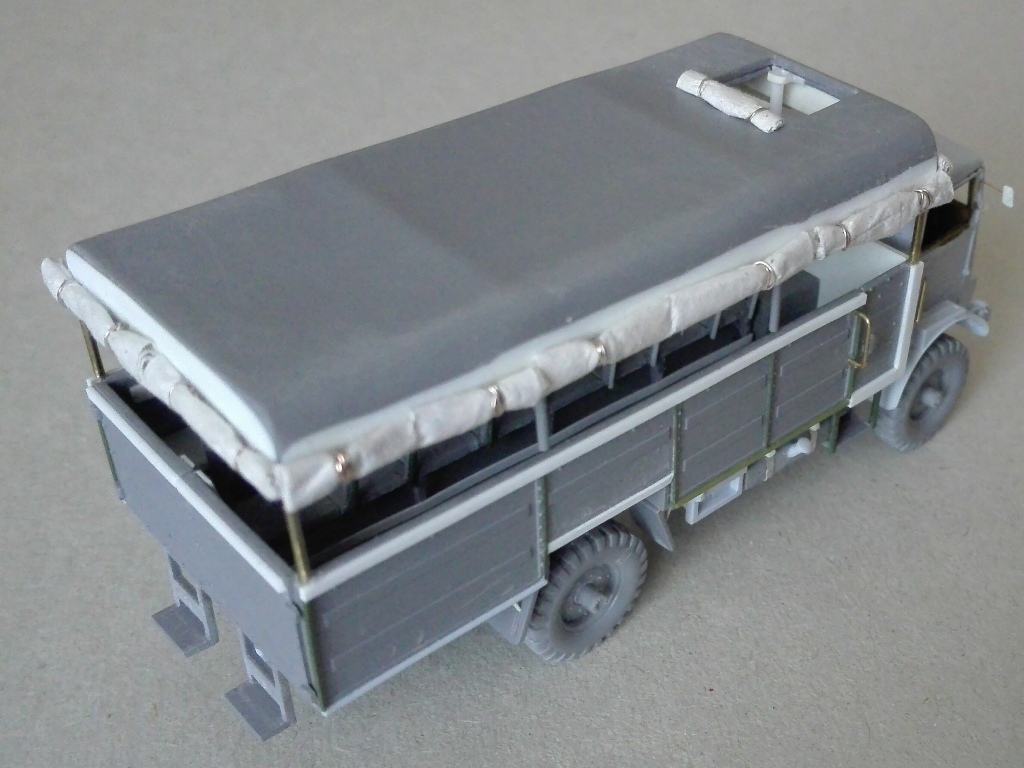
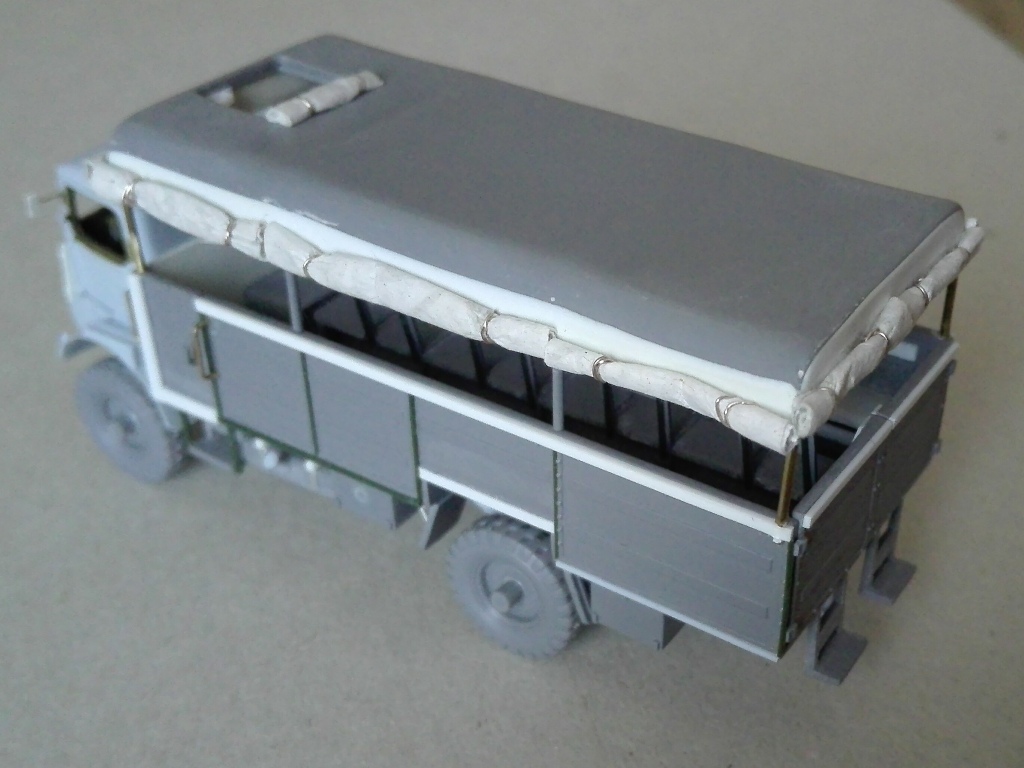
QLT


This was a trooper carrier. On the base of various sources, a number between 2,500 and 3.373 were built. I’ve found two batches numbered L559110-560479 and L560480-561979 ordered in December 1941 for a total of 2,870 troop carriers. Anyway 1,050 QLC from Contract no.V4675 were converted in QLT between August 1941 and August 1942 for a total of 3920, in theory. I didn’t find its WD numbers batch, however the QLTs L557330, L557670, L557752 and L557767 came from it. Accordingly to the production period, the QLTs I’ve seen didn’t have the upper front mudguard supports and the cab roof hip ring, anyway I can’t exclude some  lorry could be updated during deep maintenance. Airfix depicts correctly the QLT cab. For the cab and the chassis I made the same job described for the QLD. The lengthened body, built by four producers (1,700 by Austin Motor Co. and others mostly by Marshall of Cambridge), needed a lengthened chassis. To keep it, Bedford used the standard chassis with bolted on extensions. Basing on the available photos a couple of variants were made.

  1. Pressed stiffeners with squared endings and “I” side doors forward frame
  2. As point 1 with the exception of the “I” frame which became an “L” with vertical edge.
  3. As point 2 with the exception of the wheelhouse horizontal edge rod which was flat.
  4. Pressed stiffeners with rounded endings and “L” frame with sloped edge.

An interesting variant was the closed body QLT TEV (Corps), where the acronym meant Terminal Equipment Vehicle, which used the same QLT flatbed and lateral sides (not the tailgate) on which was added the upper closed body (WD numbers 
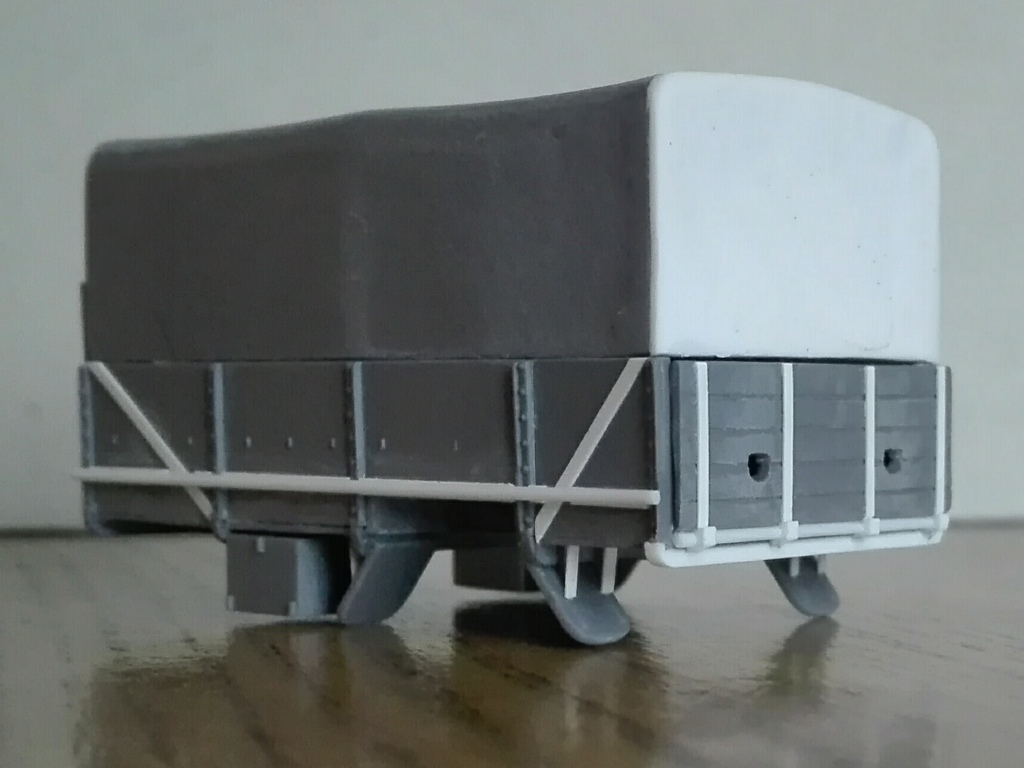
in the L5303008-L5305007 batch).

IBG depicts the QLT variant quite correctly, the only features out of place being the flanged hubs. The different rear body is depicted by a different mould. Sadly, the comparison tells us how much poorly it is depicted. The flat inside without details, the ugly benches, the shallow details of the sides, the tarpaulin, the missing details, every things look worst when compared side by side to the Airfix body. Luckily most of the faults can be solved. I didn’t find anything to do about the inner surface which will remain flat.


QLD body

1/72

1/76

IBG

Airfix


Length

53.3

50.5

53.9

51.3


Width

30.5

28.9

30.3

29.8


Height

11.0

10.7

11.3

10.6


Wheelhouse length

14.8

14.1

14.6

13.9


Cab and chassis

The cab and chassis received the same cures described above, with two exceptions:

  • The spare wheel was housed under the rear chassis extensions, but it wasn’t glued to the frame, it was kept by housing, missing in the kit. I didn’t find a clear photo of it, however as far as I’ve seen it seem there were al least two type. I used the Airfix parts which looked quite well done to me.
  • I removed the hub flanges. I can’t exclude some received them during updating; anyway in the photos I’ve seen they are absent.
  • The tank was doubled and fixed on the chassis sides. The IBG ones are poorly rendered. I added their shelves by plastic and the metallic belts by thin metallic strips. I replaced also the filler, wrongly moulded on vertically and undersized, using stretched sprue.


Body

  • After having filled the ejector marks present on each piece of the main body. I engraved the inner line of the forward doors.
  • Being badly depicted, I had to replace the benches, the foldable seat (which I depicted in closed position with their structure) and their back rests.
  • Under the benches there were four sloped supports. I made them by stretched sprue although they remained almost hidden at the end.
  • Just below the benches there was a little wall. I made it by plastic strips.
  • The stiffeners on the tail gate are shallow; I raised them by plastic strips.
  • The central seats row frame is not well done. I added the base by thin plastic strips. On the floor I erased the raised references for the frame after having drilled four holes where I glued stretched sprue segments to have the positioning interlock.
  • The backrest back is sadly flat. I added a minimum of detail with stretched sprue. This helped also their gluing (their references don’t allow a precise and strong fixing). On the front the pads were softened.
  • I couldn’t exclude the IBG piece is wrong anyway in the photos I’ve seen the forward side was flat. I made it in this way by plastic sheet.
  • The lateral doors “L” shaped frame is shallow. I raised it by plastic sheet following the type proposed because the IBG sides have the punched relieves with the squared ending.
  • The upper and lower raised edge are missing. I made the upper one by plastic strips and the lower by stretched sprue.
  • The vertical rods of the frame had “L” section. I added the raised part by stretched sprue thin segments.
  • I replaced the two handles # T9. Two other handles were fixed also on the forward corners of the body. I made them by metallic wire.
  • The four steps have an ejector mark. I filled it by cyanoacrylate glue. The side steps had the frame also on the front. I added a couple of stretched sprue segments.
  • Between the central seats row and the forward plate there was a platform for the gunner. I used an unused piece # 54.
  • On the forward side there was the AA Bren mount. I made it by plastic sheet and rod. The Bren came from the spare box.
  • The pieces # T51 and 54 were the jerrycan cages (for two of them, not three). Being better made by Airfix I replaced one of them.
  • The tarpaulin misses the “hatch” for the AA Bren and its inner side is flat without the frame. I don’t know if the hatch was added during the production and eventually retrofitted. Being my troop carrier in Normandy I added it following photographic evidences. I cut the hole and than I added the inner frame by the unused QLD ones, resized. The Bren gun could be taken from the Airfix kit, at the moment I still have to decide if use it or not, however its mount is ready to receive it.
  • The exterior has a wrong sagging and the rolled up sides are poorly made. I replaced every roll by thin paper.
  • For a correct placement of the tarpaulin I glued the central vertical segments of the frame. The outer ones were made by metallic wire and were fixed in drilled holes on the body upper edge.


Decal

The IBG kit depicts 3 QLT

  • L561987, 5th Coldstream Guards, Guards AD. It is a restored QLT as everybody can easily see on net, this WD number lie in a QLR batch.
  • L561506, 8th Rifle Btn., 1st Pol. AD. I didn’t find its photo; anyway the WD number came correctly from a QLT batch (a note on Missing Lynx says a photo is in the book OD “ACROMY” DO “ZWYCIEZCY” vol. 8 by A.A. Kaminski).
  • L569171, Podhalanian Rifle Btn., 1st Pol. AD. The correct WD number was L559171. Correctly otherwise depicted, it had the radiator mesh divided vertically by the early rod.


Conclusion

Despite its good impression when looked “in box”, both kits resulted to be problematic to me as can be seen by the corrections described above. My opinion can’t be positive. I chose to improve them following my taste, but I’m quite finicky in such things; obviously other modellers can make these kits out of the box and be satisfied or can follow a different way to improve them. There is not a True Rule. The kits could have a high potentials because the QL variants conversions possibilities. The correction of the wrong parts is strongly suggested.

A thing I did not understand is the mould maker effort to make separate tiny pieces (which could be well made also moulded on), paired by a so little cure of other major details, such as the in the bodies, or paired by dimensional errors which gave a bad rendition of the cab.

If one doesn’t mind the scale difference, the Airfix kit is the best choice to make these models by buying a single kit (which contains both!).

In any way, some not Polish decals in the QLD would be appreciated.


This model can be purchased from Tracks & Troops

Back to :
IBG Kit List
Kit Reviews
Back to Home Page

Article Last Updated:
14 April 2019