| Type :
resin
Scale : 1/72
Paint : Lifecolor, Vallejo/Model Colour, MIG
Accessories : scratch, Evergreen, Hauler (shovel)
References : Internet, Steel Masters Thématiques
n°8
History:
The Csaba armored cars formed part of the Hungarian Army during WW2.
When the Hungarians joined the Axis forces in their battle against
the Russians, most of them went together with the Hungarian Army to
Russia.
Most of the equipment was lost and so were most of the Csaba A/C.
When searching the Internet for references, you can find some pictures
of Csaba A/C in use at the Russian front; most pictures have been
taken behind the front lines and often of A/C involved in accidents.
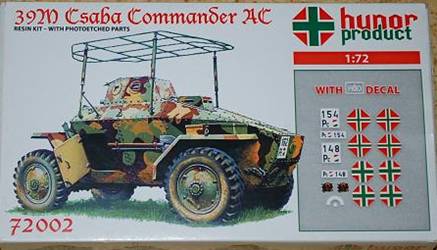
I could only find one picture of a Csaba Armored Command Car fitted
with the frame antenna and it is this same picture that Hunor Products
used for their box art of this kit.
As I do not have any other references
on this particular model I am in no position to say if this command
car has really been used or if it was a prototype version.
The article in Steel Masters Thématiques n°8 concerns the
build of a normal armored car fitted with a standard frame antenna
on the hull, not of a command version with a raised frame antenna.
However, the build of this model and the colors used proved to be
very helpful in my build of the 1/72 scale model.
I applied the same color pattern on my build using Lifecolor paint
instead of Tamiya as used in the book.
The Kit:
The kit comes in a sturdy cardboard box with the box art sliding over
it. Inside, all parts are packed in a plastic clip opening bag and
there is a separate bag for the PE antenna and the decals. The building
instructions are just a couple of drawings on a small piece of paper
and that’s it.
The resin parts are of good quality with only a few air bubbles and
holes. The detail on the hull is amazing as almost all the rivets
(and there are a lot of them on the real thing) are cast and can be
felt when passing your finger. This detail must be saved and needs
to be enhanced in the painting stage.
There are 2 turret types provided, a small one and a bigger one. When
comparing with the pictures of the real machine it looks like the
bigger turret was in use on the normal armored car, thus leaving the
smaller one for the command version. A small gun barrel is provided
for this turret but I wouldn’t be surprised if this would have
been a fake wooden barrel as this turret looks too small to house
a real gun.
The pickaxe and shovel provided in the kit were unusable and I fell
back on a spare shovel from Hauler.


Construction:
After the necessary clean up of parts, the front and rear axles had
to be fitted. There seems to be no difference between them and, once
the bottom of the hull cleaned up, test fitting proved invaluable
to see it they can be fitted horizontally. Take care if you want to
put your model on a diorama base as it is now that you must decide
if your wheels are staying flat on the surface or positioned in scenery.
The PE set also provides 4 metal parts
that need to be bent and positioned in front of the wheel arms. The
article in Steel Masters provided the necessary information regarding
their correct positions and was also very helpful with the position
of the four towing hooks.
It needs to be said that those 4 PE towing hooks are the finest I
have ever encountered in a kit. Honor Products has to be congratulated
on those as well, as there are more hooks provided than needed. (They
probably know I can be as clumsy as hell with those tiny parts.)
Take care when positioning the mudguards
(front and rear) as their correct locations are not obvious. Again
Steel Masters came in handy.
The left side of the vehicle normally
receives the shovel and pickaxe combination but, as said before, I
used a replacement Hauler shovel.
The right side receives two small trench crossing bridges forming
one part. Pictures of the real thing show they were kept in two metal
arms but these are badly represented on the part. I replaced them
with small pieces of Evergreen strip that looked more convincing.
Wheels are cleaned up and test fitted
but not glued as this will be done after the paint job.
Finally, you need to scratch build 4 lifting hooks that are positioned
on the topside of the hull.


Painting:
There is no painting guide provided and the only reference is the
box art. Again, the article in Steel Masters came to the rescue. It
mentions the Tamiya colors needed but as I didn’t have those
I started checking out the many paint jars in my collection. I so
ended up using Lifecolor UA 144 Chamois (sand), UA 143 Terre de Sienne
Français (brown) and UA 142 French Kaki (green). The first
and general coat of sand was spray painted but, after a vain attempt
to spray paint the other camouflage colors, they were painted by hand.
Again, I fell back on the article in Steel Masters as it gives a very
good description of the different painting techniques used to achieve
the 3-tone camouflage pattern and the appropriate weathering.
Although the article is based on the
painting of a 1/35 scale model, it was easy to use on the 1/72 model.
 i i

Decals:
A nice small decal sheet is provided with 2 sets of national insignia
and 2 sets of license plates. It is however not identifiable which
markings or license plates need to be fitted on the command car. I
used the same type of national insignia as shown in the article and
used the license plate with the letters Pc in it. I also added a regimental
badge probably representing an eagle but in all, it’s a lucky
guess as none of the pictures I found mention these license plates.
 
Finishing:
First of all, the wheels are fitted and adjusted so that they all
touch the base.
The kit provides a very nice PE antenna
frame that needs to be bent slightly at the front and rear. There
are however no struts provided and they need to be scratch built.
I used metal wire and Evergreen rod. The two forward struts also receive
a supplementary reinforcement strut. The construction looks convincing
but is very fragile.
A very thin copper wire representing
an antenna wire is fixed at the right rear strut running from the
car’s body up the strut.
Referring to the box art, I painted
the antenna mounts and frame in the same 3 tone camouflage pattern
but I have no references proving this really was done or not.
Some paint chips are added to the frame using a silver pencil.
 
Conclusion:
I really enjoyed this build despite encountering some difficulties
with the paint scheme and the lack of struts for the frame antenna.
Thanks to my references, construction was very straightforward and
it was the rather difficult paint scheme that absorbed most of the
time spent on this build.
If this armored car can serve as a
reference to other models released by Hunor Products then I am looking
out for them especially as they produce a nice range of trucks not
released by any other manufacturer.
My special thanks to Hunor Products
and On The Way for providing this reference model.
  
  
|