Daimler Mk. II Armored Car
Manufacturer: Hasegawa (Kit # MT24)
One of the easiest models I have ever built. The kit went together in about a half hour and was ready for paint. According to the measurements provided in the kit instructions, the finished model scales perfectly to 1/72nd. The kit is well detailed, but for some strange reason, the finished item just looks too "clean" to me. As if it needs rivets all over it, or something like that. I'm sure it's only my imagination.
The hull has a strange construction sequence, and care must be taken to make sure everything fits correctly. As I have done in the past (and am sure to do again in the future) I screwed up a little and ended up with a gap on the right side of the hull (not in the picture :). This was due to my habit of using superglue on all my models, when I really should only be using it on multimedia stuff. Oh well.
The wheel axles are two metal rods that insert through openings in the chassis, which allows for the wheels to move freely. Since I don't intend on "driving" my Daimler around the apartment, I opted to glue my wheels in place. The undercarraige is pretty well detailed, and a spare wheel is included to attach to the side of the car.
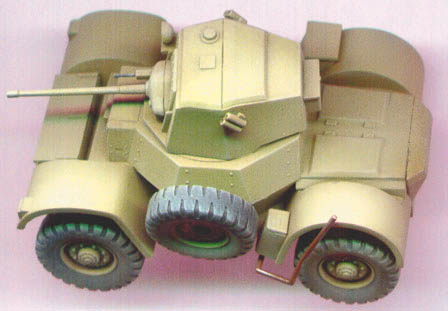
The turret hatch can be glued open or closed, but the inside of the hatch has absolutely NO detail on it. If you decide to leave it open, and use the half-figure of the vehicle commander, you might want to add some detail to the hatch. Smoke grenade launchers are attached to the side of the turret, and I drilled out openings into their business ends. The main cannon and coaxial MG are fixed in place, and do not allow for any elevation.
I used the decals for the 7th Armored Div. in Egypt. I painted the vehicle Middlestone (old Polly S - which didn't stick very well), and sprayed a very light tan "dust" over everything. The decals were well printed, but the carrier film was very thick. They silvered considerably, but that's probably because I didn't first put down a coat of clear gloss. Perhaps others will have better luck with their decals. What would really make this kit come alive is a plethora of hull stowage. Boxes, cans and especially cloth rolls would help immeasurably. My finished product looks too "new."
| Back to Kit Reviews | Back to Home Page |
| Back to Hasegawa |