Kit Preview
Before proceeding further I suggest the reader refer to the preview by Henk Timmerman of the similar Flyhawk kit of the Pz.Kpfw. I Ausf. F (VK18.01) Late
here & and a review of the same by Rob Haelterman here, as
this kit and the Pz.Kpfw. I Ausf. F (VK18.01) Late kit use quite similar approaches in their layout and construction.
The kit
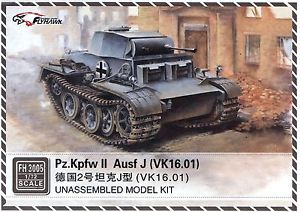
No need for me to add more superlatives on the packaging. Like all of the Flyhawk kits I've seen, this one too is packaged with TLC.
All the parts sprues are protected by foam inserts, stacked to minimize damage, and all placed inside a nice sturdy corrugated cardboard box. I will not bother to
add pictures of the packaging as it is much the same as found in the two links above.
As in their previous release of the Pz.Kpfw. I Ausf. F (VK18.01) Late the parts are superbly molded, with crisp detail, no flash and just the faintest of seams
on some of the parts (e.g. muffler - part S-21 ). A close inspection of the parts shows some nice touches - for example, the turret edges display a finely cast
weld line. There are a few sprues shared with the Pz.Kpfw. I Ausf. F (VK18.01) Late kit and some additional parts, such as the bogies, also appear to be the same as those
found in the Pz.Kpfw. I Ausf. F (VK18.01) Late. The larger parts such as the hull and turret are all new.
The tracks come in the popular link-and-length style. They are nicely detailed but very petite, so care will be needed during assembly. A nice touch is having them
molded in black which I feel will make their finishing much easier - some weathering applied to the bare plastic and a flat coat should just about do it.
Overall the detail of the parts rivals what can be found in 1/35 scale kits. Sprue shots can be found at
Henk of Holland.
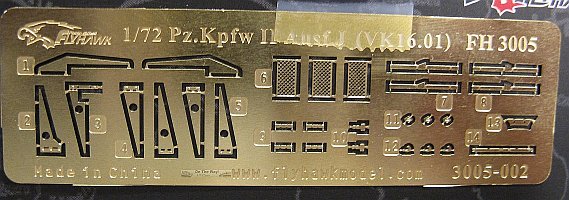
Etched parts are included for extra detailing. Some of the etchings
make sense, like for the straps holding the extra track links and for the fender brackets, while some I feel are just a recipe for disaster, like the minuscule hooks
on the turret, comprised of two microscopic etchings to make one tiny assembly with loads of opportunity to contribute one or more pieces to the carpet monster.
For this latter case Flyhawk do offer alternative hooks as one part plastic pieces, which is the option I'll probably use for my build.
A short length of twisted nylon string is supplied to be used with towing eyes (part C-2). Not sure how well this will work. A butt join with the eyes will be
problematic as well as liable to separate while being manipulated, so I'd guess that the modeller will need to find some alternative and stronger method of joining the string with
the plastic parts or possibly find an alternative for the kit's rope and eyes.
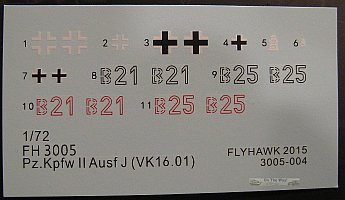
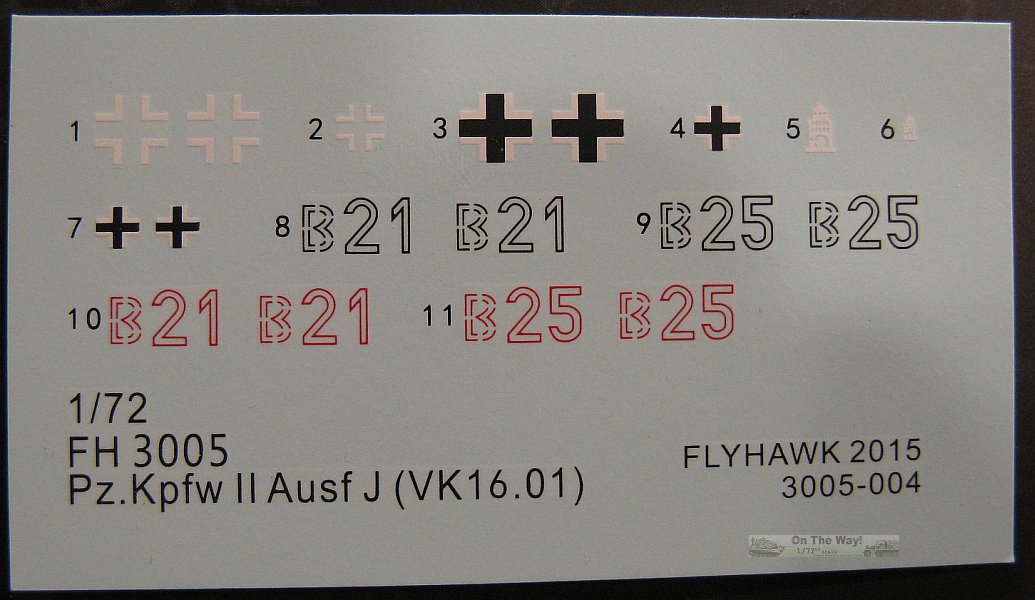
Decals look absolutely exquisite save the Balkenkreuze which appear to be ever so slightly out of register. On the plus side the carrier film looks very thin.
Overall, they are much better than the decals that came with their earlier Renault FT releases, which had some obviously pixelated images.
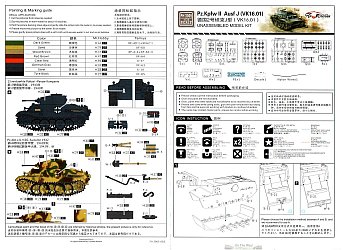
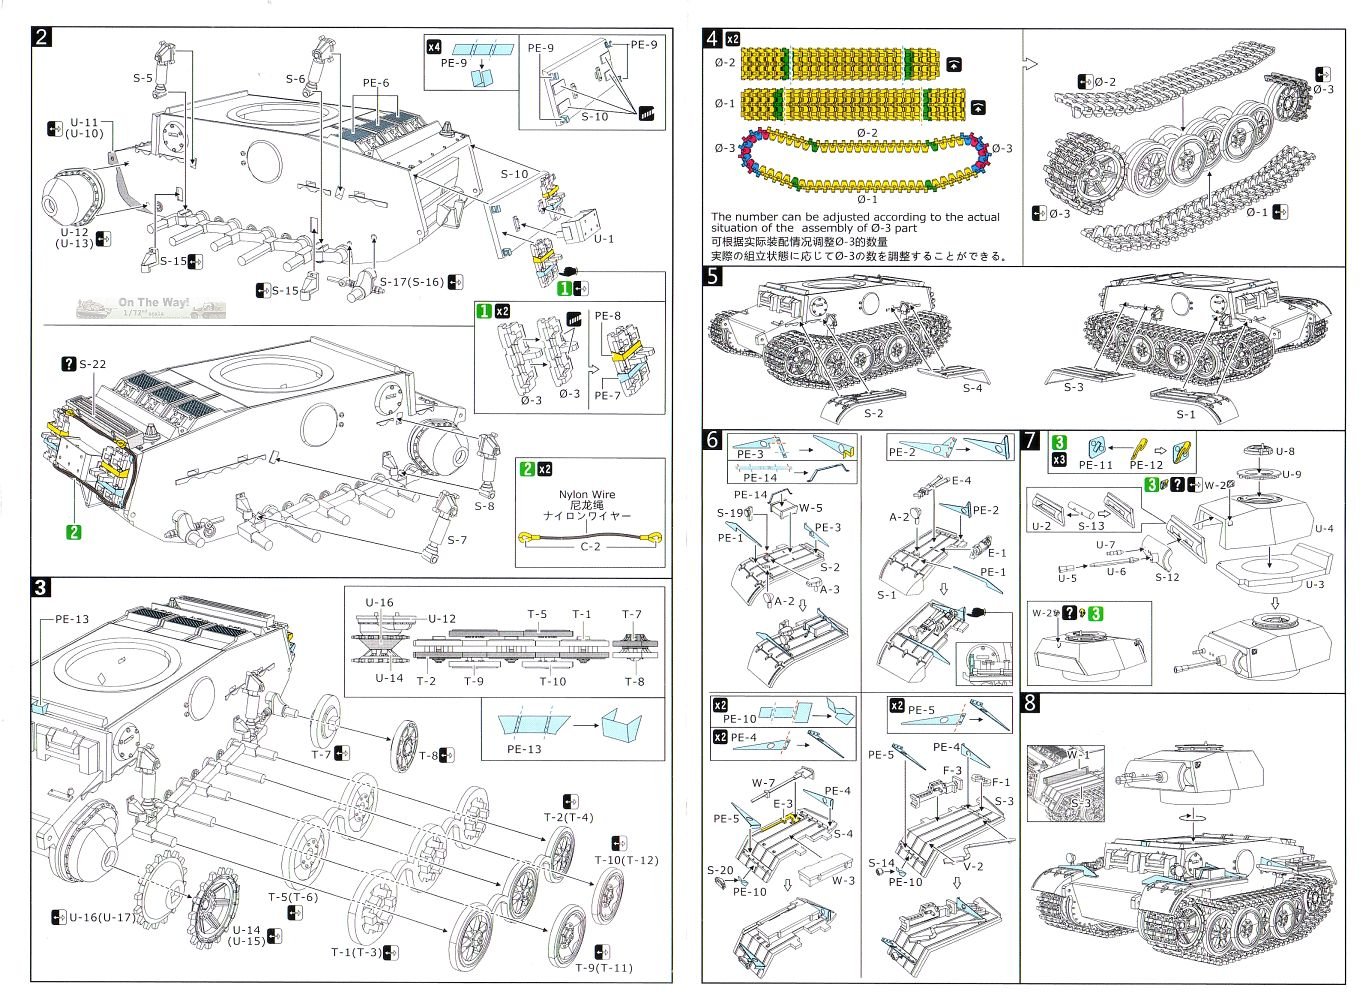
The instruction sheet is laid out very well. The only feature of it I didn't like was the dashed lines, which on first inspection were confusing, but after a thorough
scan it appears they mean "bend the part here", and colour of the dashed line indicates fold sequence - red first, blue second.
Camouflage options are for two vehicles:
- 13.verstärkte Polizei-Panzer-Kompanie, 1943, in overall panzer grey.
- Pz.Abt.z.b.V.66, Autumn 1942, in overall panzer yellow, with either brown or brown/green patches - the choice of which to use is left up to the modeller.
A note on this second option. The 3-colour yellow/brown/green scheme was only introduced in February 1943.
However, in the Panzer Tracts 2-2 book on page 52, there is a picture of a vehicle from Pz.Abt.z.b.V.66 supposedly in
"Tröpen camouflage" as they prepared for Operation Herkules in 1942. So the 3-colour option proposed by Flyhawk is somewhat suspect and this option should actually
be in tropical/desert camo. See refernce [6] below for specifics.
I could not find a use for part F-2 which appears to be a second copy of the jack block. The jack block referenced in the instructions is part W-5 with etched part
PE-14 for its strap. Parts F-4 & F-5 (tow cables) are for the sister kit FH3006 (Pz.Kpfw. I Ausf. F (VK18.01) Late), also not used.
I do have a couple of minor gripes. With all that beautiful etch, why not include a brass barrel to replace the excellent, but improvable plastic
version? Another small nitpick concerns the removal of the small rectangles from the corners of part S-10. With other options included in the kit for replacement parts why not
have an alternate S-10 with these rectangles already eliminated? It's not a big deal but just another place where extra work for the builder could be avoided by
supplying a proper part.
Preview Conclusion
Another winner from Flyhawk. Their Renault FT kits were the "cat's meow" with regards to accuracy, detail and ease of construction, and this one promises to
provide more of the same. A sure winner!
The Build
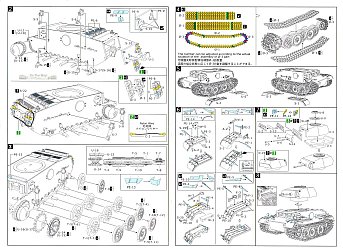
In Step 1, the mounting instructions for the visor covers (part S-18) is vague. The parts are small and virtually symmetrical so it is easy to place them the
wrong way.
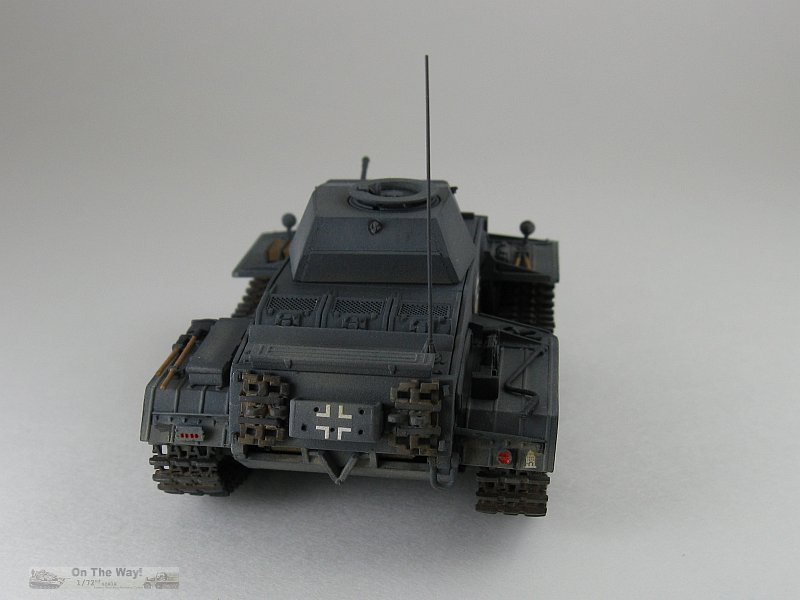
In Step 2 there is an option to use a one piece rear panel (part W-6) or a 2 part piece (parts S-11 & W-4) which is the recommended option and the one I chose.
If you do go with the two part option, use the one piece option as a placement guide. In the end I don't see much difference between them anyway.
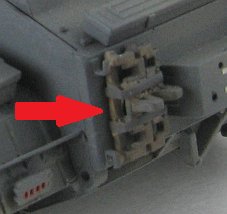
I did not add the tow rope. As I mentioned in my preview, I consider the method employed for the tow rope and eyes as a potential recipe for disaster. In my opinion
trying to route them around the brackets without causing damage to the rope and eyes or separating the brackets from the rear hull plate would be very
difficult.
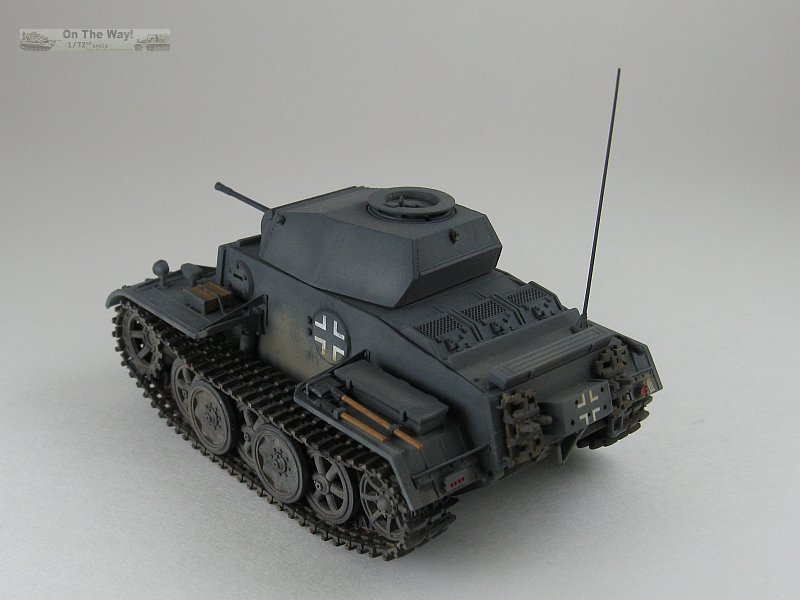
Construction of the spare track mounts is awkward due to the small and delicate nature of the etched pieces. It also doesn't quite match the spare track mount as seen in
period photographs.

I painted and weathered the hull and bogies at this point. Painting the bogies once the fenders were added looked to be problematic.
Steps 3 & 4: If I were a poet with even a modicum of talent I'd write an ode to Flyhawk and their tracks, but I'm not, so I'll have to settle for ordinary prose.
To say they're absolutely magnificent is an understatement.
I have not encountered such perfectly fitting tracks - they practically snap in place. Assembling the runs comprised of single links was easy. With just a small dab of
liquid glue at the joints along with some drying time so they would not separate, the runs stayed pliable long enough to run them around the idlers and drive sprockets.
After they have completely dried the track runs become nice and solid. I was able to get the identical number of links for each run as per the instructions, though
the left side run was a
tad tighter than the right side run. Better yet is the fact they're molded in black, making weathering just that much easier. Then, to top it off, the bogie
assemblies are exquisite. They fit tightly to the axles keeping everything aligned. The fit is
so tight that I had to ream the holes slightly after painting as the paint removed what little slack there was and there was no way I was going to slide the bogies
onto their respective axles.
Step 5: I followed the instructions here to add the fenders. The photo-etched fender brackets are a nice touch but
they are tricky to work with and any flexing of the fenders after they have been mounted usually separates the join - so take care handling the model from this
point on.
Step 6: Part S19 (the horn I assume?) was not added. Could not find any reference pictures of my chosen build option with it mounted. The instructions show the tool
box (part W-3) reversed, so turn it around such that the twin latches are facing out. Problems with the tiny photo-etched parts reared its ugly head here. One of the
tail light brackets (part PE-10) tiddly winked itself as I was working on it, never to be seen again. So I resorted to gluing the lights (Parts S-20 & S-14)
directly to the rear fenders. I think when I build the Pz.I Ausf.F kit I will do the same just to make life easier. They look fine without the brass brackets.
At Step 7, add the hatch (part U-8) to the turret before the observation port ring (part U-9). If you don't then it is impossible to get the hatch in place with
the ring already mounted.
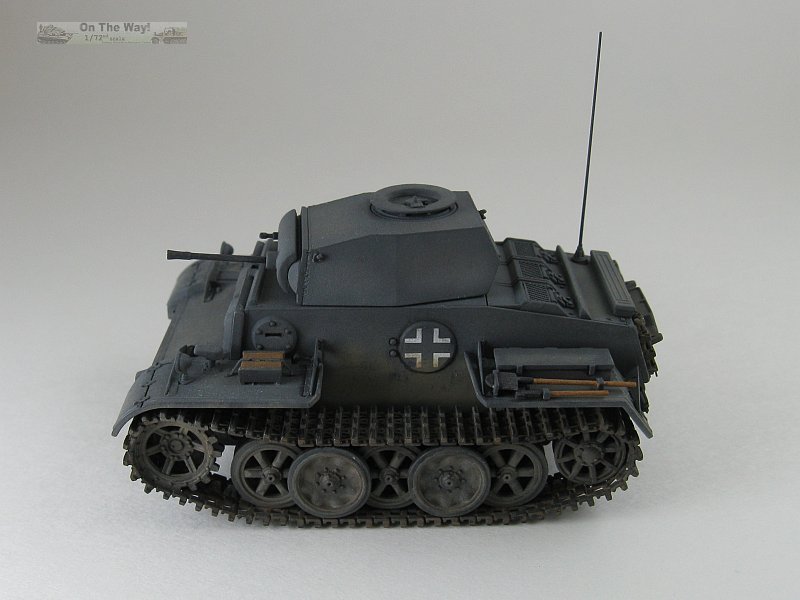
I used the plastic lift hooks on the turret versus the small and overly delicate etched pieces that are also offered. I added weld seams to the turret. This was a
simple exercise of running a line of liquid glue along the desired path and then quickly adding the weld bead with rapid taps of the tip of a sharp Xacto knife blade to
the slightly softened plastic.
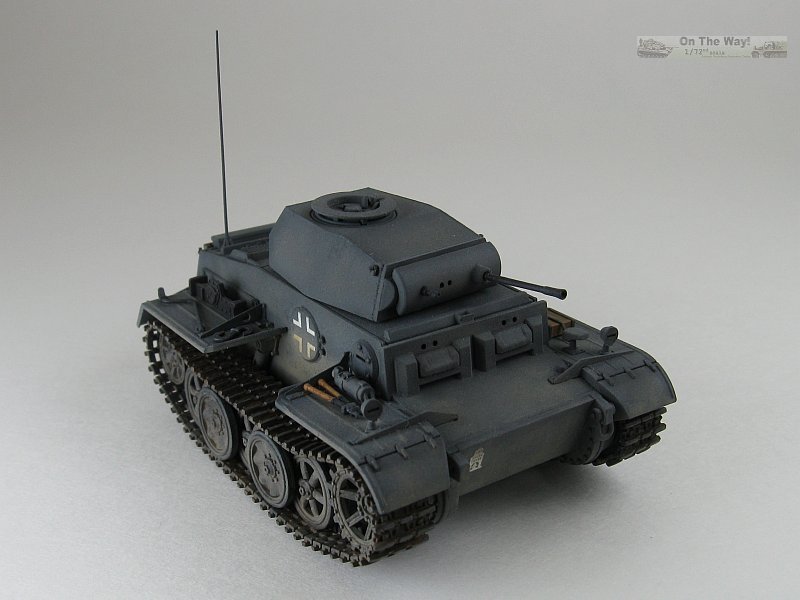
The gun is nice but the flash suppressor is a bit chunky looking and the barrel has a seam that is prominent enough that its removal puts it out of round.
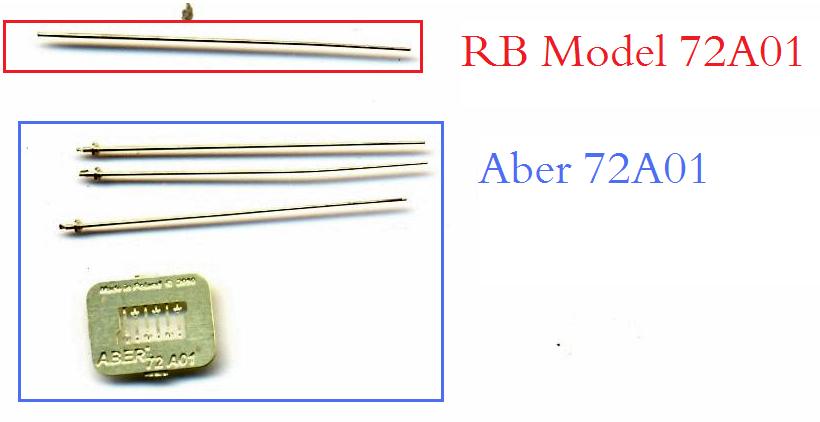
A metal barrel would have been a better option from Flyhawk, so I did what they should have and replaced the kit's version with a cut down 2cm Flak 38 replacement
barrel from RB Model. It may not be 100% accurate but it sure looks better than the "rocket nozzle on a stick" that comes with the kit.
Additional comments: You need to add an antenna. I used one from Aber
(RB Model also offer acceptable aerials). I added one tow loop to the front and rear positions even though the
instructions do not show any mounted. Tools are provided as separate pieces. They were painted separately and added after the painting of the body. There are duplicate
tools on the sprues giving you a few extras to add to the spares box.
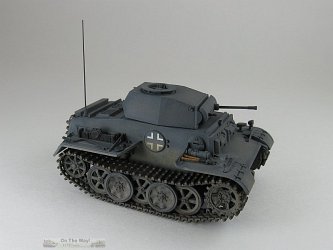
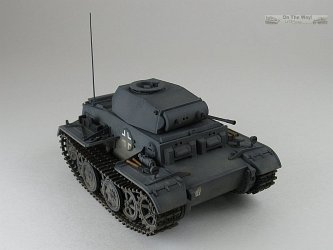
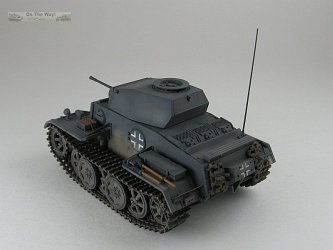
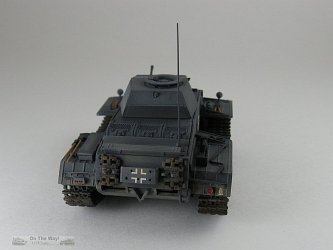
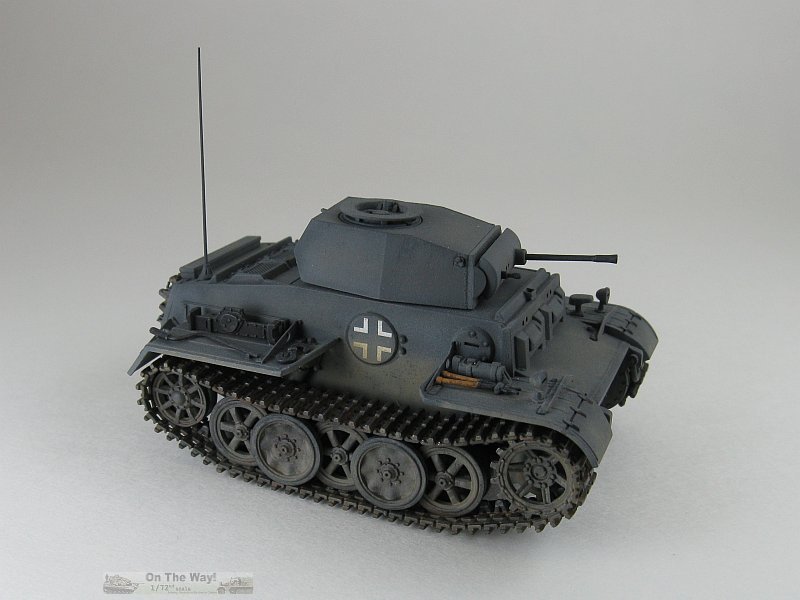
The decals are absolutely superb as far as application is concerned. As you can see below I chose the Police vehicle in the dark panzer grey and I experienced no
silvering with the simplified white Balkenkreuze images nor with the unit markings. To ensure no silvering I perforated the transfers in the clear areas and
a few applications of Microsol got them to sit down snug.
A close inspection of the decal sheet with a magnifying glass did show that the black with white outline crosses are ever so slightly out of register as I suspected
in my preview above.

Review Conclusion
It's obvious that there was a lot of thought put into this kit and Flyhawk has demonstrated once again that they are at the forefront of small scale armour kit
technology. Definitely a must have kit, especially for those who like German WWII armour.
References
[1] Encyclopedia of German Tanks of World War Two: A Complete Illustrated Directory of German Battle Tanks, Armoured Cars, Self-Propelled Guns and Semi-tracked
Vehicles, 1933-1945, Peter Chamberlain & Hilary L. Doyle, Arms & Armour, London 1993 ISBN: 1-85409-214-6
[2] dishmodels.ru (forum thread)
[3] valka.cz (forum thread)
[4] military-photo.com
[5] Panzer Tracts 2-2 Panzerkampwagen II Ausf.G, H, J, L, and M development and production from 1938 to 1943, Thomas L. Jentz & Hilary Louis Doyle, Panzer Tracts 2007, ISBN: 0977164381
[6] panzerworld.com
[7] planetarmor.com
[8] forum.worldoftanks.eu
[9] www.tanks-encyclopedia.com
Preview sample supplied by Flyhawk Model.
Flyhawk Model products are available at

|

