|
Eastern Express
|
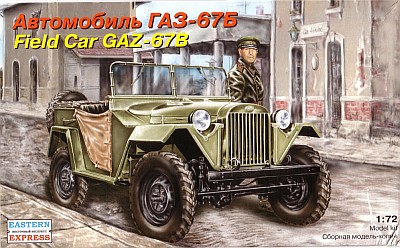
GAZ-67B |
|||
| Kit #: GAZ-67B |
Review by
- Al Magnus
|
|||
|
Eastern Express
|
GAZ-67B |
|||
| Kit #: GAZ-67B |
Review by
- Al Magnus
|
|||
 |
|
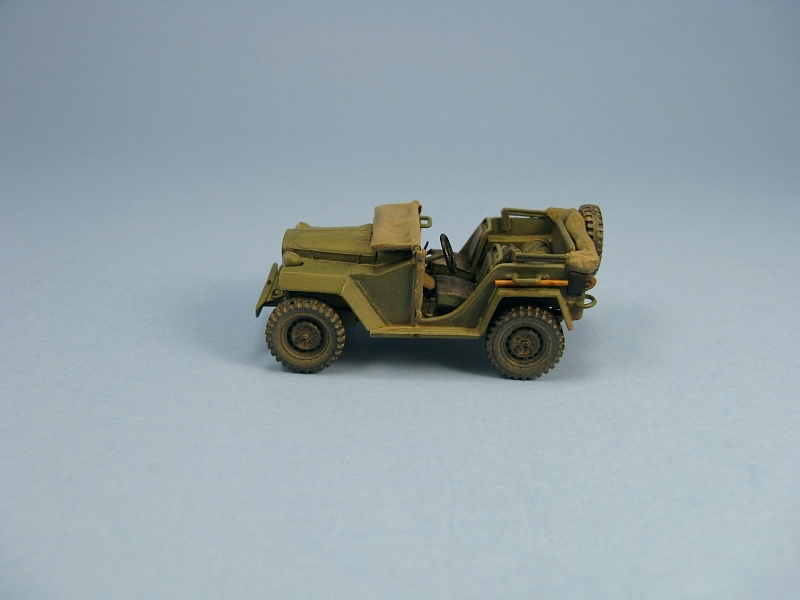
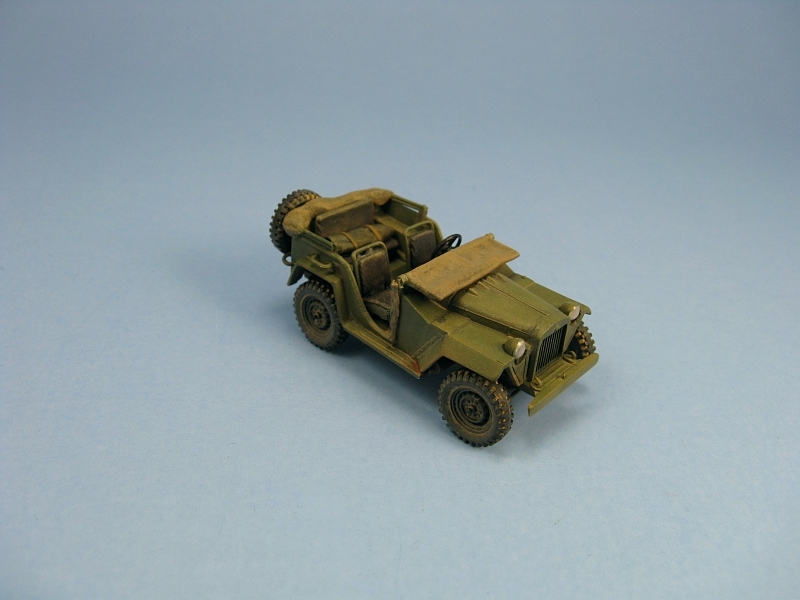
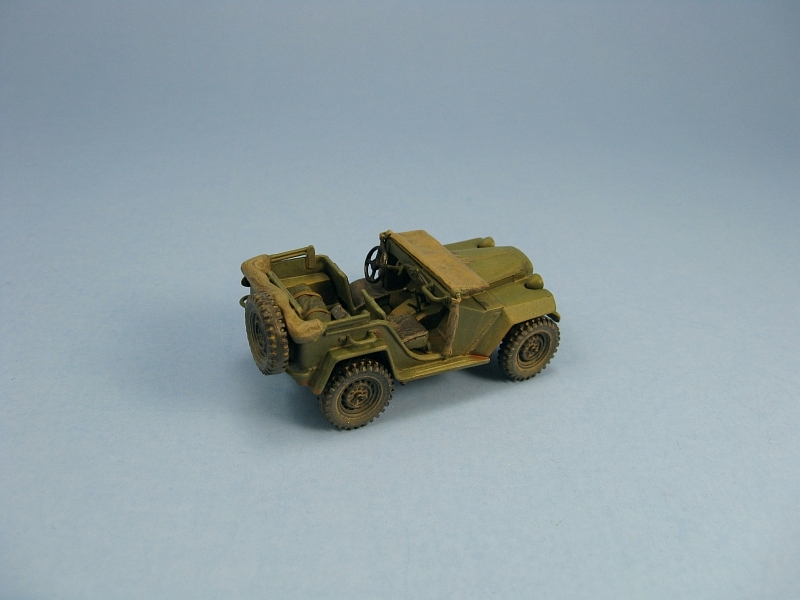
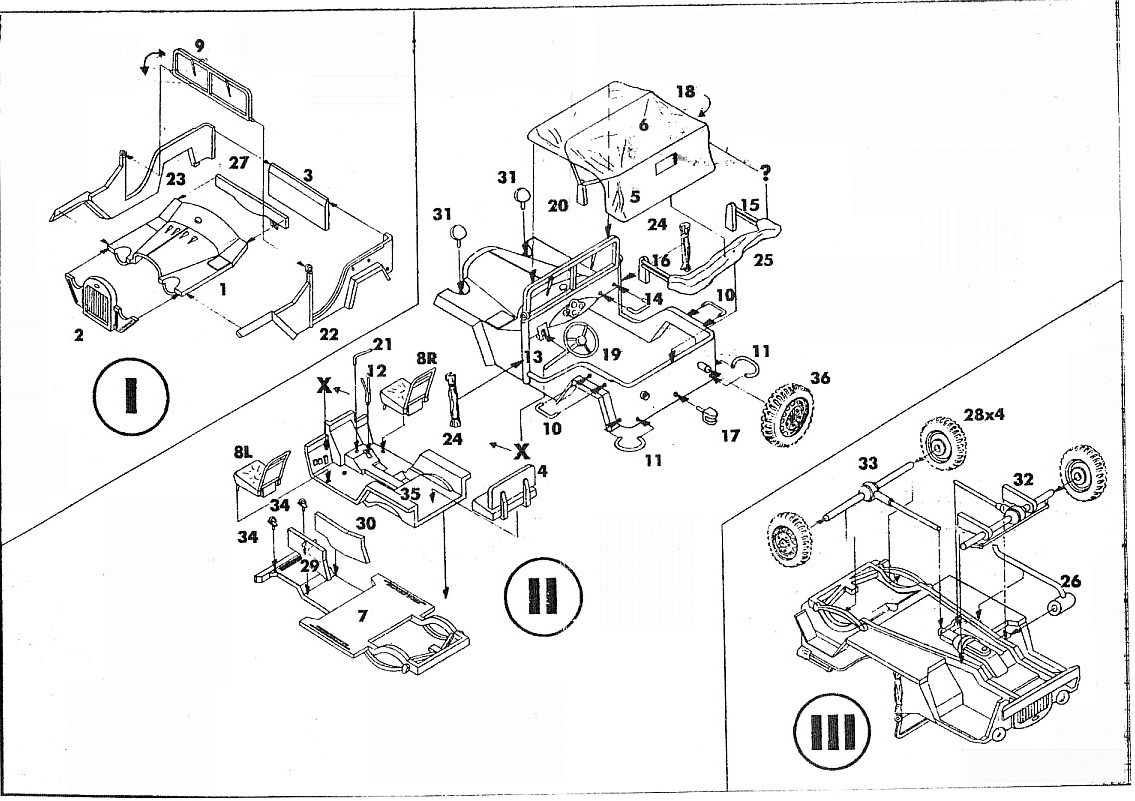
Detail is quite nice. Kit has 49 parts which are molded in a softish light grey plastic and spread over two sprues. There is some flash and a few seams to remove from most of the parts. Also there is a bit of roughness to the castings that will force you to sand some of the body panels to get a smoother finish. The wheels/tires are little jems. You get the option of a folded or deployed cover (part 6) for the interior. The deployed version is well done dut suffers from the same fate as all others that I have seen - the inside surface has not folds or creases. There are no decals and a small instructions sheet. The instructions are a three step affair of exploded diagrams showing how all the parts go together. The diagrams are reasonably easy to follow though a bit vague in a few spots. The sprues have the name Colibri cast onto them. I'm not familiar with Colibri but a browse through the OTW manufacturers page seems to indicate that Colibri, Fort, Komintern and MGD are all inter-related. Do step 1 as per the instructions. Watch the placement of the instrument panel (part 27) and make sure that it sits up high enough to be level with the bottom of the holes for the windshield pivots. Not doing this will produce a gap between the window frame and the body which is what happened to me. In the end this didn't affect me much as I had already decided to mount the windshield in the folded position and the cover I added over top of the frame filled the space nicely. For step 2 I found the following build sequence made construction easier:
For step three I followed the instructions except I left the wheels and muffler/exhaust pipe off until later following the painting. They are all easy to add afterwards. The headlights are a bit of a problem. They are molded as hollow shells, but no clear lenses are included with the kit. My solution was to fill the shells with a thin slice of plastic rod, paint them silver and then add a drop of 5 minute epoxy on top to make the lense. This worked reasonably well but I will definitely have to work on perfecting this method for creating headlight lenses. I did this following the painting and just before the final flat coat I covered them with a small piece of sticky tack to protect them from the spray. The biggest let down in the kit comes from two areas. The first is the windshield. There is no clear plastic supplied so the modeller is forced to make their own insert and the instructions provide no dimensions so it will require some trail fitting to get the correct size. Another problem lies with the fact that there is no ledge around the inside of the whindshield frame to ease the placement of the windows. Not wanting to spend a lot of time on this I chose the lazy man's route and put a cover over the windshield fashioned from Tamiya 2 part epoxy. Detailing was kept to a minimum. I drilled a hole in the small tab on the top of the front bumper and in the end of the exhaust pipe. I also drilled holes in the trailer hitch (part 17) and added a hitch pin from some piano wire bent to shape. There is no stowage included in the kit. To make the interior less sparse I added a tarp (made from 2 part Tamiya epoxy putty with straps made from thin lead foil) and a German jerry can. The last item was a scratch built shovel added to the left raar quarter panel. What's really missing is some weapons, so once I can get my hands on some Soviet rifles or MGs I'll add them to the interior just behind the driver's seat. All in all a very nice kit. Not quite up to the detail and fit standards of Dragon or Revell but close enough that this makes a fairly relaxing and quick build.
Review sample purchased by the author. |
| Back to Eastern Express Kit List | Back to Construction Reviews |
Article Last Updated: 08 August 2009 |
Back to Home Page |