|
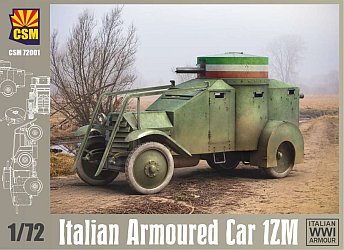
Description of the Lancia 1ZM taken from the instruction sheet:
"During the Great War, there were several Italian armoured car designs, but many of these projects and vehicles had to be abandoned because of a lack of
sufficient experience. The most serious effort towards building an effective vehicle was from Ansaldo, well
experienced in the manufacture of armour plates and a chief supplier of steel to the Italian armed forces. Ansaldo design and technical advice led in 1915
to a vehicle of welded construction mounted on a Lancia 1Z truck chassis. This chassis remained the
same on all Lancias produced between 1915 and 1918, with only minor variations.
Although superficially very much the same in appearance as the Model 1915 (1Z), the Model 1917's (1ZM) most noticeable differences were more rounded mudguards, a
bracket for a new signal light and more interior equipment. The armoured plates of the Model 1917 1ZM were in some cases of inferior quality, as plates were made of
molybdenum steel instead of the original nickel-chromium steel because of wartime shortages of chromium and nickel.
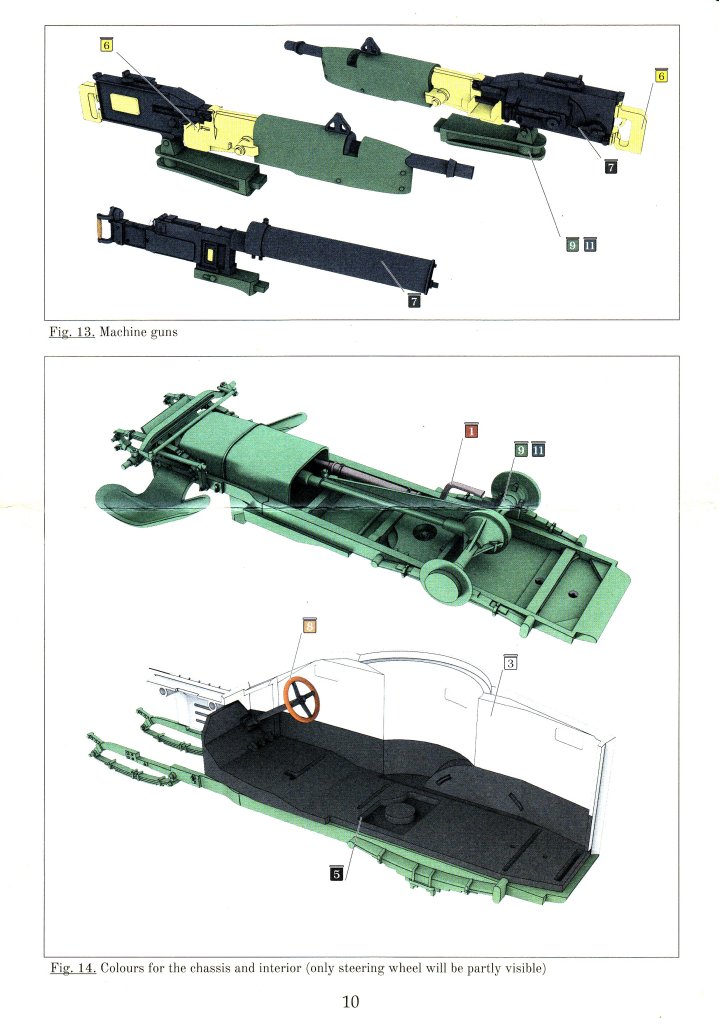
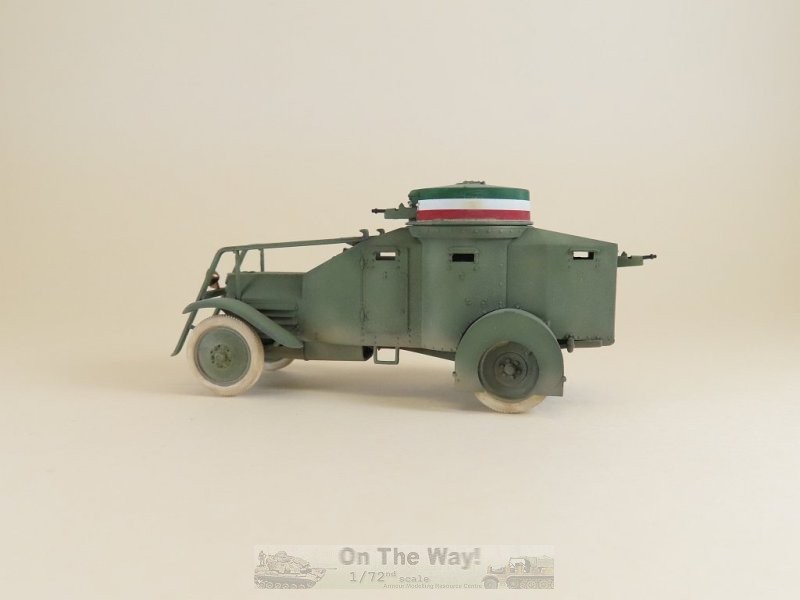
There are some key features that distinguish the late-pattern vehicles from the early vehicles. The early Lancia version (1Z) had two Fiat-Revelli 6.5 mm machine
guns in its low cylindrical turret and a third one in a smaller turret on top of it (which could rotate
independently), but the weight made the centre of gravity too high, leading to accidents.
A new turret design eliminated the top machine gun and placed it in the rear of the hull with a limited traverse but with better depression. It does not seem that
the third machine gun was usually operated from the shelter of the hull's rear, but a light machine
gun could fire from a small circular hatch on the turret's top. Despite that, the Lancia was used extensively during peacetime and between the wars. Cars were
frequently upgraded or modified, from a 1923 armament changeover (Fiat 14 instead of the
wartime air-cooled French St. Etienne) until the last modifications of 1935-1936, when new wheels were used instead of the original disc pattern. The last
surviving example, which was rearmed with a new type of Breda-Safat 7.7 mm machine gun, escaped being scrapped after the war and is on display in the
Trieste Museum."
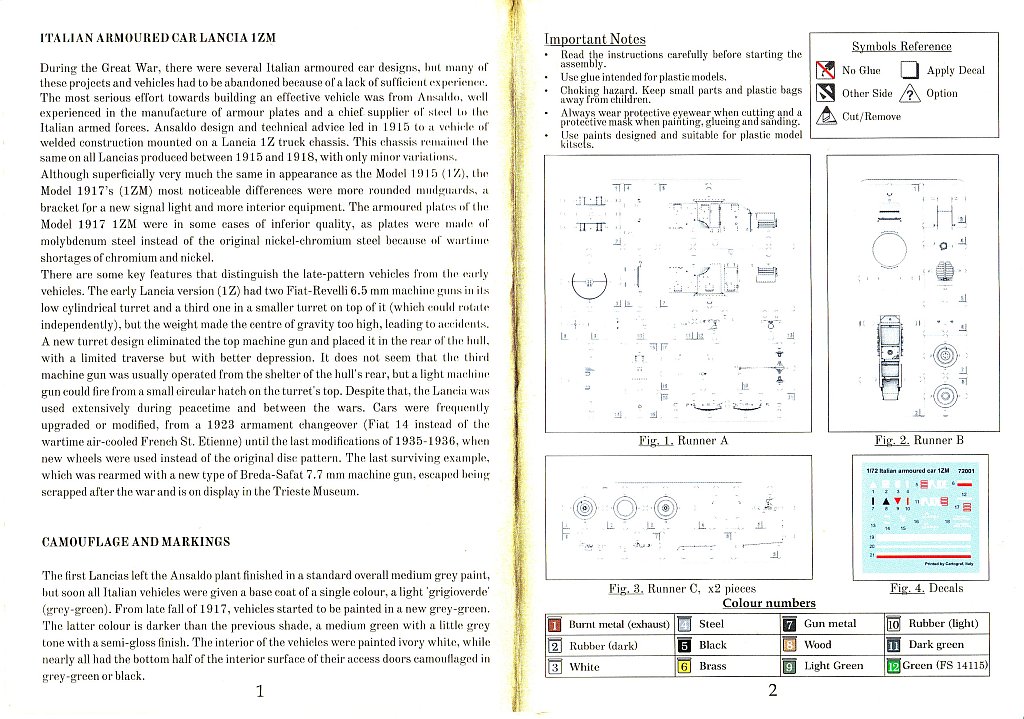
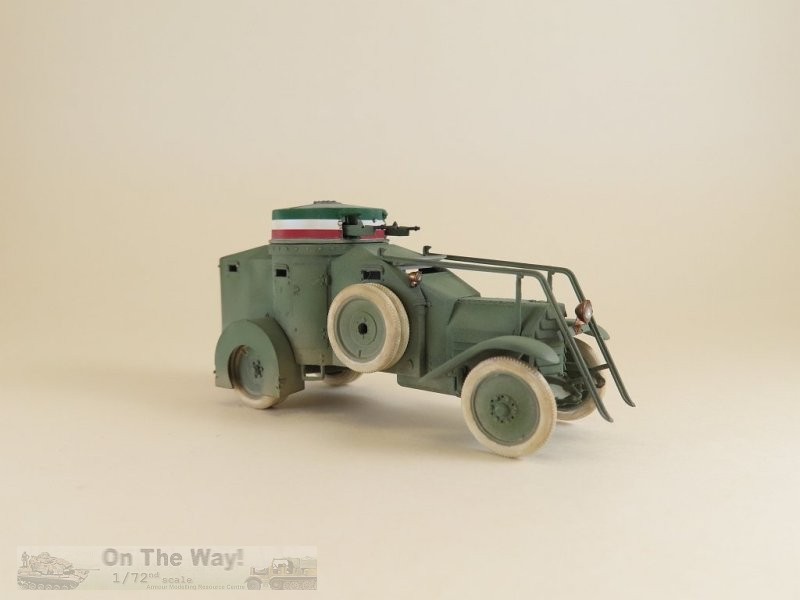
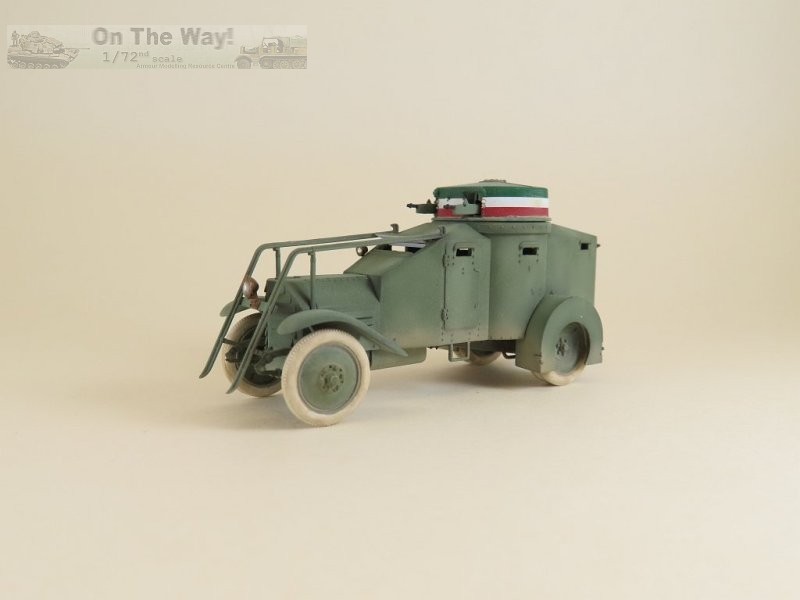
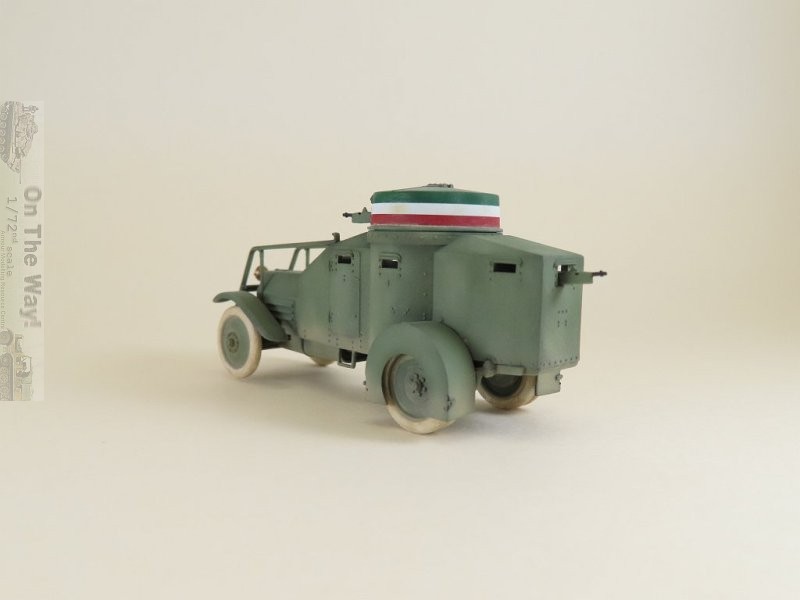
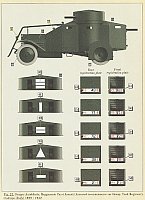
The kit
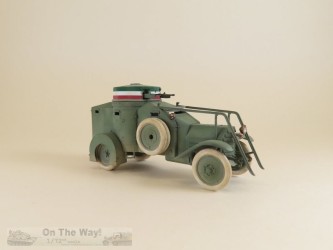
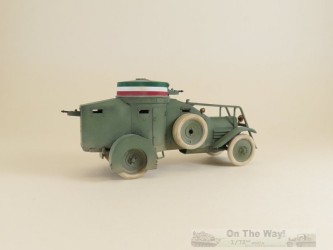
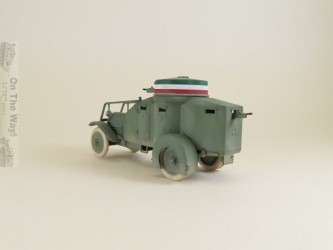
Inside the box one receives a set of four sprues in injected light grey styrene like plastic. Parts count totals 47. There is an excellent looking set of decals
printed by Cartograf, and an instruction sheet. It's not often I'm impressed by a kit fresh from the box, but this one did it in spades. The parts are well molded
with only a hint of seams on a few pieces and no flash. Detail is superb. The decal sheet exudes quality and the instruction sheet is printed on heavy weight paper.
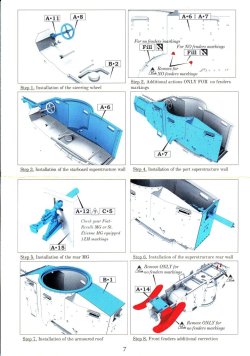

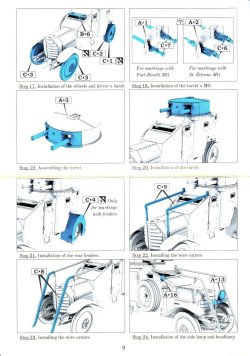

It is unusual in its design though, being one large sheet folded into a booklet format, which is nice but rather awkward to use due to its size when opened. There are
24 steps for construction, each one displaying the newly added parts in blue, and parts to remove in red. Interestingly, no paint brands are specified. The colours
are just numbered 1 to 12, with generic names such as Wood, Light Green, Dark Green, etc.
Eight marking options are available. Before I get into what I could verify with photographs it should be noted that this kit was produced in cooperation with
author Antonio Tallillo of reference [9] below. That book contains photos for marking options 3 (pg. 49) & 5 (pg. 73) below, so I'm willing to assume he has
photographic proof for the other options as well. Only option 8 is suspicious (see below).
|
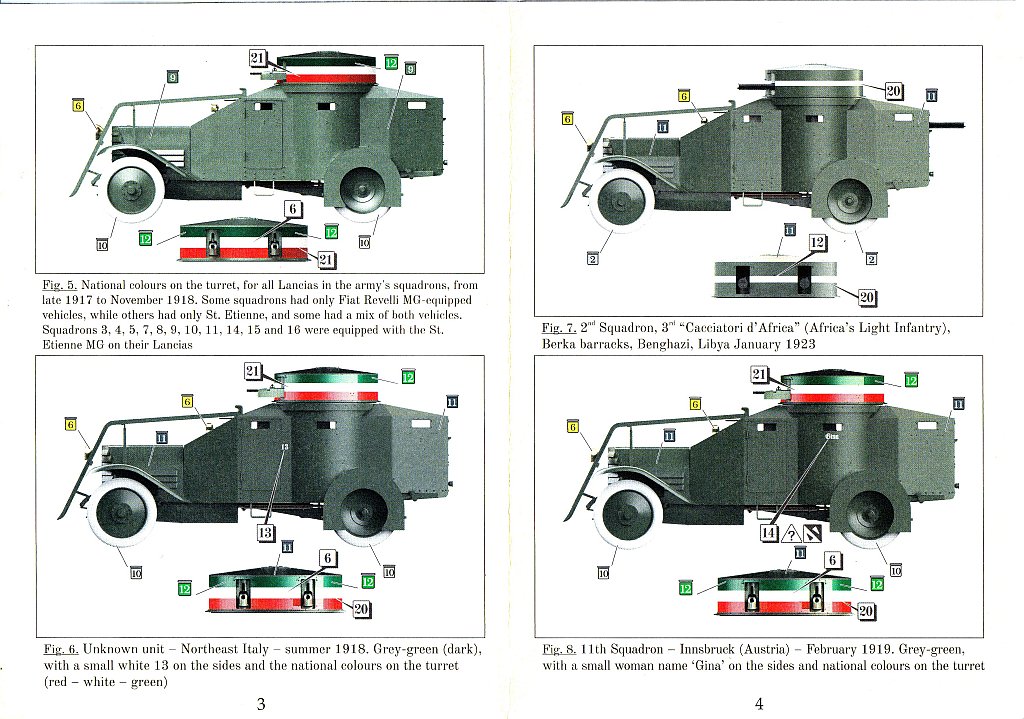
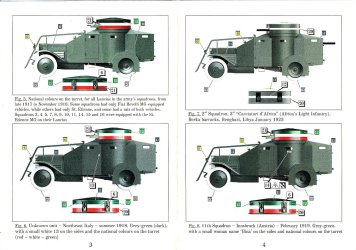
- Generic overall light green camouflage with Italian national coloured bands on the turret, carried from late 1917 to November 1918
- White 13 in generic overall dark green camouflage with Italian national coloured bands on the turret, summer 1918
- Overall dark green camouflage with a narrow white band on the turret, 2nd Squadron, "Cacciatori d'Africa, Benghazi, Libya 1923.
There is a photo of this vehicle on pg. 49 of reference [9].
- Overall dark green camouflage with Italian national coloured bands on the turret, with white "Gina" carried on the turret tub, 11th
Squadron, Innsbruck, Austria February 1919.
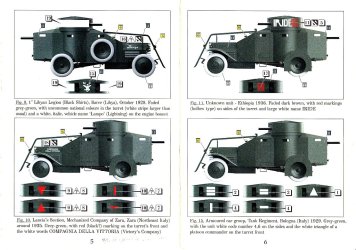
- Overall dark green camouflage with wide white band on the turret, plus white eagle motif on front of turret and "Lampo" on engine
hood, Libyan Legion, Barce, Libya, October 1929.
- Overall dark green camouflage with white "COMPAGNIA DELLA VITTORIA" on engine hood, Lancia Section, Mechanized Company of Zara,
Zara, Italy ca. 1935.
- Overall dark green camouflage with white "IRIDE" and red rectangles on the turret, Ethiopia 1936.
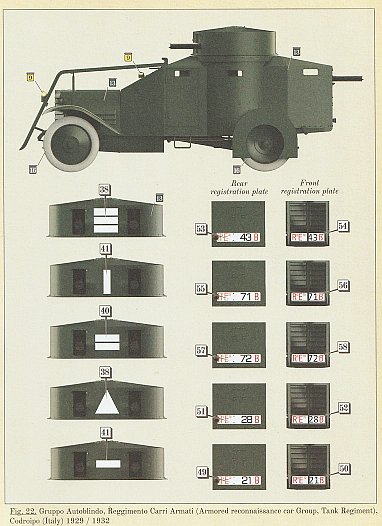
- Overall dark green camouflage, Bologna, Italy 1929. I found this option confusing. The instructions state ".. with number 4.6 on
the sides and the white triangle of a platoon commander on the turret front". I could not find any "4.6" numerals on the decal sheet. Also shown are options for
various combinations of one, two or three white rectangles with no description as to their meaning. I think this option is a carry over from Copper State's 1/35
scale kit, and as such it is missing additional markings for registration plates carried on the front & rear of the body as shown in their
1/35 scale kit.
|
Construction
Not much to say outside of having to tidy up a few seams and adjusting the bevel on some of the body panels to aid their joining. The decals were exceptional - thin, opaque and easy to apply. There's really not much to slow one down
building this kit. Below are a few items to watch for.
- Beware the steps below the doors. They're easily snapped off during any handling to add other parts or while finishing seams. Thinning
them early in construction, as I did on my example, just made this problem even more evident. I suggest leave thinning them to the very end of construction.
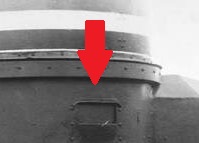
- There are a plethora of ejector pin depressions on the inside, though they aren't readily visible through the openings. If they
really bother you, on the real vehicle the slits have sliding interior covers (see example below), so any combination of the model's viewing slits could be
covered over from the inside, or you could obviously fill the marks in.
- A nice touch is the beveled edges on the body panels. Some do need slight adjustments to get a good fit, easily done with a few
swipes of a knife or some sandpaper.
- I originally wished to attach the driver's visor closed, but the way it's molded prevents that option.
- A few of the smaller items, such as the machine guns and the starter crank exhibit slight mold misalignment, so some sanding and/or
scraping of these parts will be needed.
- I found that the rear MG's mount contacts the wall before it can slip into its designated slot, forcing a slight upward
slant to the gun. I left it as is to give some variation to the build.
- In Step 6, there are instructions to remove a pair of molded on spikes located at the underside rear of the chassis
(part B2 & marked in red). Doing it at this point is problematic, as the two body sides (parts A6 & A7) make it difficult to remove the nubs
that are left behind. I strongly suggest their removal be done before any construction commences, while it's easy to access the area.
- I opted for a pair of St. Étienne MGs at Step 18, which requires the use of Part A2 on the turret. The lip on Part A2
was thicker than the corresponding lip on the turret, so some work is needed to get them to match. I expect the same will hold true for part A1, required for the
Fiat-Revelli MG option.
- I find it odd that the colouring suggestion for the interior is found after all of the body has been completed previously. It
should have been located closer to Step 3 & 4 where the side walls are attached to the chassis frame.
- Fitting of the drive shaft and its guard proved a tight fit. Take care to not snap it.
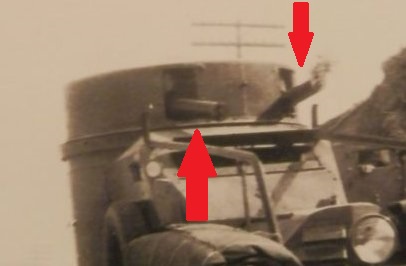
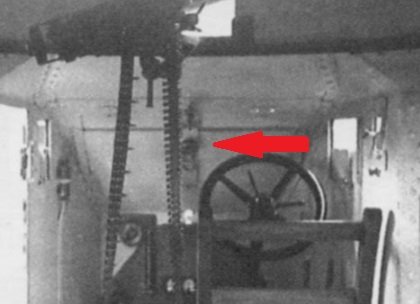
- Though the instruction illustrate the MGs as being level with each other, it appears that on the real vehicle the MGs were
actually set up to elevate independently (red arrows below). I chose to mount mine level as per the instructions.
Unless the builder is adventurous and decides to detail the interior, which would also require removing one of the molded on doors, I
see little else to do detail wise other than possibly replace the molded on drive shaft on Part A19 with a section of plastic rod, add the wire from the armoured
radiator grille to the headlight and add the opening mechanism with its associated support to the front window (red arrows below).
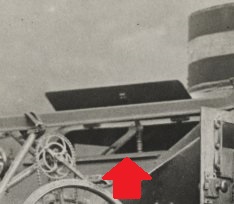
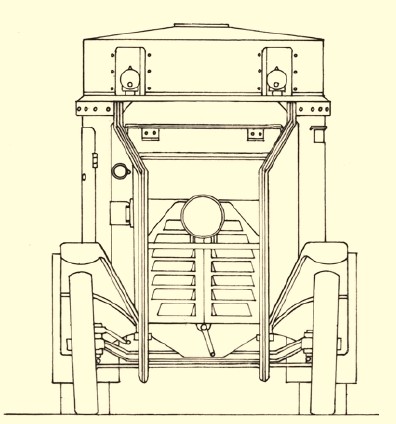
No mention is made on the vertical alignment of the front wheels. The following pictures (from [9]) show that they should cant slightly outwards at the top. There
is enough play at the spindle to hub join to allow the modeller to do this.
Addendum
Briga (kit no. 72090) offers a set of replacement wheels for those who want to convert this kit into a German beute version as used in World War Two.
Conclusion
Outside of a few minor molding and marking option issues this is a well thought out and executed kit. Quality is evident at the first opening of the box.
Nice detail, excellent fit, easy to follow instructions and superb decals. Very highly recommended.
I eagerly awaiting for Copper State to downsize their 1/35 scale World War One armoured cars. I expect they'll be as impeccable as this kit.
References
[1] Landships II (Lancia 1Z)
[2] Tanks Encyclopedia
[3] wikipedia
[4] Tank History
[5] The Military Factory
[6] Lancia Info Blog
[7] Other Axis & Allied Armored Fighting Vehicles, George Bradford, Stackpole Books, Mechanicsberg, PA 2008 ISBN-13: 9780-8-1173-4554 ISBN-10: 0-8117-3455-2
[8] Italian Armoured Cars and Reconnaissance Cars 1911-45: Osprey New Vanguard 261, Filippo Cappellano & Pier Paolo Battistelli, Osprey Publishing, Oxford, 2018 ISBN: 9781-4-7282-4332
[9] L'Autoblindo Lancia 1Z: e le Altre Italiane del 1912-1945 (Fiat Arsenale, Isotta Fraschini, Bianchi e Fiat Terni), Andrea Tallillo & Antonio Tallillo, Gruppo Modellistico Trentino, 2021 ISBN: 978-88-98631-18-6
Review sample purchased by the author.


|