|
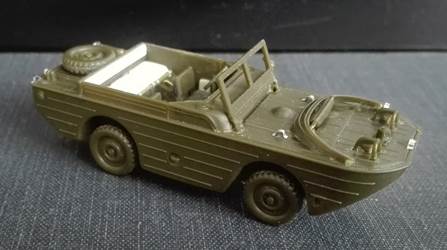
The plastic kit of the amphibious variant
of the jeep is proposed only by Academy, in two of their multiple
kits. In one it shares the box with a Jeep and a Kubelwagen, in the
other it shares the box with a M3A1 halftrack and a Harley Davidson
motorbike. My GPA came from this last (13408). As for other Academy
kits, the first impression is good. A single dark green mould gives
us every piece that is needed. No transparent parts are given. Sharp
and tiny details, flash free pieces, every thing say this is a good
kit. The dimensions are quite correct, being just a little longer.
| |
|
1/72 (mm) |
kit (mm) |
| Length |
182” |
64.2 |
65.6 |
| Width |
64" |
22.6 |
22.7 |
| Height |
69" |
24.3 |
23.9 |
| Height at the edge |
45" |
15.9 |
15.5 |
| Wheelbase |
84" |
29.6 |
30.5 |
| Wheel |
6.0 x 16 |
10.1 x 2.4 |
10.0 x 2.8 |
The supply catalogue number for the GPA was G504. 12,778 "Ford
Truck, Amphibian, GPA, ¼ ton 4x4"” were produced
by September 1942 to June 1943 and although this is quite a short
time, some changes were introduced along production. The US Army prefix
for an amphibious vehicle was 70. The registration numbers list
for the GPA batches is comprised between 702104 and 7014878. Steven
J. Zaloga in "Jeeps 1941-1945" wrote that 3,520 of them
went to the USSR (where it was well appreciated) and 852 were supplied
to the British Army, where they were called "Car, 5-cwt, amphibious
(Ford)". The WD prefix letter for amphibian vehicle was P, but in
a photo a GPA sports what look to be an M, which is correct for a
car. Again I didn't find the allocated WD number, anyway the numbers
I found lies in the 5219xxx batch.
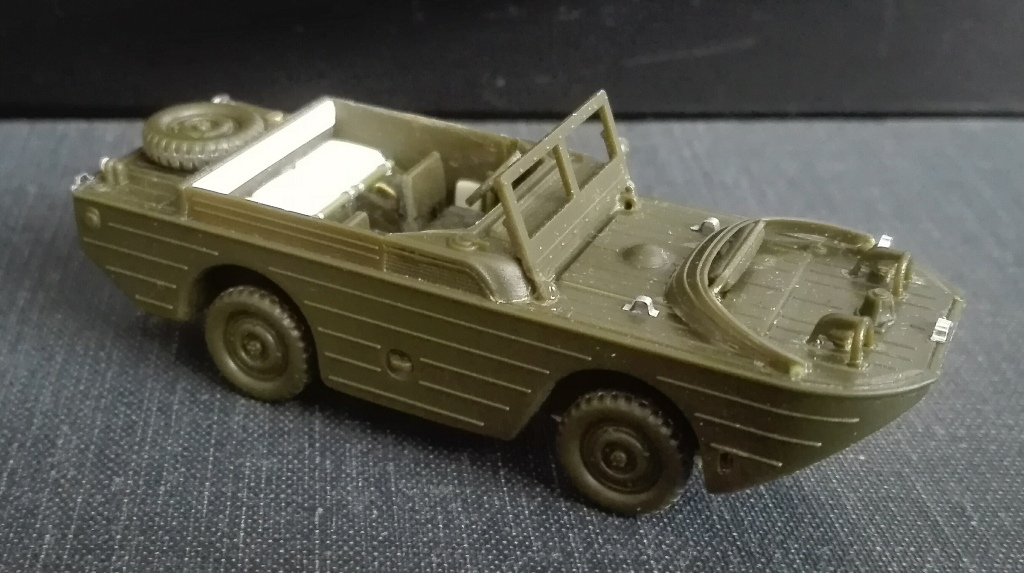
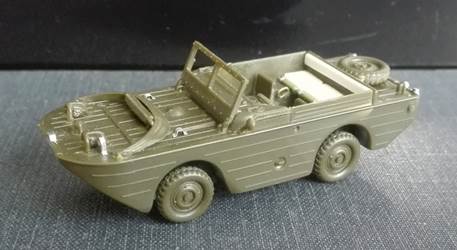
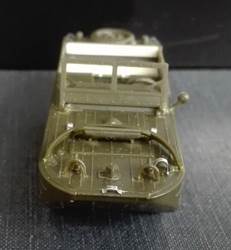
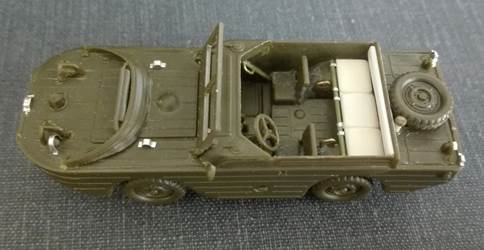
The kit depicts a hybrid between the mid production and the later standard. Early features depicted by the kit are the short rear lights, while later features are the asymmetrical spare wheel, the jerrycan holder and the protected muffler. Further features for very early production vehicles (the first 1.300) would be the flat side panels (the ones over the edge) and no external lifting rings. Late production vehicles had an anchor and a boat hook stored on the right side.
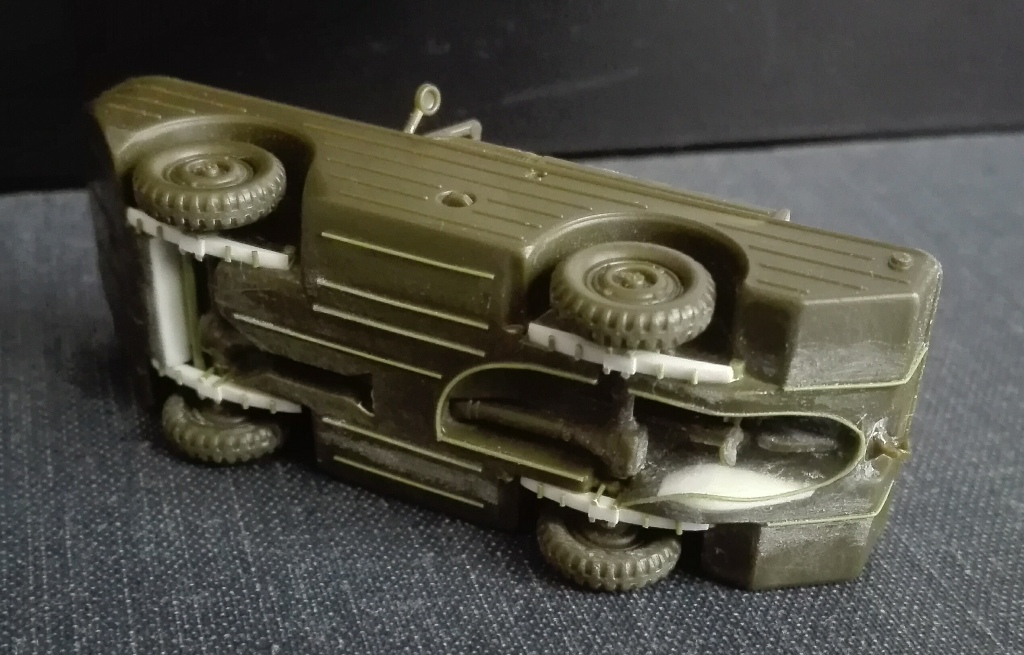
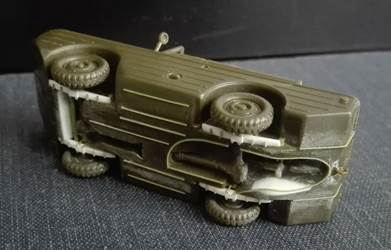
Closer examination of the model, revealed
some problems in the interior and on the belly, with some shapes mistakes
to be corrected. The front axle housing misses the room for the steering
rod and the water propeller housing is incorrectly central. Although
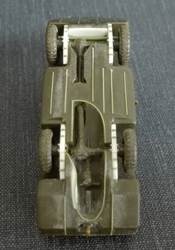
the belly looks a bit too low, the ground clearance is well respected.
For my model I kept the variant suggested
almost. Here what I did to detail my Seep.
Exterior
- I sanded down the belly to the correct shape
and erased the leaf springs opening the axle slots.
- The front axle misses the steering rod. I reshaped
the housing to make room for it and then a made it with stretched
sprue.
- The propeller tunnel wasn't central. I shaped
a plastic piece to be accommodated in the propeller tunnel and give
it a more correct shifted placement. I glued a rib edge made by
thin stretched sprue (very early GPA hadn't).
- The axles are too low and not in line with
the wheel hubs. I filed their upper side to push them higher and
glue them aligned to the wheel hubs.
- I made the attachment points for the leaf spring
with stretched sprue and these were scratchbuilt
by plastic strips and stretched sprue.
- I added the belly ribbing by thin stretched
sprue.
- Just forward of the front right wheel I drilled
the oval hole through which exits the exhaust pipe coming from the
deck. About the exhaust, early GPA mufflers (it is the piece C10)
didn't have the protection.
- The lights brush guards need to be thinned,
I used a sharpened blade.
- The blackout light misses the brush guard;
I made it with a thin metallic strip.
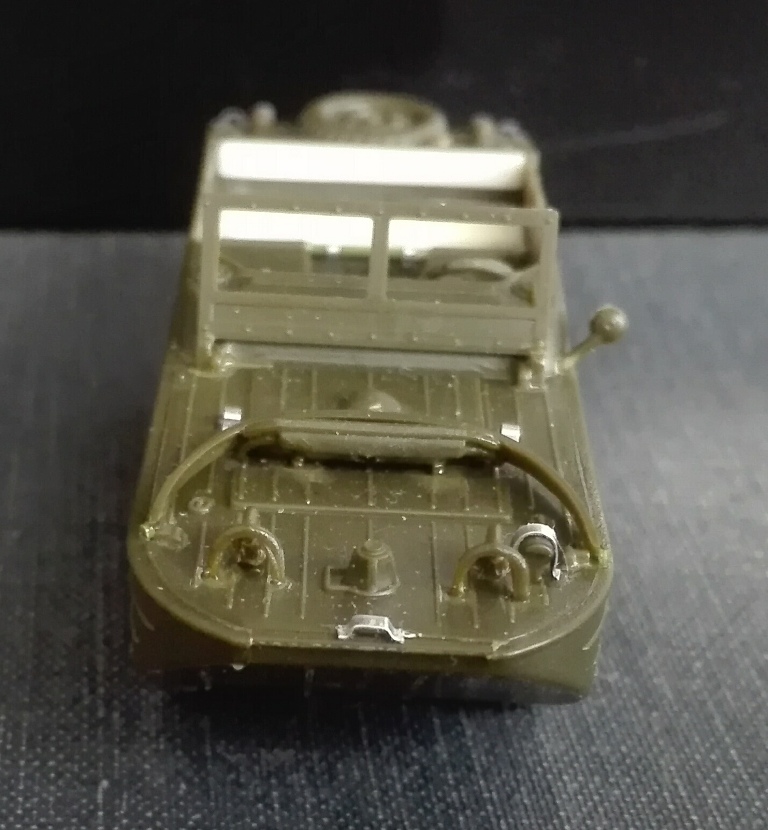
- The windshield stoppers are missing; I made
them with thin metallic strips.
- I made the hinges of the foldable bow part
with stretched sprue sections.
- There were three points to tie the ropes like
in a boat; one on the bow and two, smaller, on the rear corners
of the stern. I made them with thin metallic
strips.
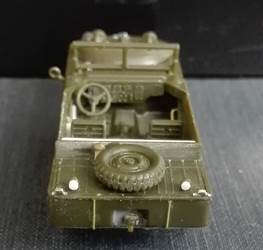
- On the rear deck I replaced the moulded on
fuel tank cap by plastic rod and stretched sprue to have the correct
rounded section.
- I added the rear lights using slices of plastic
rod. Late production lights were taller.
- I placed the spare wheel in the middle of the
deck as for about the first 6288 GPAs and it is the only modification
I made to the variant proposed by the kit.
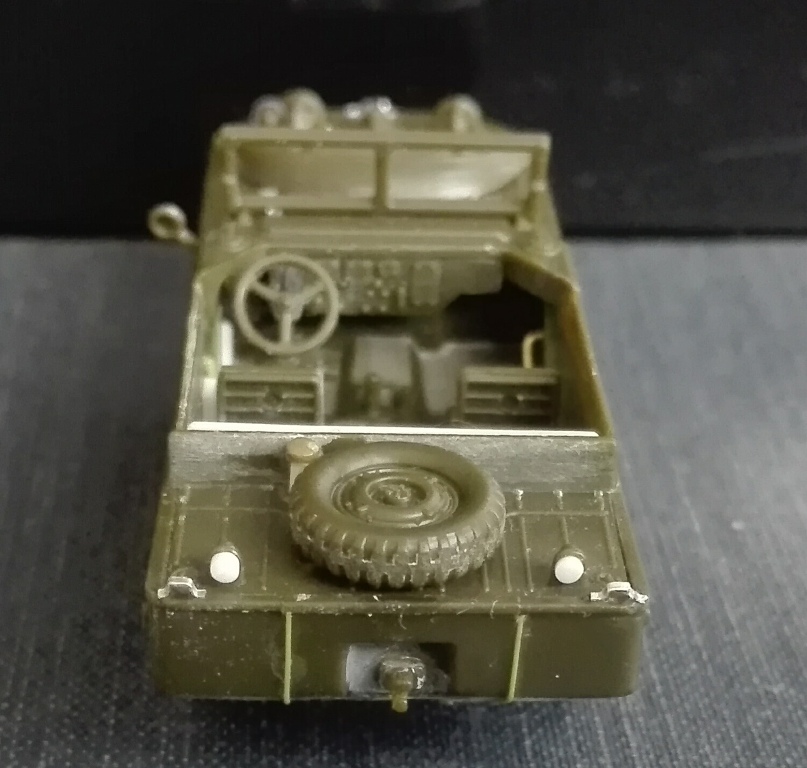
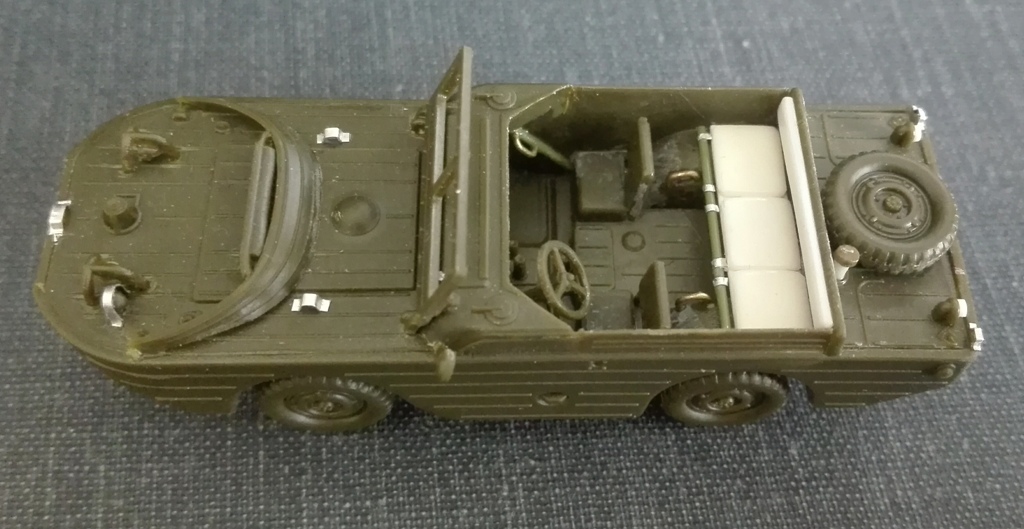
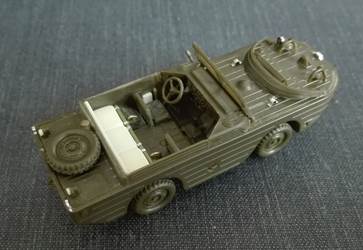
Interior
- The exterior ribbing was visible inside as
an engraving (like in the Kubelwagen). The kit interiors are flat
and the correction is very hard. I ignored the problem.
- The air outlet inside are too long and too
much inclined to the rear. I filed the piece to the correct shape.
The dimension is given by the external mesh rear edge.
- The 17" steering wheel (6.0 mm in 1/72)
is shifted to the centre because the above wrongly shaped air inlet
and the rod is placed too much vertical (I guess it should be very
hard to drive in this way). I modified its position and the steering
wheel now is aligned to the driver seat in a more natural way to
use.
- In the forward left corner (near the left foot
of the driver) there was the fire extinguisher. I made it with a
plastic rod section.
- Just outside the left hip of the driver there
was a little box and a piping which ends to the little depression
visible outside. I made them by plastic sheet and stretched sprue.
- On the forward sides there were two inclined
structure rods, I made them by stretched sprue.
- There were three handle, two in front of the
rear seats and one in front of the forward passenger. I made them
with metallic wire.
- The rear seats are depicted as a single bench,
anyway in the photos I've seen, there were usually three seats with
a unique backrest. I choose to change the layout of the rear seats
using plastic sheet. In front of the seats there was a rod, I made
it with stretched sprue, were the cushions were fastened. I made
the belts with thin metallic strips.
- As said, no transparent parts are given; anyway
they could be easily cut off from some packaging.
Decals
Only the registration number 705282 is given for an anonymous mid production GPA. I didn't find its photo; anyway it is compatible to the variant depicted, more or less (see above).
Conclusion
After having made the Dodge WC-54 and the GMC CCKW-353, this is my
third Academy kit and I was prepared to the possibility to find a
well detailed kit with some shaping errors. Although it could be considered
minor, being less present in the photos of the WW2 than other cars,
12,700 GPA were made and they were sent in North Africa, in Italy,
in France, as well as from the Eastern Front and the Pacific area.
It saw service in the US Army, British, Canadian, French and Russian.
Some captured GPA's were used by the Germans (see on beutepanzer.ru).
I think this should make it interesting for a lot of modelers. Having
said this, it is my opinion that a better attention in making the
moulds would be appreciated. For an aftermarket maker, the correct
lower hull should be an easy part to do. Anyway it is not hard to
correct as it could seem. A decal set with some more options would
be welcome.
References
[1] Vehicules Militaires n. 7 April 2006
[2] Osprey New Vanguard "Jeeps 194145" by Steven J. Zaloga
[3] G503 Military Vehicle Message Forums
[4] Walkaround (always pay attention to the restored vehicles details which could differ from the original).
[5] mapleleafup.net (Just 386 War Dept. numbers look to be allocated and refers to the SM2820 contract: P5219692-5219876, P5219881-5219981, P5587101-5587200.
No further info about the other GPA's look to be found, however every photo I've seen about them have a WD number comprised in these batches.)
This
model can be purchased from

|