|
Academy
|
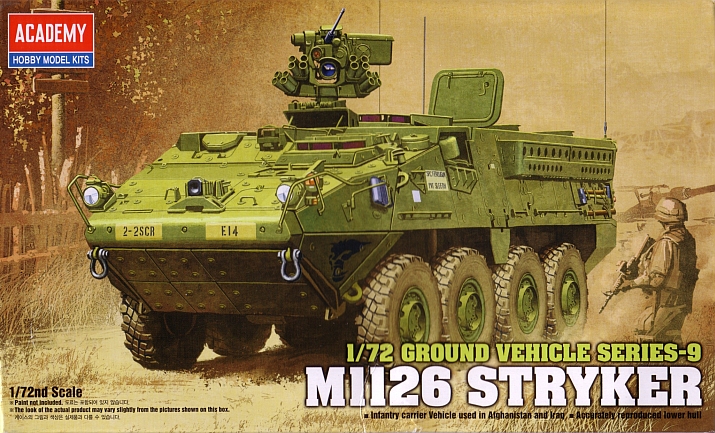
M1126 Stryker |
|||
| Kit #: 13411 |
Review by
- Al Magnus
|
|||
|
Academy
|
M1126 Stryker |
|||
| Kit #: 13411 |
Review by
- Al Magnus
|
|||
 |
|
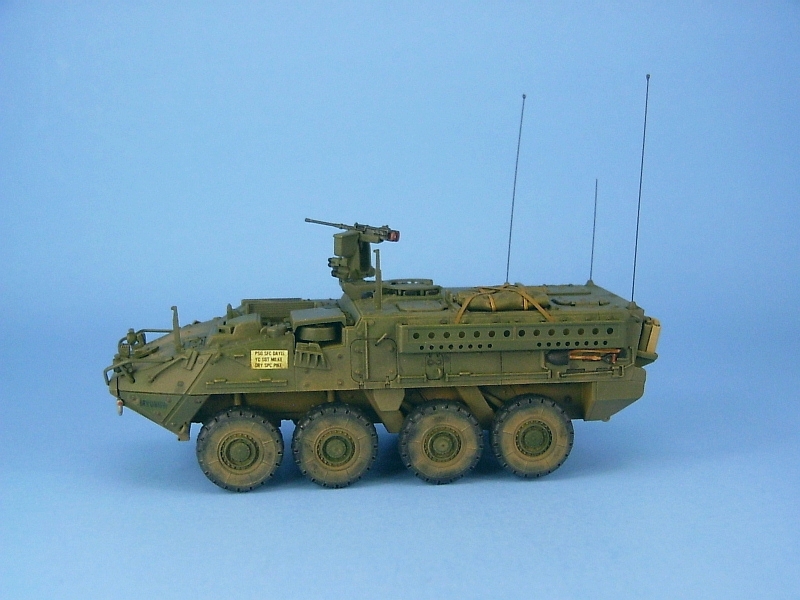
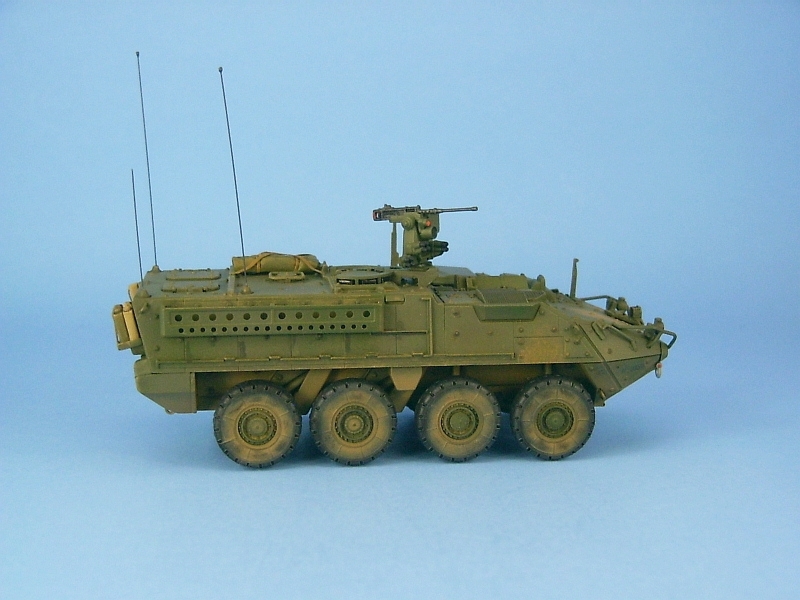
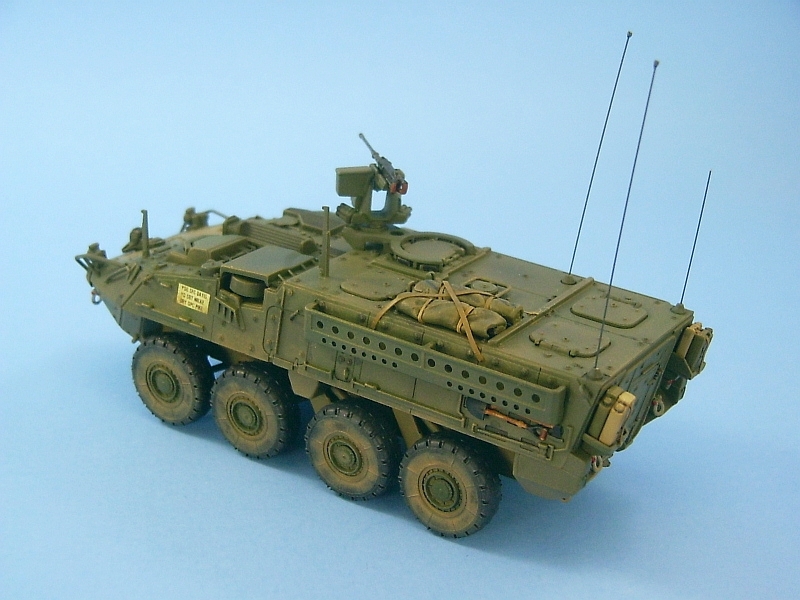
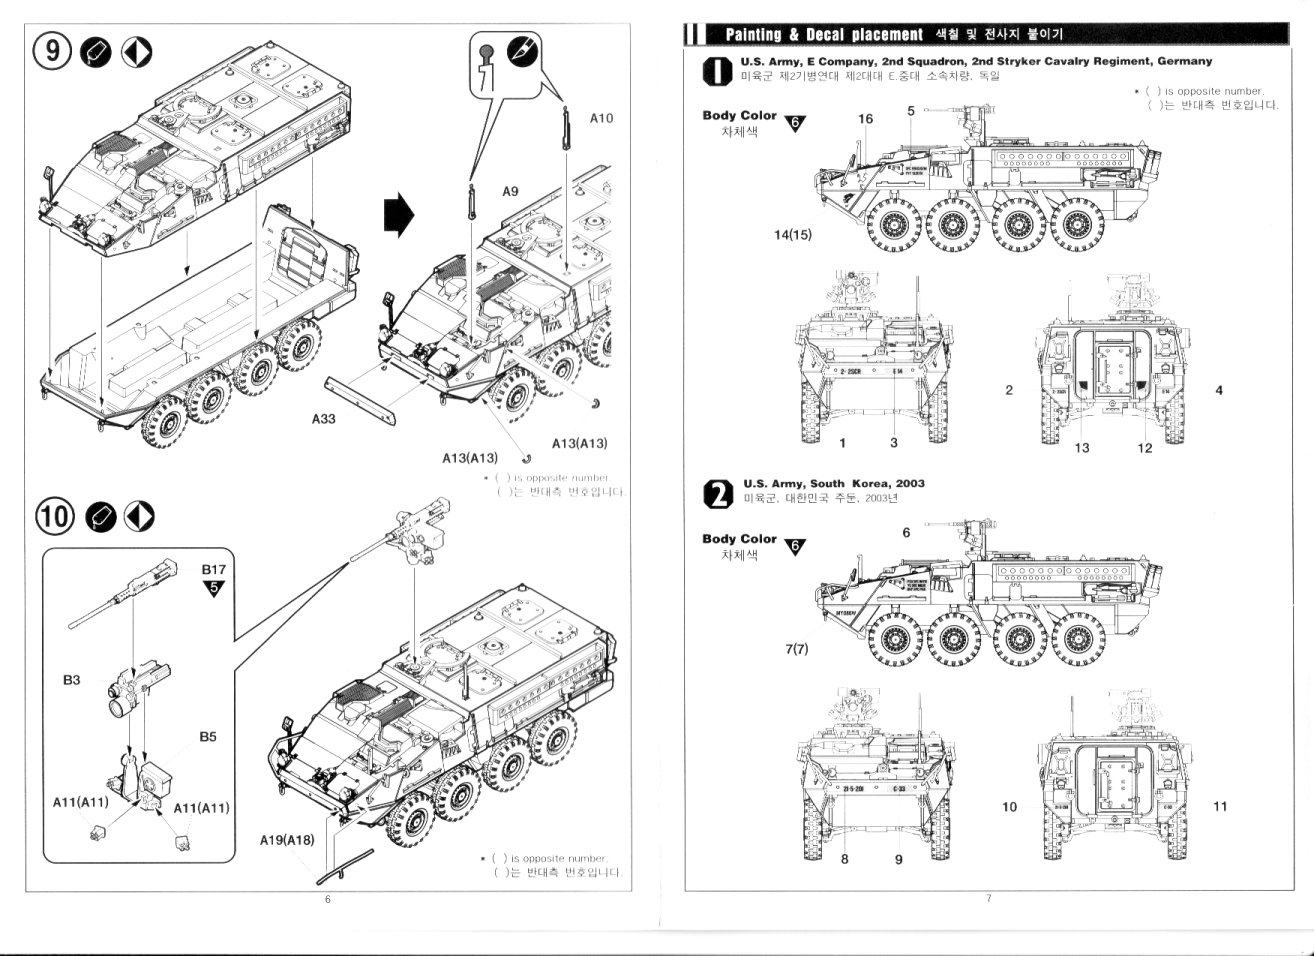
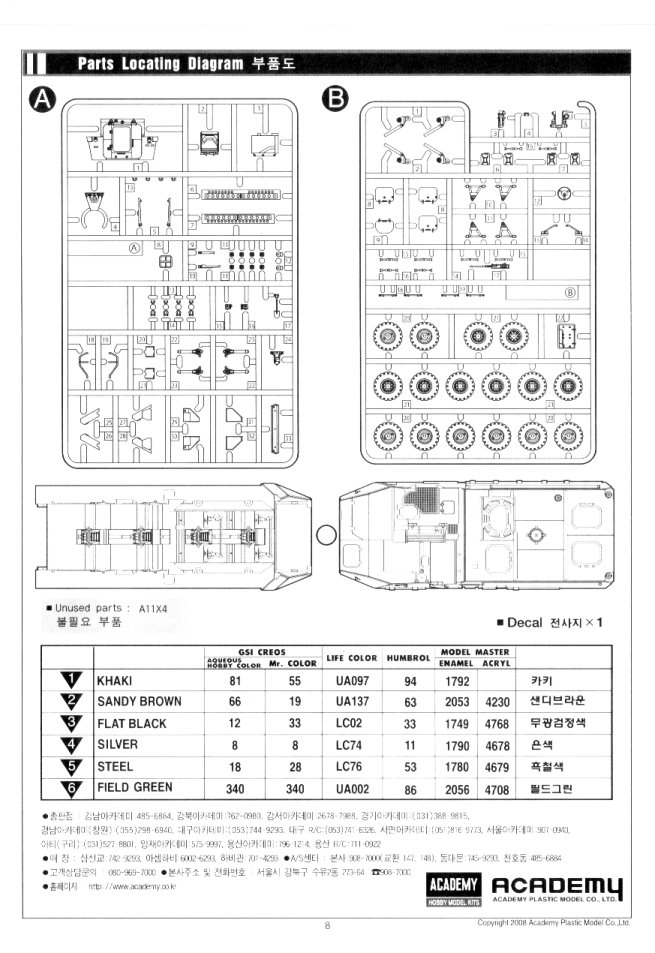
There are 106 parts molded in a dark green plastic. All the parts are well molded with excellent detail. Fit is excellent throughout. Instructions are easy to follow for the most part. There is a small decal sheet with markings for two US Army Strykers in overall green camouflage:
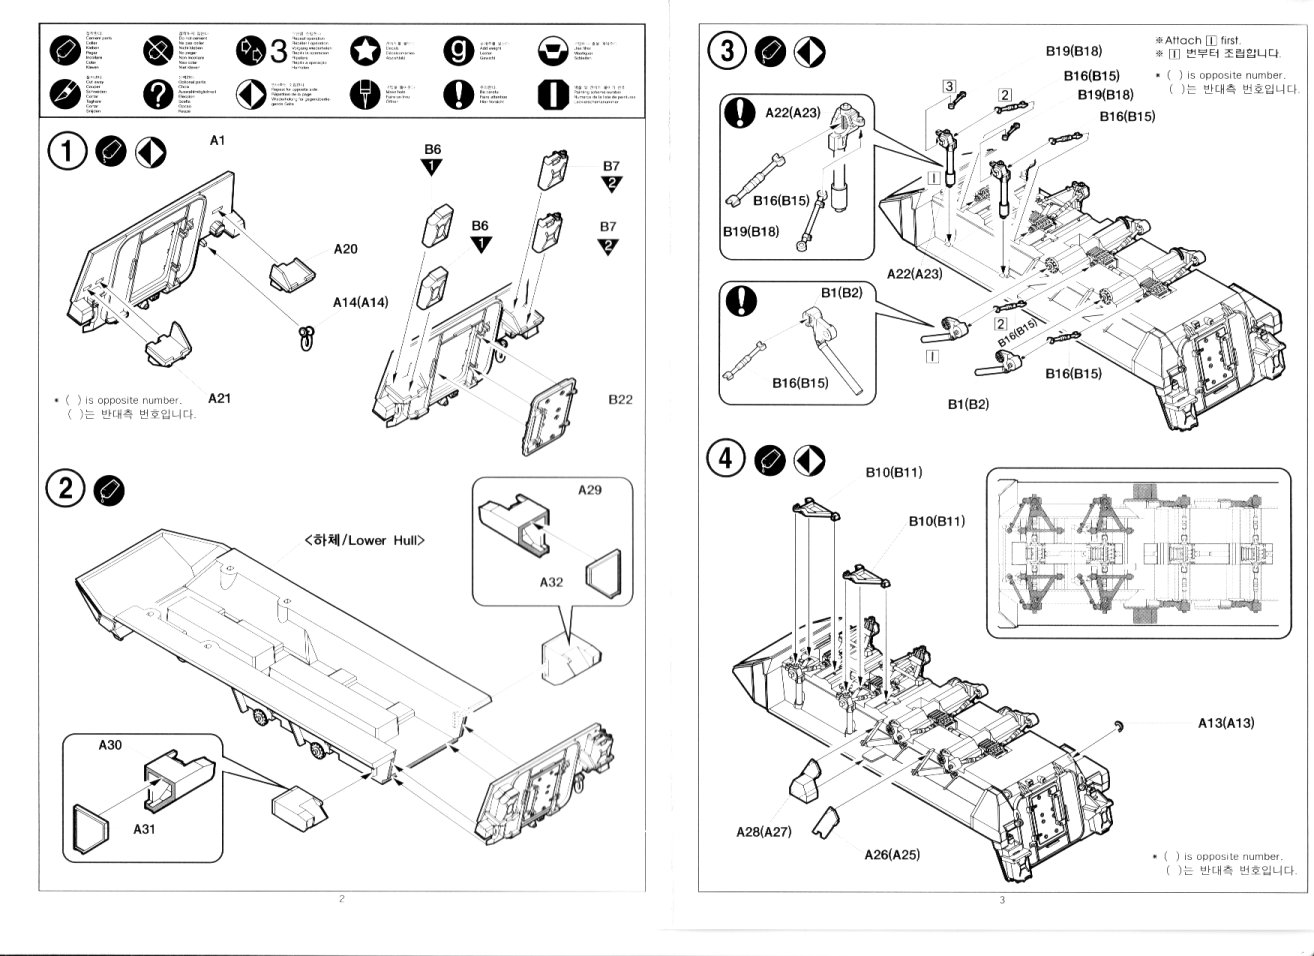
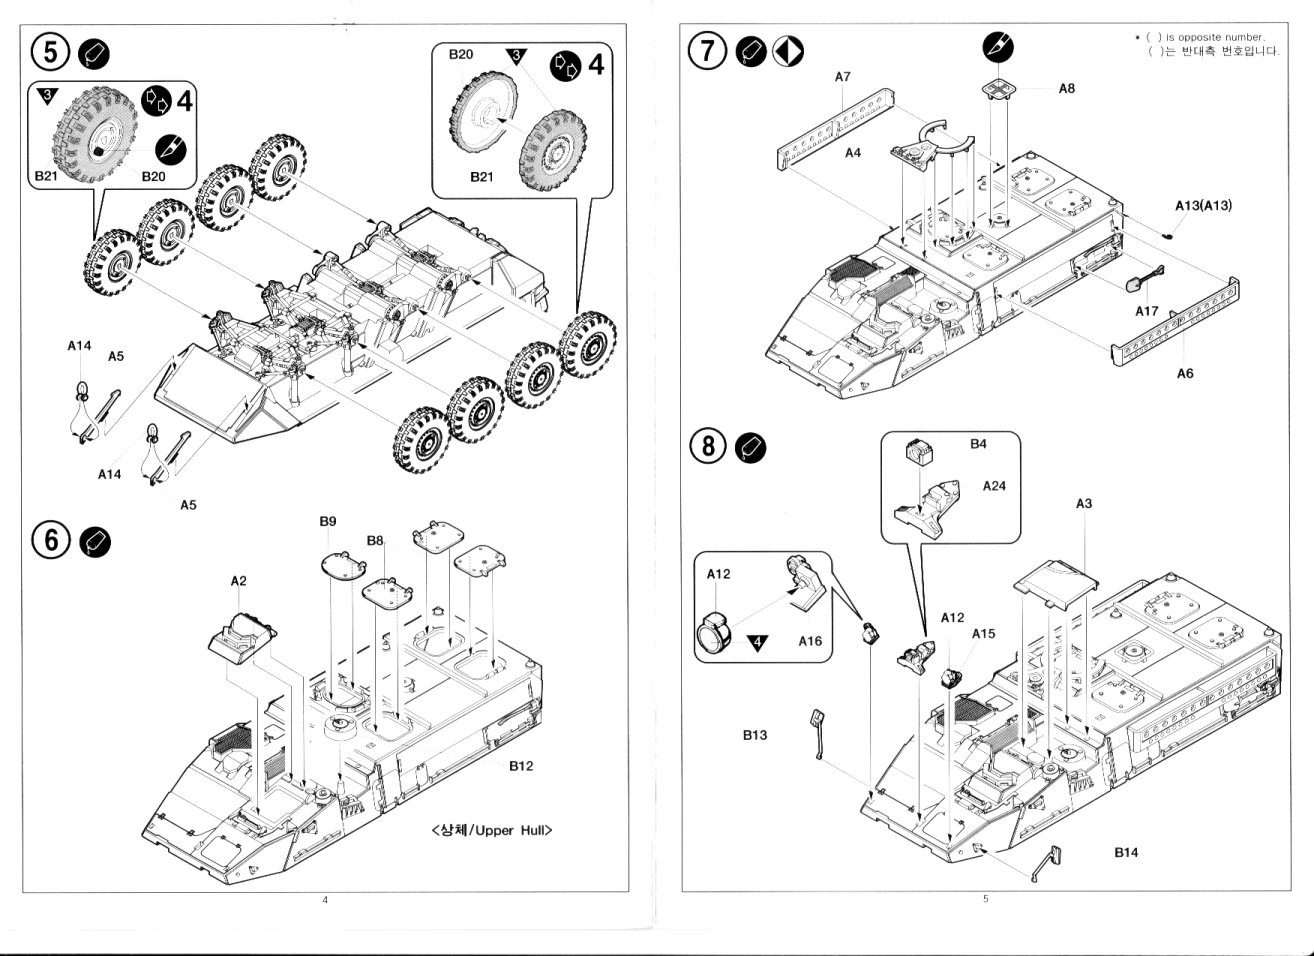
The suspension for the four front wheels is a bit tricky to put together. I found the tie rods (parts B18 & B19) difficult to get into their proper positions. The instructions suggest a particular order for attaching the parts (struts, then drive shafts, then tie rods and finally the suspension arms) which as I started construction turned out to be the most logical way to add them. Plus there is a nice diagram showing the suspension's layout which also helps in figuring out how it all goes together. The tread on the tires is not accurate at all and is the worst part of the kit. The wheels come molded in two halves. There are locating points molded to the inside each half but they actually make the alignment of the two halves worse. I removed them with my handy plastic nippers and was able to get the halves lined up properly. Unfortunately due to the way the tread detail has been molded, it is impossible to scrape and sand the seams without destroying what tread detail there is. I tried to reduce the prominence of the seam by melting the plastic somewhat by applying liquid glue to the seam and then brushing along the seam as the glue softened the plastic. Though not entirely successful it did reduce some of the seam. I had a minor issue with the rear tow hooks as they had interference problems with the body. Extra detailing was limited to a few minor items. The handles for the jerry cans were opened up with my trusty drill set and I added straps from a scrap photo-etched brass frame after they were glued in place. I added the prominent L-shaped handle on the left side and a handle made from bent wire. My last change was to drill out the handle for the machine gun. Stowage is non-existent on this kit which is unfortunate because you almost always see Strykers with bags, tarps, jerry cans and so forth all over the exterior of the vehicle. I fashioned some tarps from rolled up Tamiya 2-part epoxy putty and added straps cut from thin lead foil. These were glued to the top of the vehicle and a set of tie downs were made from more strips cut from some more lead foil. The top edge of the stowage bins (parts A6 & A7) was thinned to make them not look so thick. I wanted to add more jerry cans inside the bins but the bins bulged slightly when the cans were pushed inside. I suppose if you really wanted to add stuff inside the bins you could scrape them before attaching them, but in my case it was too late to do this. I didn't want to have the mirrors extended. They looked very fragile and were crying out to be broken as the model was handled. I bent the mounts and attached them to the model in their folded configuration. The decals were excellent and snuggled down well with an application of Microsol. The inks are dense enough to not let the dark green camouflage bleed through. A quick note here about the painting guide. I use enamels, so according to the guide I was to use Testors Model Master 2056 for the green camouflage, which is RAF Medium Slate Grey. This selection seemed odd to me, and when I checked out this colour at my local hobby shop it appered to be very close to Luftwaffe RLM 02 Grey. My solution was to custom mix my camouflage - Testors Green Drab 1787, which is quite dark, lightened with some Medium Green 1713 until I had a green that I was happy with. As per my usual practice, I left the wheels off, leaving them 'til the end when I attached the last remaining parts following the painting. I had test fit them beforehand and to me they appeared to all touch the ground, but when it came time to the actual gluing this was not the case. I had to adjust a few of the wheels by extending the length of their mounting holes to allow them to shift downward a bit when glued to the wheel to the hub. This got most, but unfortunately not all, of the wheels to touch the ground. I'm not sure why this happened. I think the root cause had to do with the adjusting the tires/wheels as mentioned above so the halves would match, thus causing the mounting holes to shift from their intended vertical position by a fraction of a millimetre, and for some reason my test fitting didn't show the problem. The last detail was the antennae which were made from sections of guitar wire. On the two longer antennae I added knobs to the top end. I do this by dipping one end of the wire into some super glue, then dipping the end with the glue into some baking soda. This creates a little knob which I quickly dip again into some super glue follwed by a shot of accelerator. I then do a light sanding of the knob and then give it a thick coat of paint to smooth out any roughness from the baking soda. The nice thing about this method is that it produces fairly consistent results, and if you should happen to make the knob too large or it's mishaped then it can be scraped off the wire with an Xacto knife and done over again until you get the results you desire. Academy's Stryker makes into a nicely detailed kit straight from the box. The only quibbles I have with it is the lack of external stowage and most of all the very poor tires. Apparently aftermarket replacement wheels are available and the lack of stowage was addressed by Academy when they reissued this kit (kit no. 13413) with a resin stowage set made by Legend.
Review sample purchased by the author. |
| Back to Academy Kit List | Back to Construction Reviews |
Article Last Updated: 13 February 2009 |
Back to Home Page |