|
|
M3 Half Track with Wurfrahmen |
|||
| Kit: Academy # 13408 Kit: Dragon # 7310 |
Review by Rob Haelterman - heman_148(at)hotmail(dot)com | |||
|
|
M3 Half Track with Wurfrahmen |
|||
| Kit: Academy # 13408 Kit: Dragon # 7310 |
Review by Rob Haelterman - heman_148(at)hotmail(dot)com | |||
|
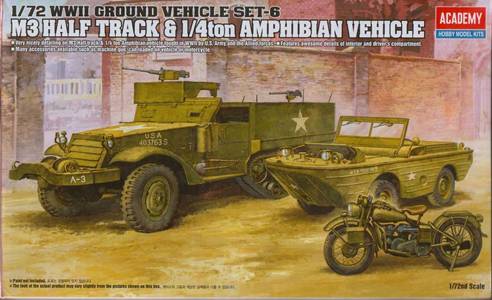
| Introduction This M3 Half Track comes as part of
Academy's "WW II Ground Vehicle Set #6", where it shares
the box with an amphibious Jeep and a Harley Davidson motorcycle. For the purpose of this review I dug
a bit deeper in my library and learned that the first M3 was produced
in May 1941. Minor modifications were added over the production run,
like a spring loaded idler in the Fall of 1942, which was reinforced
in the Summer of 19433 (Academy gives the latter type.) Early models
had a ditch crossing roller on the front bumper, while later models
had a winch (Academy offers both.) Mine racks were added to the sides
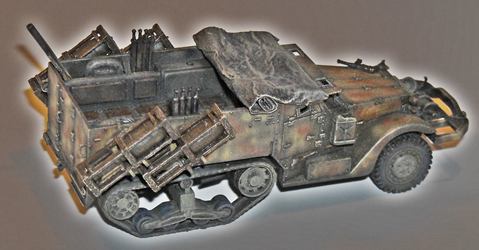
in August 1942 and subsequently retrofitted. I decided to build this kit after seeing a picture of a captured M3 in Panzerwrecks 3. The vehicle apparently belonged to 10.(Pi.)/Pz.Gren.Rgt.111, 11. Panzer Division, and was put into use as a gepanzerter Mannschaftstransportwagen M3(a) around December 1944. This clearly was an M3, not an M3A1, and had the striking characteristic that it was fitted with Wurfrahmen to the sides of the hull. I was in for some conversion work.
Accuracy I shied away from measuring the kit
against plans, but noticed some errors/omissions:
Construction
I started construction with the tracks,
adding both the "groove" and the "rail". I also
added a groove to the top return roller. The whole of the tracks assembly
can be added to the chassis without the use of glue, which is very
practical for the paint-job to come. There is some interference between
part A12 (the front axle) and part A2 (chassis), which needs some
fiddling.
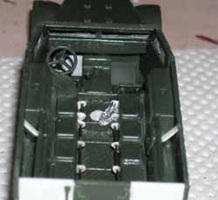
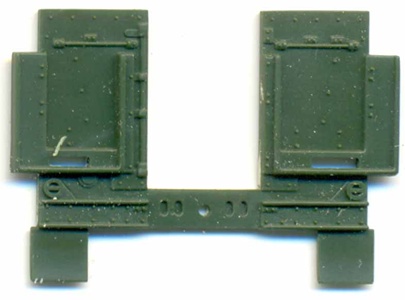
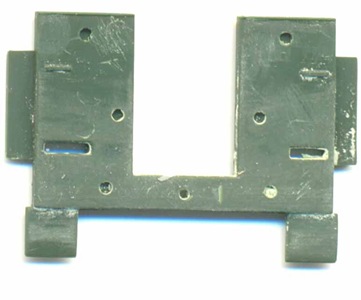
I added the reinforcement rails to
the interior stowage bins and a footrest beneath the seats. I saw
pictures of the interior of an M3 where there was a third seat in
the middle, but I chose not to replicate this.
There are some holes on the inside of this hull plate, for which I still not have found the reason.
I also omitted the rear mudflaps as
the pictures of the vehicle I was building did not show them.
The armored windshield is far too thick,
so I sanded it down. If, like me, you build it opened up, you will
need to add supporting rods. Academy gives you the choice between
open and closed engine louvres at the front of the engine compartment,
which is nice, as is the choice between a winch and a roller. I finished construction by adding Notek
lights to the front and rear and adding four Wurfrahmen which I stole
from one of Dragon's Sd.Kfz.251 kits (in this case kit
7310).
In general, I noticed that most ejector marks are strategically located, except that on the winch and on the inside of the tyres. Fit is also quite good, except for those few steps that are mentioned above.
Painting and markings I tried to faithfully reproduce the
vehicle in the pictures I had found, which are in black and white,
unfortunately. No markings are to be seen, and the vehicle's color
seems to be non-uniform. I went for the following (hypothetical) camouflage
scheme
References [1] Half-Track: A History of American Semi-Tracked Vehicles, R.P. Hunnicutt [2] Panzerwrecks 3, Lee Archer & William Auerbach [3] http://beute.narod.ru/Beutepanzer/us/M3_halftrack/wurframen.htm
|
| Back to Academy Kit List | Back to Home Page |
Article Last Updated: 04 June 2011 |
Back to Construction Review Page |