|
ADGZ |
|||
Kit # 72262 |
Review by
- Al Magnus
|
|||
|
ADGZ |
|||
Kit # 72262 |
Review by
- Al Magnus
|
|||
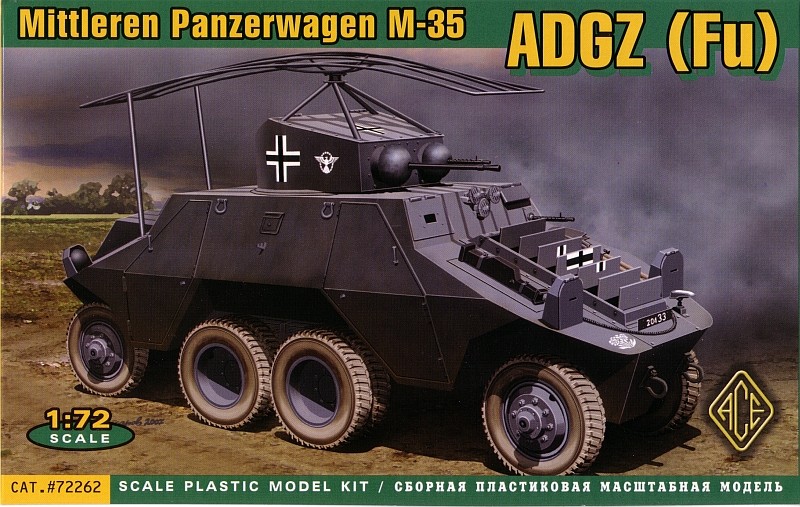 |
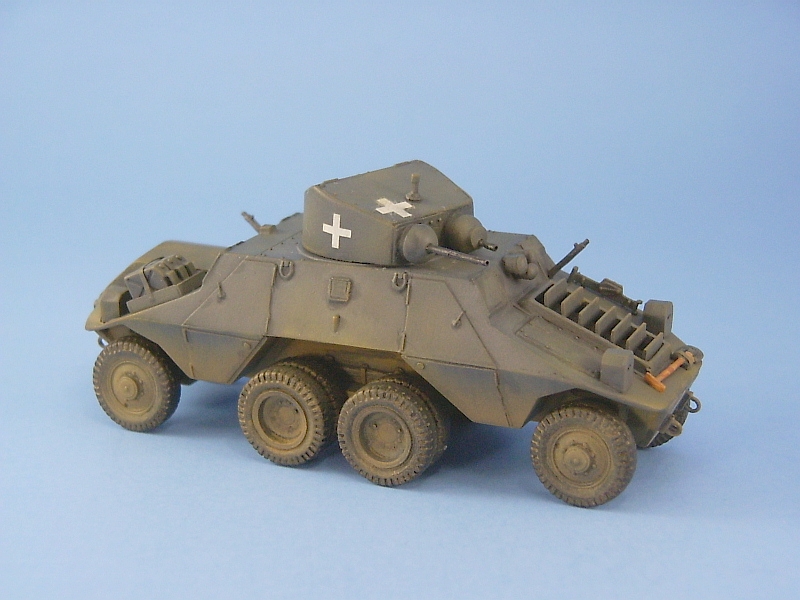
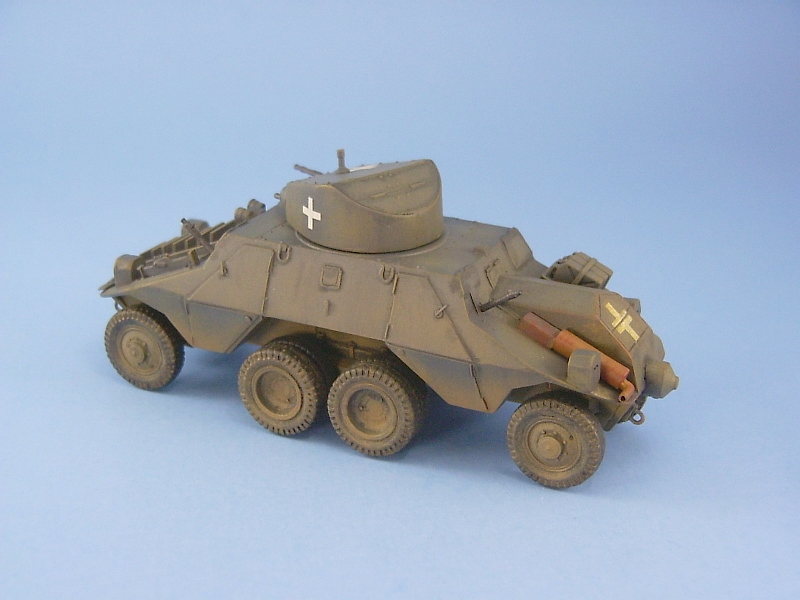
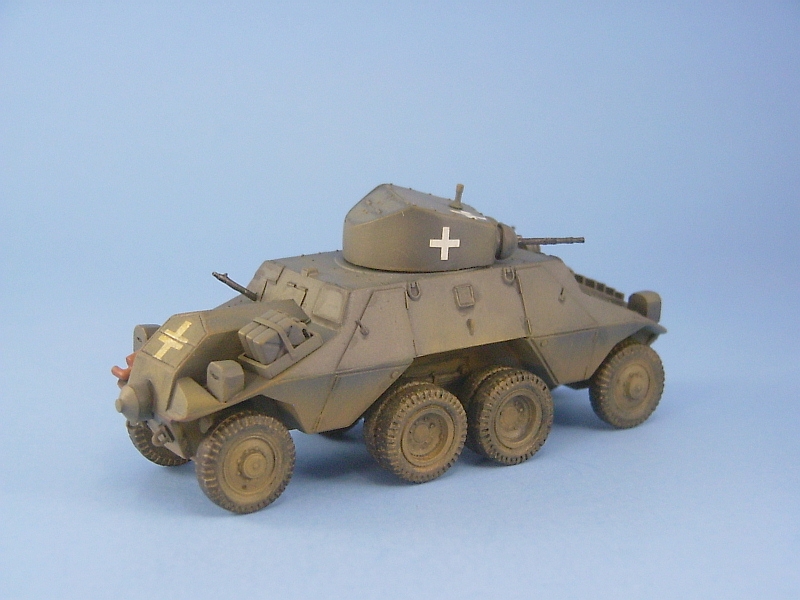
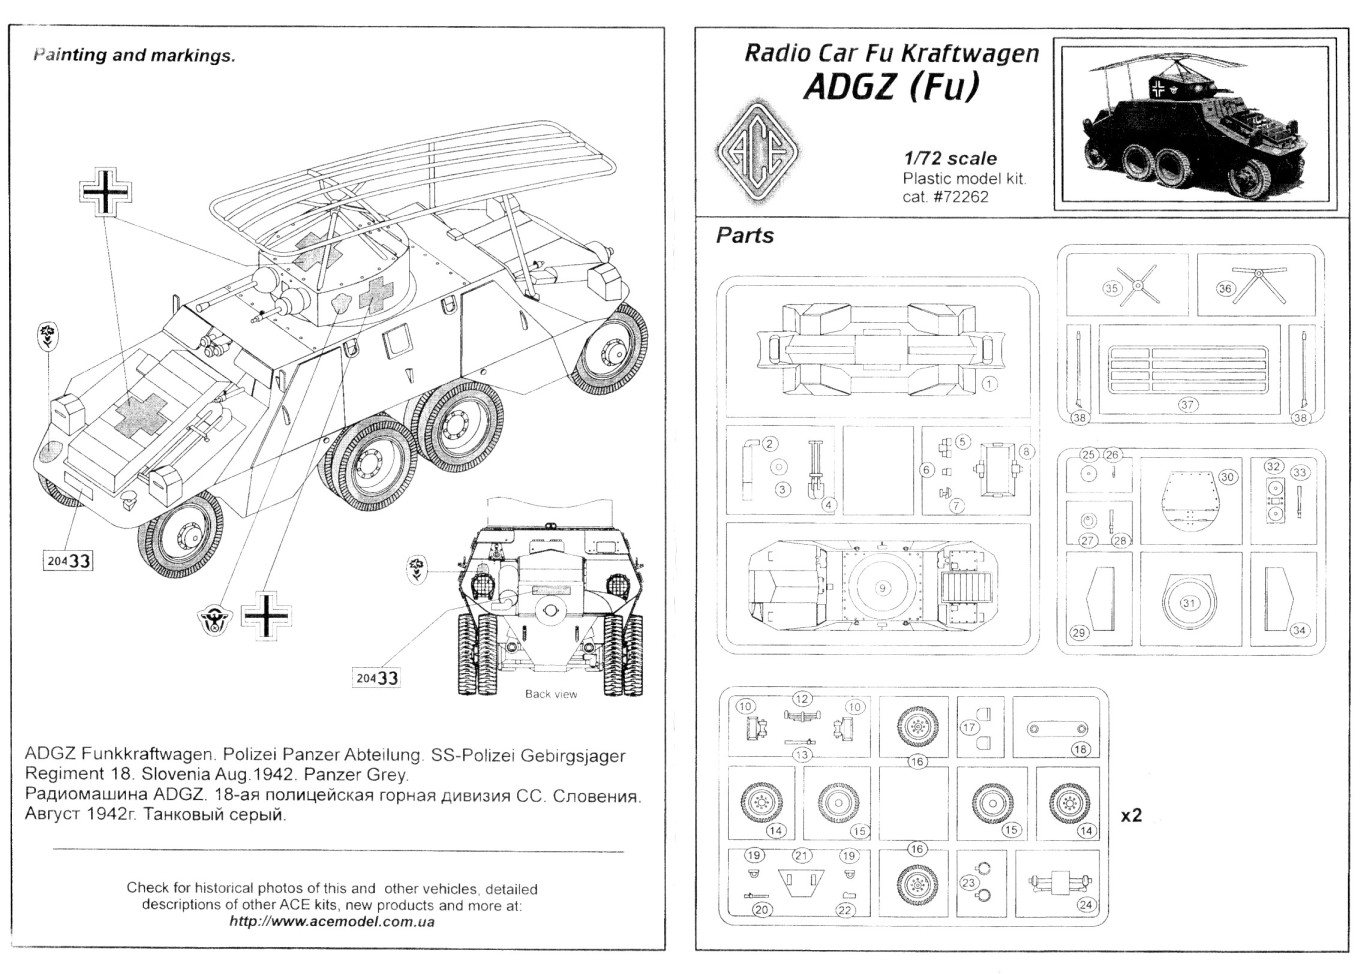
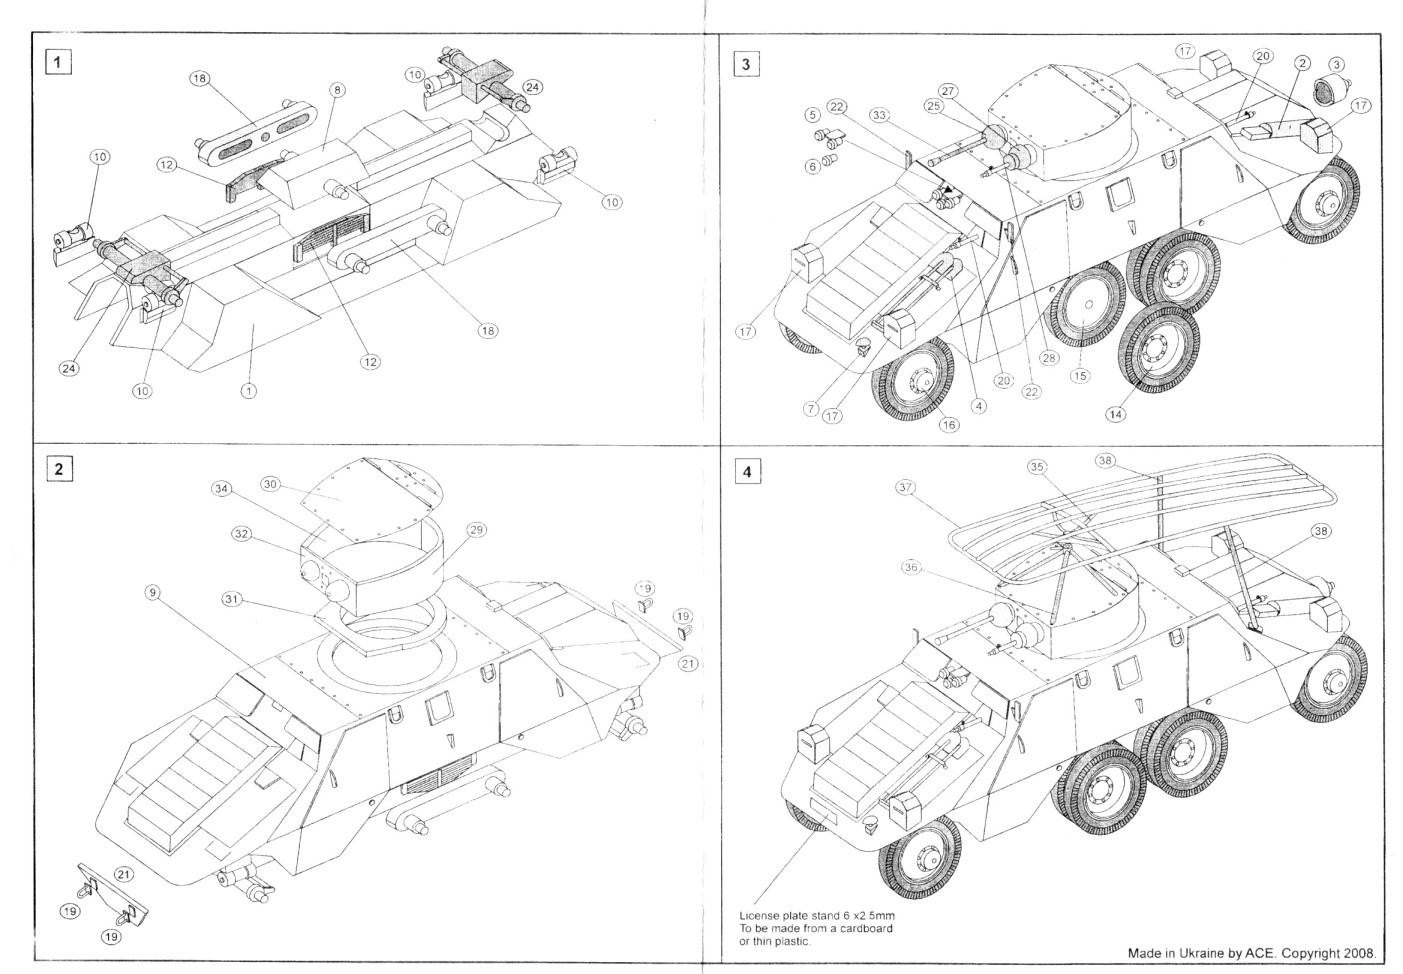
In the box you get 66 parts on five trees, molded in a soft light blue plastic. There is also an instruction sheet and a very tiny decal sheet. The molding is pretty rough and basic, typical of the vast majority of short run model offerings from Eastern Europe manufacturers. For the most part the pieces are useable but there is an obvious seam to be removed from almost every piece. The wheels are particularly poor and removing the seam will destroy what little tread pattern there is down the middle of the tires. On other parts removing the seam will flatten them out, such as on the wheel shafts. At least the soft light blue-grey plastic makes the cleanup task less difficult but it is very easy to break the thinner pieces such as the gun barrels, and the antenna frame supports. Parts fit is generally poor and you’ll spend the vast majority of your time cleaning up and doing test fitting. There are three areas that need special attention. First is the fit between the upper and lower portions of the body halves. Take extra time here and you’ll eliminate the need for major amounts of filling and sanding. Even after all my test fitting, I still needed some filling around all of the fender areas. The wheel opening at the lip where the top and bottom meet needs to be thinned also. The next concerns the middle set of dual wheels. The way the suspension is set up for these pretty much guarantees that they will not touch the ground. Some extra work is needed here to avoid this. The suspension arms for the wheels attach to a box like structure (part 8 – the transfer case maybe?) that attaches to the middle of the underside of the body. I kept the sanding of this box structure to a minimum so I wouldn’t reduce its height too much in an attempt to have it sit a bit closer to the ground than what it appears to be intended. When it came time to mount the wheels I did the corner wheels first and then the middle sets afterwards. Even my best effort here still required me to ream out the holes in the rims just a bit larger to allow the wheels to shift down a little to allow them to touch the ground. The last problem area is with the turret. Because it is made up of four parts – base, left and right sides, and top, which compounded with the poor fit, makes putting this together a challenge. I had to bend the top front of the turret to increase the slope to get a better fit with the sides. The markings are for ADGZ number 20433, of which I found four pictures on the web. I wanted to model an ADGZ that didn’t have the antenna frame as I much prefer the cleaner brutish look of the ADGZ without it. A search of the web produced two images of an ADGZ carrying the plain white crosses used during the German Polish campaign and decided to do my ADGZ in similar fashion. To get the look I wanted and to replicate the reference pictures as much as possible I performed the following modifications: 1. Sanded off the poor door handles that were
molded to the body and added The white crosses came from the spares box. The kit was sprayed overall with Testors Model Master Panzer grey and weathered with Model Master RLM66 dark grey and Aeromaster Earth Brown enamels. All in all this is a kit that makes into a reasonable
representation of the ADGZ but it will take a lot of work and some
patience to transform this fairly crude lump into something less lumpish.
If this kit is representative of what Ace produces then I for one
will limit future purchases of Ace kits. I have lots of other subjects
to build that promise to be a lot easier to build.
Review sample purchased by the author. |
| Back to Manufacturer Kit List | Back to Construction Reviews |
Article Last Updated: 13 January 2009 |
Back to Home Page |