|
Ace
|
www.onthewaymodels.com |
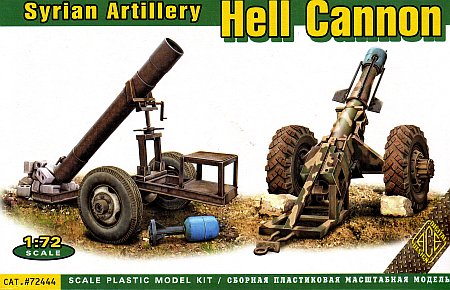
Syrian Artillery Hell Cannon |
|||
| Kit #: 72444 |
Review by
- Al Magnus
|
||||
|
Ace
|
www.onthewaymodels.com |
Syrian Artillery Hell Cannon |
|||
| Kit #: 72444 |
Review by
- Al Magnus
|
||||
 |
|
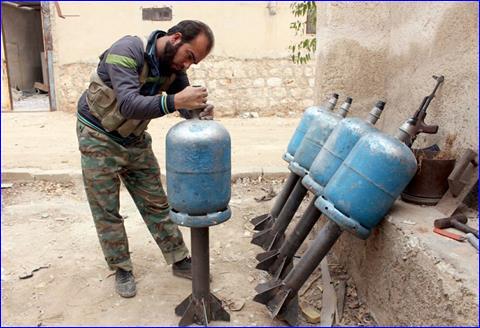
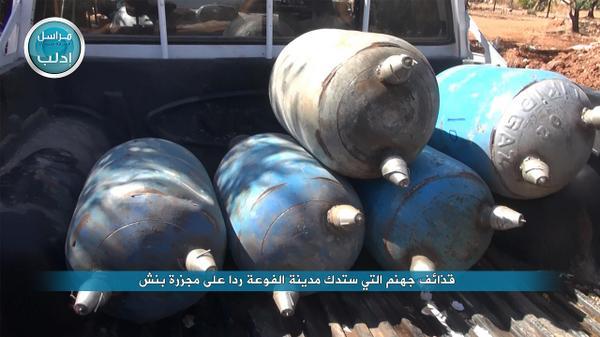
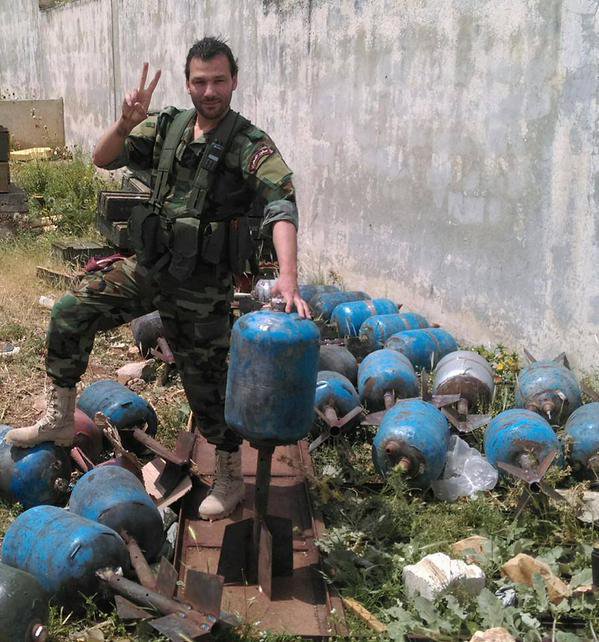
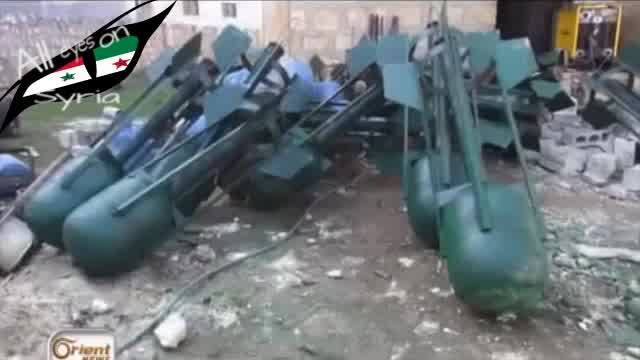
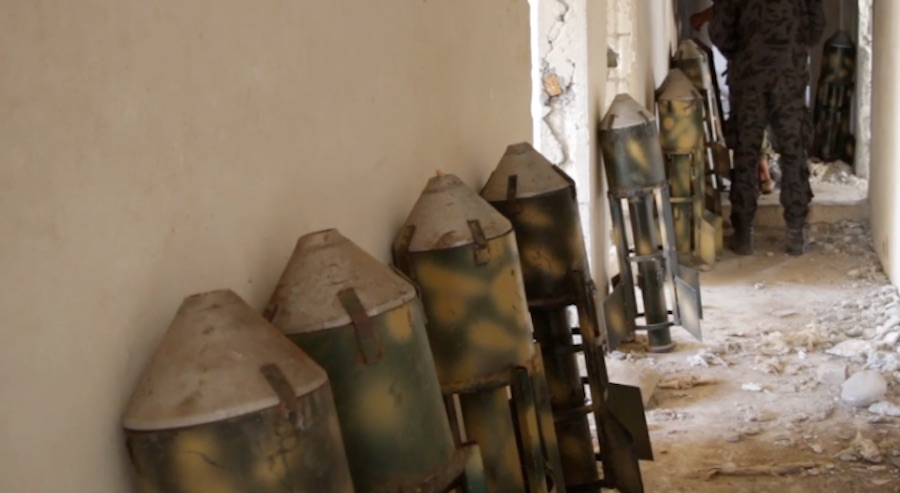
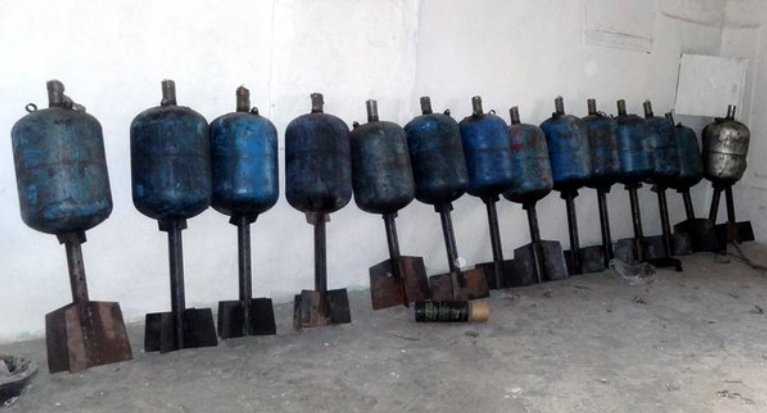
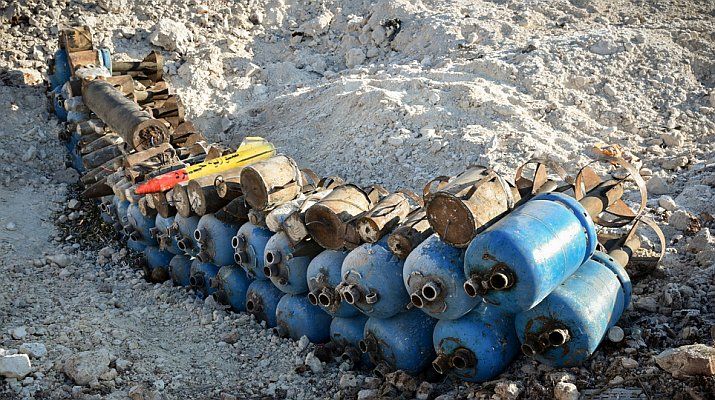
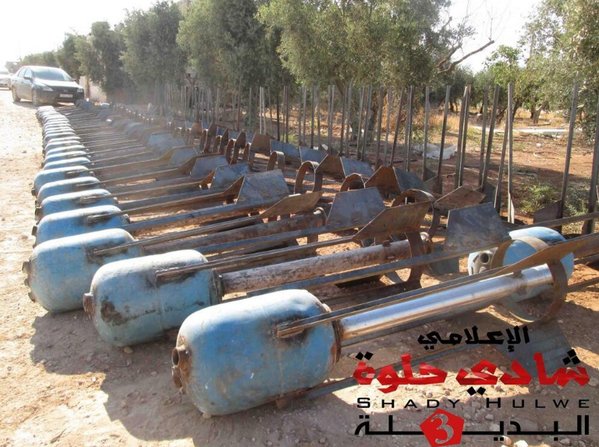
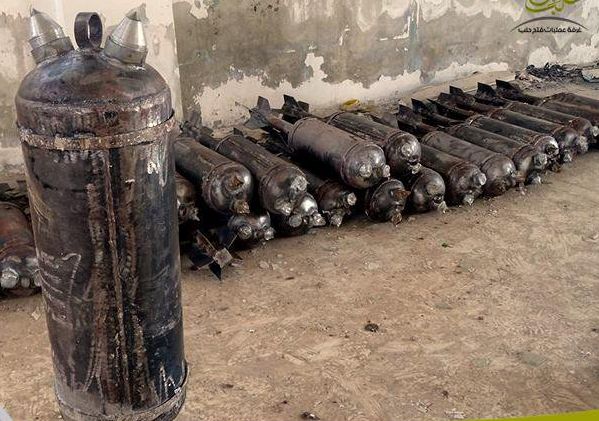
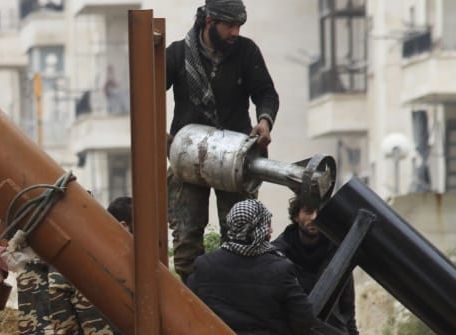
When you don't have access to factory built artillery for your fight, then makeshift solutions need to be found. The
Syrian Liberation Army along with other Islamic factions conceived and built simple, easy to construct artillery designed along the lines of a spigot style mortar.
Using basic tubes or
salvaged artillery barrels, and finned conversions of propane and other gas cylinders for ammunition, the guns were able to fire their improvised projectiles
up to a mile. Though the guns were inexpensive, accuracy was not their strong point.
The kit
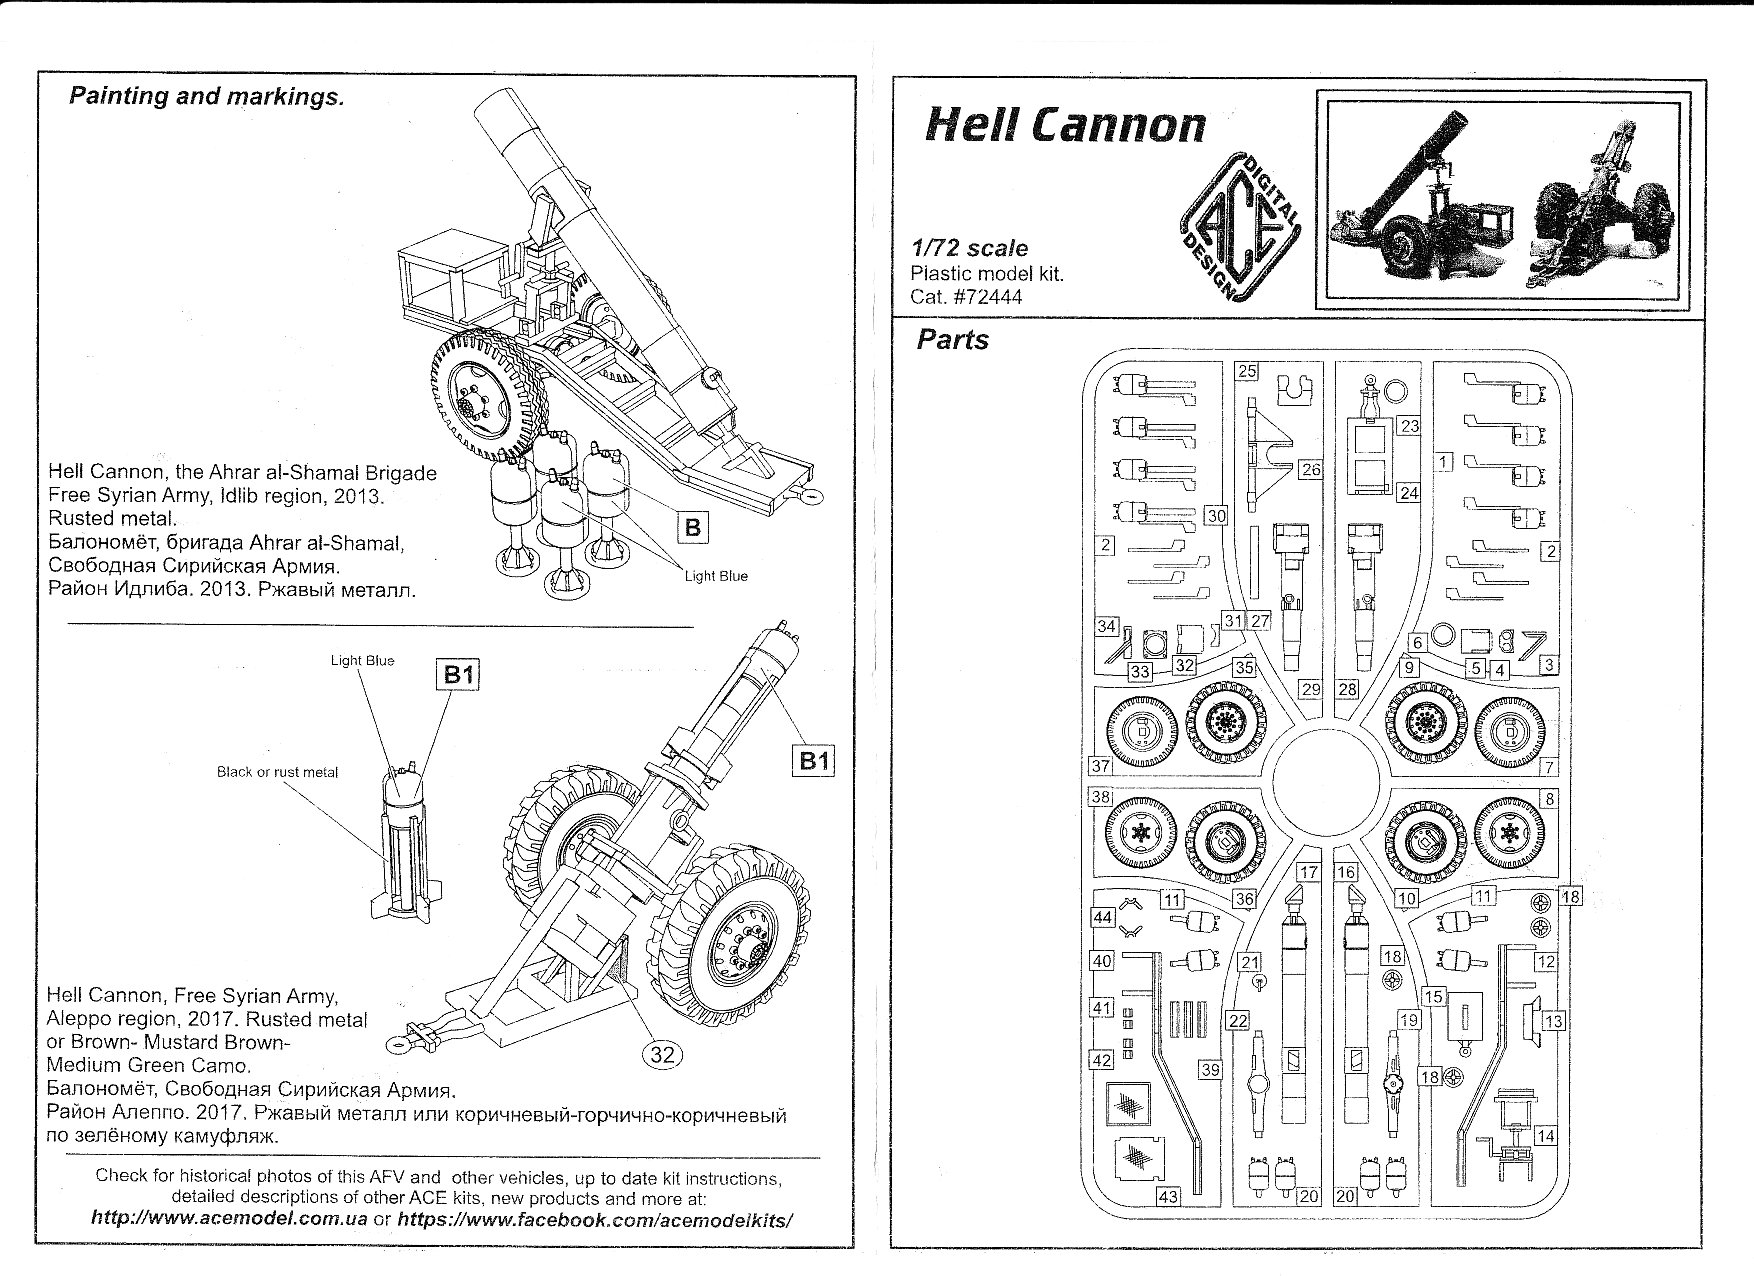
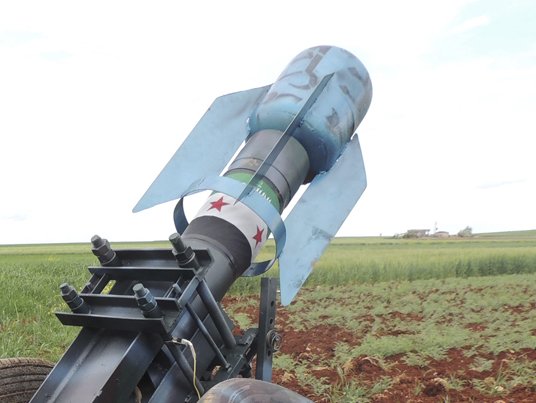
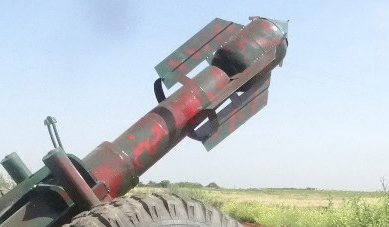
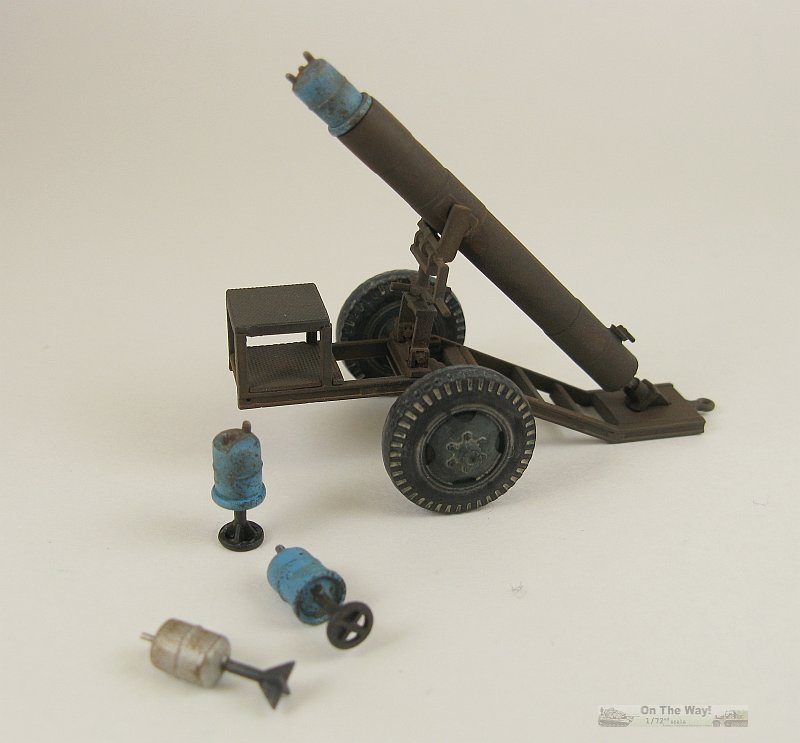
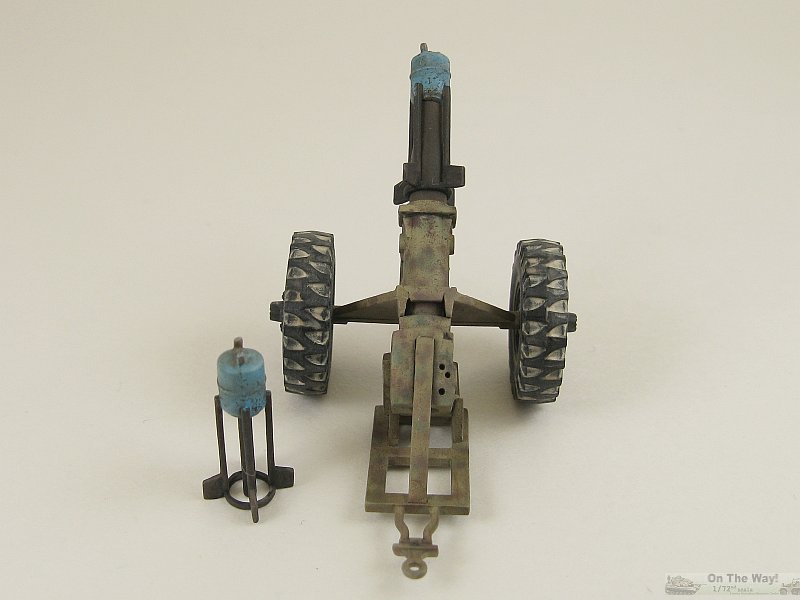
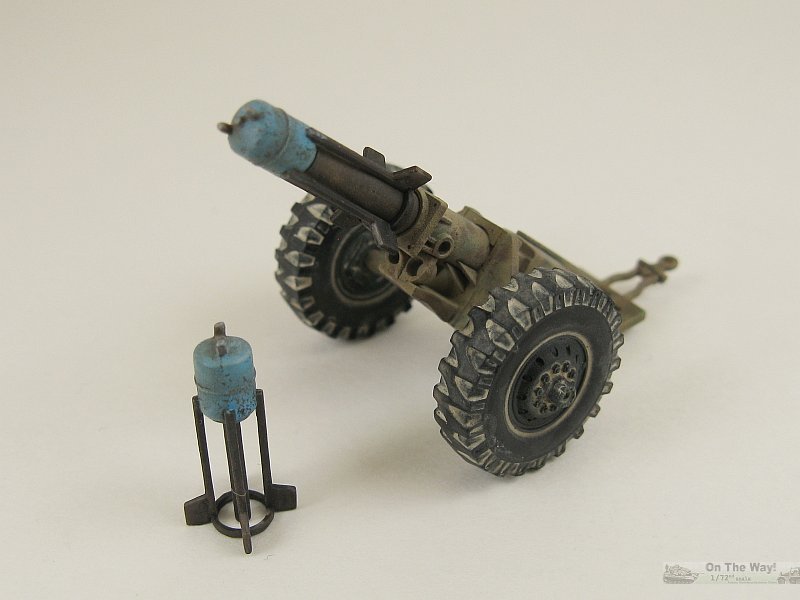
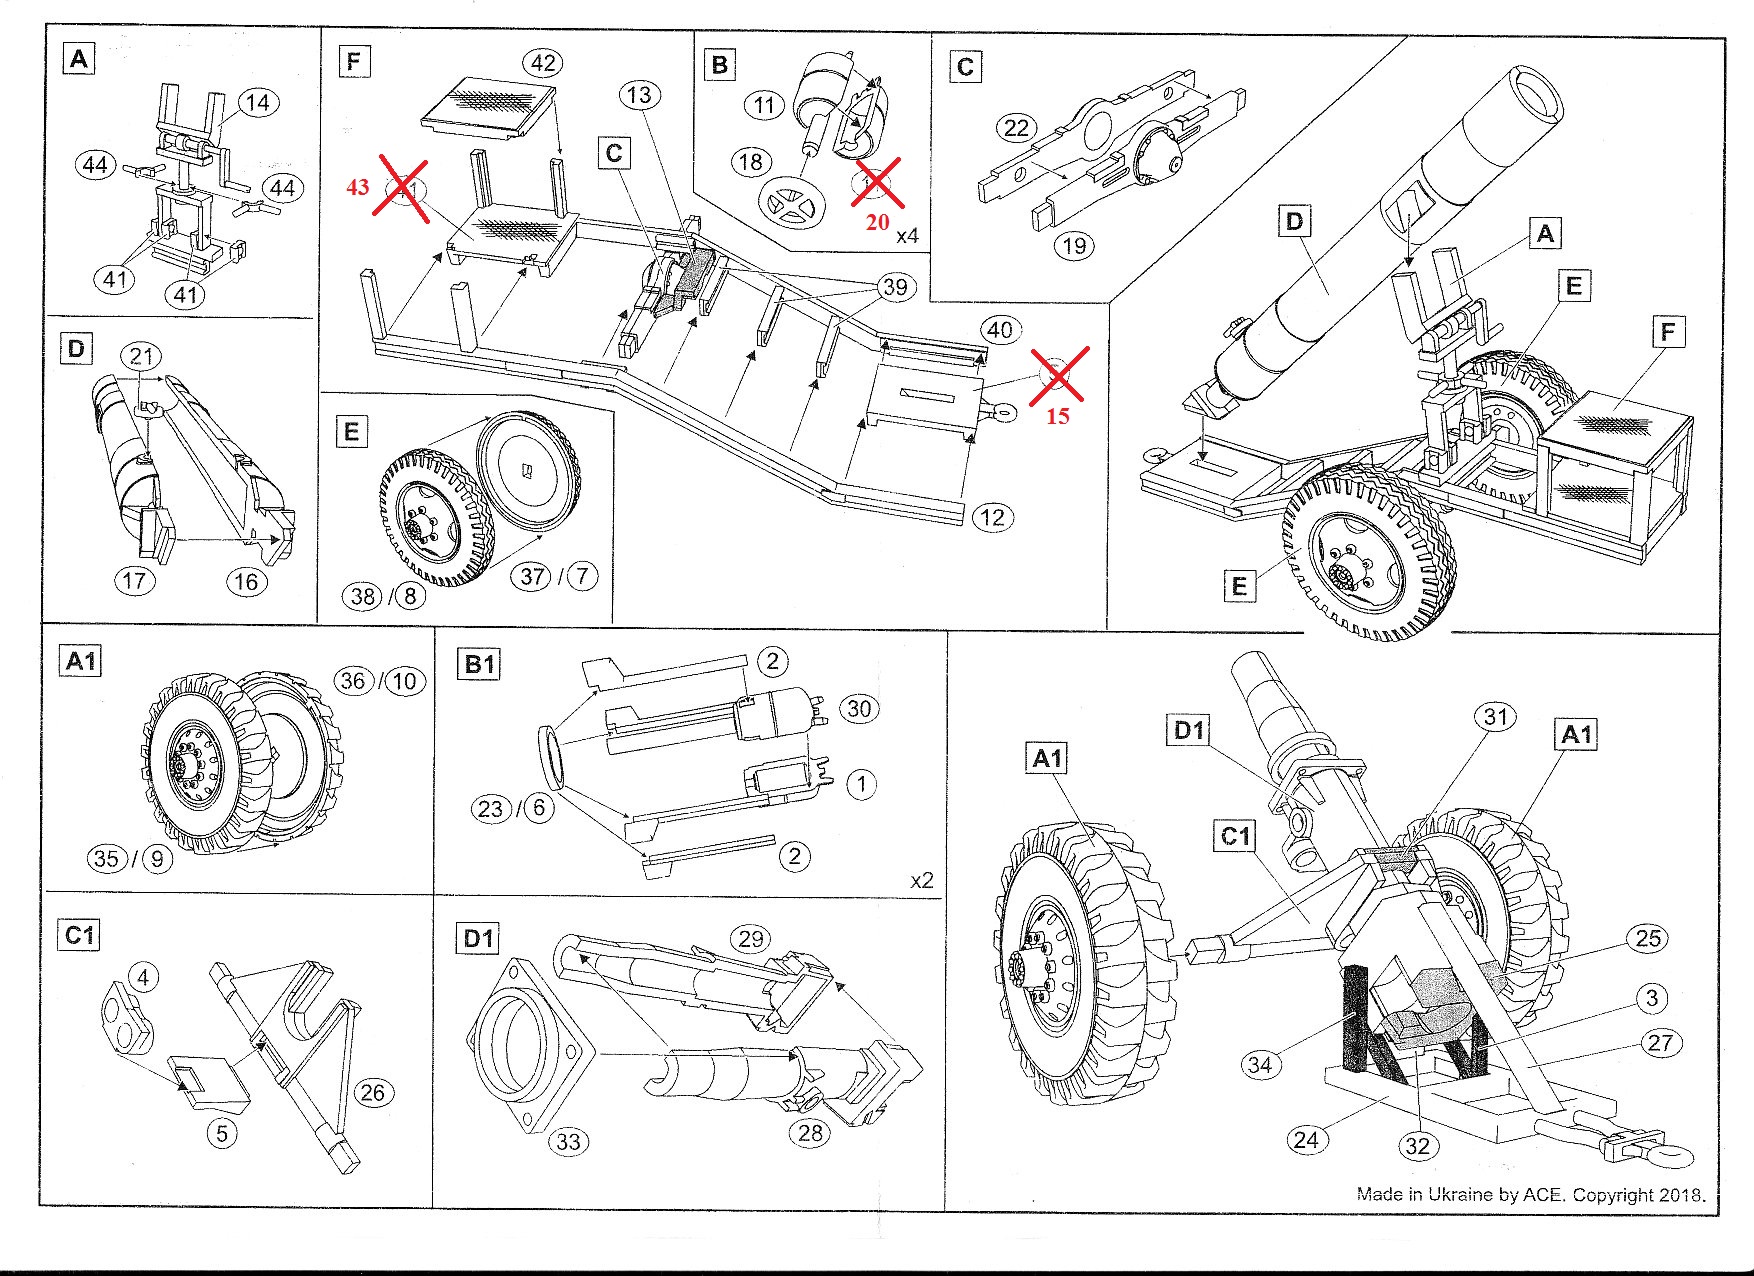 Inside the box you get one sprue of light grey, injected plastic, containing 72 parts for a pair of guns plus ammunition. One gun consists of 35 parts, while the remaining 37 parts are for the other gun. The moldings are relatively free of flash and I could find no ejector pin marks nor low points. The wheels for both guns are somewhat disappointing in their tire tread detail. Other than that, detail is quite good. There is a simple two sided instruction sheet, and obviously no decals. The gun with the platform under the muzzle (hereafter called gun type 1) has 7 construction steps. The other gun (hereafter called gun type 2) has 5 construction steps. Four of the externally finned projectiles are on the sprue but there are only 2 rings to cap their ends, thus the other two projectiles can not be completed. Some part numbers are misidentified in the instructions- Step B: Part 11 is actually part 20, Step F, part 41 is actually 43 and part 5 is actually 15. Construction Both guns were pretty much built straight out of the box. Both were built in sub-assemblies - four for gun type 1 (pair of wheels/tires, tube and carriage), three for gun type 2 (pair of wheels/tires plus a tube/carriage unit). Fit is very good all-round. The weld seam on all the ammunition was damaged after sanding the joints, so it was completely removed and replaced with stretched sprue modified to look like a weld seam. A nice feature of both guns is that the axles have rectangular mounting pegs that fit nicely into the corresponding slots in the wheels, making alignment just that much easier. Gun type 1 particulars The barrel for this gun is not quite circular in cross section following joining the two separate halves (parts 16 & 17). I didn't put any effort into hiding joint lines on the carriage, especially with the loaders platform, as this gun are very crudely built. For its ammunition I added missing circular bases to the cylinders using plastic tube pieces, cut and sanded to size. One of the cylinders was modified to have only a single fuse and by removing the circular ring at the end of the fins. Not wanting to fiddle with getting one of its projectiles to fit into the gun's muzzle I modified one by removing the fins and replacing them with a piece of round rod that fit the barrel snuggly. Once in place the rod was not visible. Gun type 2 particulars This gun is obviously constructed from a salvaged artillery piece, most likely Soviet/Russian in origin, though one that I can't identify. The trunnion hole on the right side was partly filled in, so it was deepened some with a drill bit. There are three holes on the top (probably from missing breech mechanisms) seen in the reference photos, so these too were added with a small drill bit. The kit is missing a couple of triangular supporting ribs just aft of the trunnion mounts which were fashioned from thin sheet plastic. For those with more skill than I, the thickish fins on its projectiles could be replaced with thinner versions. Painting Instruction specify a rusted metal finish for gun type 1. Ace's reference photos show a hint of green patches along with the rusty finish. For gun type 2, the instructions specify rusty or brown/mustard/green splotched finish. Ace's reference photo's show a combination - rusty fore barrel with a brown/mustard/green finish heavily weathered with dust and dirt. I followed the reference photos as closely as I could. As for painting the propane cylinders, pretty much anything goes, as long as it is within reason. Take a look at the pictures at the bottom of this page and you can see what I mean. I chose to paint most of them light blue, with one being done in silver. All of them were scratched up with dabs of burnt umber applied with small pieces of sponge, and a little dry brushing with a lighter shade of blue. Conclusion A very nice little offering from Ace. Simple to build, decent detail and unusual. The newer releases from Ace continue to improve over their older offerings. I can recommend this one highly.
Gun type 1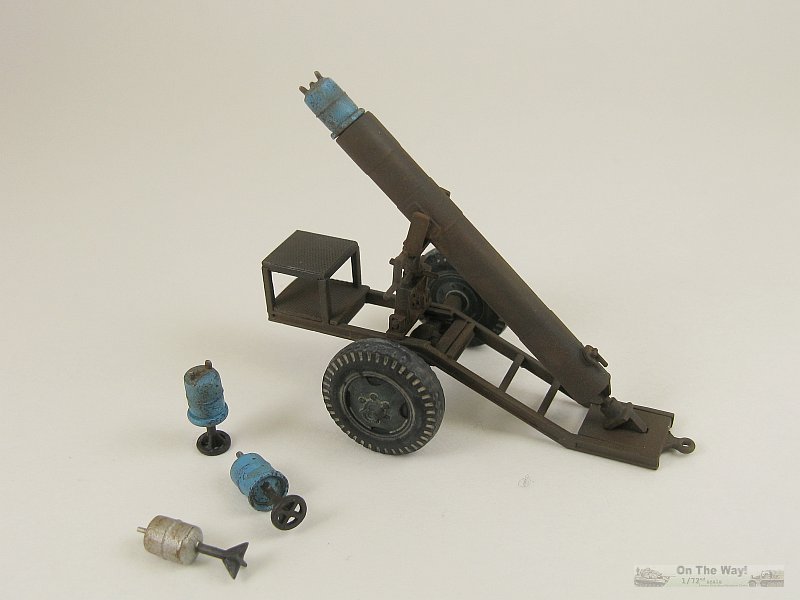
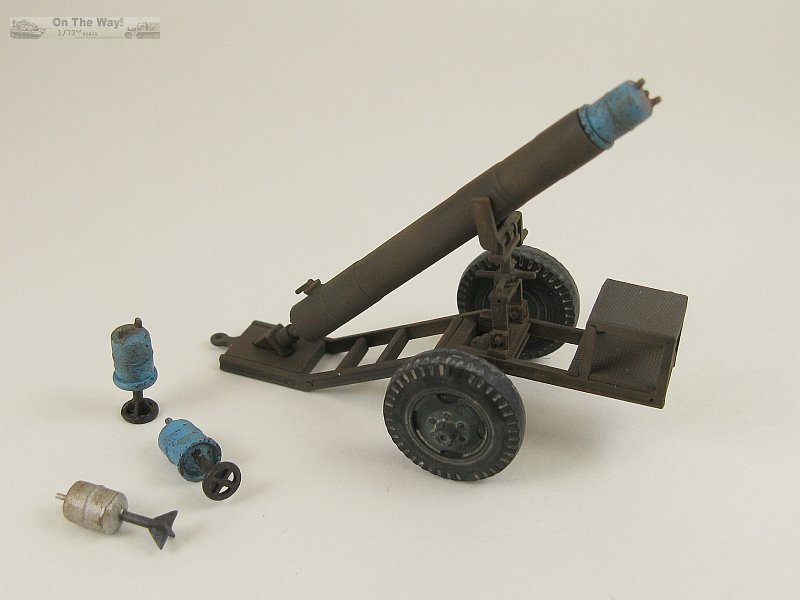 Gun type 2
Ace products are available at
References
Review sample purchased by the author. |
| Back to Ace Kit List | Back to Construction Reviews |
Article Last Updated: 24 September 2018 |
Back to Home Page |