|
Ever since ACE released the First true 1/72nd T-72 (Well it was the second really as MMS released one a lot earlier in White metal and I almost forgot the Modelkrak T-72 or rather I keep trying!) I have wanted to model the earlier version with the Co-incidental rangefinder, the reason I haven't done so as yet is because the ACE tank represents a M version with the added armour plate to the Glacis, removing this has been a major headache. The along comes Revell to the rescue, Although the Revell kit also represents the M version with the added armour, because of the breakdown of the Revell kit with the Glacis being a separate piece, modeling the earlier version is now not so a daunting a task, although it is still bad enough depending on how far you want to go. Starting off the lower hull and track assembly can be made straight out of the box there are no changes necessary on these parts. The upper hull however does require some work, depending on how far you want to go depends on how difficult it will be, You can go too far like I have in some places and it will show no significant improvement without compromise. Tracks and Lower Hull The tracks and lower hull can be assembled as per instructions, but here comes the first dilemma !Which wheels? well a good general rule to follow is, if modeling an early vehicle then the 8 spoke variety, however if modeling a later period vehicle then it is possible that the vehicle could have been fitted with the 6 spoke variety.
Because the T-72 had no side skirts as such, this exposes the top run of the tracks, unless you want to show the vehicle moving, where the top run would be straight, you need to add a slight sag into the tracks. For those that believe the T-72 tracks are "live"(see note 1) and so don't have sag, trust me when I say that all tracks will have a sag if the distance between the return rollers is big enough however the problem lies in the fact that the Revell tracks are just big enough, even a slight amount of sag will produce a gap, the other problem is, if you add a link, then the sag becomes too great.
This is about the correct amount of sag required, but it leaves a small gap between the individual links around the sprocket and the idler, this can be hidden fairly well from the side but would be noticeable if you left the front fender off.
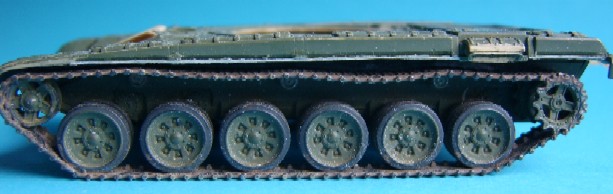
This is with the extra link added and as you can see it is slightly too much.
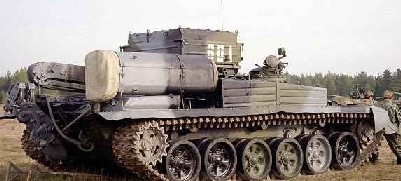
This is possibly one of the best images I can find that shows the slight sag in the track. There is one other change to be made to the lower hull, depending on which country T-72 you want to model, these are the mine clearing attachment points on the lower hull, Russian and Polish vehicles have more than their Czech counterparts, but these can only be done when the two hull halves are attached.
The kit engineering points are fitted too far back and should be moved forward, I made these using plastic rod, glueing 4 rods together in a row and then cutting off small sections, the moulded detail was removed and the rods glued in place, I later added the prominent bolt detail.
There are two additions to be made to the lower hull, the first is the addition of two strips of plastic along the top of the sides, this is to close the gap between the lower and upper hulls, it also acts as better contact for joining the two hull halves. I used 2mm channel as personal choice, you can cut the channel around where the turret fits to stop any fouling of the turret, although by using the channel, when the turret is in position and facing the front the top half gets trapped by the tabs on the turret ring.
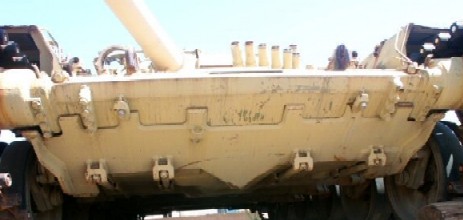
The other piece that needs to be added, is the mud scraper at the rear of the hull just above the sprockets, it is probably better to add these after the tracks have been fitted.
The Upper Hull There are a few more changes to be under taken on the hull top than on the lower hull, some of the changes are necessary, others can be done if you wish to go that far. Starting with the necessary, first up is the Glacis plate, luckily Revell have provided this as a separate piece, which makes altering it easier than the moulded in place glacis of the ACE kit. The T-72 did not have the added armoured plate found in the kit and on the real M type vehicle, removing this is a fairly easy affair, you need to thin the part out from the back until it fits flush with the rest of the glacis, This leaves the tow hooks and a small area in front of the driver now lower than the rest of the glacis, these can be filled by adding small strips of plastic,
The white is the added plastic strip, what also needs to be done are the engineering attachments need to be removed and the gaps filled to create a flat surface. Although they look completely different, the layout of the T-72 is very similar to the T-62/55/54 in that the external fuel tanks are sat on the fenders and are not integral to the hull, the fenders are not represented in the kit and need to be replaced, the shape of the fuel tanks need to be changed slightly, Revell have not bothered doing this as they are hidden behind the side skirts. The fenders can be represented by two strips of plastic, these do not need to be full width, the fuel tank edges need to be more rounded both on top and on the bottom so that there is an undercut near the fenders.
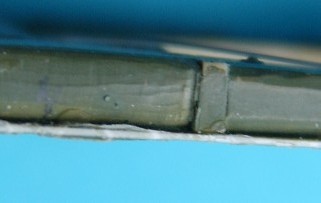
Here you can see that I have used both a narrow strip and the full width, on the outside you can not tell the difference.
The undercut carries on down both sides. The next thing that needs to be changed are the bullet deflectors in front of the drivers hatch, the "M" had the number of deflectors reduced to 2, the initial T-72 had 3, this is where the plastic strip you added just in front of the driver comes in handy, the top most deflector sits on the bottom edge of this strip, the other two are then place evenly between the top strip and the strengthening strip on the "V" Splash guard.
The bolt detail is then added to the top of the splash guard. Also the position lights can be changed, these are made from two pieces of rod glued a right angles to each other. The other thing that needs to be done is replacing the mine clearing attachment points on the glacis, the following pictures will help in their placement.
I have added a picture of the fender detail should you wish to add it. The Non Necessary Bits If you are feeling really adventurous then you can add the detail beneath the Mesh in the rear if the tank, whether this will enhance the model or make no difference remains to be seen, the fan intake certainly benefits, but I am not so sure about the Radiator intake, where with the mesh in place, little can be seen beneath it, or I use different (bigger) mesh and compromise on the accuracy as it is noticeable.
The radiator and auxiliary intakes are made up from a number of vanes
Note 1 Live tracks are so called because when laid on the ground the ends will actually lift up off the ground as opposed to non live tracks that will lie completely flat, this is due to Bushes which are usually made of nylon being added where the track pins join the links together, these are under tension and the result it forces the link into the wheels. It is a popular misconception that these live track have no sag, this is true over short distances but the greater the distance the greater the sag, although a non live track over the same distance would sag a lot more.
|

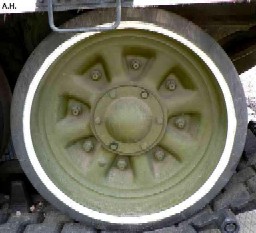 8
spoke
8
spoke 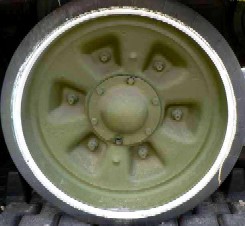 6spoke
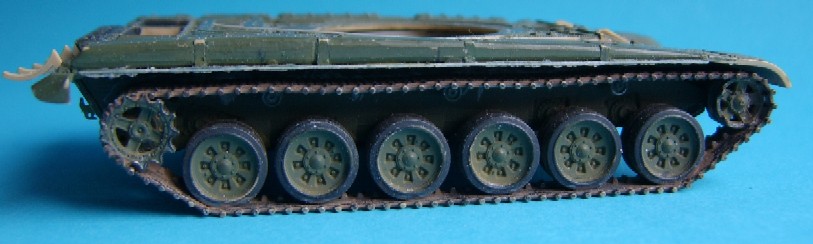
 Czech build
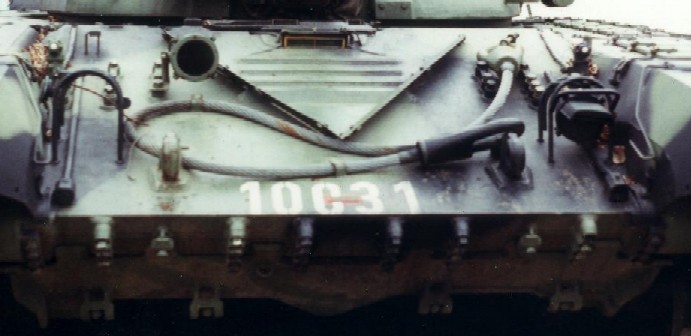 Russian build
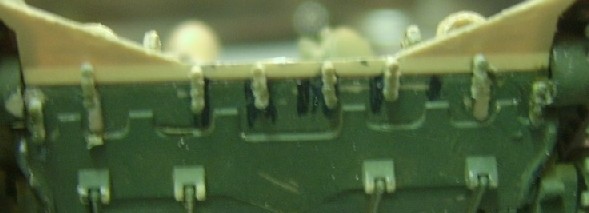
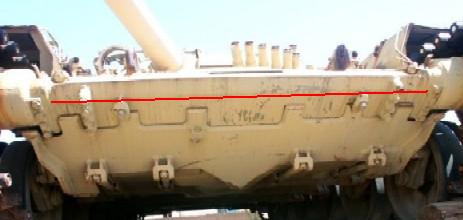 the Red line is where the Revell and ACE hulls are split
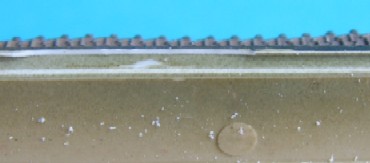 the channel
 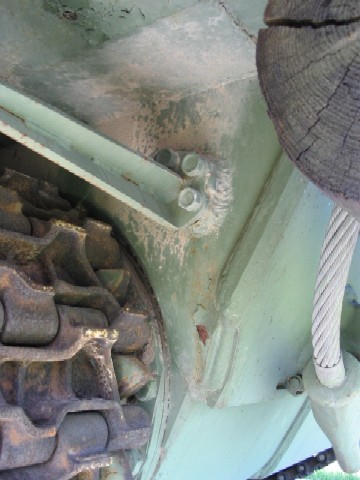 the LHS mud scraper, it is the same on the RHS
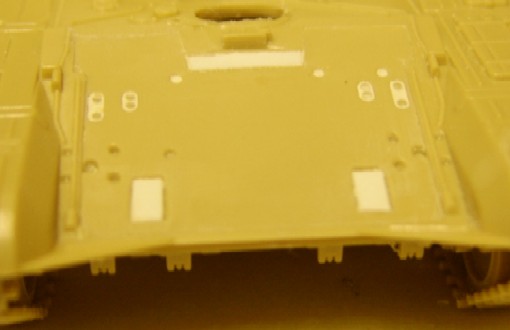 Front Glacis
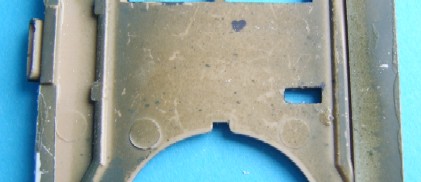
 Fuel
tank detail
Fuel
tank detail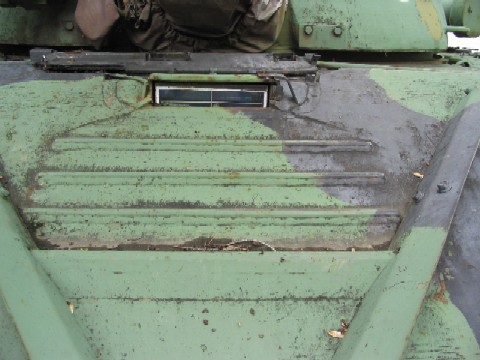 The real thing
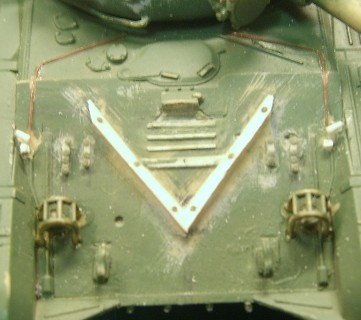 on the kit
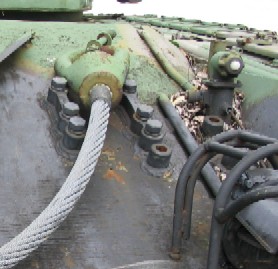 LH side
 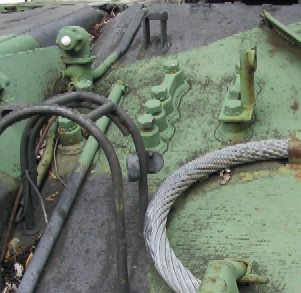 RH side
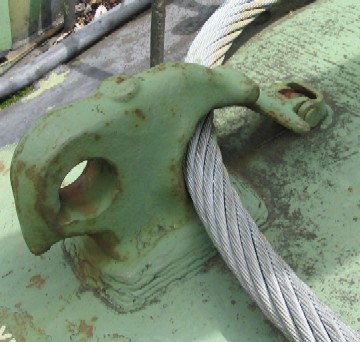 Tow hook detail
 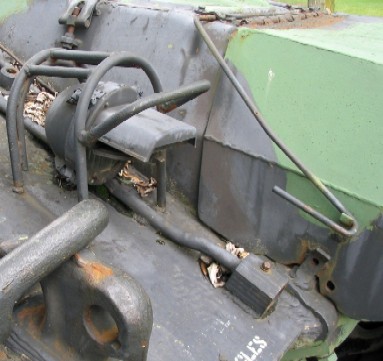 fender detail
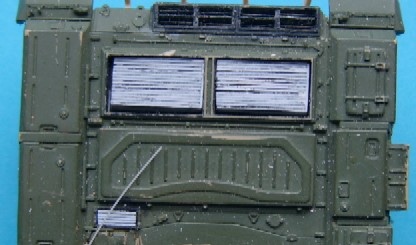 The
radiator and Auxiliary intake(still in white)
The
radiator and Auxiliary intake(still in white)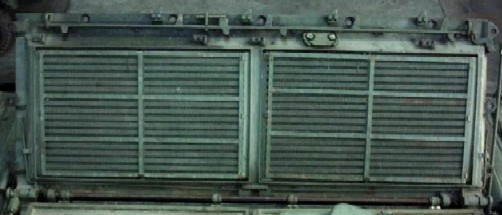 The real thing (Radiator)
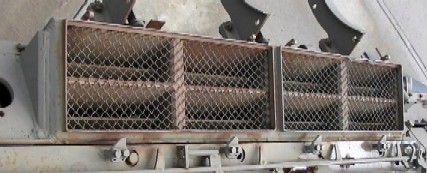 Fan outlet