|
Comparison of Esci & Trumpeter M113 Armored Personnel Carrier
and variants in 1/72 scale
I intend this to be an in-box compare
& contrast review of the elder ESCI M113 Armored Personnel Carrier
(APC) with the more current M113 APC variants released by Trumpeter
Models. First I will look at the basic armored M113 APCs by both model
companies and then look at some derivatives of the 1/72-scale M113
models.
Brief M113 History
The M113 was developed by the Food Machinery & Chemical Company
(FMC) who, based on the name is just the company I would expect to
develop an armored fighting vehicle. The initial M113 appeared in
service in 1960, served extensively in Vietnam and in Europe and during
the invasion and conquest of Iraq in 2003. The M113 and variants still
remains in service in many nations as of 2013.
The vehicle is composed of an aluminum armor body, is amphibious and
the APC version carries 12 soldiers. An APC was envisioned as a battle
taxi, carrying troops up the front lines and keeping pace with the
Main Battle Tanks. Eventually the M113 was modified to be command
posts, engineering vehicles, and a weapons platform for TOW missiles,
mortars, and antiaircraft weapons, etc. and also developed into Armored
Infantry Fighting Vehicles (AIFV or IFV) by South Korea, Netherlands
and Italy.
The Box Art: What is supposed
to be inside.
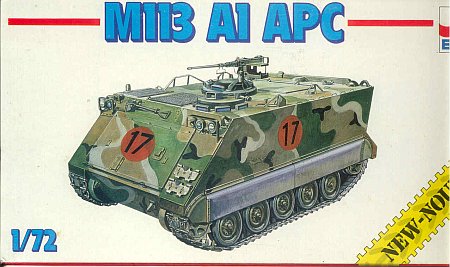 |
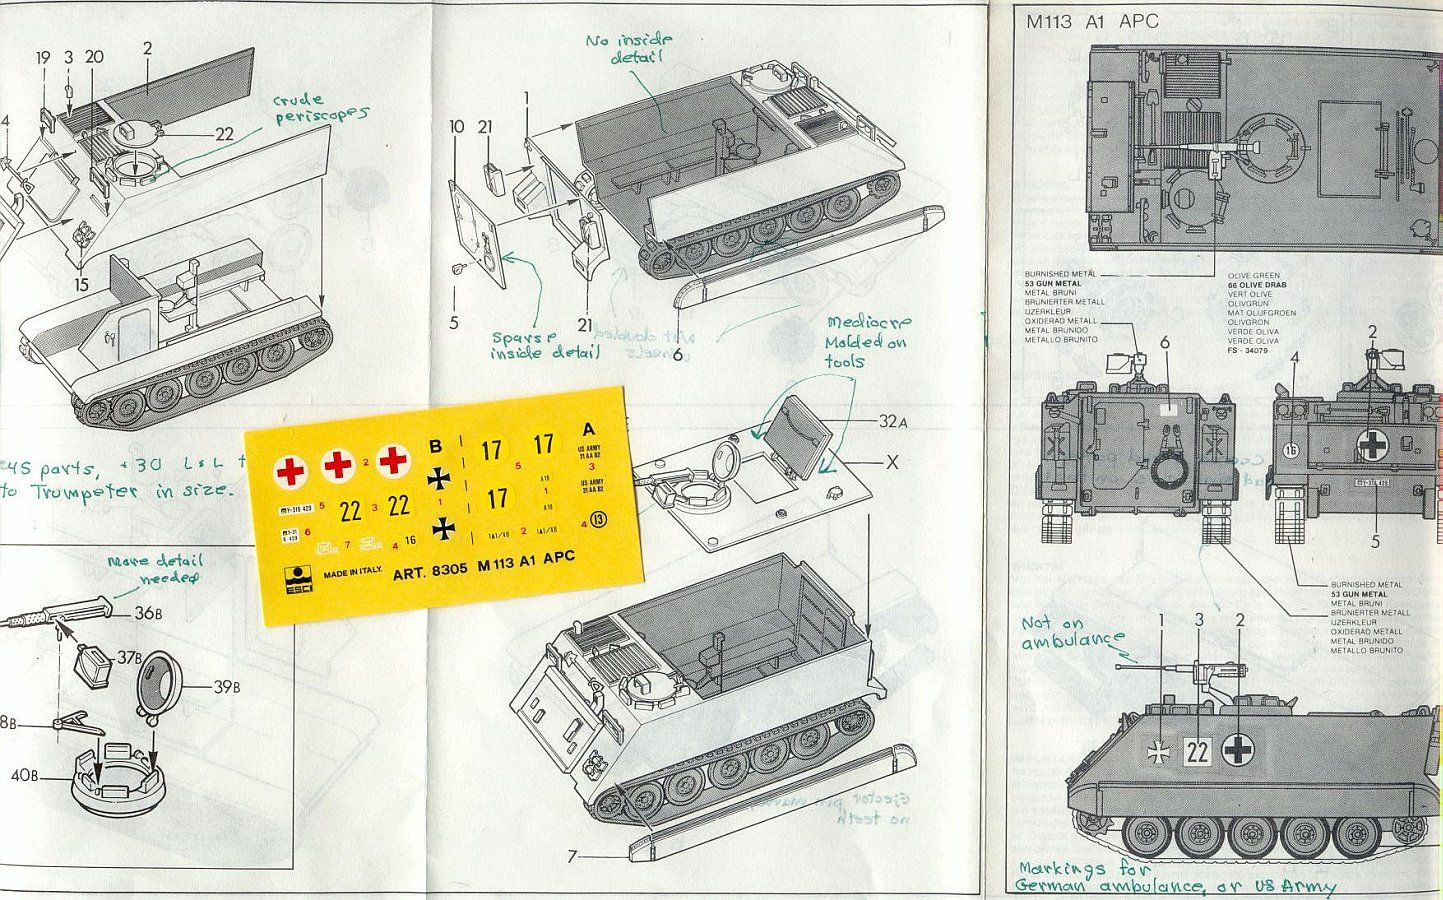
ESCI M113A1 APC kit 8305 &
Italeri kit 7011
The box art for the ESCI kit 8305 represents an M113A1 version
of the M113. The M113A1 is an M113 upgraded to a diesel engine
in 1964. This kit is now released by Italeri as kit 7011.
The vehicle is armed with a single 50-calibre machine gun on the
commander's cupola. Around the driver and commander's hatches
we see periscopes tinted pale blue. Right of the driver's hatch
(our left) we see the rooftop engine grates. Along both sides
of the roof are pyramid-shape antenna guards made from steel rod.
On the bow is a large rectangular breakwater plate (trim vane)
folded back against the front plate; an engine access hatch is
located behind this vane. On each side of the trim vane are groups
of headlights, a hand shovel, and several spare track links. The
track skirt above the five torsion bar suspension road wheels
appears to be black rubber. The engine is at the front as are
the drive sprockets.
At each upper corner of the box art M113 are lifting D-rings that
I often see missing from the small-scale M113 models. Missing
in the box art and on the model is a small bilge pump drain hole
at the forward upper corner next to the driver's hatch.
The vehicle is painted in a four-color, sharp edged camouflage
scheme. The rubber side skirt is represented here in its natural
dark gray color. I've not found historical photos of this particular
M113 yet, but the markings appear to be for a US Army vehicle
serving in Europe based on photos of similar M113's. The number
within the orange circle I understand to be military exercise
markings. There are additional markings on the kit's decal sheet
that are not portrayed here. |
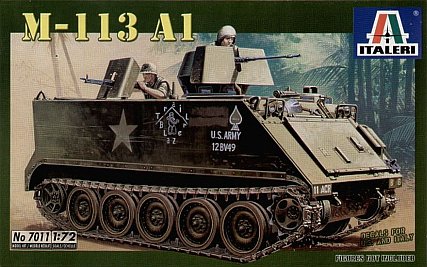 |
This is a scan of the box art
for Italeri's re-release of the ESCI M113A1 kit. The boxart depicts
a M113 ACAV (Armored Cavalry Assault Vehicle) with the characteristic
armor shields for the machine guns. The Italeri kit here differs
from ESCI kit 8305 in offering the option of building it with
just the 50-calibre M2 gun mounted on the commander's cupola of
the APC, or the three machine guns and shields of the ACAV vehicle;
the ACAV variant is not offered in the original ESCI kit.
The box art shows a Vietnam period M113. With the side skirt off
we can see the twin road wheels and the track teeth, both missing
from the kit parts. Up on the engine deck the short exhaust pipe,
and the lifting rings are visible. |
 |
Trumpeter M113A2
kit 7239
Moving on to a Trumpeter release of a 1/72 scale M113, the M113A2
version which has additional upgrades over the M113A1. I've read
that during the Iraq invasion the M113A2 could not keep pace with
the Abrams tanks and Bradley IFVs, though the upgraded M113A3
with an improved power pack could keep up. Rather than a painting
of the vehicle Trumpeter shows a photo of an actual finished model.
The M113A2 variant continued the modernization of the M113 with
upgrades to the engine cooling system and the suspension. I've
read that many of the M113's serving in Iraq were M113A2 versions
and that some could be seen with the exterior fuel tanks and additional
floatation in the trim vane that is typical of the M113A3 version.
The overall features are about the same as with the ESCI box art
above: the hatches and periscopes, the machine gun mount, wheels
and side skirt. Externally a difference from the ESCI M113A1 are
smoke projectors mounted on the bow on each side of the trim vane,
and on the rear we see a protrusion of the exterior diesel fuel
tank mounted on either side of the rear door. I also notice a
flat plate or box on the bow (part C2) above the trim vane where
the ESCI kits and the Trumpeter M113 ACAV mounts a shovel.
As far as how the kit is rendered, the headlights do not look
right: the metal guard going around the lights should be placed
a little in front of the lights not directly above and attached
to the lights. There are odd solid triangles coming up from the
roof, these are supposed to represent antenna mount guards actually
made from steel rod, not solid plate; see the ESCI box art to
see what these are supposed to look like. I also see no lifting
rings at the four corners of the roof. These lift rings are also
missing from the ESCI M113 kits.
The vehicle is painted in a 3-color camouflage scheme with markings
for a US ARMY ambulance. I question an ambulance being armed with
the 50-caliber MG.
Simon Barnes has done a review of Trumpeter's M113A3 kit 7240
here. Many
of his comments about his M113A3 also count for the other Trumpeter
M113 kits so I will try and compliment his review and not duplicate
his observations. |
The Kit Parts
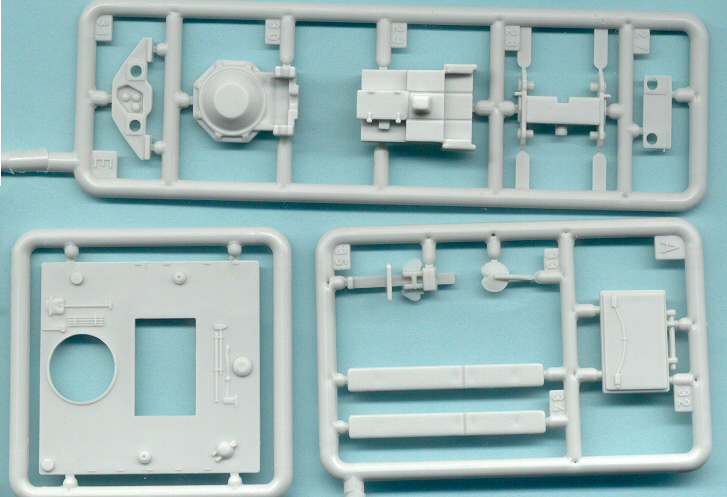
ESCI's M113A1 kit 8305 (Italeri kit
7011) consists of 46 injection-molded styrene plastic vehicle parts
along with 30 link & length styrene track parts. The color of
the styrene plastic parts varies among my collection of ESCI M113
kits. Many of the comments for this 1/72 scale ESCI (Italeri) M113A1
kit will also apply to the other ESCI M113 variants.
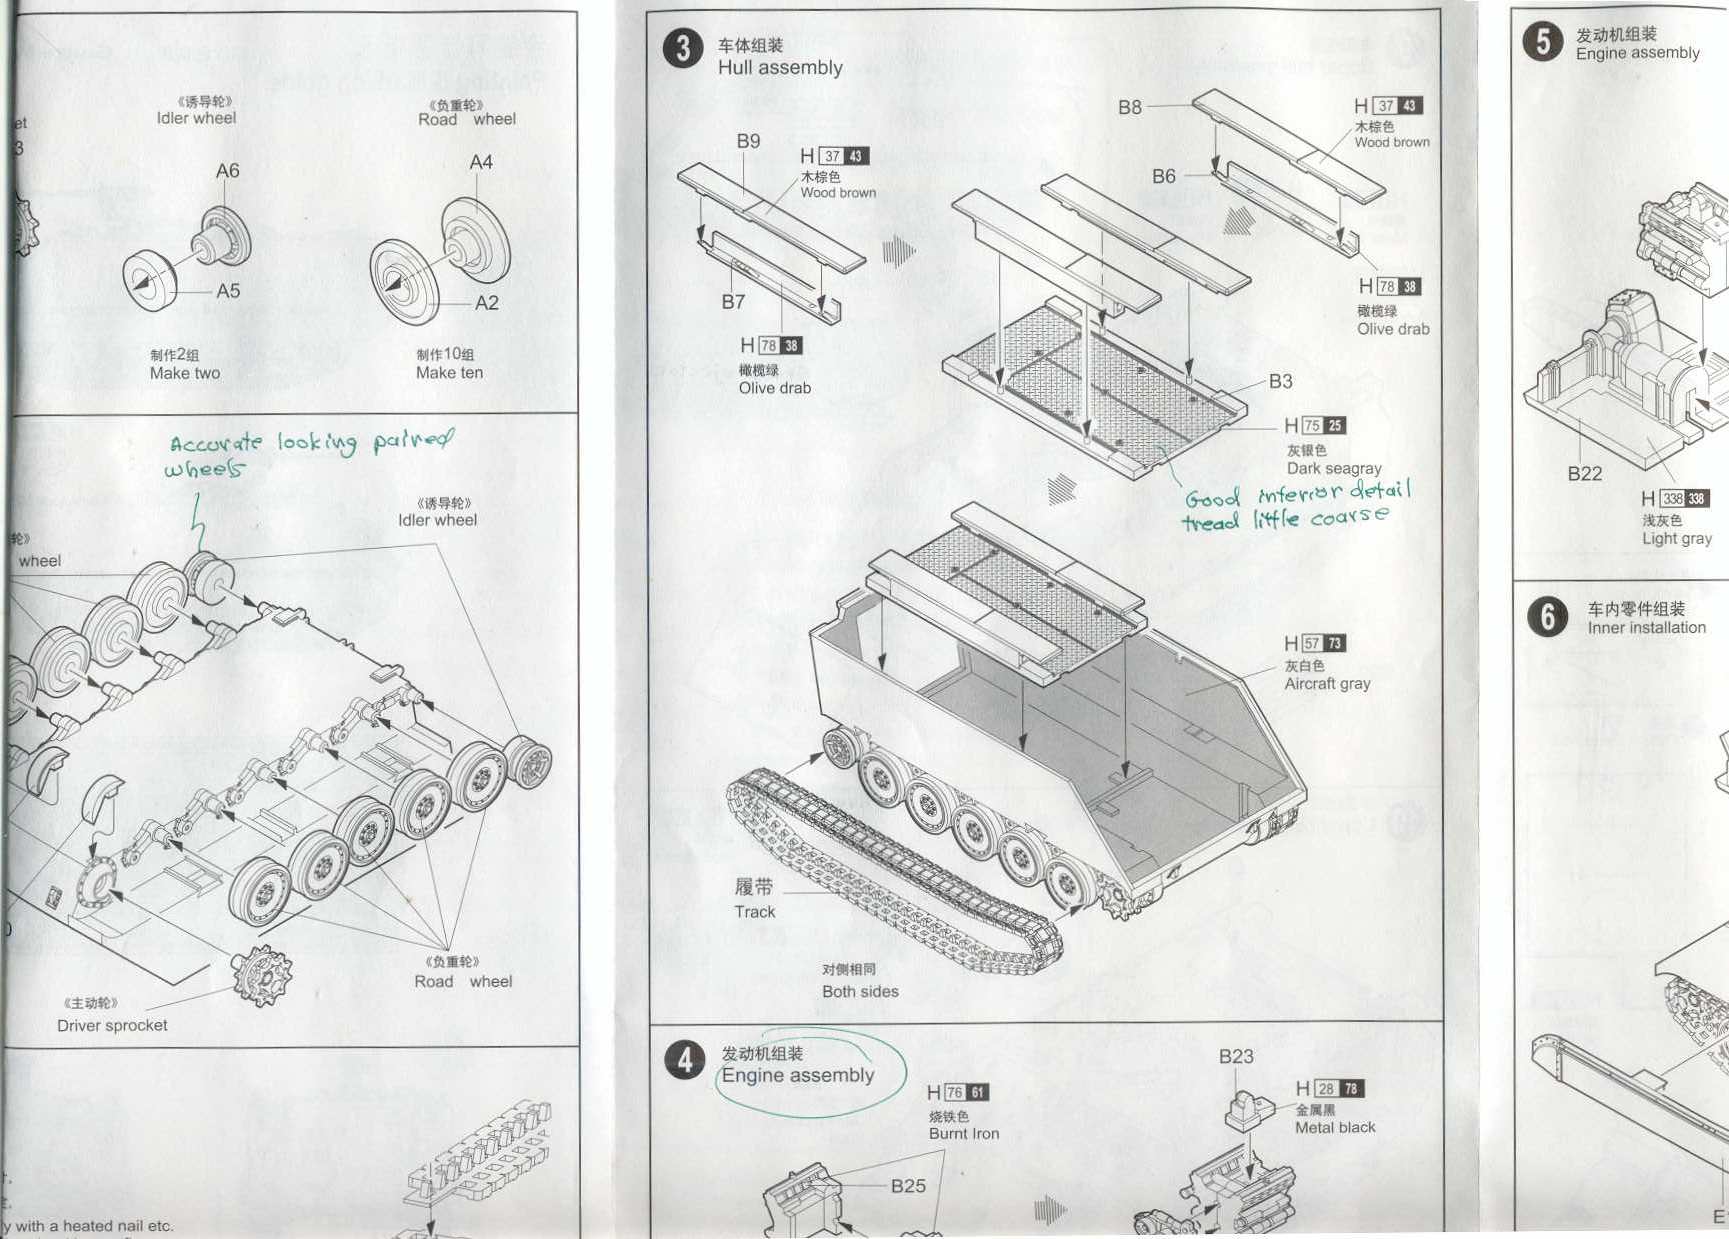
The Trumpeter M113A2 kit 7239 consists of 70 pale gray, injection
molded styrene parts and two soft plastic band tracks. Many of the
comments for this 1/72 scale Trumpeter M113A2 kit will also apply
to the other Trumpeter 1/72 scale M113 variants. On both the ESCI
and the Trumpeter kits I found a few sinkholes and ejector-pin marks
that needed filling and sanding.
Neither the ESCI or the Trumpeter M113 models come with crew figures,
or etched brass.
For more views of the sprues and markings included in the ESCI and
Trumpeter M113 kits please see Henk
of Holland.

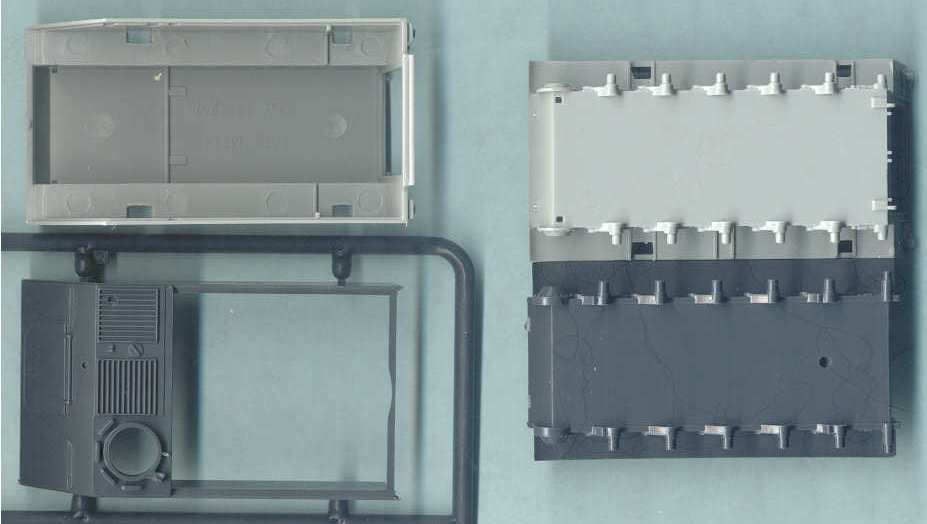
This scan shows the upper and lower hulls of the pale gray Trumpeter
model and the dark gray ESCI model. Trumpeter models their lower hull
integral with the hull sides; while ESCI (Italeri), takes a different
approach in molding the hull sides to the bow and forward roof. (Both
ESCI and Trumpeter model their roof hatches open, which is good.)
The length and width of the Trumpeter and ESCI hulls appear pretty
comparable though I do note a difference in placement of the road
wheel axles and the ESCI M113 is a millimeter or two wider.
With all the open hatches and the large open interior these M113 kits
are crying out for detailed interiors. There is a little detail but
what there is, could be more accurate. There are large ejector pin
marks and side-skirt mounting holes on the sponson floors which will
by visible if you leave the hatches open.
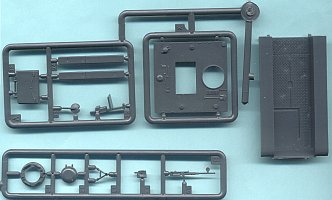
This scan of the ESCI kit shows the vehicle roof at center showing
fuel caps, open hatches, and molded-on hand tools. The crew compartment
floor is molded into the lower hull at far right. The tread pattern
is too coarse and several of my ESCI floors have sinkholes here, but
several do not.
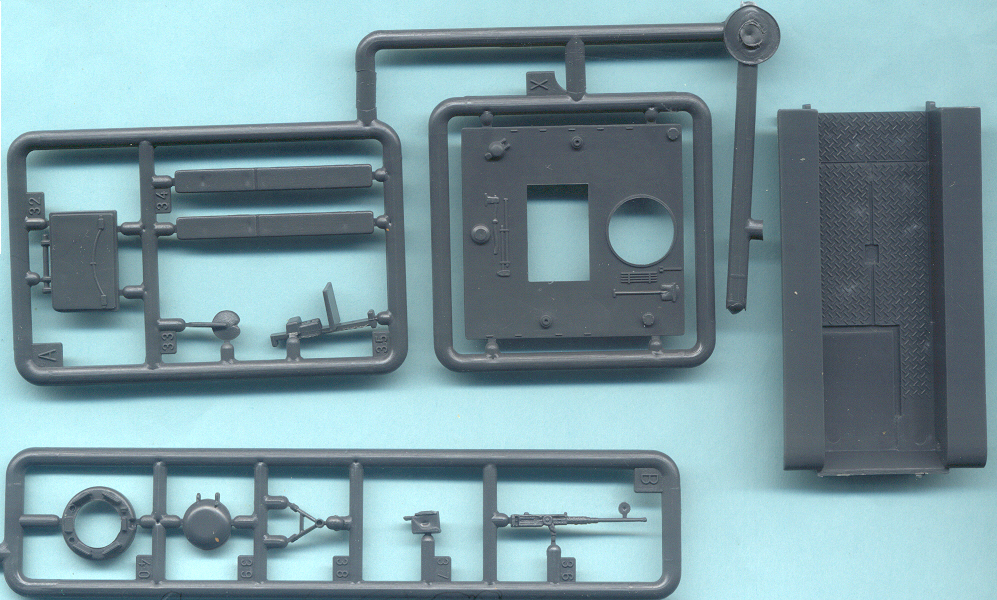
At far left is a small sprue holding the passenger bench seats (parts
34A), the large roof hatch (part 32A) and the commander's seat (parts
33A and 35A). There are sinkholes in the passenger seats.
At bottom is the small sprue-B particular to this M113A1 kit, holding
the commander's cupola and machine gun parts. Overall detail is fine
though for a good display model we'll want to add underside detail
to open hatches, make the periscopes appear more accurate, and add
more surface details to the machine gun.

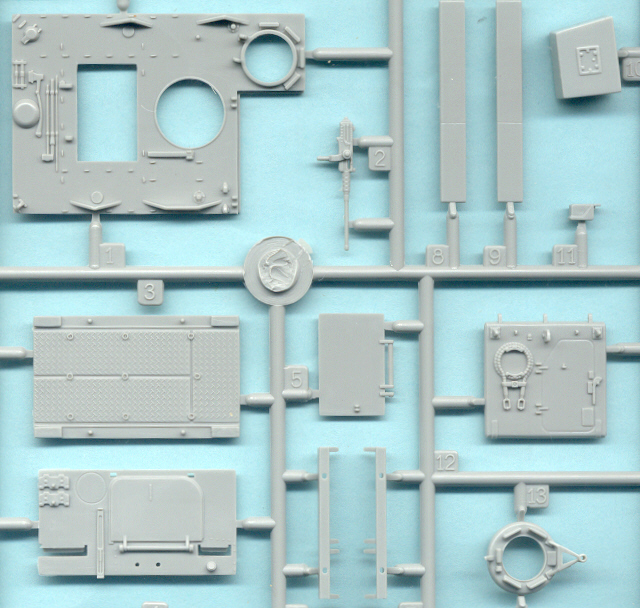
Here is a scan of Trumpeter's sprue-B containing interior parts, hatches
and the vehicle roof. Hatches and doors have detail on both sides,
and the interior bulkheads are notably better detailed than the ESCI
M113. Detail is crisp and I noted little to no flash or sinkholes
in the plastic.
At left are engine and transmission parts which is great, but we cannot
see them on the completed model unless we open the engine roof hatch
(part C7) or we cut open the bow engine door located on part B4.
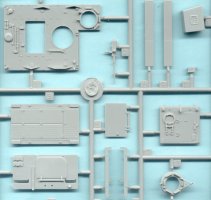
Part B1 at upper left is the hull roof with the three open hatches.
Around the perimeter of the roof are the antenna guards represented
as solid triangles though they should be steel rods. I am not sure
which I like less: ESCI totally leaving off this detail, or Trumpeter
representing them as solid features. Like the ESCI kit, Trumpeter
molds hand tools onto the roof.
On this close-up we can see the tread pattern molded onto the interior
floor, a pattern better rendered than ESCI (Italeri) does, but still
a little too coarse.
So far neither ESCI nor Trumpeter molds the small door in their rear
hatch as a separate part. The 50-calibre M2 machine gun has no handles
on it, an odd thing to do but a feature I have seen missing on their
50-calibre mg from the Trumpeter Sherman kits also.
The commander's cupola with machine gun mount (part B13) is well done
even though molded as one part; ESCI molded it as two parts. The periscopes
on both ESCI and Trumpeter could be done better.
The bow engine hatch on part B4, at lower left, will have to be cut
out to display the engine supplied in the Trumpeter kits. On the rear
hatch (part B12) the tow cable is molded to the part though otherwise
detail is good. On the interior side of the rear door there are prominent
ejector pin marks that we'll have to fill in if the hatch is modeled
lowered.
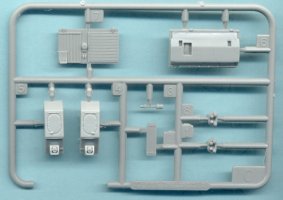
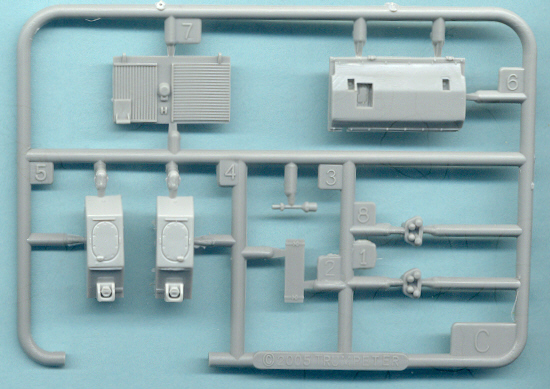
Sprue C here is particular to the Trumpeter M113A2 and M113A3 kits
and contains the trim vane with supplementary floatation (part C6)
that may replace the trim vane (part F1) common to the late-M113A2
and the M113A3. Part C6 is not supposed to be used with this M113A2
kit.
Sprue C also contains the rear fuel tanks (C5 & C6) that flank
the rear door, the smoke dischargers (parts C1 & C8), and the
engine deck (part C7). The smoke dischargers are particular to M113A3
and some late M113A2. This sprue is not included in the M113 ACAV
kit no. 7237. The parts here look well rendered.
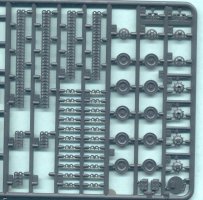
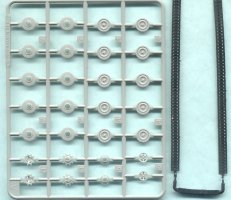
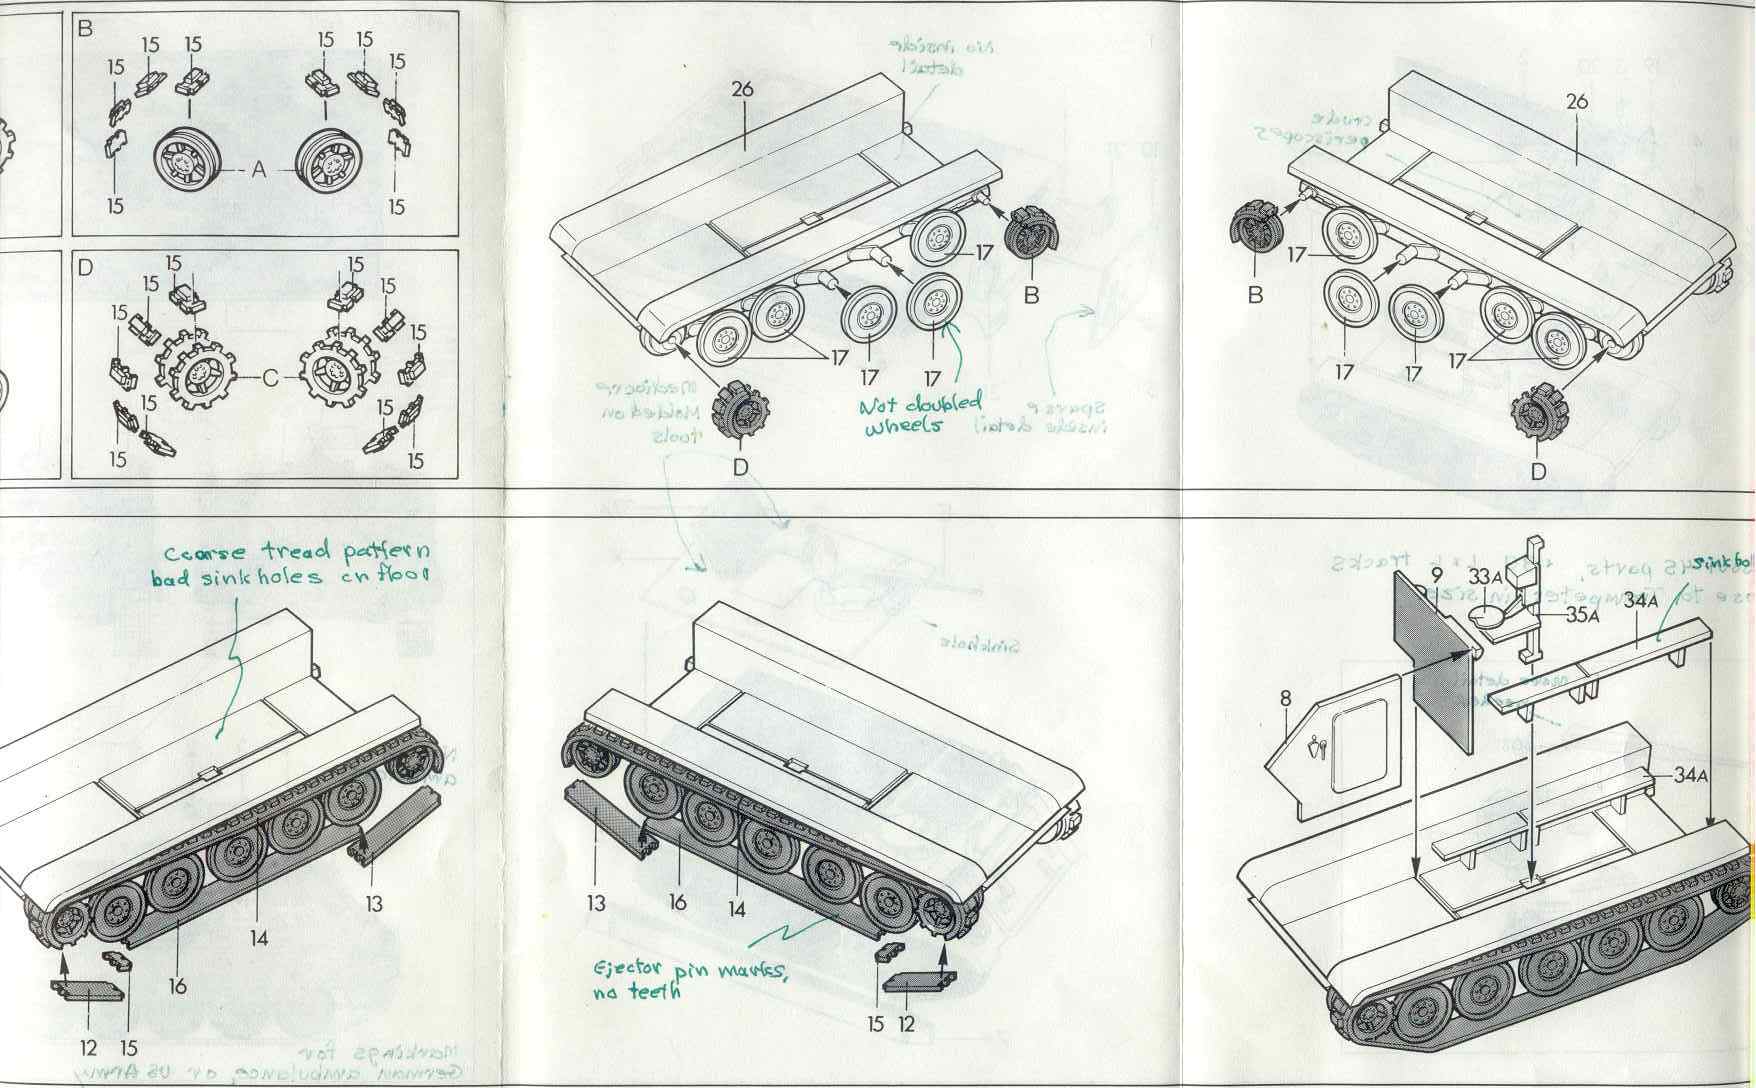
All my ESCI M113 kits come with hard styrene link & length tracks,
I've not yet seen any kits with the stiff polyethylene band tracks
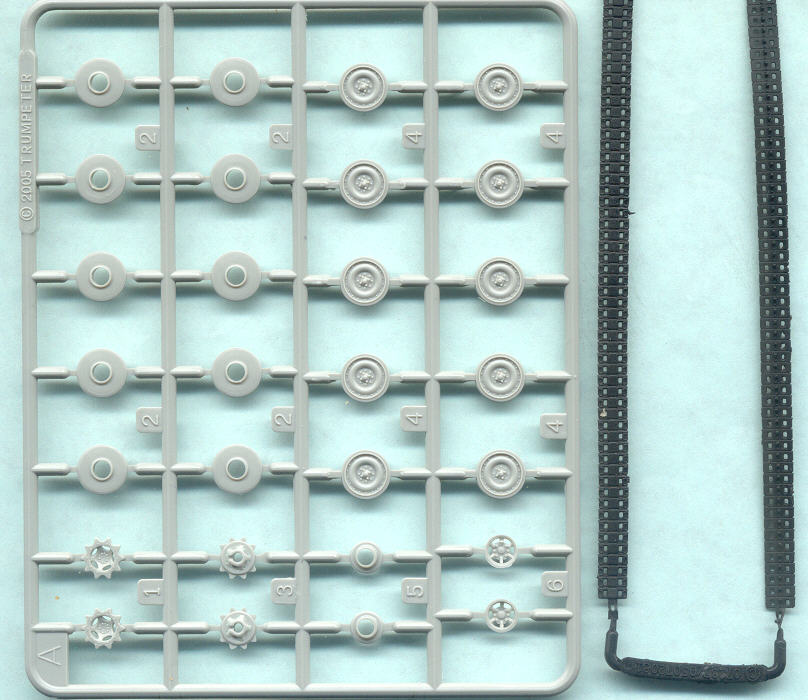
found on many ESCI kits. The idler and sprocket wheels at the right
are molded open and look reasonably accurate. ESCI gives us half the
number of road wheels that the Trumpeter M113 kits do as ESCI chose
to leave out the inner road wheel. When the model is completed it
may be hard to tell that the inner wheel is missing but a contest
judge, and you, will know.
At upper right of this sprue we see ESCI's rendition of the M113 headlights
which suffer the same molding issue as the Trumpeter models. At lower
right corner is the driver's hatch (part 22) and several rudimentary
jerrycans (parts 21). The track and road wheels will be discussed
more in detail below.
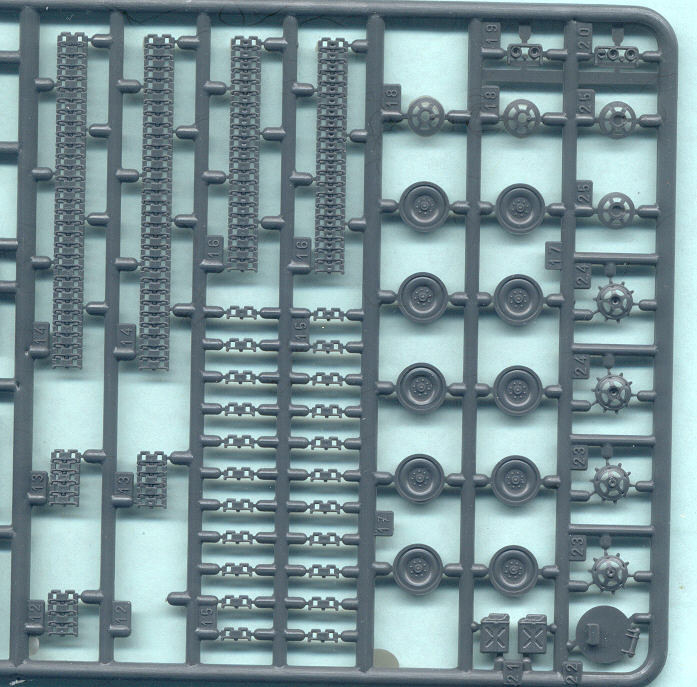
Trumpeter's wheels and soft band tracks are common to all their M113
kits. Trumpeter gives twice the number of road wheels as the ESCI/Italeri
M113 kit, though there is no tire or bolt detail on the inside wheels.

The exterior detail of the track would be decent if not for the sinkholes
on many of the track pads. There are no track guide teeth on interior
surface, an all too common fault of small-scale ESCI kit track. The
M113 was propelled though water by the tracks so the outside surface
detail of the track links could be more prominent. To be fair, the
sinkholes are mot present on all the track pieces in the kit, and
some of my ESCI M113 kits have no sinkholes at all.
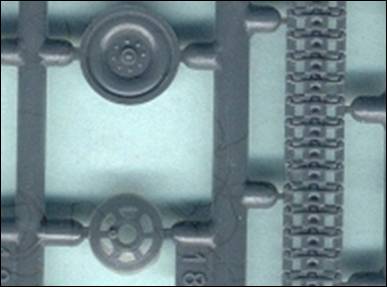
On this close-up of the ESCI road wheel we notice that a ring of bolts
is missing but otherwise the wheel is decently rendered.
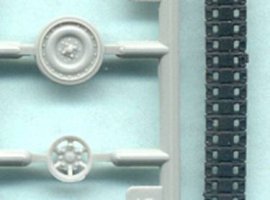
Trumpeter's soft plastic band track has no sinkholes and does have
guide teeth on the interior surface. They still lack much surface
relief and the rubber pads are not too evident, but are still overall
better in my eyes than the ESCI link & length track.
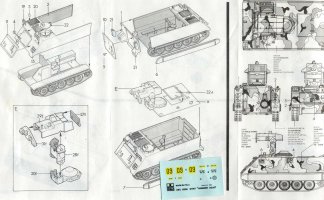
Assembly Instructions
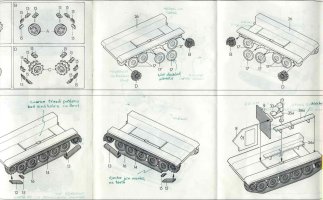
ESCI gives us standard 10-part exploded-view instructions. At upper
left are instructions for attaching the individual link tracks onto
the idler and sprocket wheels before affixing these wheels onto the
lower hull, guidance I wholly agree with. I prefer to glue the idler
and sprocket wheels to the hull after adding track to the road wheels
to insure all are aligned with each other. With the side skirt on,
I suspect we could leave off the top track run and most people would
never know it. Adding sag to the top run of track is particularly
important if you leave off the side skirt.
At lower right are the sparse interior features. The commanders seat
(parts 33A and 35A) looks decent but can use some additional details;
the passenger seats (parts 34A) are very much simplified compared
to my reference photos. Missing is the large fuel tank and all the
various driver controls, wiring, lights and interior storage boxes.

The reverse side of ESCI's instructions shows us final assembly of
the exterior and with options of hatches opens or closed. German M113
ambulances I have seen have rear view mirrors mounted on the front
corners of the roof.
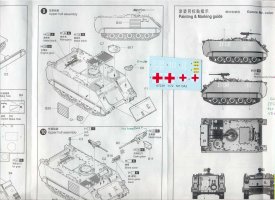
The 4-view painting and markings guide show a German Bundeswehr M113
ambulance, a different vehicle than that portrayed on the box art.
I do not believe that a machine gun is normally mounted on an ambulance
vehicle. The small decal sheet offers water-slide markings for the
two M113s depicted on the box and on the instruction sheet.
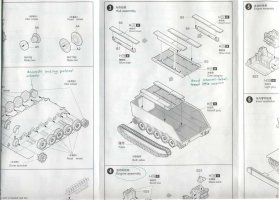
Trumpeter's M113A2 instructions have 10-steps with clear line drawings.
The passenger seats (parts B7 & B9) are better than ESCI's passenger
seats but still simplified. At the bottom and far right we see a little
peak at the engine assembly.
We are instructed here to paint the interior aircraft gray and dark
gray; from color photos I have mostly seen the interior walls either
white or pale green and the floor pale green or gray.
If you mount the exterior fuel tanks (parts C5 & C6) I understand
your should not install the interior fuel tank (part B10). We can
use this interior fuel tank in the ESCI kit interior instead.
This page of the instructions shows the final assembly of the armament
and hatches. If we model the hatches open the interior surfaces are
typical painted the same color as the vehicle exterior (with perhaps
less weathering and sun fading?).
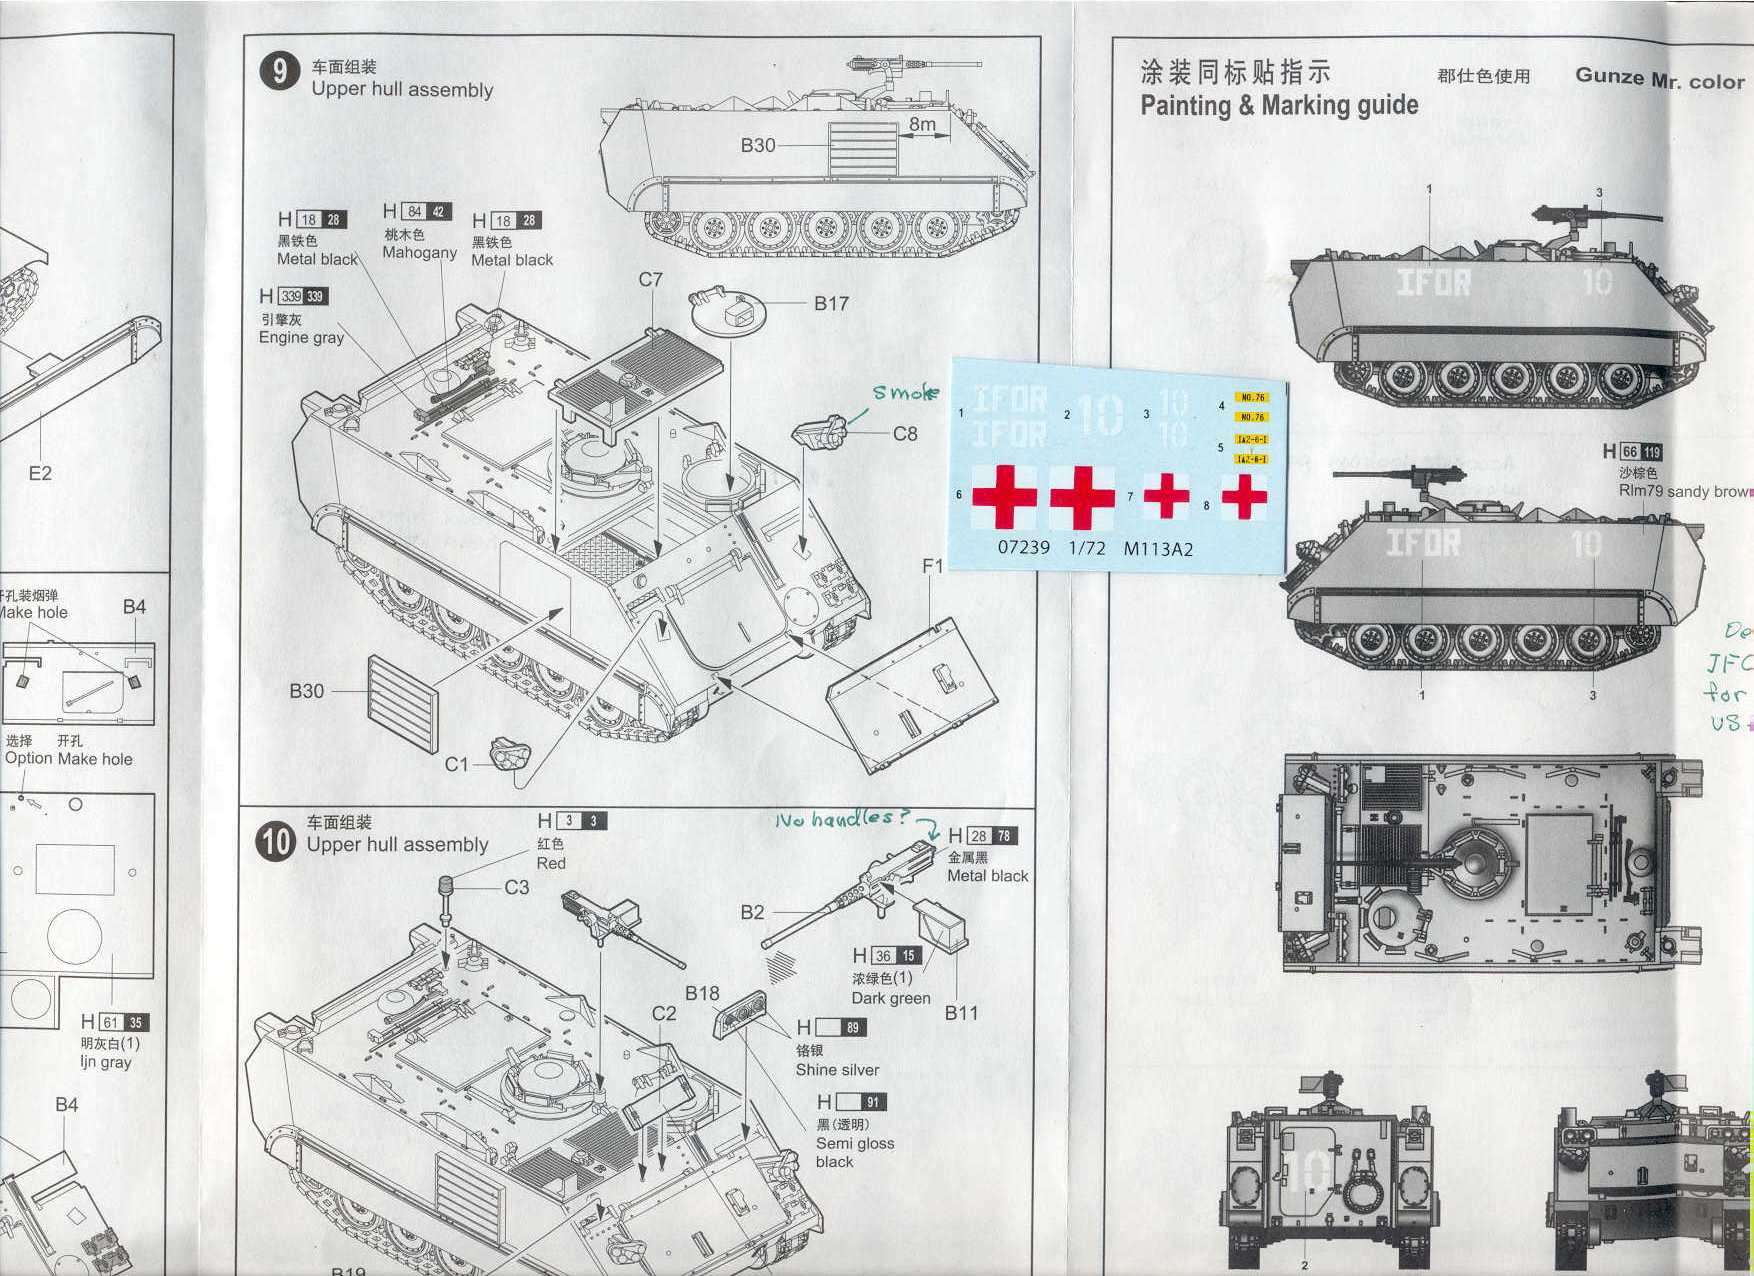
The louver-like panels (parts B30) are Combat Identification Panels
(CIP) used in Iraq to inhibit friendly fire incidents and should be
present on both sides, but only one is included in the kit (see: here
for more information on CIP). This Trumpeter M113A2 exhibits many
exterior features of the M113A3 and is only missing the trim vane
with extra floatation (part C6).
The 5-view drawing at right shows an M113 in monochrome olive color
and markings for an M113 APC during the NATO IFOR (Implementation
Force) operations in Bosnia. The small decal sheet has options for
two M113s: an ambulance in European style camouflage that is depicted
on the box, and the IFOR vehicle depicted in the instructions. Painted
in desert tan this M113A2 could also represent a vehicle involved
in the Iraq invasions and occupation.
Conclusions
Both kits I find to be descent representations of their respective
M113 APCs and both are recommended for wargaming built out of the
box. For a good display model both will need the antenna guards and
perhaps a full interior scratch built. With the three top hatches
open and the rear entry ramp lowered admirers can enjoy a nice view
of the interior.
The Trumpeter M113 kit is generally more an accurate M113 with some
notable exceptions with some parts. The kit has great surface detail
but the 50-calibre M2 machine gun comes with no handles, and the interior
has no commander seat. Neither ESCI nor Trumpeter has a driver seat
or instrument and control details.
Trumpeter Models M113 ACAV Armored
Car, Kit no. 7237
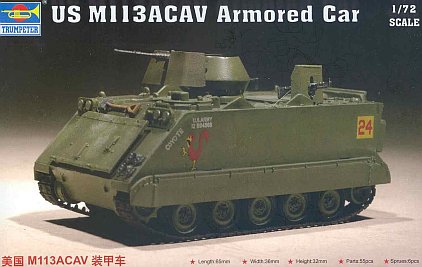
The kit represents a M113 ACAV variant of the M113 Armored Personnel
Carrier (APC). ACAV stands for Armored Cavalry Assault Vehicle and was
derived first by the South Vietnamese Army as an Infantry Fighting Vehicle.
A 1990s reference I read stated that no M113 ACAVs are in service though
it appears that the gun shields were brought of storage out and mounted
on M113's serving in the Iraq occupation.
First let us have a look at the box art so we will know what we are
buying and what is supposed to be within the box.
Like with most small scale Trumpeter model kits, rather than painting
of the vehicle they give us a photo of the actual built and painted
model. From the top we see the most obvious difference from the ESCI
and Trumpeter M113s we looked at above: the armor gun shields and additional
machine guns on the roof. The gun on either side of the rear roof hatch
are M60 machine guns indicating a vehicle serving in Vietnam. There
is no fuel tank hanging off the rear hull indicating this is an M113
or more likely, an M113A1 variant. Except for those differences this
is essentially the same kit is the Trumpeter M113A2 kit.
The vehicle is painted in olive drab with some attractive US Army markings.
The shovel on the bow is painted natural wood though many tools I have
seen are painted the same color as the rest of the vehicle exterior.
Except for the markings, exterior fuel tanks, and the roof mounted guns
and shields, this kit assembles the same as the Trumpeter M113A2 kit.
The CIP panel shown here (part B30) should only be mounted on a vehicle
serving in the Iraq war and should not be present on a Vietnam era M113.
Since one of these panels are mounted on both the left and right sides
we can use this panel on the M113A2 or M113A3 kits.
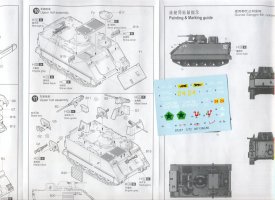
The 5-view drawings showing markings and painting is for the same M113
ACAV shown on the box top, though the decal sheet has makings for four
of five M113s but we have no guidance in the instructions on how to
place the other markings.
Seen in the book Armor In Vietnam, A Pictorial History:
- The red rooster markings (no. 14 & 15) and name BARBIE (no.
18) are for an M113 seen northwest of Da Nang.
- The black star in the green background with RED BARON in red letters
(no. 21 & 22) on the main gun shield is for an M113 ACAV that
served with the 716th MP Battalion in 1972.
- COYOTE DUSTERS with the eyes and mouth (no. 19 & 20) on the
gun shield is for an M113 mounted on the bed of 5-ton truck at Cam
Rhan Bay 1971.
- The black lion and yellow 24 (no. 2, 3 & 6) are for an ACAV
of the 8th Mechanized Infantry during 1970.
- The FIGHTIN "1" RIDES AGAIN and the white horse (no. 5, 16 & 17)
are for an M113 ACAV with the 4th Cavalry of the 1st Infantry Division
in 1969.
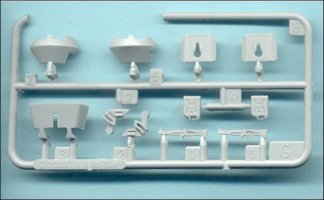
Sprue-G here is particular to the Trumpeter M113 ACAV kit and supplies
the two M60 machine guns and the gun shields. The M60 machine guns
look a little clunky to me and they are missing the end of the gun
barrels. Though the plastic is a little thick the gun shields are
otherwise well done. See reference photos if you wish to detail the
guns and shields to be more accurate.
Tim
Lau adds:
As
Stephen noted, the kit Trumpeter M133 ACAV only has instructions
about how to make "Barbie" but not about how to use the
other decals. I have created a diagram to help with this (see below).
_t.jpg)
The Italeri 1/35 kit has diagrams (also below) to deal with "Bob"
and "Panther 24" liveries.
_t.jpg) _t.jpg)
Paint
schemes from Italeri kit. Taken from Cyber-Hobby.
For discussion purposes only.
References about "Coyote Dusters" and "Red Baron"
can be found in Squadron 6033, "Armor in Vietnam: A Pictoral
History". All five decal options were clearly taken from drawings
in Squadron 6033.
"Lift Here", decal 7, is generic.
_t.jpg)
Taken from Super
Hobby, for discussion purposes only.
That does not help us deal with the question of whether the decals
are correct. Well, to start with, there should be three sets of
"US Army"+Number for the four options that have those
markings. These markings should be placed on both sides and also
on the rear like this.
Specifically
about "Barbie," I have attached the clearest picture I
have found. The decals are clearly missing the front marking, "B"+Number.
I am also doubtful about whether the rooster would be painted on
both sides of the vehicle and whether it would look front on both
sides.
_t.jpg)
Picture
from Photobucket; exact source forgotten; for discussion purposes
only.
I have
not been able to locate a picture of "Bob." But here are
other vehicles belonging to 1/4th Cav, with the "Fightin' 1st
Rides Again" slogan, like this,
this
and this.
As
can be seen in the pictures, "Fightin' 1st Rides Again"
is left aligned on the port side and right aligned on the starboard
side. The decal set have them all left aligned, which is incorrect.
On some of the vehicles "Lift Here" can be seen but others
cannot. Again, markings on the front, such as "1-1-4 CAV"
are missing from the decal sheet.
As
for Panther 24, I have some doubts about whether the field should
be yellow as seen in the decals. I have only seen pictures of 2/8th
Cav with a panther on a blue field. E.g. here
and here.
Maybe
someone can find a picture to prove my doubts wrong.
I
have not found a picture of "Red Baron" and I will not
comment on it.
I
have not found a picture of "Coyote Dusters" either. However,
in Squadron 6066, the book states that the "Coyote Dusters"
was fitted onto a 5 ton truck. If that were the case, it may be
completely wrong to just make a model of the M113 ACAV alone with
the decals. The transportation companies sometimes mounted M113
that could not be repaired onto trucks for fire support. An example
can be seen here
and here.
Naturally,
if "Coyote Dusters" were such a vehicle, then it needs
a truck to go with it. It may not, as seen in the examples, have
its own tracks or wheels.
Here
are some other comments about the kit. Most vehicles in the field
do not have the sand shields. However, the kit more or less forces
the shields to be installed. (See attached kit excerpt.) Filling
the holes may be troublesome.
_t.jpg)
Finally, a comment that applies to all Trumpeter M113 kits. The
features on the front of the model are a bit overscale. I have attached
pictures of a ready-made model built from the kit and of an actual
vehicle. As can be seen, the light on the starboard side should
end where the trim vane begins. But on the model, the lights extend
a bit further. Everything looks too big, from the trim vane to the
lights to even the spade. I am unsure about other features on other
parts of the vehicle but I suspect there are similar problems throughout.
_t.jpg)
Taken
from Easy
Model, for discussion purposes only.
_t.jpg)
Taken
from Flickr,
for discussion purposes only.
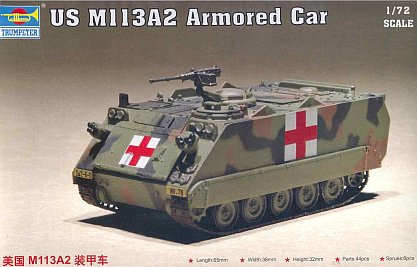
M163 "Vulcan": ESCI Models Kit 8304,
and Italeri kit no. 7066
This ESCI model depicts the M163 Vulcan Air Defense vehicle mounting
a 20mm M168 cannon, the same gun mounted in the fighter aircraft.
Coming into service in 1967 its purpose was to be a self-propelled,
close defense antiaircraft platform against low flying aircraft. It
proved unable to adequately track fast jet aircraft and was out-ranged
by helicopter-mounted AT missiles, though it did prove valuable in
a ground support role. The Israelis have compensated for the guns
limited range by also mounting Stinger antiaircraft missiles.
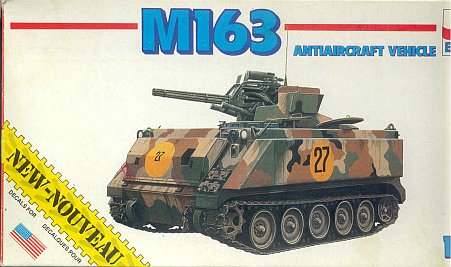
On the box art is a reasonably accurate painting of an M163 Vulcan.
Mounted atop the M113 hull we see the large open-top turret with 6-barrel
gattling gun protruding ominously. In the front corner we see the
open diver's hatch. The turret takes up much of the roof center so
I am puzzled by what looks like a second round hatch to the side of
the turret. There is a round hatch on the rear starboard side of the
roof but we could not see it from this angle.
At the four corners we see the lift rings which are missing from the
kit itself. The bow has the extra flotation built into the trim vane
and there is additional floatation on the port and starboard sides
needed to compensate for the weight of the turret. Many photos of
the M163 I've examined do not have the extra flotation in the trim
vane; (this flotation trim vane I understand to be also a feature
of the late-M113A2 and M113A3 APCs.
The vehicle is painted in a 4-color winter MERDC Camouflage scheme
(Mobility Equipment Research and Development Center) for a serving
in NW Europe and temperate North America (see here
for more information on MERDC scheme). The yellow circles with numbers
are for vehicles involved in war exercises.
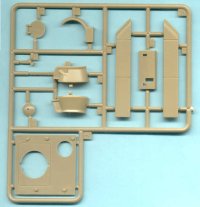
Here is the sprue for the M163 Vulcan air defense turret with the
hull roof at lower left, the side hull and trim vane flotation at
right and the greatly simplified turret and gun at center left. The
gun and turret is a big disappointment for me and appears more like
a toy or wargame piece at best. Just in comparing it to the box art
we can see how simplified the actual kit it is. I can be a good start
for a major scratch building project though.
There are no crew members included. As is typical of models when this
kit was first released, there are no etched brass or resin parts.
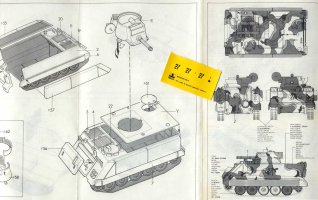
The final page of ESCI's M163 instructions shows the assembly of the
turret parts and a 4-view painting guide. The turret is open top and
the interior very empty so a crew figure would help some. For a good
display model a full rebuilding of the turret and gun is required.
If you wish to build and correct this Vulcan model may you "Live long
and prosper".
The small water-slide decal sheet included within the ESCI kit has
markings for one M163 with large markings of a yellow circle with
number 27. When re-released by Italeri, markings for three or more
vehicles are typically offered.
A 20mm Vulcan rotary cannon in turned & etched brass is offered
by Master Model in 1/72
scale with parts that should be helpful in correcting this M163 Vulcan
kit.
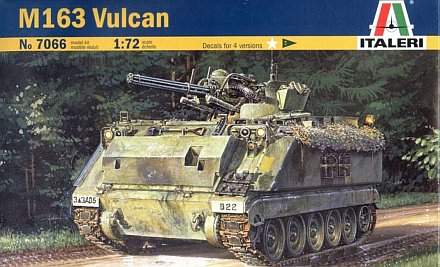
Here is the box art for Italeri's re-release of the ESCI M163 kit.
The Italeri differs in offering decal markings for four vehicles.
Esci M901 "Hammerhead" Improved
Tow Vehicle Kit, kit no. 8306
The M901 Improved Tow Vehicle (ITV) replaced an M113 with M220 TOW
missile launcher that had that retracted into the vehicle hull. The
large hammerhead shape TOW launcher of the M901 was raised up so the
vehicle could hide in a (hull down) depression with only the launcher
exposed. The launcher was lowered for reloading through the crew hatch
in the rear.
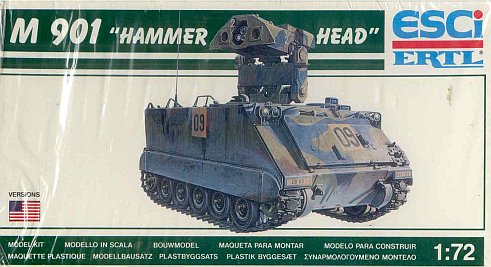
This old ESCI-ERTL box art shows an accurate M901 with the launcher
raised and turned to the starboard side. There are two large holes
for the TOW missiles on either side of the aiming sight located in
the center. There are three lenses in the center for the missile sight.
When examining the kit's launcher parts it is evident that the kit
launcher is greatly simplified.
Along the edge between the side and the bow plate we see a weld and
joint seam that is not present on the actual ESCI model. At the rear
corner we see an antenna mount behind the antenna guards that are
missing from the ESCI kit. On the port side of the bow are several
spare track links. On the metal track links are rubber track pads.
This TOW missile launcher is also mounted on the YPR-765 prat, and
VCC-1 variants of the M113, and on the LAV-AT armored car (which is
offered by Trumpeter in 1/72 scale).

The ESCI M901 kit is essentially the same kit as the standard ESCI
M113 APC kit except for the Sprue E above with the TOW launcher, and
the machine gun and commander cupola are excluded.
The TOW launcher when assembled looks like the actual launcher though
has some significant differences from all my reference photos. The
launchers I've studied do not have a rear plate like part 27E. I had
hoped that the TOW launcher included in the Trumpeter LAV AT kit would
be more accurate and useful to make this more accurate, though the
Trumpeter launcher does not match my reference photos either.
The M901's launcher is mounted in the location of the M113's commander's
cupola. In the interior the commander's and passenger's seats are
not mounted so we have these as extra parts. The rectangular roof
hatch is used for reloading the TOW missiles. On the roof are the
disappointing tools molded to the kit roof. Missing from the ESCI
model are little details particular to the M901 vehicle: side looking
periscopes and a wind gauge sensor staff on the roof, and tall brackets
for the missile launcher to rest on when traveling, and missing a
small armored window in the rear door.
The last page of ESCI's instructions show assembly of the TOW launcher,
and the 4-view drawing showing the 4-color MERDC camouflage and placement
of the markings. The water slide decals are for one M901 vehicle.
The M901 Hammerhead ESCI kit was considered state of the art for small
scale when released years ago and is still a reasonably good model.
Conclusions
For wargaming model both manufacturers are near ideal except the Trumpeter
band tracks will be easier to use. The great plus of the ESCI M113
family releases is the M163, M901 and M106 mortar carrier versions
not offered by Trumpeter. This review cannot reasonably point out
all the features, problems and good points about these models, so
please see and study your references well.
The Trumpeter M113 models are certainly an improvement in ways but
does not live up to its potential; it seems like a compromise between
a display model and a gaming model. Many features are certainly no
improvement over the older ESCI (now Italeri) M113s. A dozen or so
small to medium-size parts for the interior and outside hand tools
could make this into a much better display model. The big plus of
the Trumpeter kits is that M113 ACAV, M113A2 and the M113A3 versions
not offered by ESCI/Italeri. When ESCI released their M113A1 and other
M113 kits the actual M113A2 and M113A3 had not even been developed.
I am surprised that I could find no etched brass detail sets, or resin
interiors for either the ESCI or the Trumpeter M113 kits. I am fortunate
to have an old LEVA Productions resin conversion to build the ESCI
M113 as an Israeli ZELDA vehicle with TOGA armor.
References
[1] M113 in Action, Armor No. 17. Squadron Signal Publications (1978).
An old book but still a reasonable resource on the earlier variants
of the M113.
[2] Armor in Vietnam, by Jim Mesko, Squadron/Signal Publications (1982)
[3] Warmachines No. 9, Military Photo File, M113/Part 2, Verlinden
Publications. Softcover book with photos and description of the M163
and M901.
|


.jpg)
.jpg)
.jpg)
.jpg)
.jpg)
.jpg)
.jpg)
.jpg)