|
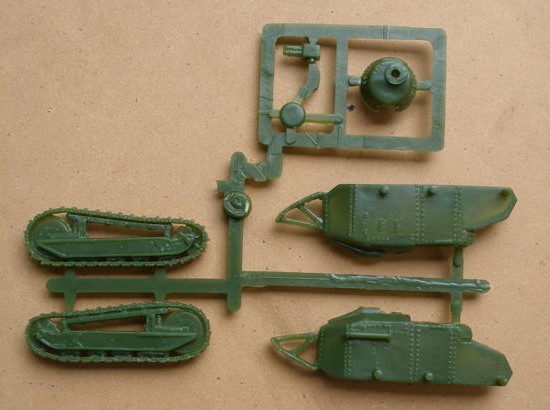
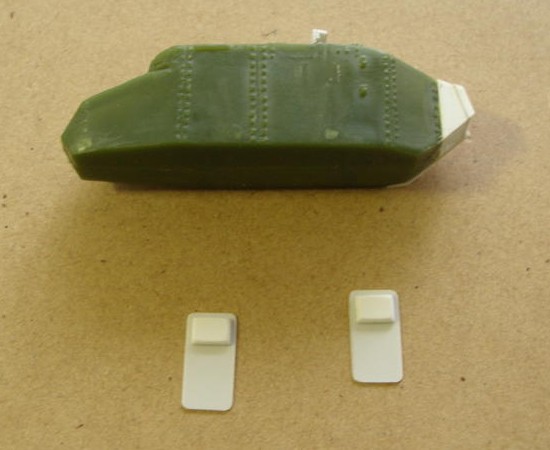
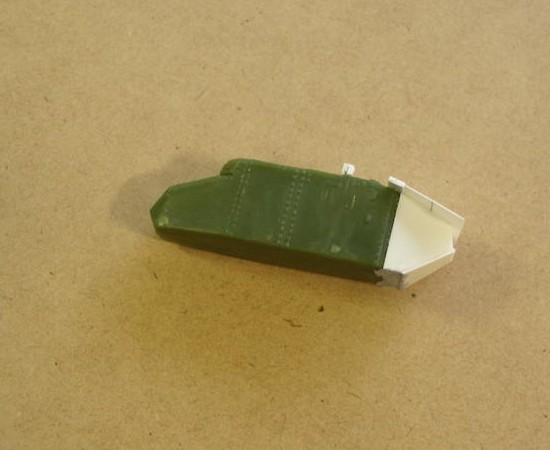
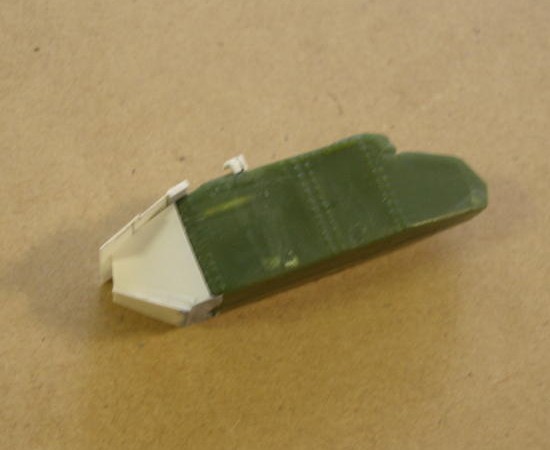
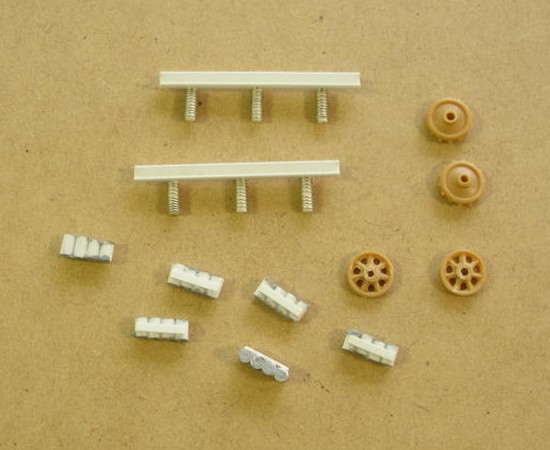
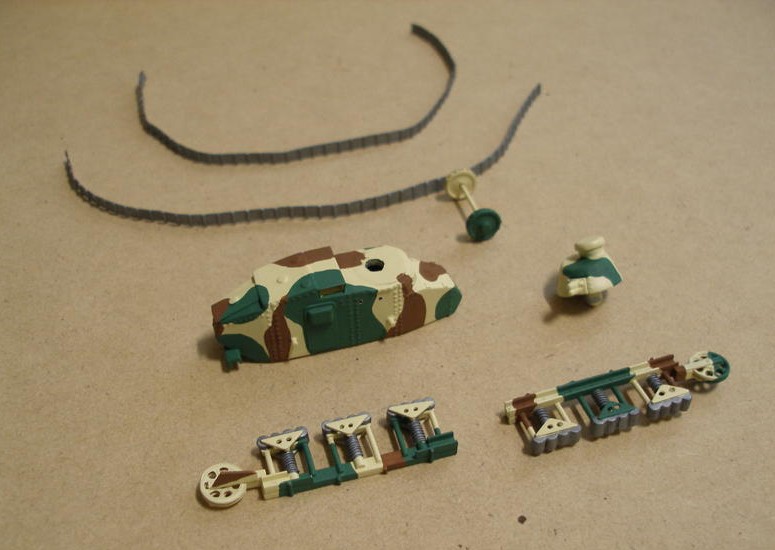
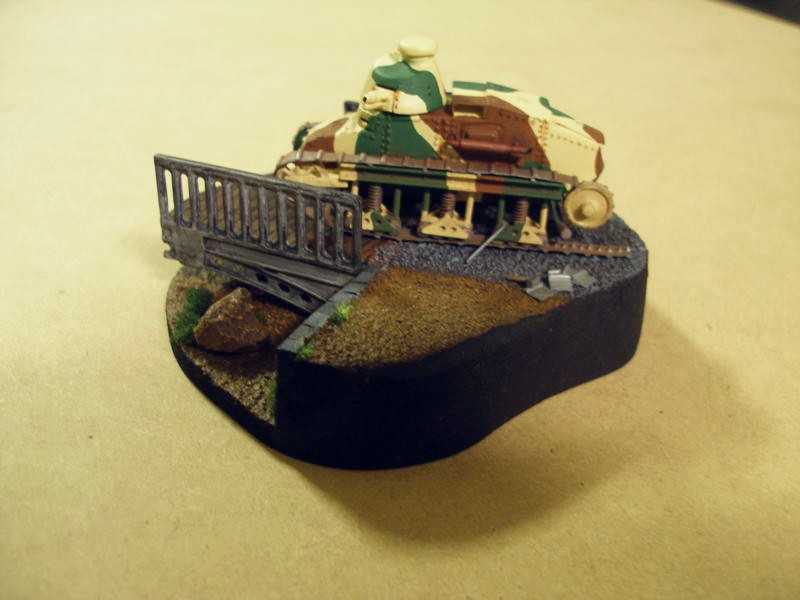
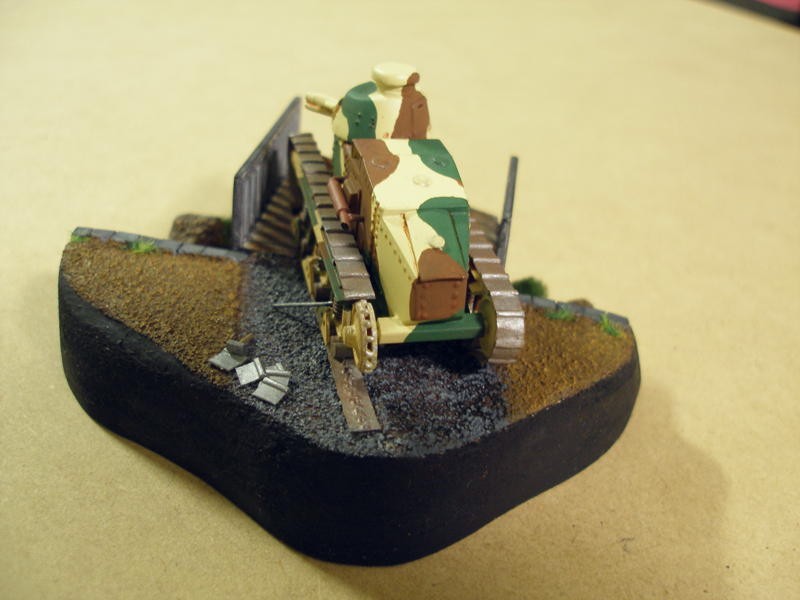
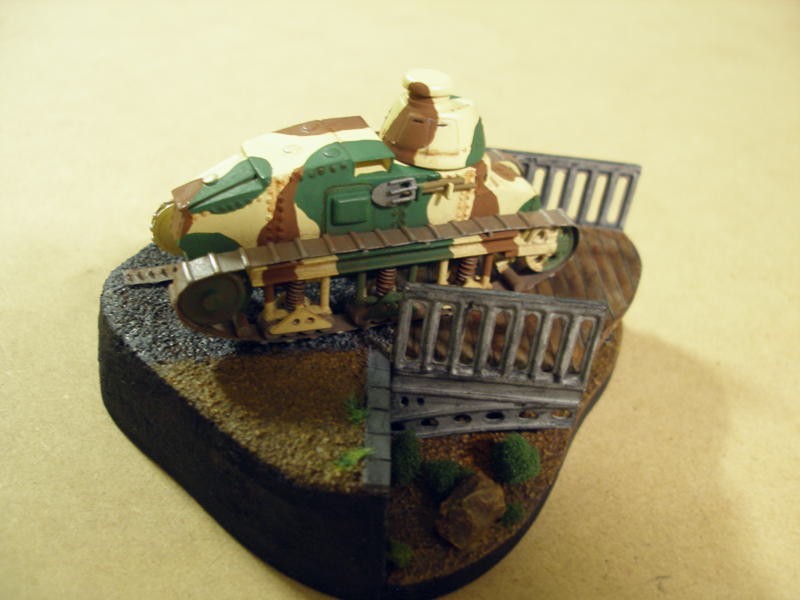
Historical Notes The FT-17 was designed and manufactured by Louis Renault's company in 1916, based on parameters set out by General Jean-Baptiste Etienne who is regarded by the French as the “father” of the modern tank. By the Armistice in November 1918, almost 4,000 examples had been delivered by French contractors. Later it was produced in the USA as the “Six Ton Tank”, in Italy (in slightly modified form) as the Fiat 300D, and also copied by the Soviets as the “Ruskii-Reno”. In 1923, Renault produced a modernized, larger derivative identified as the NC-27, sometimes referred to as the NC-1. This vehicle had a revised suspension and a more powerful engine. Another change to the suspension resulted in the NC-25/26 or NC-2 in 1928. However both of these models suffered from unreliable engines and problems with the gearbox. Sales of the NC-27 were abysmal: one to Belgium, one to Sweden and ten to Japan. In Sweden it was called Stridsvagen fm/28 and is currently preserved in the Pansaar Museum in Axvall. In Japan it was called Otsu Juta Sensha and the engines were replaced with Japanese diesels at some stage. The Imperial Japanese Army (IJA) used the NC-27 primarily for training, although small numbers of the type were deployed to Shanghai in 1932 and in Northern China after that. Unconfirmed reports have the survivors in service with the Manchuko Army in the later 1930s. Modelling the NC-27 in 1/72 Not surprisingly, the hull is based on an FT-17 kit such as the Hat wargamer's model (which I used), the Matchbox/Revell or RPM kits. As illustrated by the photos, the hull is re-profiled and lengthened with plasticard to match the drawings with detailing from plasticard/sprue and bolt heads added from 5-minute epoxy glue. The suspension is built up from plasticard, Evergreen plastic sections and plastic rod with springs from fuse wire. The components should be cut to length/shape, laid on a 1/72 drawing and “tacked” together with polystyrene glue then all the joints then flooded with superglue for strength. I finished the major components in the three-tone camouflage scheme used by the IJA, then assembled and slightly weathered with acrylic paint and gunmetal enamel. Detail work such as adding the exhaust/silencer and tool storage on the hull sides was added by scratch building from plastic rod. I constructed the tracks from strips of thin plasticard with half round plastic rod glued on to represent the ridge at one end of each plate type track shoe. Unhappily this was not very successful as the finished item was rather flexible and brittle and required much adjustment to fit to the suspension. A better solution would have been to use strips of flexible plastic and even perhaps thick masking tape. Once the tracks were fitted, final weathering with pastels and dry brushing was completed and the model mounted on a suitable base. With hindsight, the suspension system does not really reproduce well in 1/72 and 1/35 would be a better option for this conversion. This has the added advantage that suitable aftermarket tracks would probably be available as well.
|