www.onthewaymodels.com |
Converting the Dragon 7.5cm Pak 40 into an FK 7M59 |
||||
|
Article by Al Magnus |
|||||
www.onthewaymodels.com |
Converting the Dragon 7.5cm Pak 40 into an FK 7M59 |
||||
|
Article by Al Magnus |
|||||
|
Before I start I suggest the reader refer to Stephen Brezinski's article
here on On The Way! for more information on the FK 7M59 and his conversion using the Roden kit.
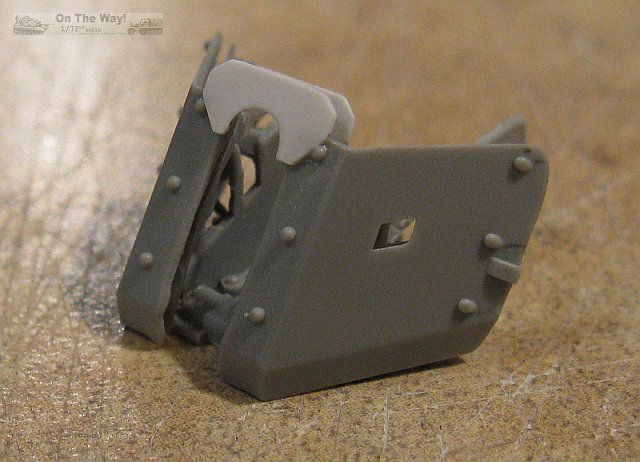
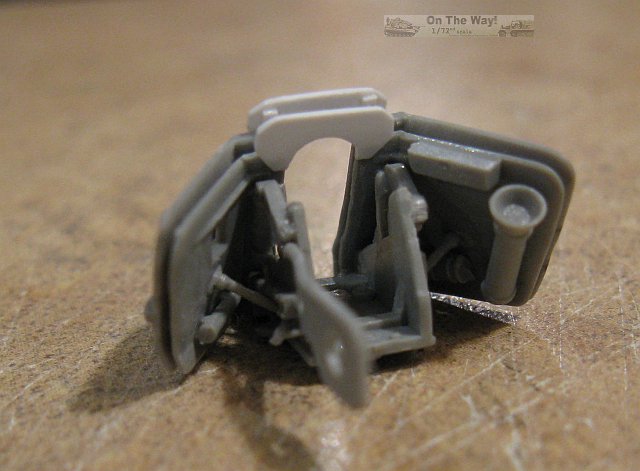
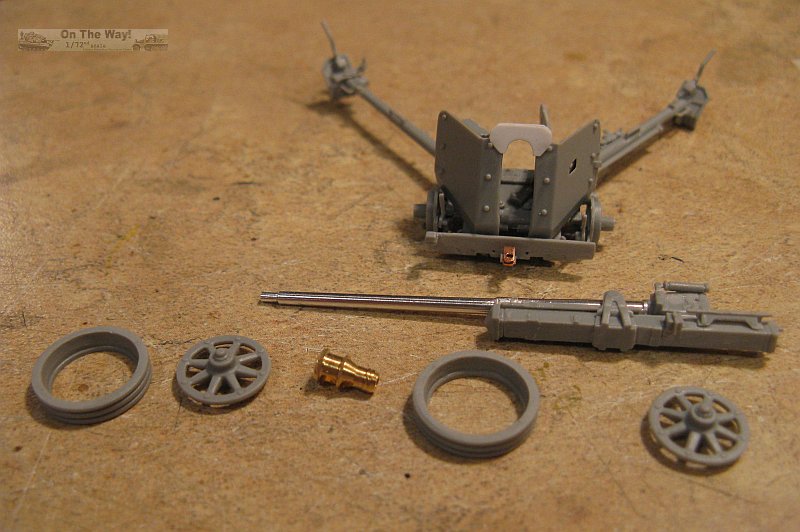
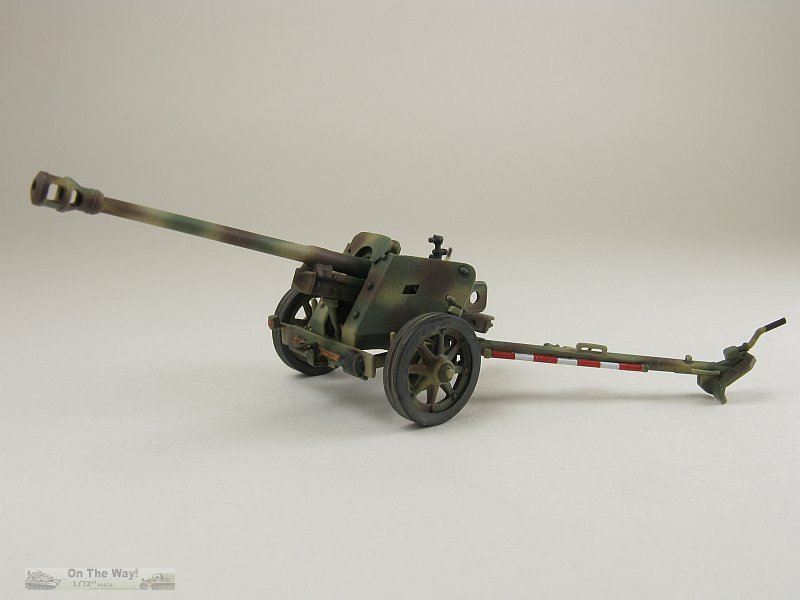
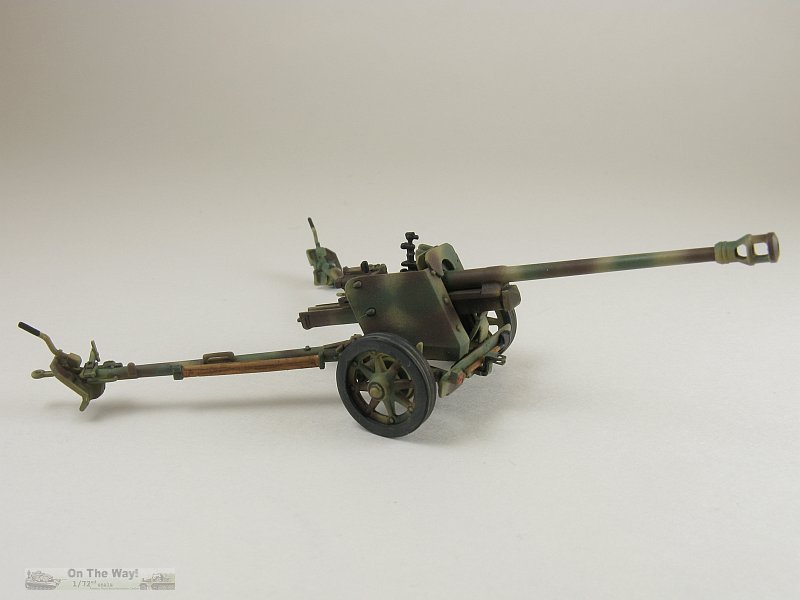
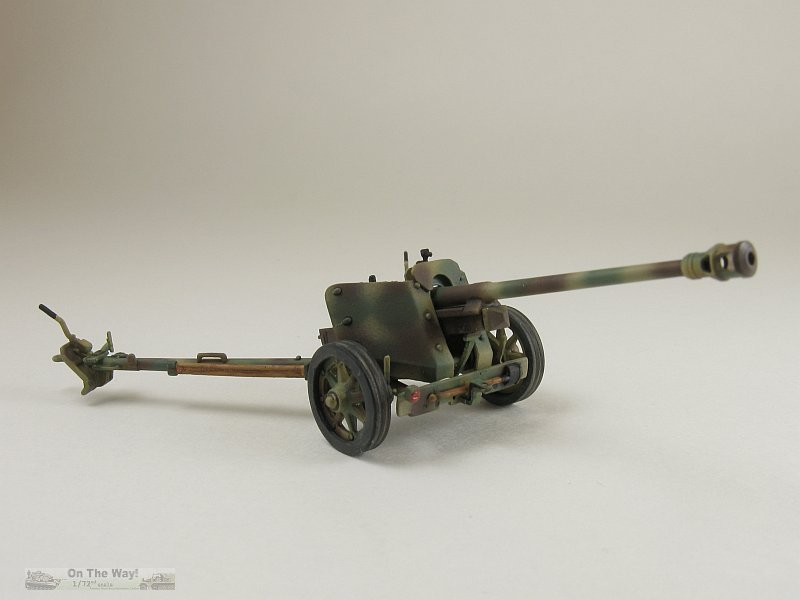
The majority of the work revolved around shield changes. The most noticeable being the fillet extensions above the barrel slot. After a few attempts I was able to cut some presentable fillets from some thin plastic sheet. These I sanded down to make them as thin as I possibly dared to go. The slot in the shield has to modified so that its sides are straight. This I did by cutting away all of the plastic save for the support brace that spans the gap at the top. I left this in place for a modicum of stability and strength for the shield while I worked on it. I attached the shield to its mount and let everything dry solid. Then I carefully snipped off the small brace that I left in place earlier, sanded everything smooth and added my new fillets. There are a pair of support braces welded to backside of the front fillet which I added with small strips of plastic. Other minor changes involved relocating the box on the backside of the rear shield from the centre, to the right side. A new gun sight was obtained from my spares box. As I had done for my previous Pak 40 build, I replaced the kit's barrel with an excellent metal item from RB Model, and as happened with the Pak 40, the metal barrel makes the model nose heavy, forcing me to display the gun with a small piece of blue tack under one of the spades to keep it sitting on its trails. That's about it as far as the conversion goes. Nothing really difficult, other than cutting out the slot in the shield, making the new fillet extensions and tow hitch, along with the usual test fitting along the way to ensure everything fits properly, are the only things to slow you down versus building the kit straight from the box. 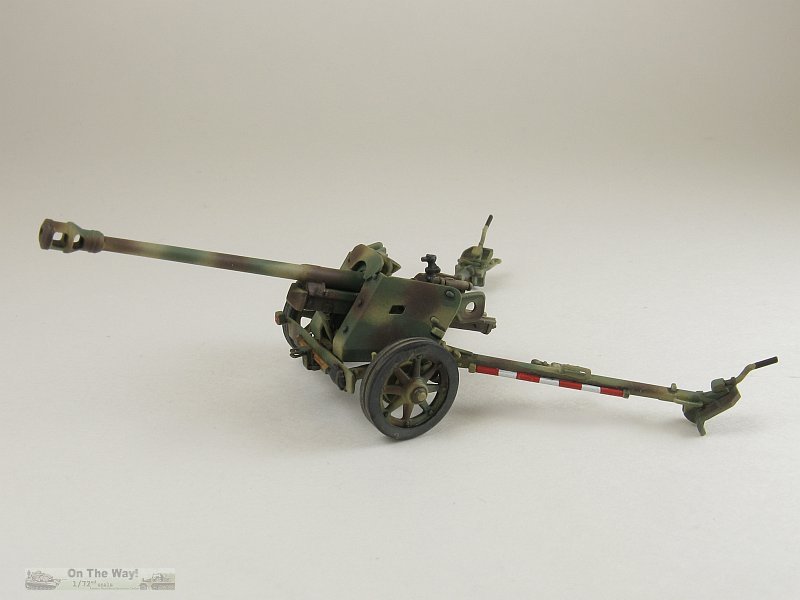
References
|
| Back to Articles Page | Back to Home Page |
Article Last Updated: 10 November 2016 |
|