| --UM Models |
StuG III Ausf E |
|||
Kit
: # 278 |
Review
by Joe Stauder - jlds62(at)yahoo(dot)com Edited by F. Giovagnorio |
|||
| --UM Models |
StuG III Ausf E |
|||
Kit
: # 278 |
Review
by Joe Stauder - jlds62(at)yahoo(dot)com Edited by F. Giovagnorio |
|||

|
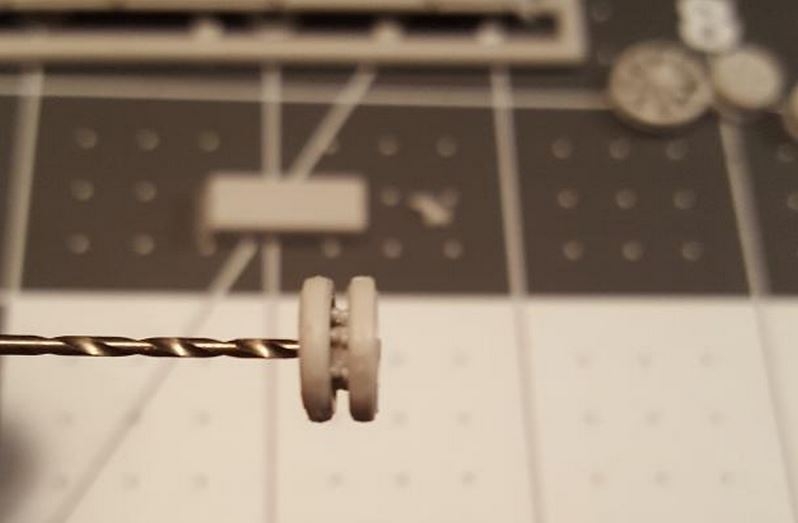
I really looked forward to building this as this is my first UM kit. In the box, the kit looked really nice with great detail crisply and cleanly molded. It contained a boat load of parts, with lots of little fiddly pieces but even so I wasn't nearly as intimidated as I should have been. Right out of the blocks I had some issues, the first four steps in the instructions deal with the wheels. The sprockets are designed to fit together with a special pin and hole shaped to fit a certain way, unfortunately the receiver hole was filled and had to be cleaned up to accept the pin. Which rendered the whole thing moot. The idler wheels went together well with no issues. Then came the road wheels – a lot of cleaning to get them usable, then lining them up was an exercise in frustration. I used a drill bit to line up the connecting bolts and then glued them together in situ. Doing this 12 times was no fun. Here is a photo of how I did it.
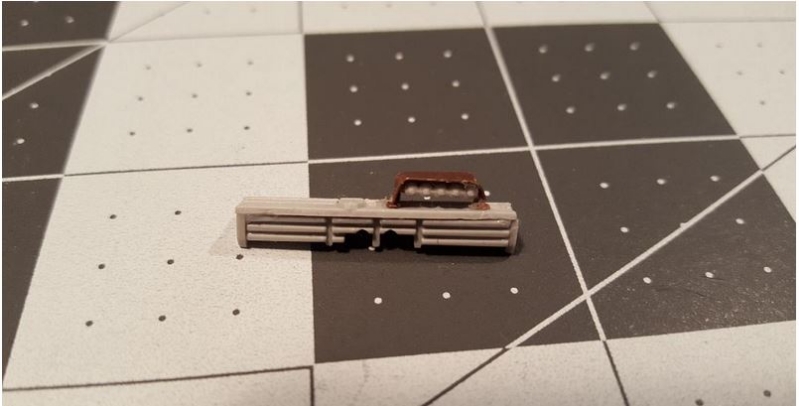
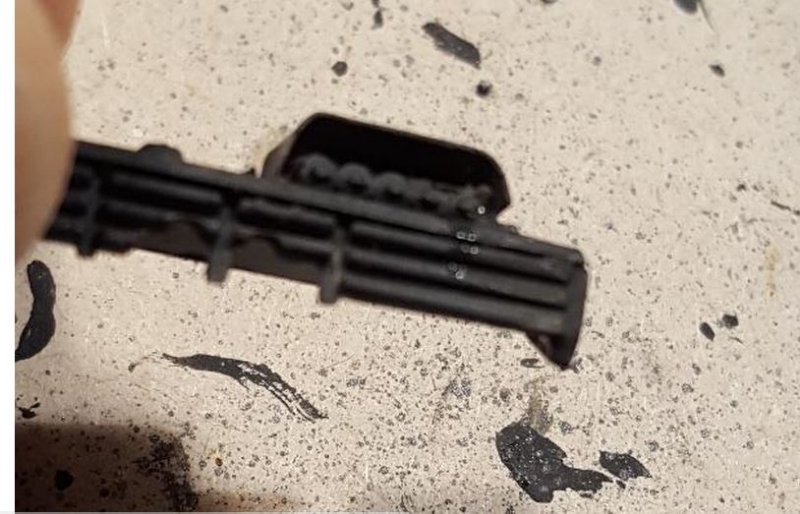
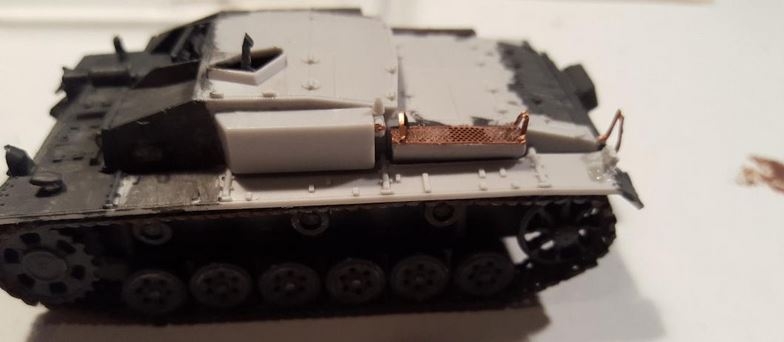
Step 5 was attaching the antenna mount to the panniers, I chose not to do a command vehicle so I only did the left hand one. Use a reference for the correct mounting of this piece as the instructions are a little vague. Step 6 deals with the upper rear plate and the smoke candles. I had issues – it was probably me – getting the candles to fit the way they are shown in the instructions. It shows an almost horizontal positioning with the P/E housing folded around it. I couldn't get it to fit that way, and I couldn't find any good photos of the mounting, so I attached it vertically and it fit. Here's how I did it.
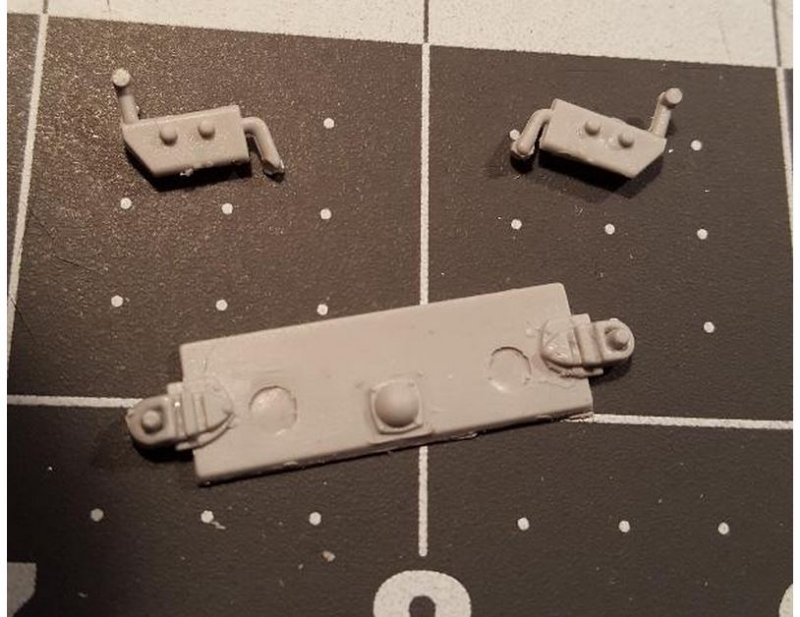
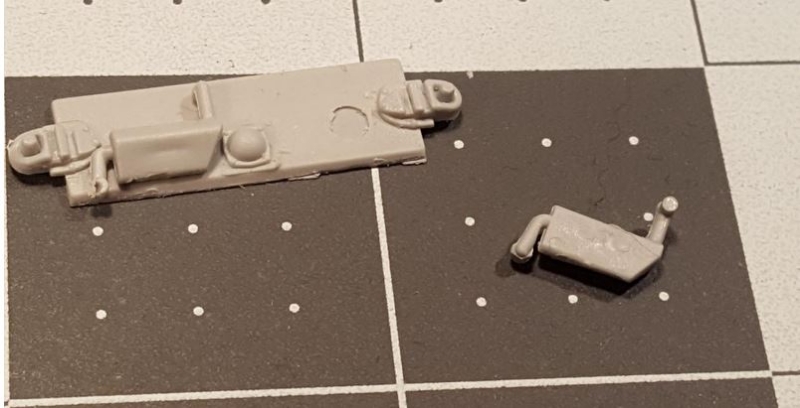
Step 7 had issues with every part. The instructions show the mufflers attaching via pins. The mufflers have pins, but there are no holes in part 38B to receive them, just sink marks. I filed off the pins and attached them directly to the piece. I did not fill the sink holes as the muffler covered them well enough. (See photos.) Next the instructions show the pairing of tow cable hook ups as 5B/36b and 6B/37B, this is incorrect it should be 5B/6B and 36B/37B.
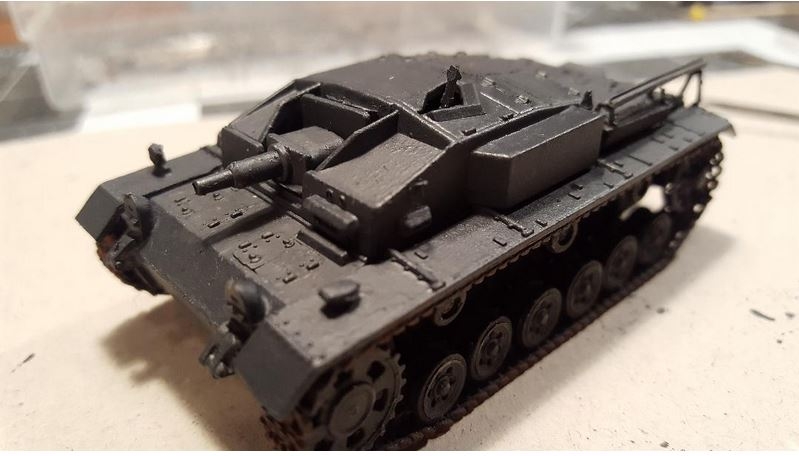
Steps 8 and 9: I waited until the end to add the tools, definitely the right way to go. Steps 10&11: deal with the wheels and tracks. A good amount of drilling and fitting to get the wheels on correctly. The shocks (4A) are a fiddly fit so you might have to trim a bit to fit. The track installation is tricky. The individual links do not sit well on the sprocket, so I had to trim off the teeth to get them to sit nicely. The count is different from the instructions, I recommend starting with the long top piece and working around both the sprocket and idler wheels and then fitting the bottom together as best you can – It was a tricky fit but it worked and I had a lot of extra single links for stowage. Step 12: Putting tracks and lower hull together. Attach the rear plate from Step 7 first, it will help with the lining up and attaching of the track assemblies. Add 12A last after the tracks are secure, it makes more sense as to placement. Steps 13-15 deal with the gun and gun mount, I decide to assemble the mount in place and then add the gun later, this worked out very well as the fit is not right and I would have had to take it all apart to get it to fit. It also made it much easier to test fit the superstructure, the periscope and the gun itself. One issue of note here is the gun has a big seam running down the length on the top, fill and sand before attaching to gun shield it's much easier to sand that way. Next, the gun shield (6E) has two big sink marks in it that need to be filled and sanded before assembly as well. Beware the periscope is attached to the fret via its top lens, I accidently trimmed off the tiny lens cleaning the part up – still working to right that wrong.
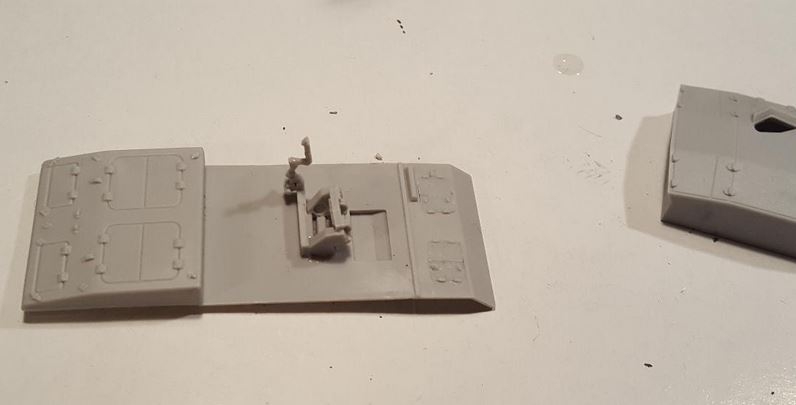
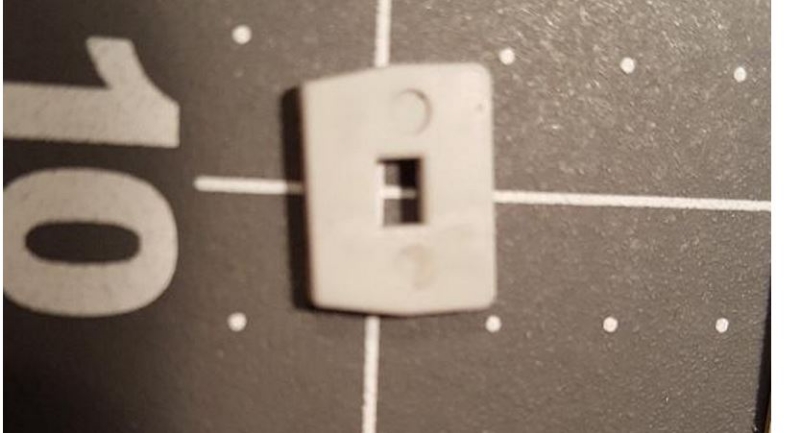
Step 16 part 18E needs to be cleaned up or it won't fit right, mine had heavy injector marks on the back face. Also, very important the transmission/brake hatches are wrong, the suggested parts (12,14,22,23E) are for the earlier makes with the large hinges. Use parts 18C (small hinges) which are supplied with the kit. Both roof hatches are molded closed. Corrections I recommend for the superstructure include: cutting in a slot in the drivers port side viewport, cutting in a slot around the roof ventilation dome, cutting out the hole for the gunner's telescopic sight and making a new scratchbuilt gun sight, and drill the two small view holes in the driver's plate above the visor.
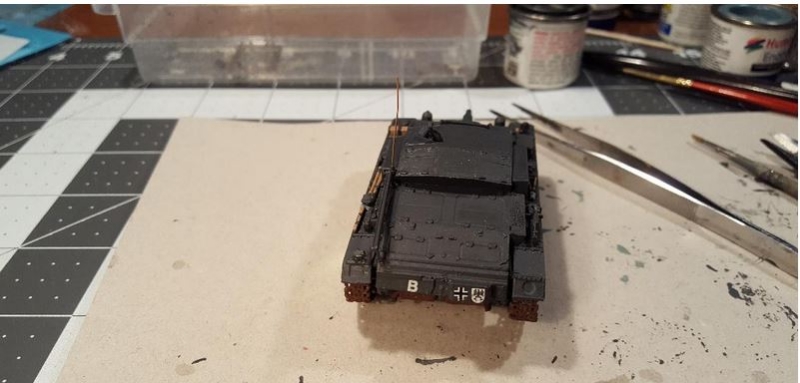
Steps 17 – 19 The final assembly is pretty straight forward, I added the upper hull, then the fenders. I sanded down the underside of the fenders a bit to get some space between them and the tracks. I am really glad I only did one antenna, the P/E brackets were hard to line up height wise with each other, (see photo). I attached the panniers after a lot of checking with other sources as the instructions are vague. Remember they don't rest on the fenders, but ride slightly above them. Tool placement was easier once the panniers are in, but the S clamps don't quite fit in their allotted space, I used some creative placing. Also, the instructions have the crank placement backwards in Step 8, but it shows correctly in Step 18 and the box photo is correct, too.
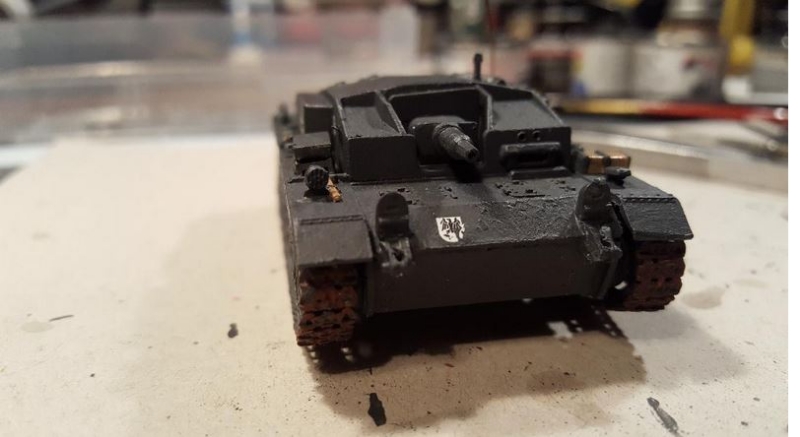
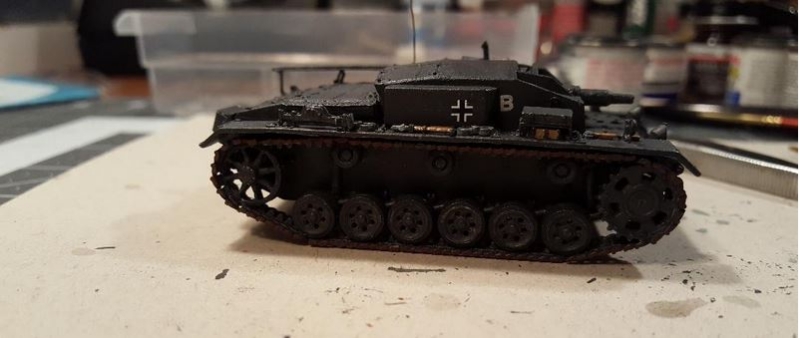
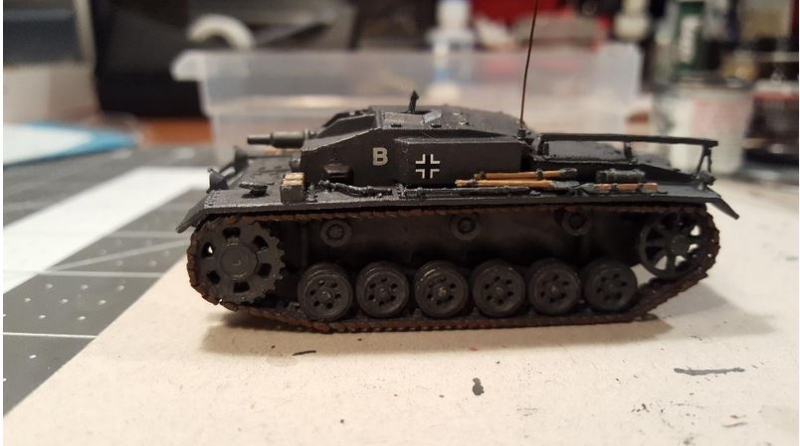
The decals all looked good, but I only used the divisional marking for Sturm Abt. 197 and it went on very nicely. The Balkenkreuz are dry transfers from Archer and the lettering is from a generic dry transfer sheet of unknown origin. I painted the model in Testor's Model Master Panzer Schwarzgrau '39-'42 RAL 7021. I haven't added any stowage yet, nor have I done any weathering. This is basically an out of box build to get a look at the finished model. I really like the look of the completed model, it is a very nice depiction of one of my favorite subjects and from my references it looks to be very accurate. This is ultimately going into a small dio and I will send more photos once that is completed.
I took a long (11 year) break from modeling due to real life, this is my first real build since coming back, all in all it was fun but I need more work to get back into form. I am more of a model builder than a model maker, so I tend to lean more heavily towards dealing with I.M.S. vs. A.M.S. Comments are welcome, thanks.
References Sturmgeschutz III in Action, Squadron Signal Pub., Armor#14, Bruce Culver, w/ Don Greer Stug III Assault Gun 1940-1942, Osprey Military, New Vanguard #19, Hilary Doyle & Tom Jentz, w/ Peter Sarson Encyclopedia of German Tanks of World War II, Arms & Armour Pub., Peter Chamberlain & Hilary Doyle, w/ Thomas Jentz
Review sample purchased by the author. This
model can be purchased from
|
Back to UM Kit List |
Back to Home Page |
Article Last Updated: 02 March 2018 |