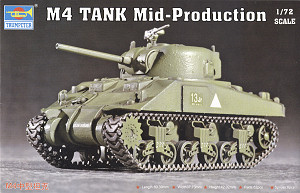
The kit is boxed with a photo of the finished model, a right way to
give an idea of what you are buying. There are six light gray flash
free mouldings: the bogies with the wheels (both types!) named A,
the upper hull named D, the turret named E, the lower hull (with no
letter) and a second suspension set named T2, each individually packed.
This last one is a “quick building” single piece set with
the open spokes wheels. The kit also comes with two black soft plastic
T48 tracks and the decals. The mouldings also give us two jerry cans,
two wooden boxes, two drum cans and two nice MG (a 0.30 and a 0.50).
The M4 Sherman type proposed is the early - mid production (March
1943-July 1943), with the bolted transmission cover, the M34A1 gun
mount and the pistol port/appliqué armor turret, as built by
the American Locomotive Company. The Pullman Standard hull was identical,
but had a different antenna bracket type. It can also easily be converted
into a PSC tank. Aside the always welcome personal items, strangely
enough the cast maker forgot to make the characteristic brush guards
on the glacis.
Sadly, the kit upper hull has the glacis at too big an angle, stretching
it and pushing backward the whole deck (see the preview).
To avoid
a hull that would be much too long, the rear was cut a little more
of a millimetre short; the effect is a deformed upper hull. Supposedly,
this makes the kit unsuitable out of the box. Thank to the preview
I was aware of the problem, however, surfing on the net I found this
post where
the author said that the upper hull could be corrected, I followed
this tip and bought the kit. As a 3D reference I used a Dragon M4
together with the usual sources (Hunnicut book and the Sherman
Minutia website). The thing worked and at the end I bought two
other kits. The work is not as difficult as it looks.
Hull
First of all, the upper hull correction:
- I
scribed the inner upper hull side joints until the sides were detached
from the glacis plate.
- I
cut the sides to have a 68 mm long side, measured on the lower edge.
From this new length the forward sloped edge was restored at the
correct glacis angle.
- The
glacis plate was folded downward and the sides were glued to the
new forward side edges. The upper hull plastic is thin and this
means less plastic to cut but also a weak gluing line, so every
new joint was stiffened with sprue pieces glued inside with a generous
amount of cyanoacrylate.
- The
lower glacis edge was trimmed to size, carefully cutting off the
fenders.
- I
trimmed the inner back plate to free the passage of the exhausts.
- The
exhausts were detailed, adding the two pipes and filling the two
holes.
- I
glued two sprue segments inside, flush to the lower edge. It helped
to find the correct alignment when the two halves were glued, giving
a support between the upper hull sides and the horizontal plates
of the lower hull.
- I
erased the rear lights and with 1.0 x 1.0 mm rod the hull rear was
stretched. Then I glued the rear plate. Its upper edge was kept
aligned with the engine deck, while its lower edge overhangs the
lower edge of the sides by a millimetre. This is correct for an
ALCO or a Pullman tank, for a PSC tank file the shim part vertically,
keeping the kit lower side edge corner as a reference.
- I
glued a 1.0 x 1.0 mm rod along each lower edge of the upper hull
sides leaving it a little raised outside; this restored the height
and added the missing sand skirt support.
- I
heightened the lower hull rear plate D1 gluing a 1.0 x 1.0 mm rod
piece on the upper edge.
- Before
gluing the hull halves I had to replace the transmission cover:
it is wrong, not only because it is missing the bolts, its curved
plate has a wrong radius. For my tanks I used a cast one (an Italeri
part converted in a rounded type) and two bolted ones (one from
Dragon and one from Heller). Before removing it I used the kit part
to mark the points as a reference for the correct alignment of the
upper hull.
Now I could glue the hull halves. At this point, the upper hull has
the same features (almost) of a Dragon or a Heller M4 upper hull (take
a look at the comparison photos). Then I could work on the details:
- The
thin welding seam around the bow antenna bracket is correct for
the ALCO produced tanks while a larger seam is needed for a PSC
tank. For Pullman tanks a wide cast base is needed (see the antenna
bracket of the Armourfast M4); the detailing is a bit complicated,
being solid with the glacis and for one of my three Trumpeter M4,
which reproduces a Pullman tank, I chose to ignore it.
- The
lights were added in the new position together with the new lifting
points made with metallic wire (also the rear ones).
- I
added the light brush guards, missing in the kit, with Dragon PE
spare parts or by scratch building.
- The
hood appliqué armor was made from 0.25 mm plasticard. Their
shapes were also modified, making the inner sides vertical. The
huge welding seams were also added with stretched sprue and cyanoacrylate
glue.
- The
glacis siren with its guard was scratch built with a rod section
shaped like an egg. This is not shown in the photo as it interferes
with the bow star marking. It will be glued after the decal has
dried. The fender siren didn’t have the guard.
- The
engine air intake cover D2 was a cast piece; with sand paper I rounded
the corners.
- The
shovel handle was erased and a new one was made with stretched sprue,
after having removed as much plastic as possible under the shovel.
- New
scratch built rear lights were added with spare Dragon PE light
brush guards or by scratch building.
- The
towing hook is upside down. I removed the hook base and a new one
was made with two plastic strips. The interlock on the hull plate
was filled.
- Each
track tensioner received a 1.0 mm long piece of 1.20 mm diameter
plastic rod (I know, it should be hexagonal…).
- The
four towing eyes were made with metallic wire.
Turret
- The
1 ½ (or 1 ¾) inch appliqué armour is moulded
on the turret side. It looks a bit thin; I thickened it with thin
plastic card. On one of my M4 tanks the turret received a cast-in
armor and its pistol port was consequently removed.
- The
hole for the smoke grenade was used by November 1943 when only Baldwin
was still producing the 56° glacis welded hull. For my tanks
I filled the hole with a drop of cyanoacrylate glue.
- The
lifting points were made with new with metallic wire.
- The
mantlet is a bit tall. I removed plastic from above and from the
bottom (see the photos on the Sherman
Minutia website).
- The
hatch ring hole is a millimetre too wide while the external diameter
is correct, making the ring section tight. I know, it is only a
millimetre but it is really visible! I added a 0.5 x 1.0 mm plastic
strip into the hole to reduce it by a full millimetre. The hatches
were reduced in consequence, sanding away the plastic outside the
little external gap.
- The
aiming blade was thinned.
- The
periscopes received the covers which I made with 1.5 x 0.5 mm plastic
strip.
Wheels
and tracks
- The
bogies are well done (strangely, the solid quick building pieces
look better made then the other ones). The return rollers anyway
are a millimetre larger (on both types provided). I erased and changed
them with 2.50 mm diameter rod segments, taken from the T2 sprue
which has the right diameter.
- The
wheels sets are really good and the one you don’t use will
be really useful for other projects.
- The
sprockets (two sets) are well done, but a slice of plasticard was
added between the toothed disks on the forward side of the hub,
where the inner side of the tracks can lie. This job is needed to
avoid the warping of the tracks which are really soft.
Decal
In the instructions there are drawings only for one tank:
6th AD “HELL WITH IT”: I’ve seen
it only in two photos, taken in Germany in April 1945. It had the
appliqué armor/pistol port turret, but the cast transmission
cover is not visible and I can’t confirm it had the bolted type
(anyway other 6th AD tanks had it so it could be correct). The serial
and the antenna bracket aren’t visible, but the rear upper plate
is sloped, according to the kit. The bumper codes 6Δ68Δ
and
HQ-13 are missing.
The decal
set provides markings for two other tanks, not included in the instructions.
- 4th
AD 8th TB serial 3039798 in Normandy. It could
be a Pullman Standard M4. I say “it could” and not “it
was” because I’ve seen this tank only in colour profiles
and not in a photo so I’m not able to confirm if the serial
is correct (but I think it isn’t, looking a bit too high,
3039178 could be more appropriate, being a July 1943 tank if my
counts are correct). Looking at the proposed serial, it should have
had the cast transmission cover and the cast-in armor turret with
no pistol port, being higher than 3039595 (the higher Pullman serial
I’ve found) which already had them. The 8th TB tanks had a
dry mud or similar colour paint stripes camouflage. The 3rd platoon
vertical stripes were carried on the hull sides, just forward of
the serial (which looks a little too small), and on the shutter
of the rear engine hatch. They have to be applied before the camo
stripes for a better result. The bumper codes 4Δ8Δ
and
company-tank are missing.
- 754th
TB C-2 “DRAGON LADY” in Luzon, Philippines,
February 1945. It was a late production Pullman Standard tank, with
the cast rounded cover and the cast-in armour/no pistol port turret.
The siren was placed on the glacis with the late type guard (the
type you can find on the 47° glacis tanks).
Conclusions
Out of the box the kit is useful only for wargaming. Upper hull and
transmission cover apart, what remains is a good kit and some interesting
spare parts. Not as good as the Dragon or the Heller kits, it is still
useful with a bit of elbow grease, the only missing parts being the
light brushes. An option to use the kit can be the upper hull replacement
with another one taken from an aftermarket set or from a quick building
kit (and it can be used also for a M4A1).
_t.jpg) _t.jpg)
 _t.jpg)
_t.jpg)
_t.jpg)
 _t.jpg)
Preview sample purchased by the
author.
Trumpeter kits can be
purchased from

|

.jpg)
.jpg)
.jpg)
.jpg)
.jpg)
.jpg)
.jpg)
.jpg)