|
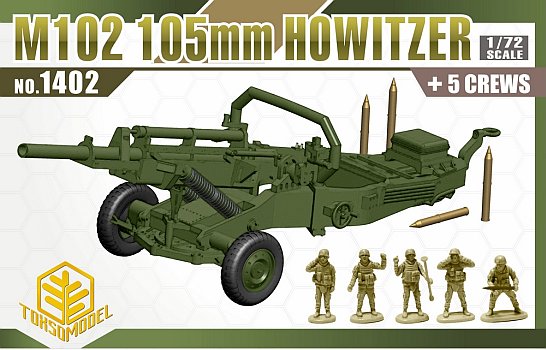
Kit Preview
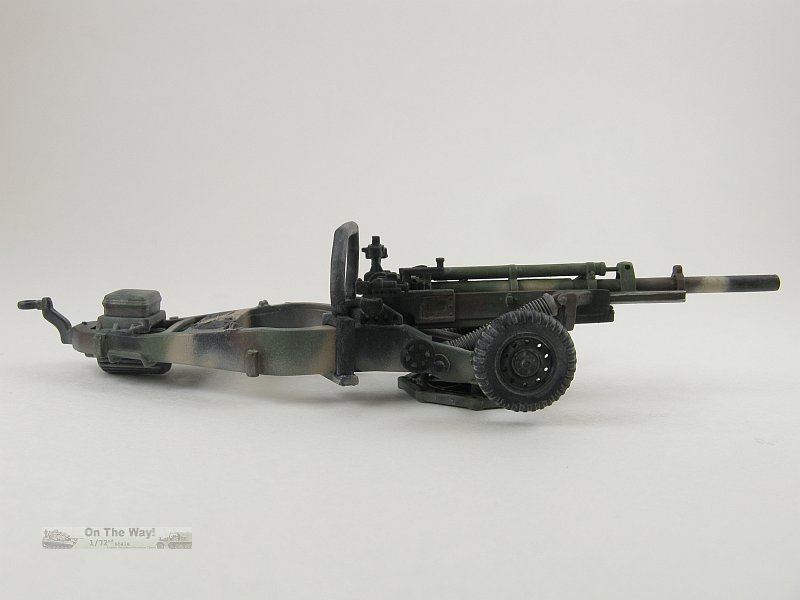
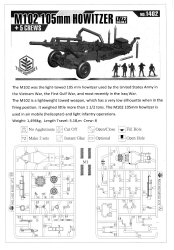
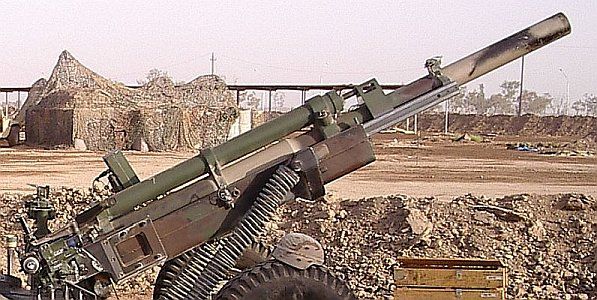
First introduced during the Vietnam War in 1966, the 105mm M102 howitzer became the US Army's light-towed artillery piece for decades,
seeing use with Operation Desert Storm in the early 1990s and even into the early 21st century with the Invasion of Iraq in 2003.
It has now been supplanted by the newer M119. The last active deployment of the M102 was in Iraq in 2004. It fires a variety of conventional munitions and can be traversed through 360 degrees. M102s can be dropped by parachute or transported by utility helicopters
for normal movement or air assault operations.
I have practically nothing in my library on this gun forcing me to get busy researching it on the web. As a result this preview will
look at the sprues and focus on some of the parts to illustrate
the level of detail in this kit. Any comments on the kit's accuracy will be limited to what knowledge I can glean from
web references, primarily walkarounds and wikipedia, and from the down-loadable documents found at references [6] & [8].
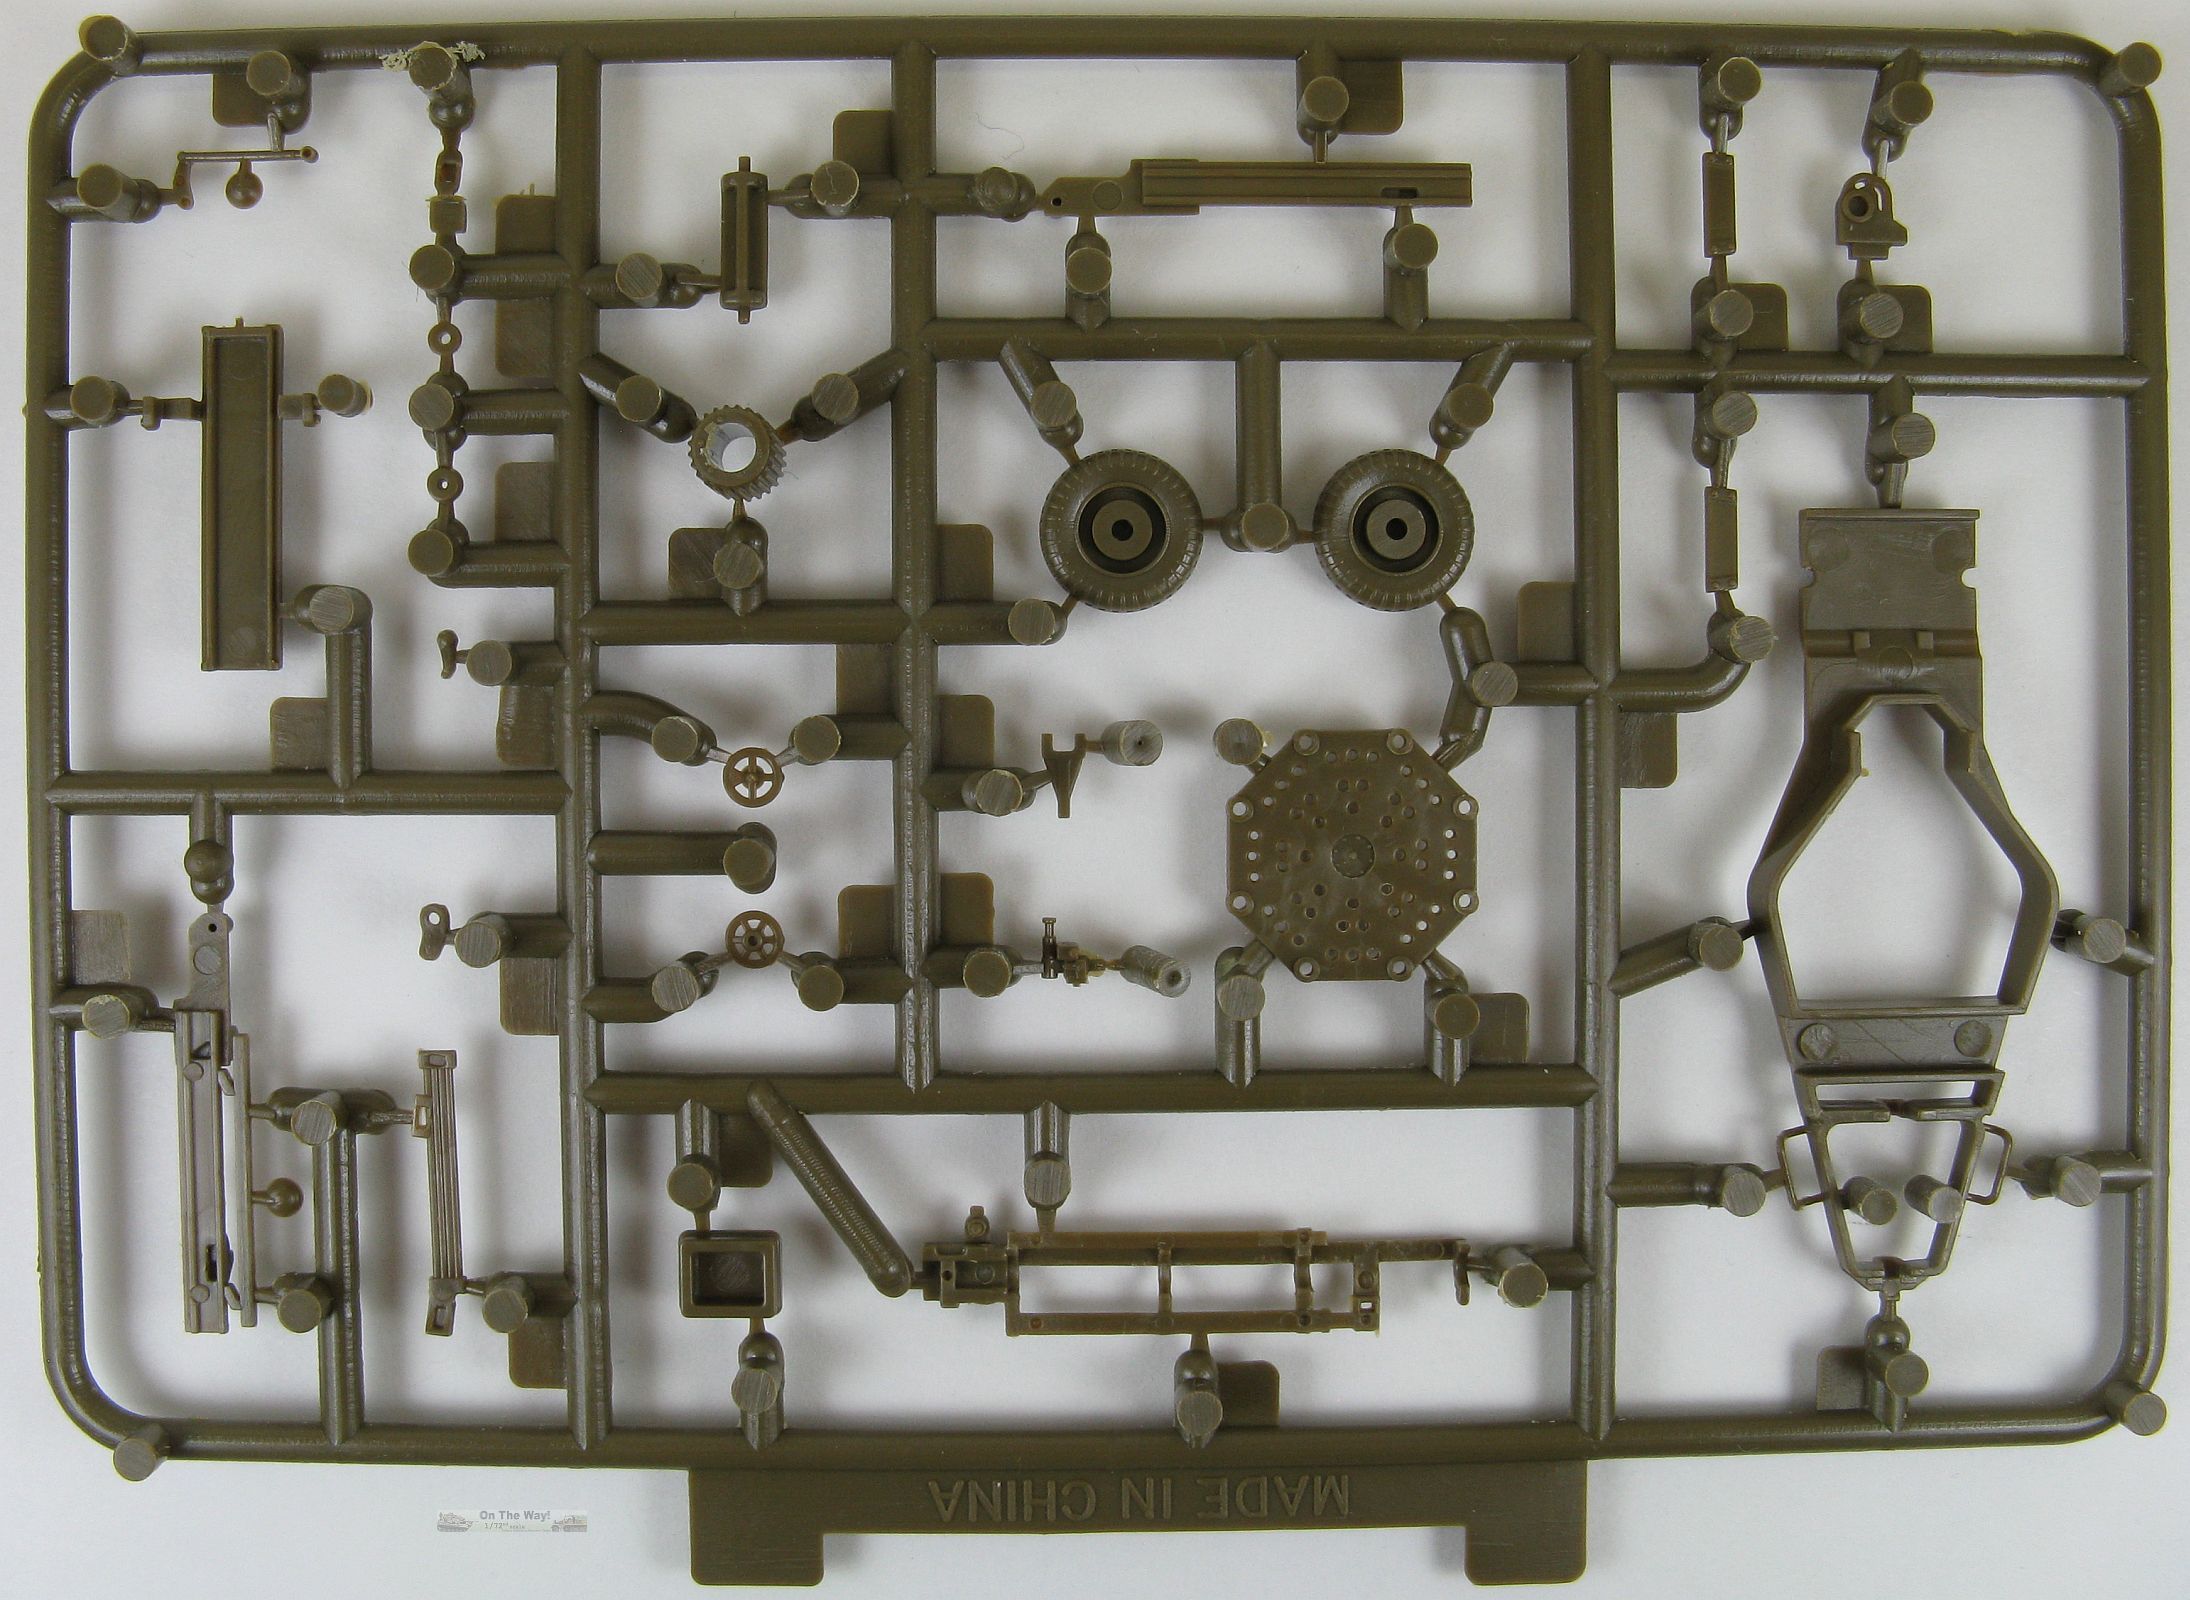
The kit
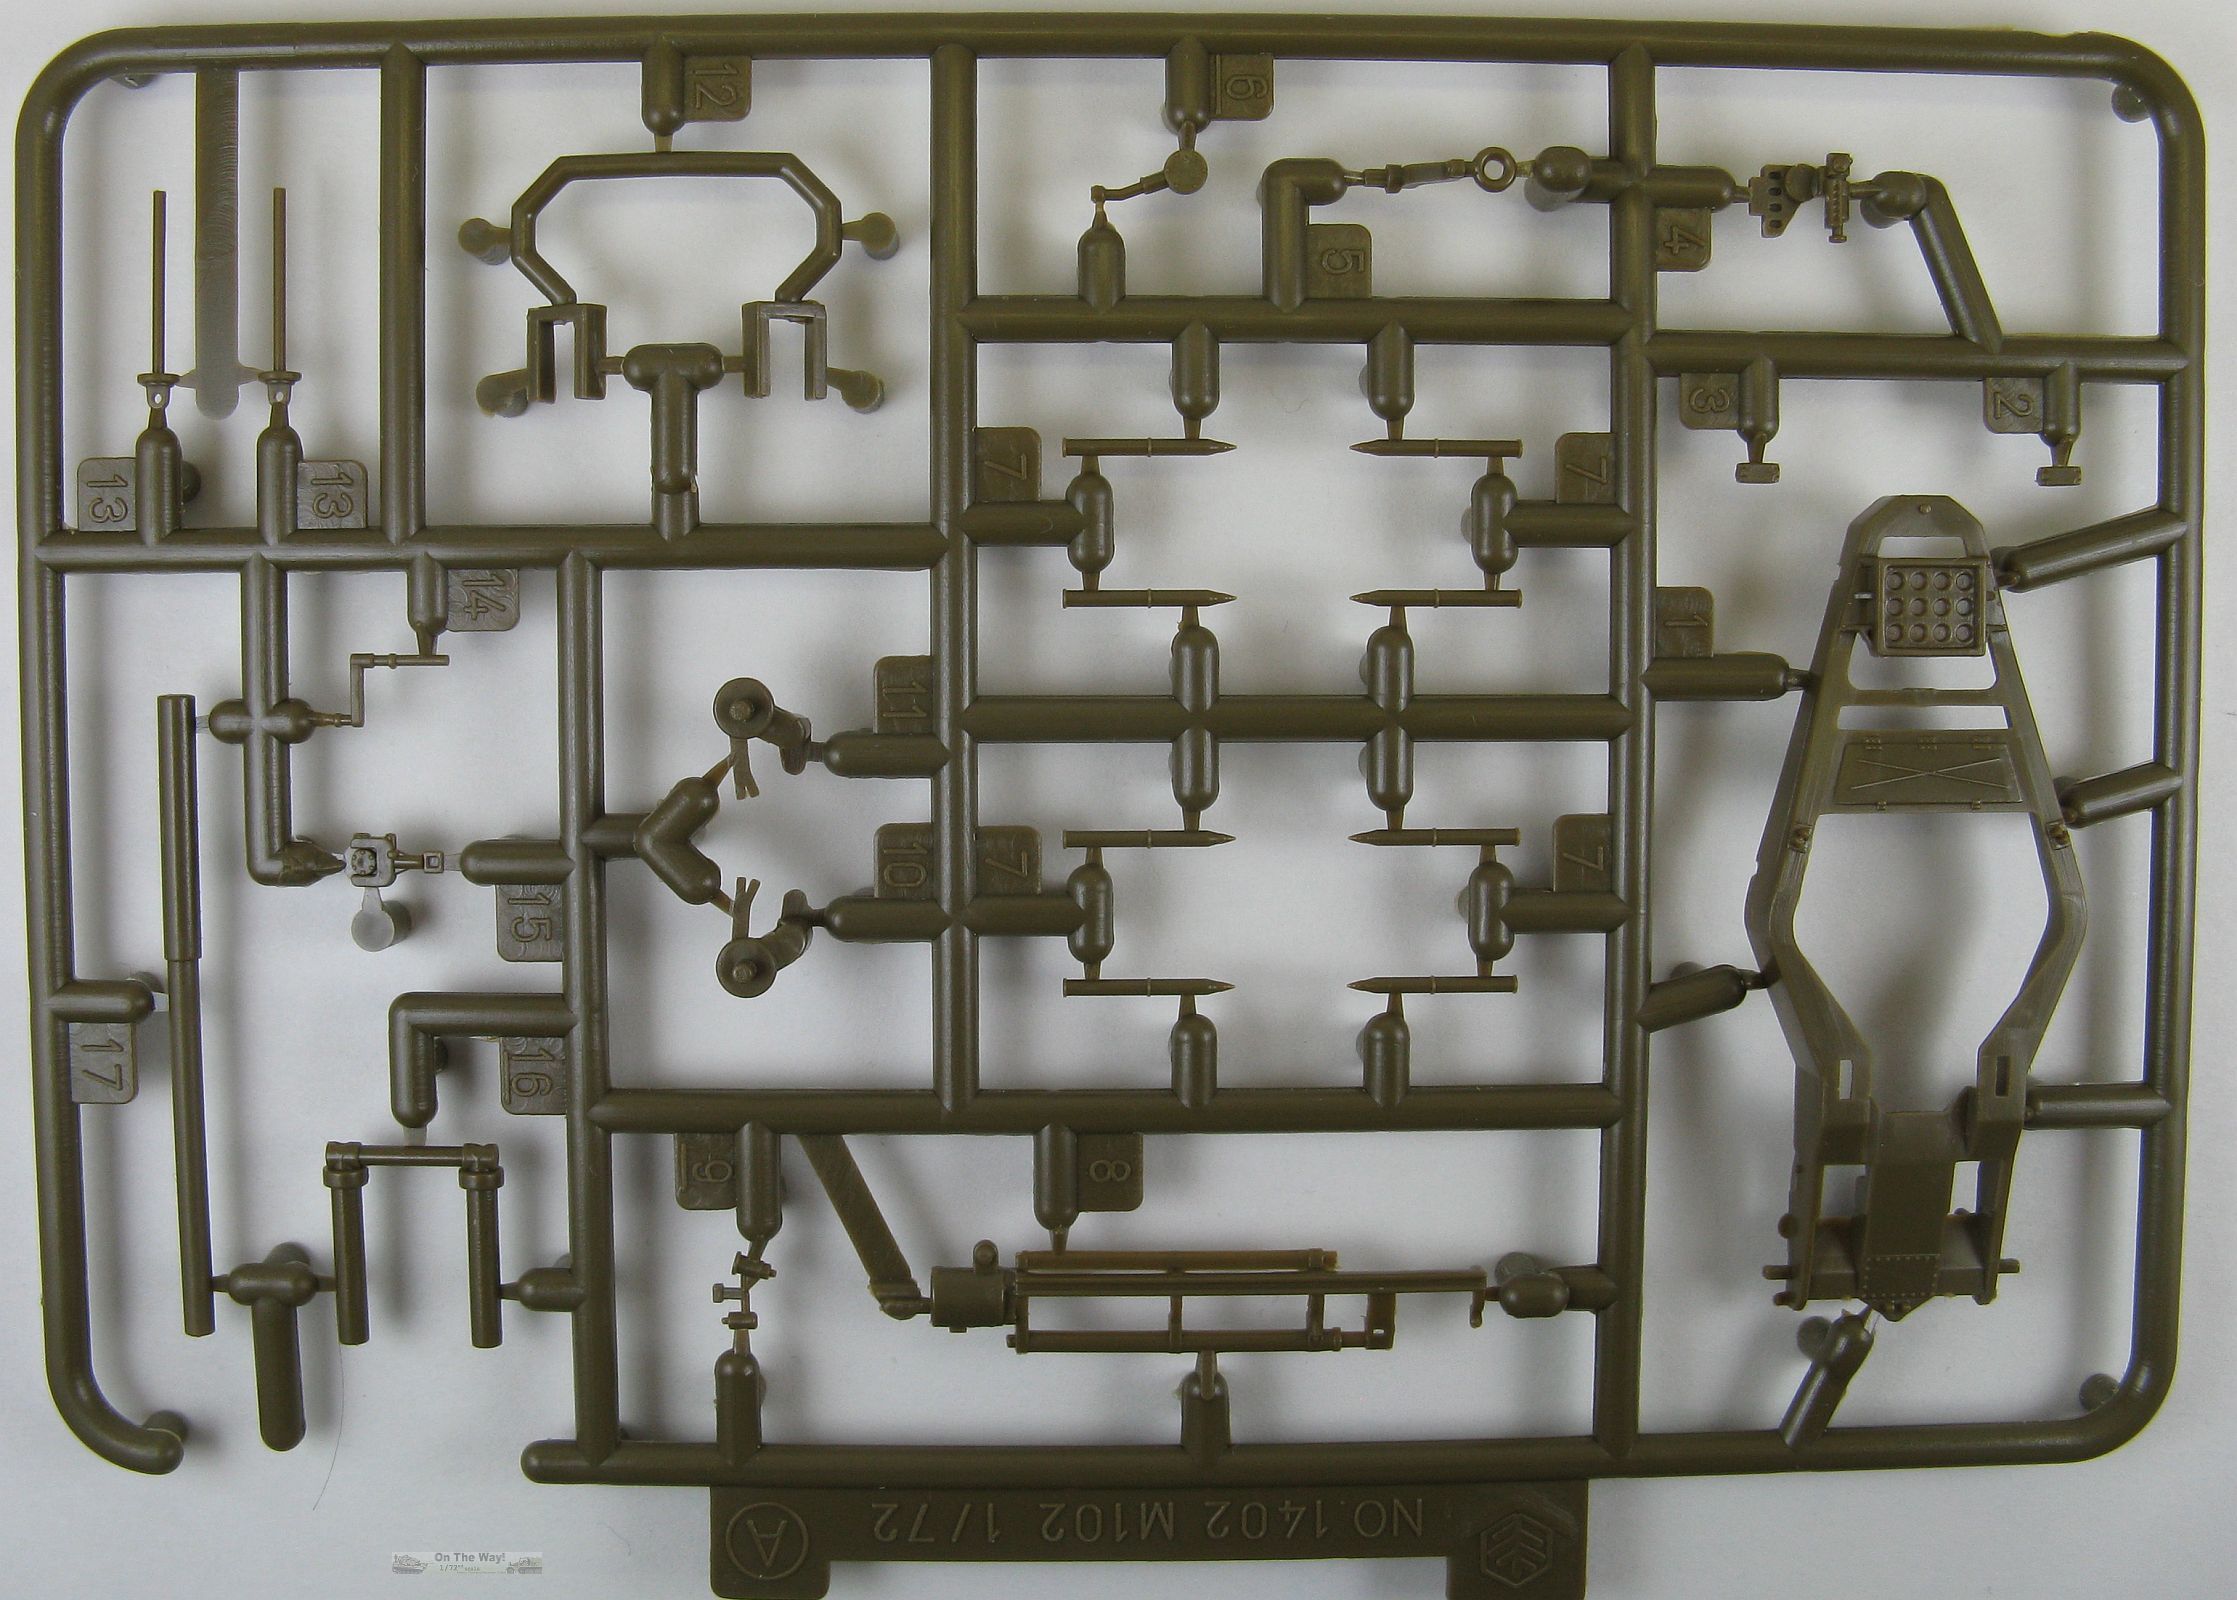
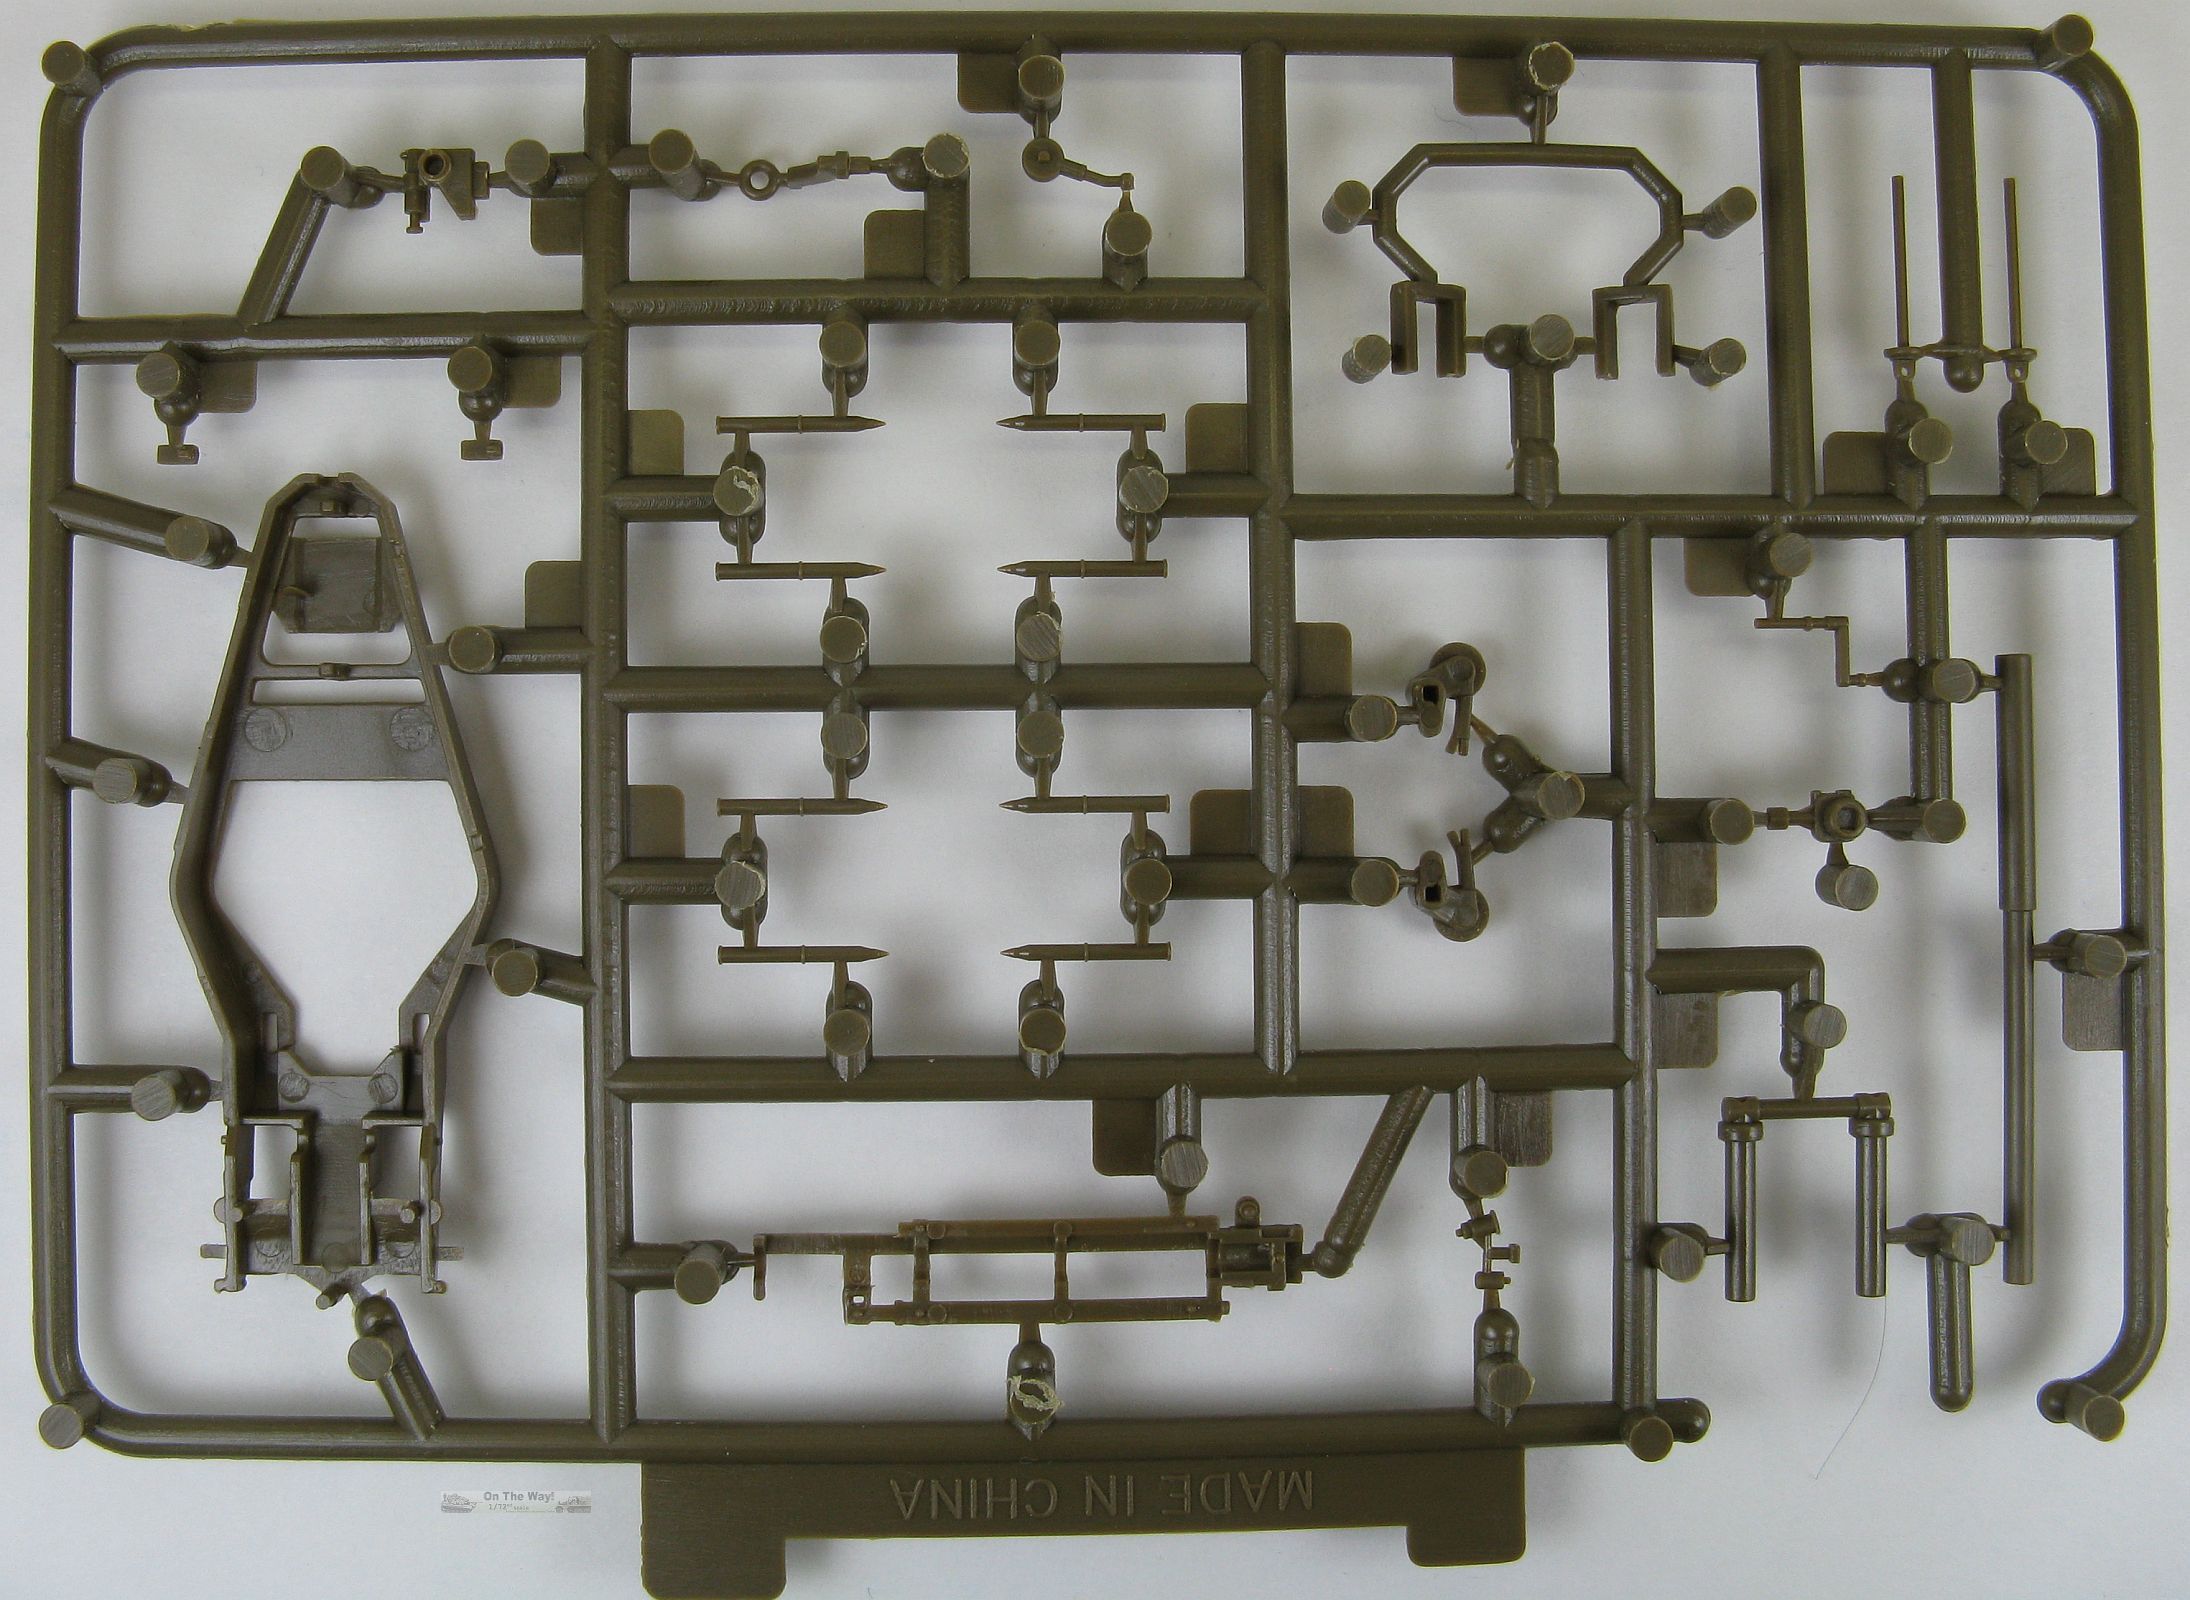
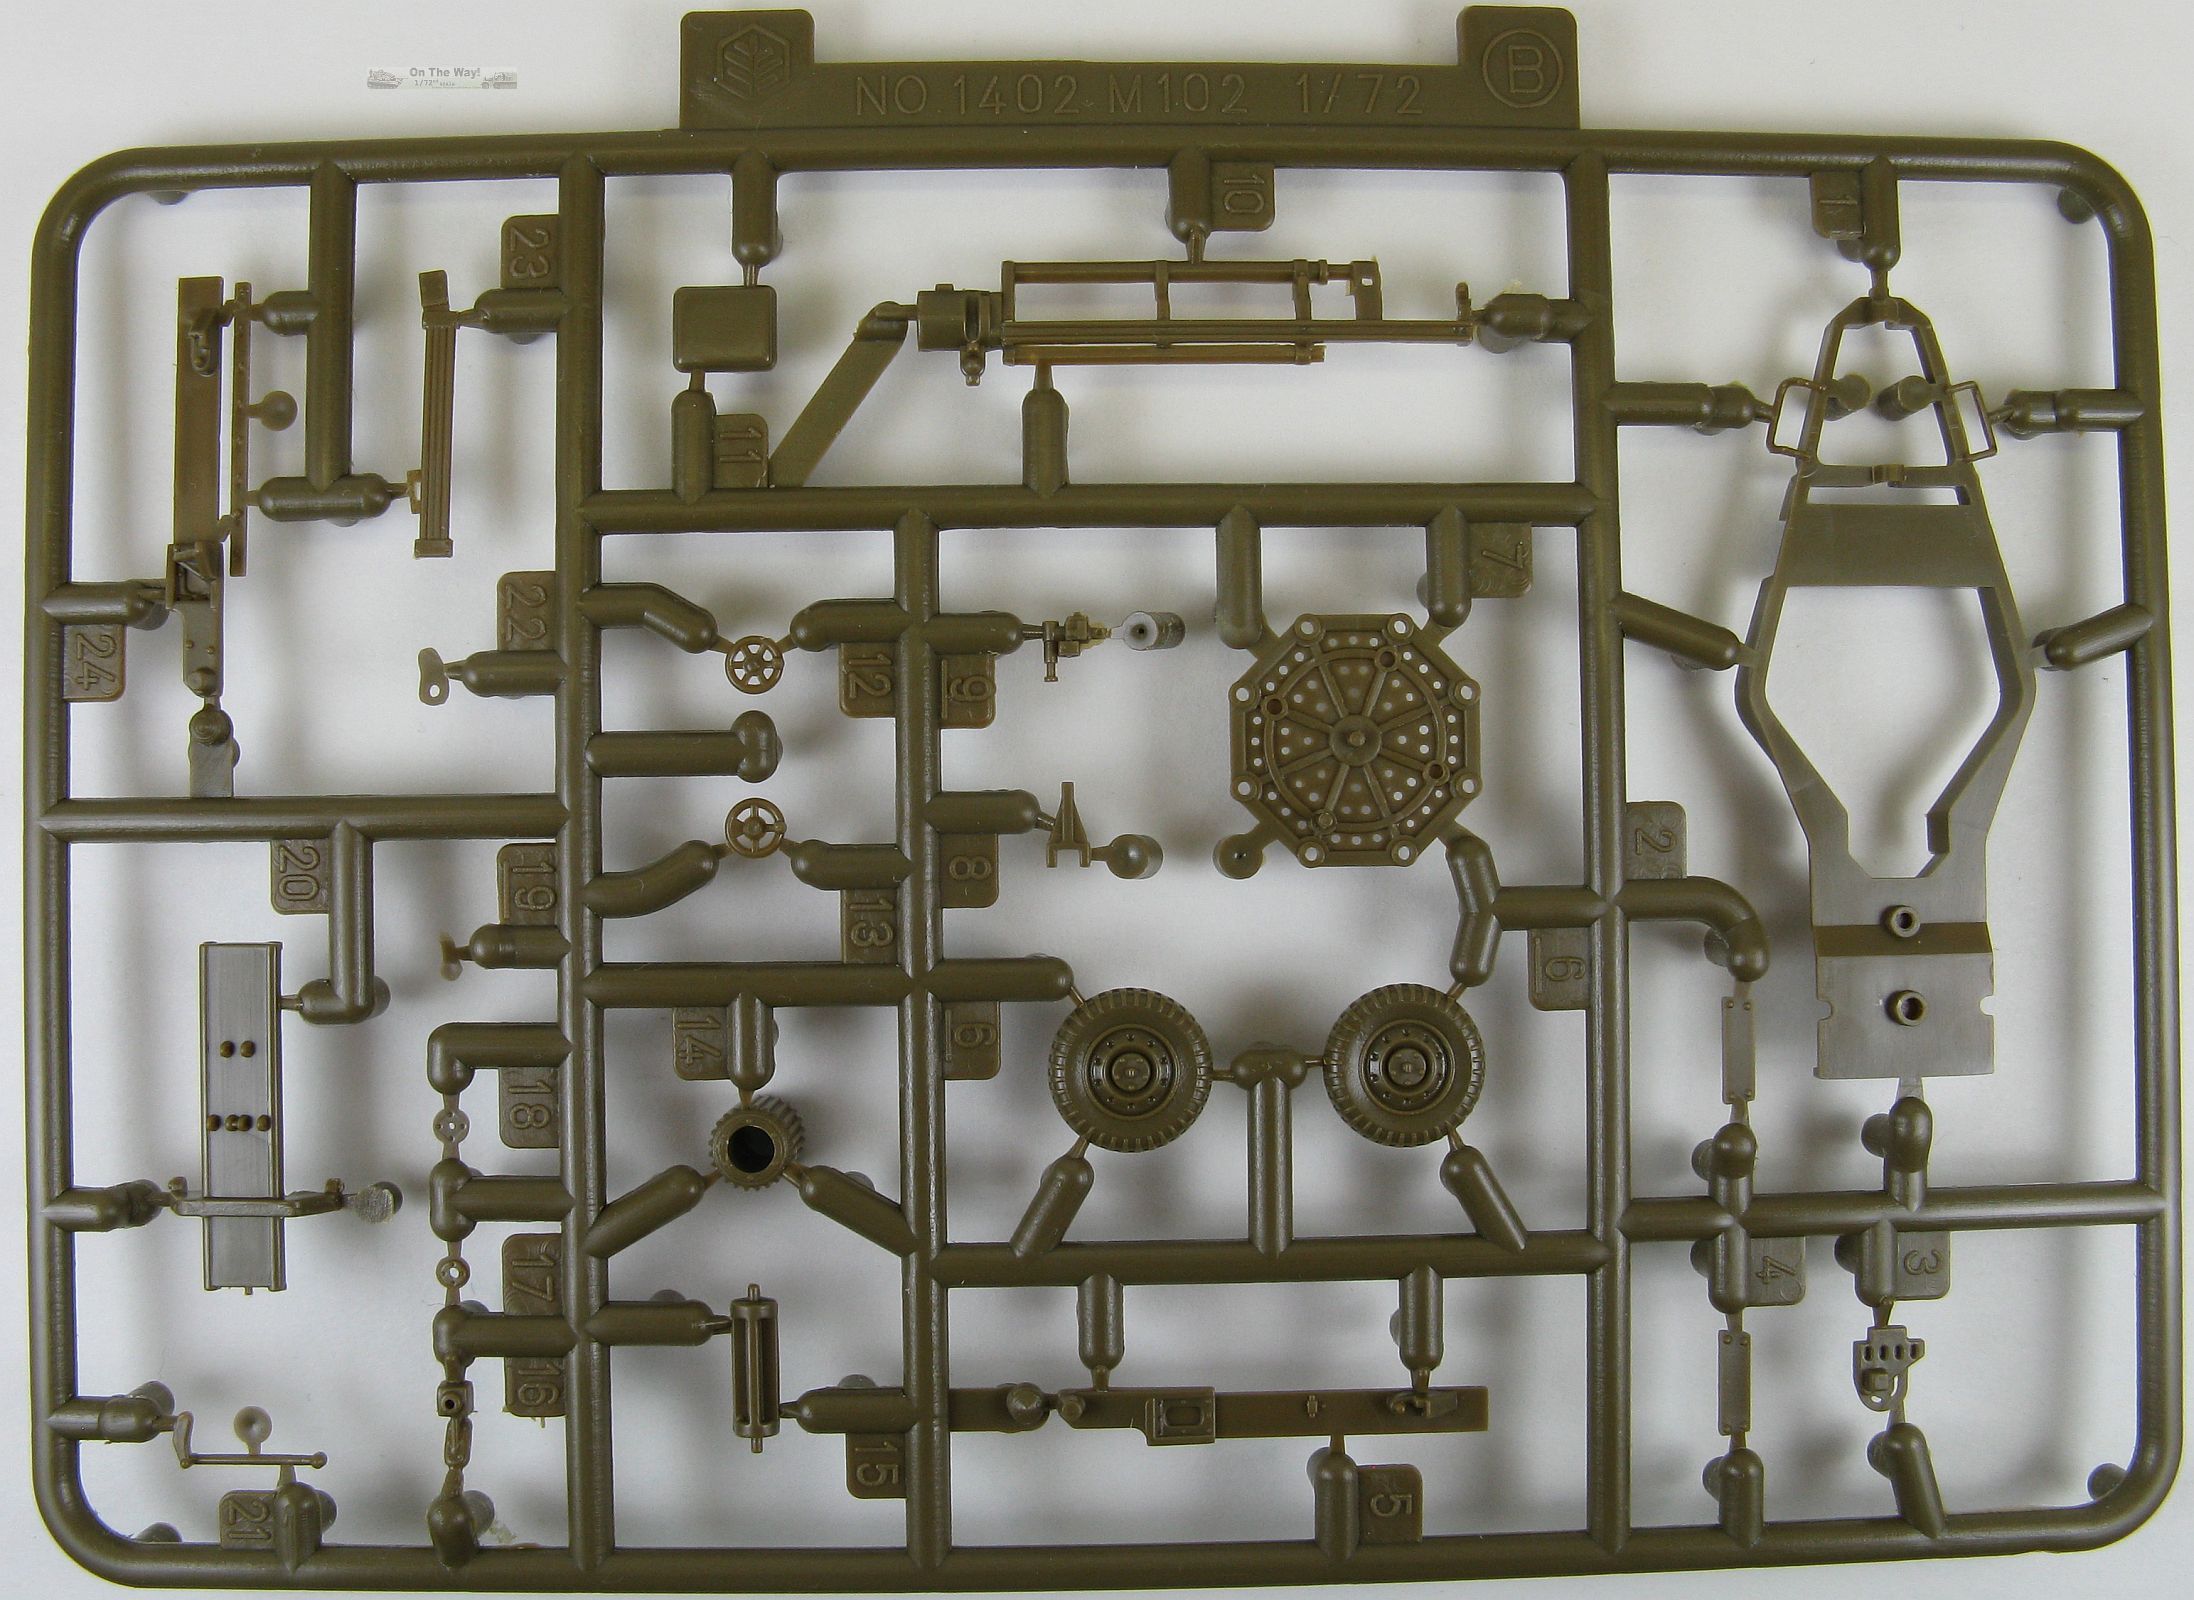
Let's take an overall look at the kit first. Inside the box there are two sprues of light olive green, hard styrene like plastic for the gun and a set of four small
and very
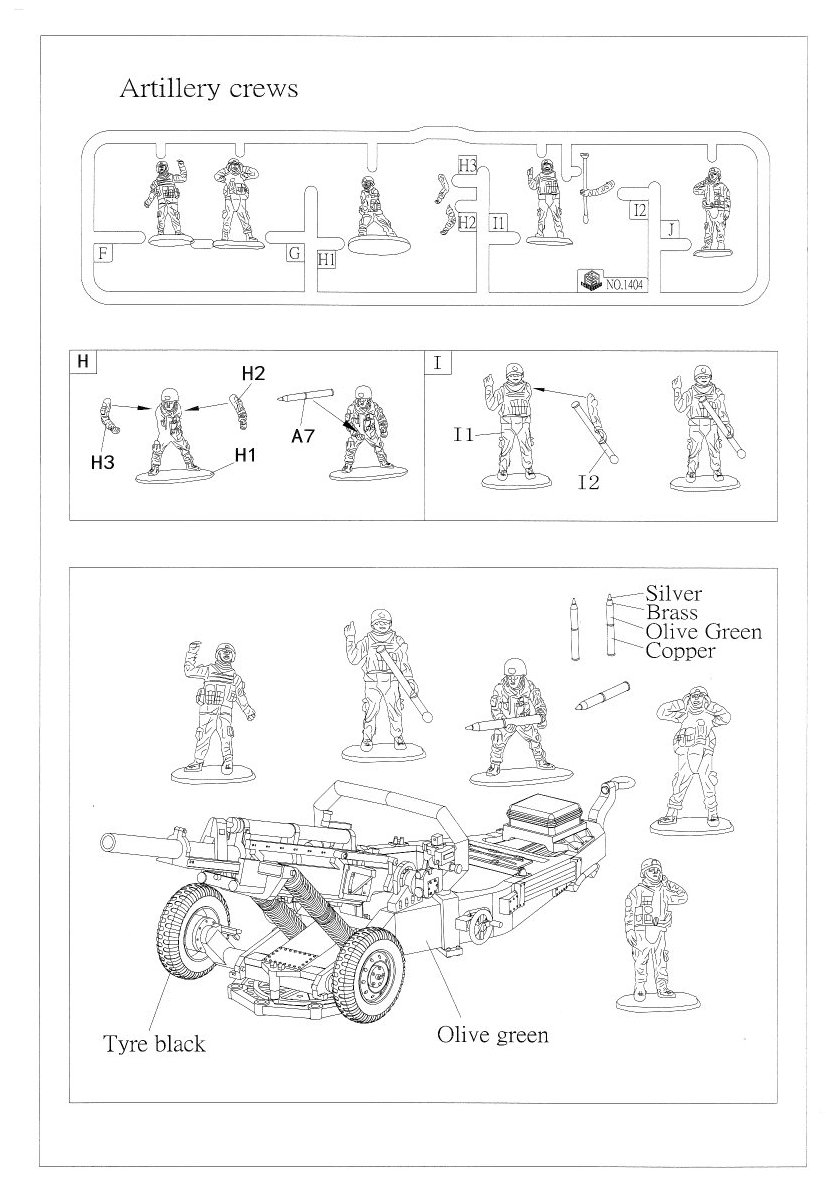
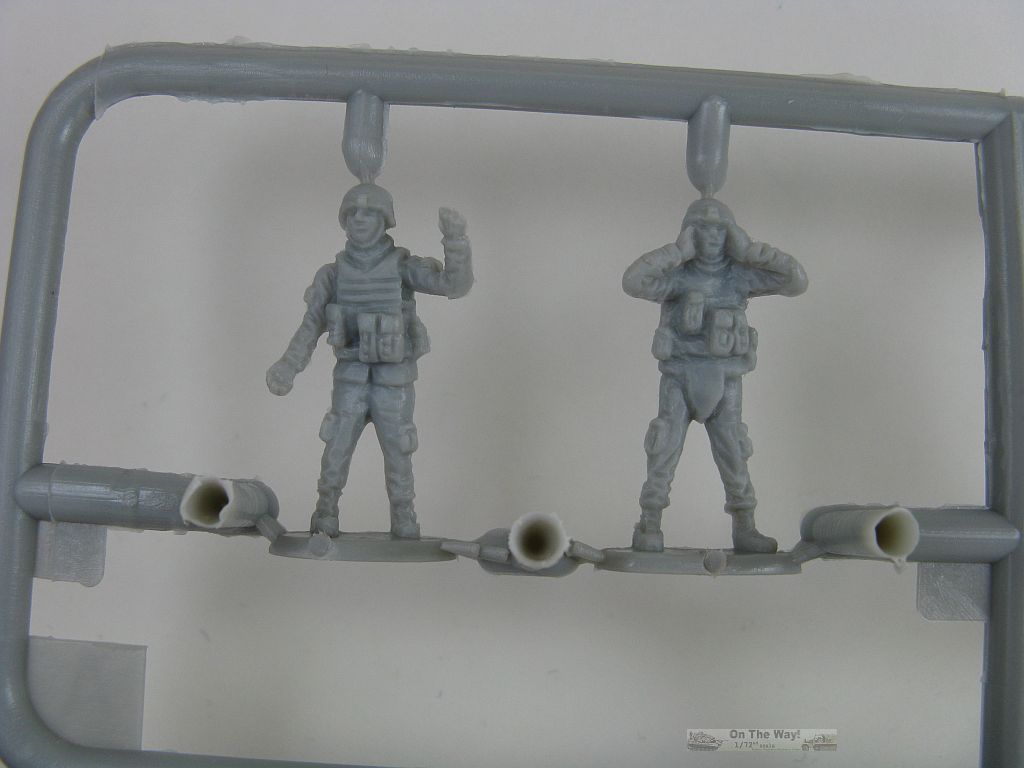
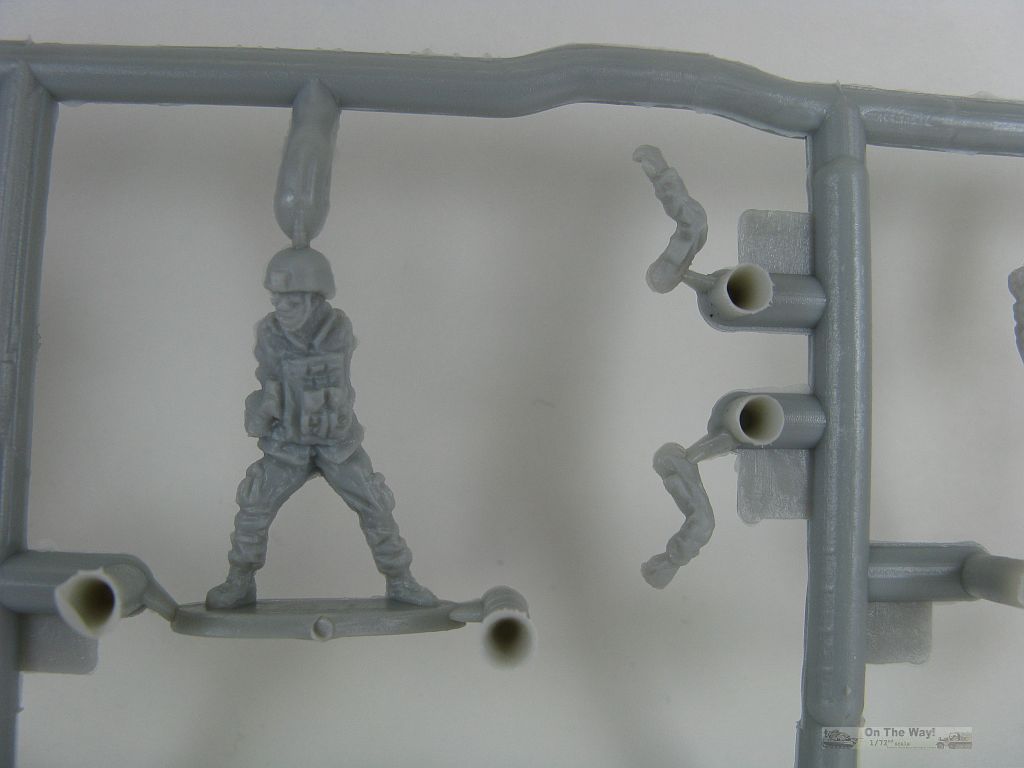
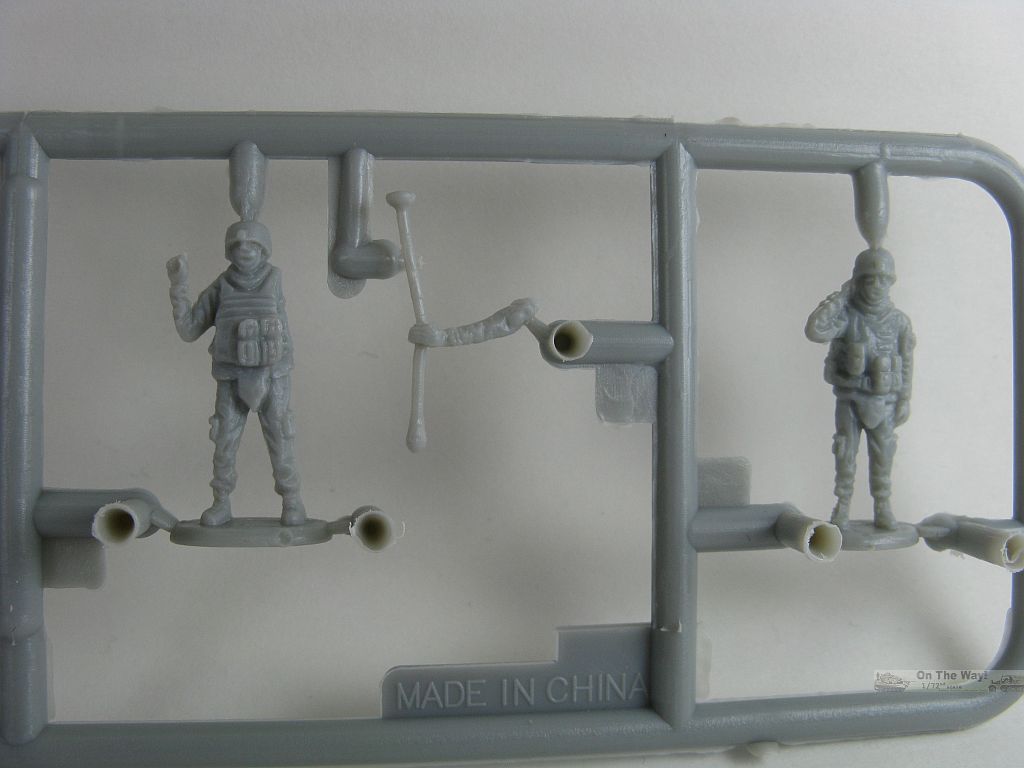
delicate looking springs. Parts total 25 on each of the gun sprues. An additional sprue contains the five crew. This sprue is molded in soft, flexible light grey
plastic. The crew wears what looks more like modern style uniforms & helmets than what I've seen in period photos from Vietnam.

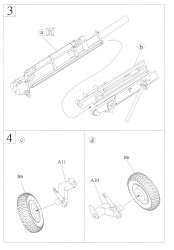
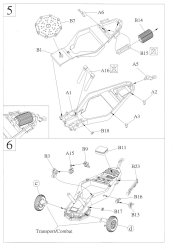

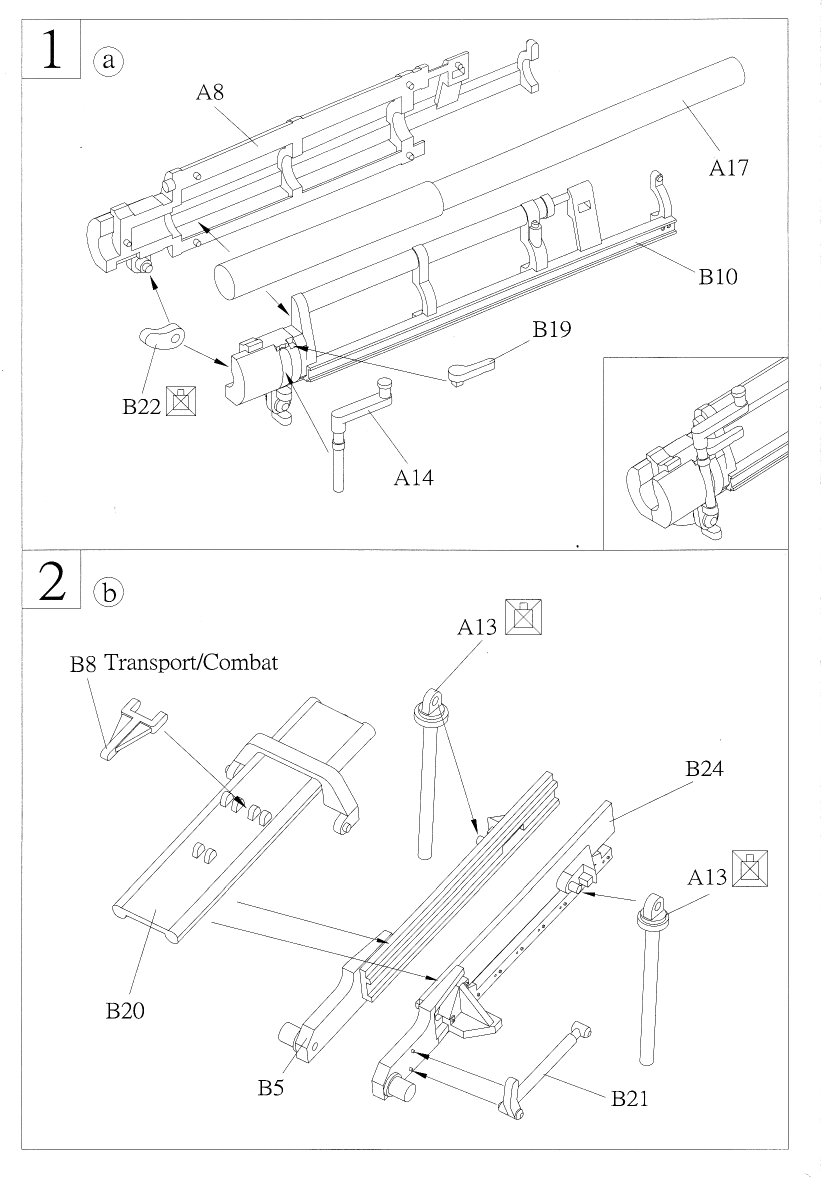
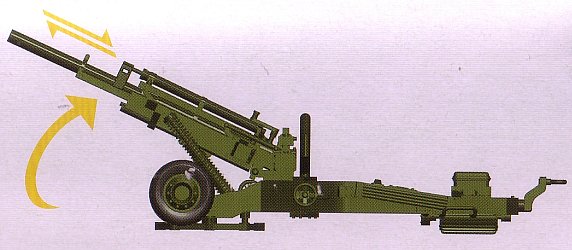
Instructions come as a 6 page folded pamphlet style, with 7 construction steps. A close inspection of the
instructions shows parts that should not be glued. It appears that Toxso has made an attempt to design the kit so the gun can be moved in elevation and the barrel can
be moved back or forward on the slide (see the drawing from the box side panel below).
No decals are provided, and really none would be expected.
Detail on all the sprues is outstanding. Inspection reveals practically no flash, no sink marks, next to nothing for seams, and pin marks are few.
Those ejector pin marks that are present are located in areas that will be hidden by other parts. The springs for the equilibrators are a nice touch. The gun barrel will
need to have the muzzle drilled out (correction 17/Dec/2015: the barrel is actually molded partly hollow and thus already has an opening for the muzzle).
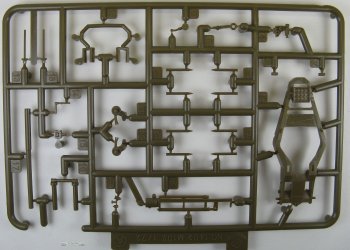
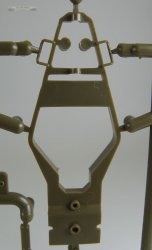
Sprue A (upper)

Sprue A (under)
|

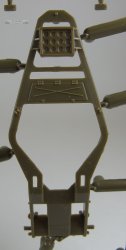
Sprue B (upper)

Sprue B (under)
|
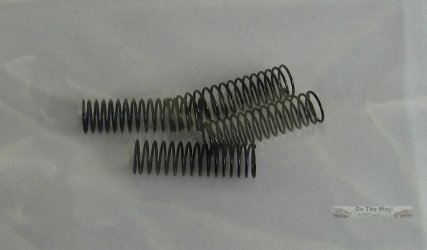
Above are photographs of the front and rear of the two gun sprues, and the metal springs used for the equilibrators. Very impressive. And below are a few
closeups showing the outstanding detail and molding of some parts I find particularly nice.
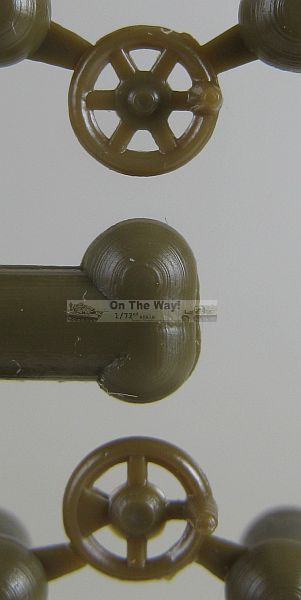
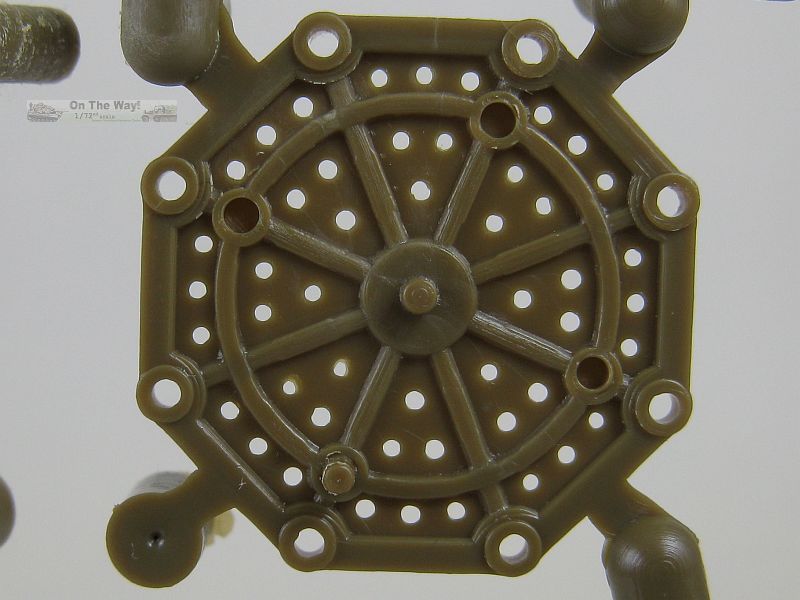
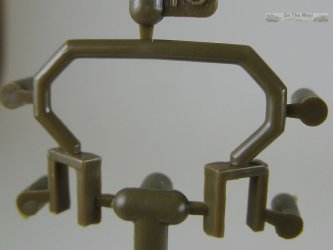
Delicately molded aiming wheels. |
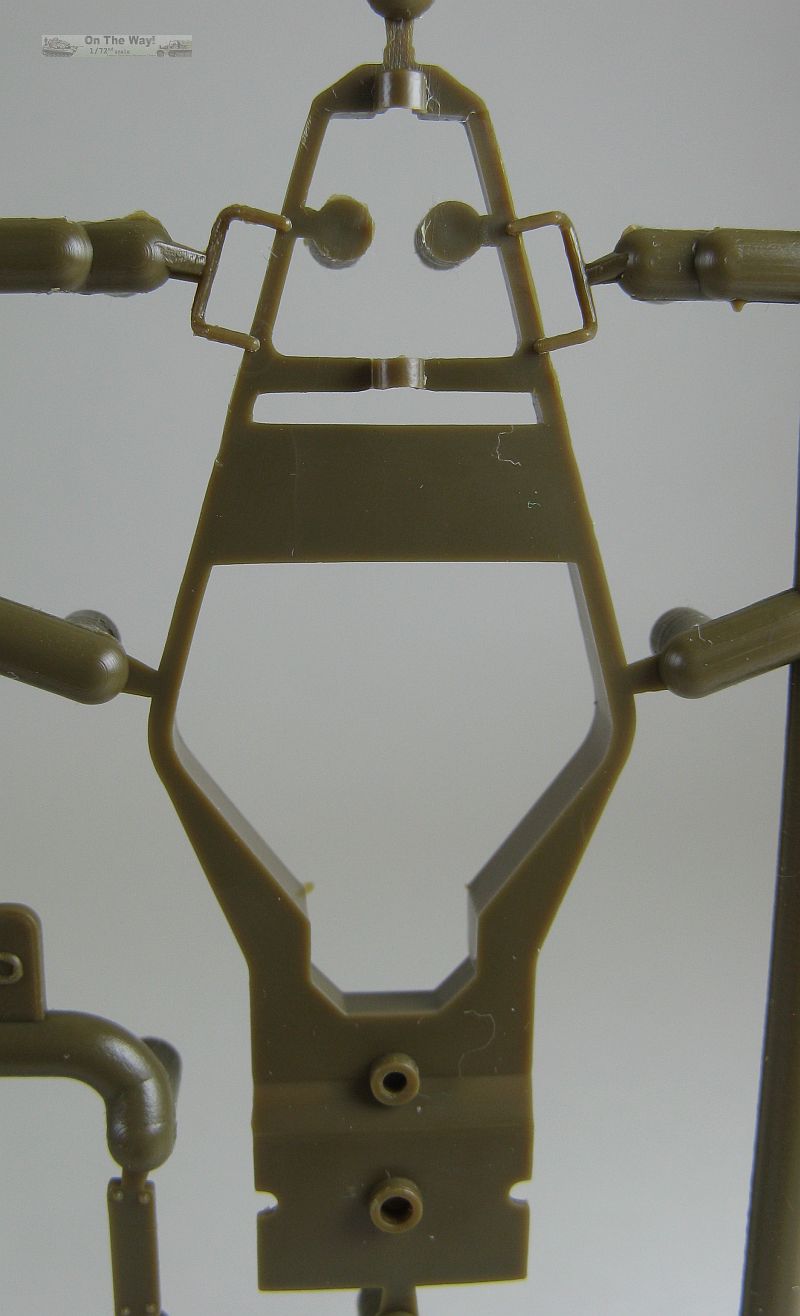
Top & bottom pieces for the superb box trail. The tray for the carrying case could have its holes drilled
out. Nice to see the grab handles supplied and molded directly to the trail. |

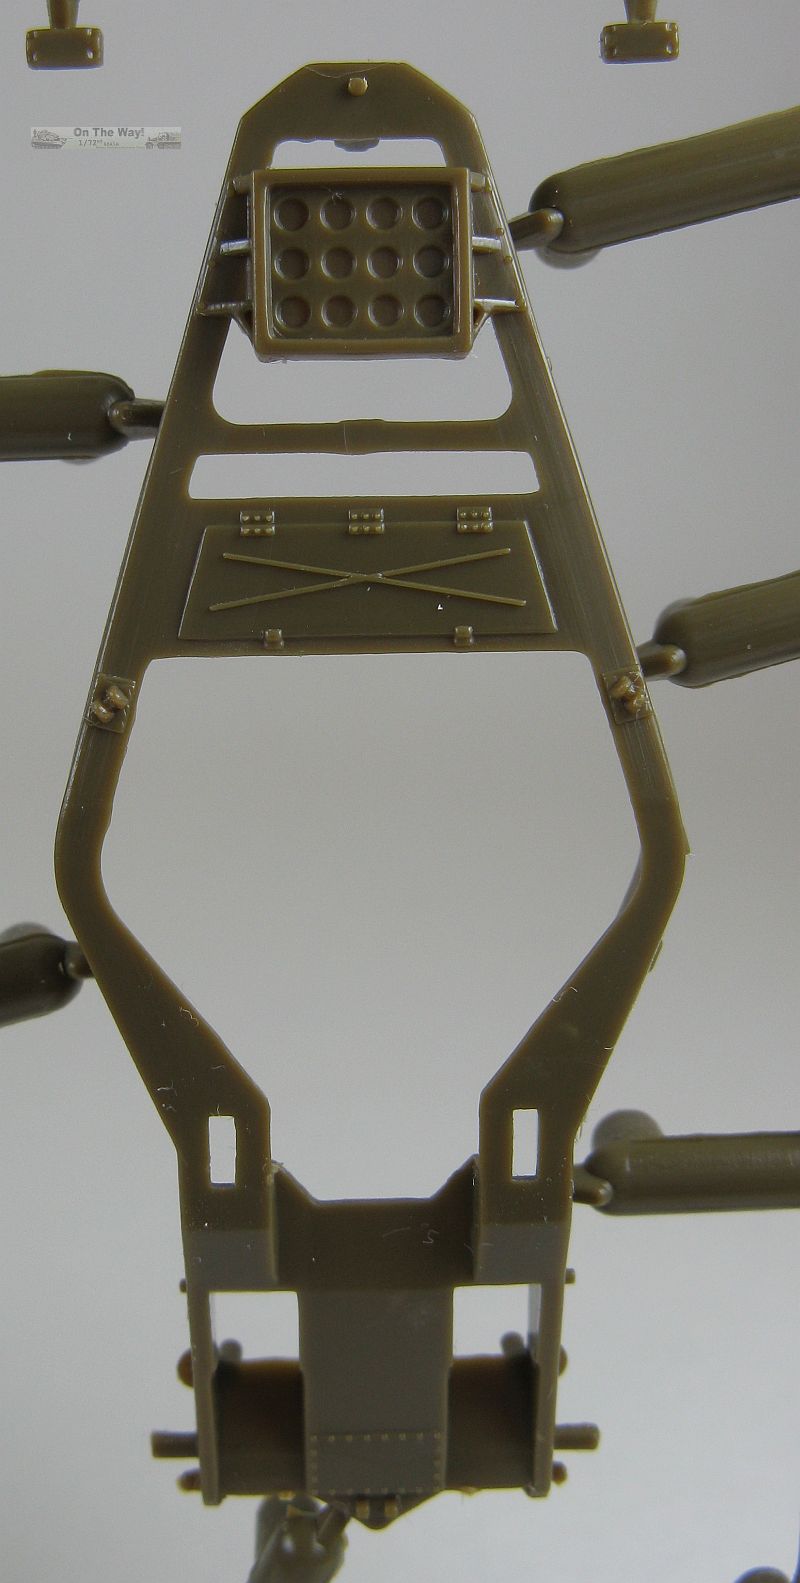
The firing platform is probably my favourite part. Just look at the great detail, excellent shape and holes already opened up for the modeller. |
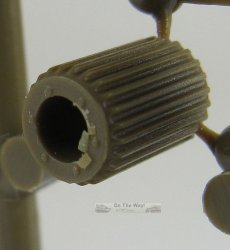
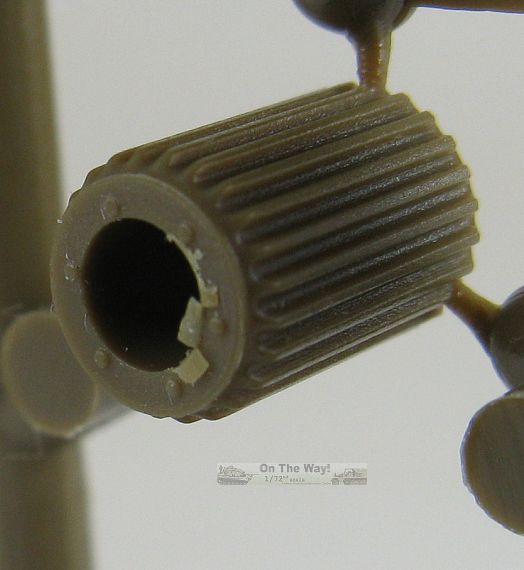
Excellent ridges on the roller. |
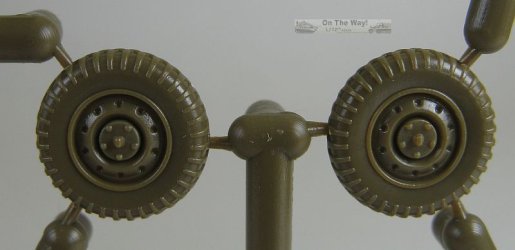
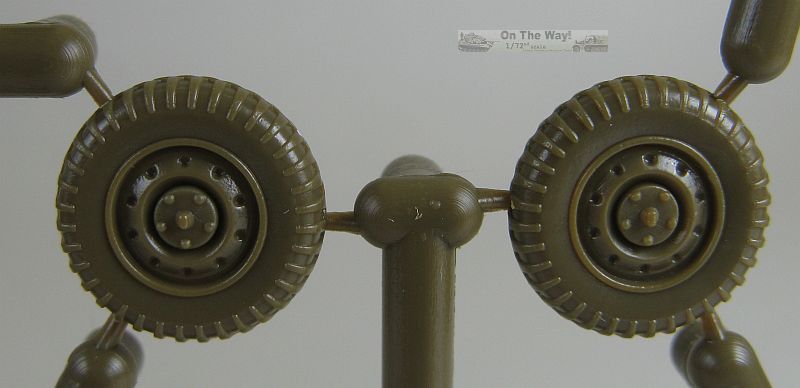
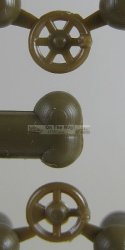
The tires have nice tread detail. Wheel rims have indentations for the
circular ventilation holes which could be drilled out. |
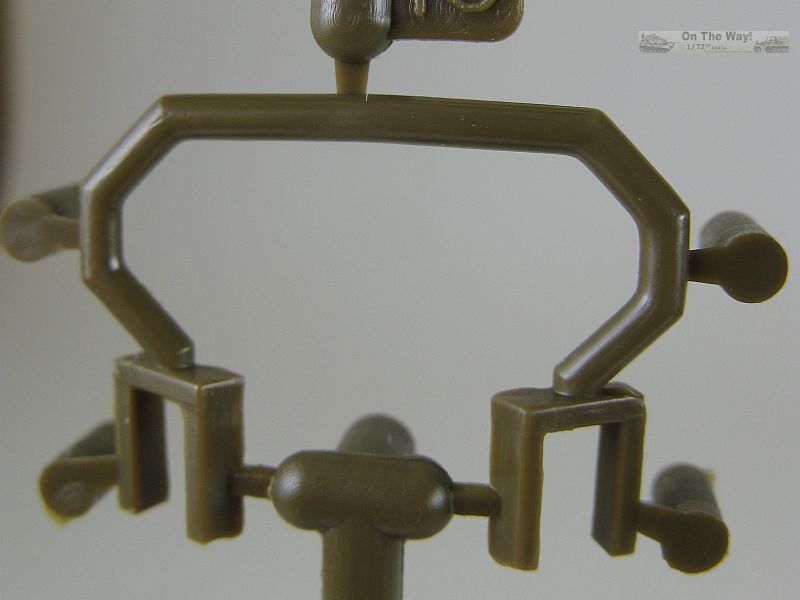
This beautifully molded part is the roll bar, which according
to [9], was added ca. 1990 to protect the recoil mechanism
during airlift operations
or parachute drops. |
Eight rounds are included, ammunition type is unknown. My guess is
that they are 105mm M548 HERA (High Explosive Rocket Assisted) shells, based on their shape and measurements from reference [8], which states a HERA round measuring
to 32.706in (in 1/72 this is 0.454in). My
dial calipers show the kit rounds as 0.455in, which is pretty close to the HERA measurement. As for a standard HE round, reference [6] has it at 31.07in (in 1/72
this is 0.430in), so I would guess that
a little sanding of the nose would probably remove the scant 0.02in difference and produce one.
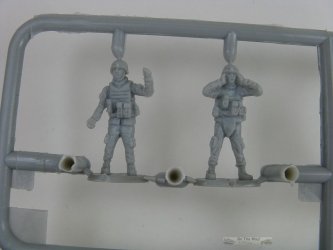
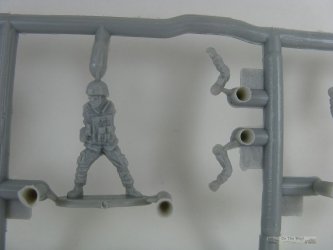
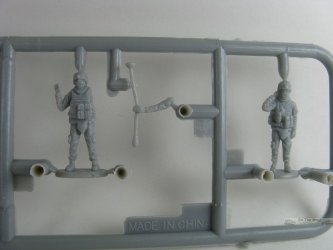 I'm not very educated when it comes to figures but to me these seem atrocious. Facial features are almost melted looking, reminding me more of a Hollywood
Egyptian mummy than that of a living being ("A face only a mother could love!"). Hands are blobbish, devoid of anything resembling fingers. Add in the fact that the
plastic is of the soft, vinyl like variety, and the figures are definitely not up to snuff with the rest of the kit.
I'm not very educated when it comes to figures but to me these seem atrocious. Facial features are almost melted looking, reminding me more of a Hollywood
Egyptian mummy than that of a living being ("A face only a mother could love!"). Hands are blobbish, devoid of anything resembling fingers. Add in the fact that the
plastic is of the soft, vinyl like variety, and the figures are definitely not up to snuff with the rest of the kit.
Conclusion (Preview)
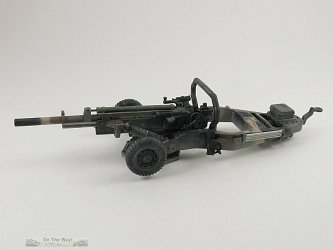
An absolute stunner in the box, outside of the figures.
There's no guarantee that this great engineering will result in an easy and accurate build, but I for one would bet on it.
A definite winner from a newbie in the
1/72 scale market. This one is destined to go to the front of my build queue pronto!
Build Review
Noticed this on 28/January/2015:
Construction has uncovered this appalling error which went unnoticed in my original preview. The recuperator cylinder is mounted much too high above the barrel
when compared to pictures of the real gun (refer to pictures below).
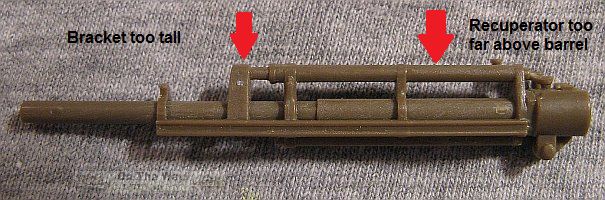
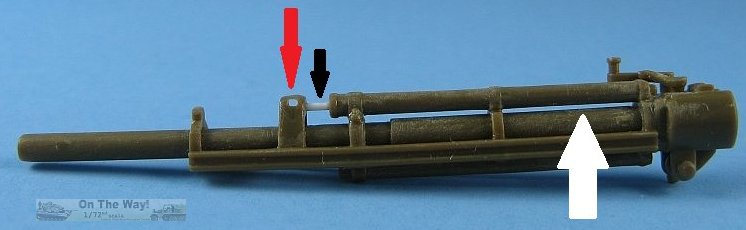
This was fixed by sawing off the recuperator, trimming and sanding the brackets,
reattach the recuperator and fill in any resultant seams/gaps. The white arrow points to the reduced gap, the red arrow to the sanded down bracket &
the black arrow points to the smaller diameter rod replacing the much too thick kit version. As a result of the changed gap the breech operating
lever needs its shaft reduced in length accordingly (refer to picture below).
Other observations:
- A majority of the parts have very fine seams that will require removal.
- Parts fit is very good for the most part.
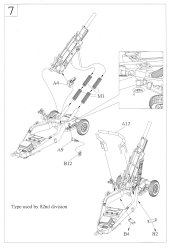
- Step 2 offers a choice for the barrel's travel lock but only shows the lock in the stowed position for firing. Check your references for proper positioning.
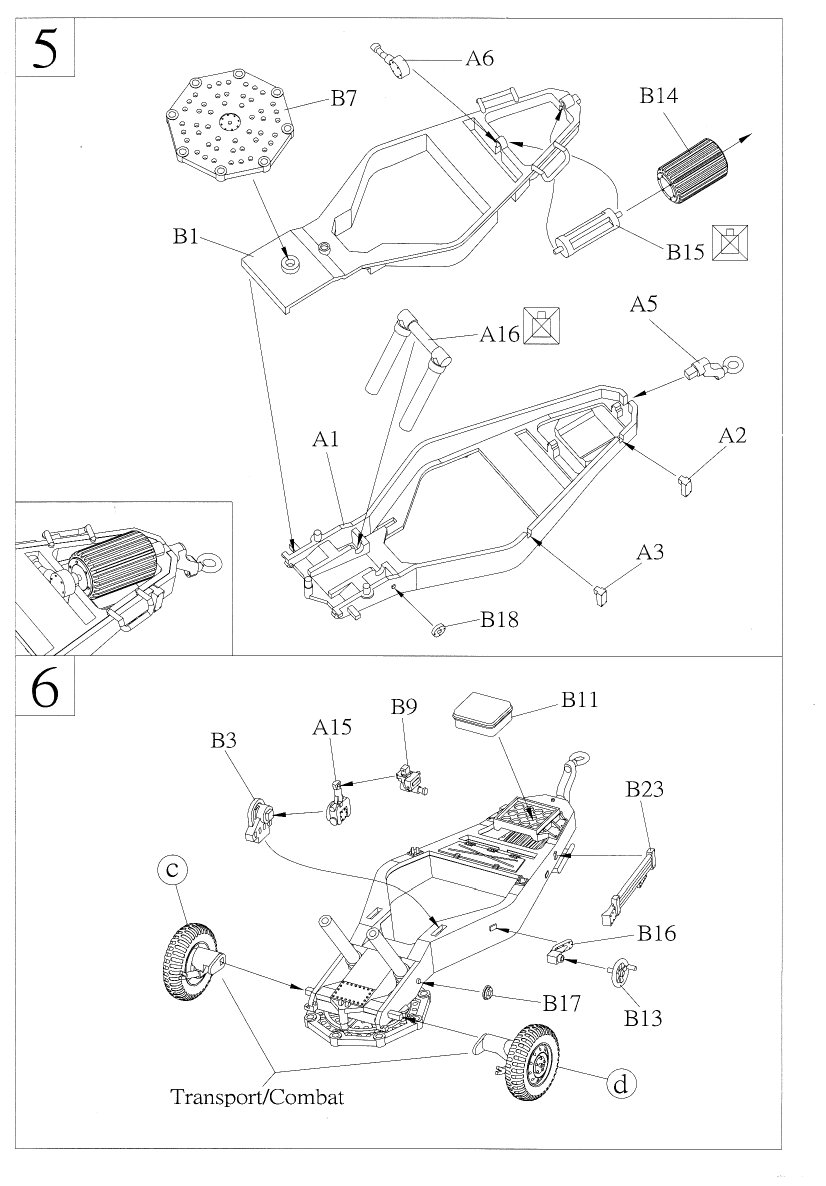
- Step 6 offers a choice of positioning the wheels for transport or for firing. The diagram is vague as to how this is done, so check your reference pictures
to get this correct
- I drilled out the holes in the wheel rims (part B6) and in the trunnion supports (parts A4 & B3).
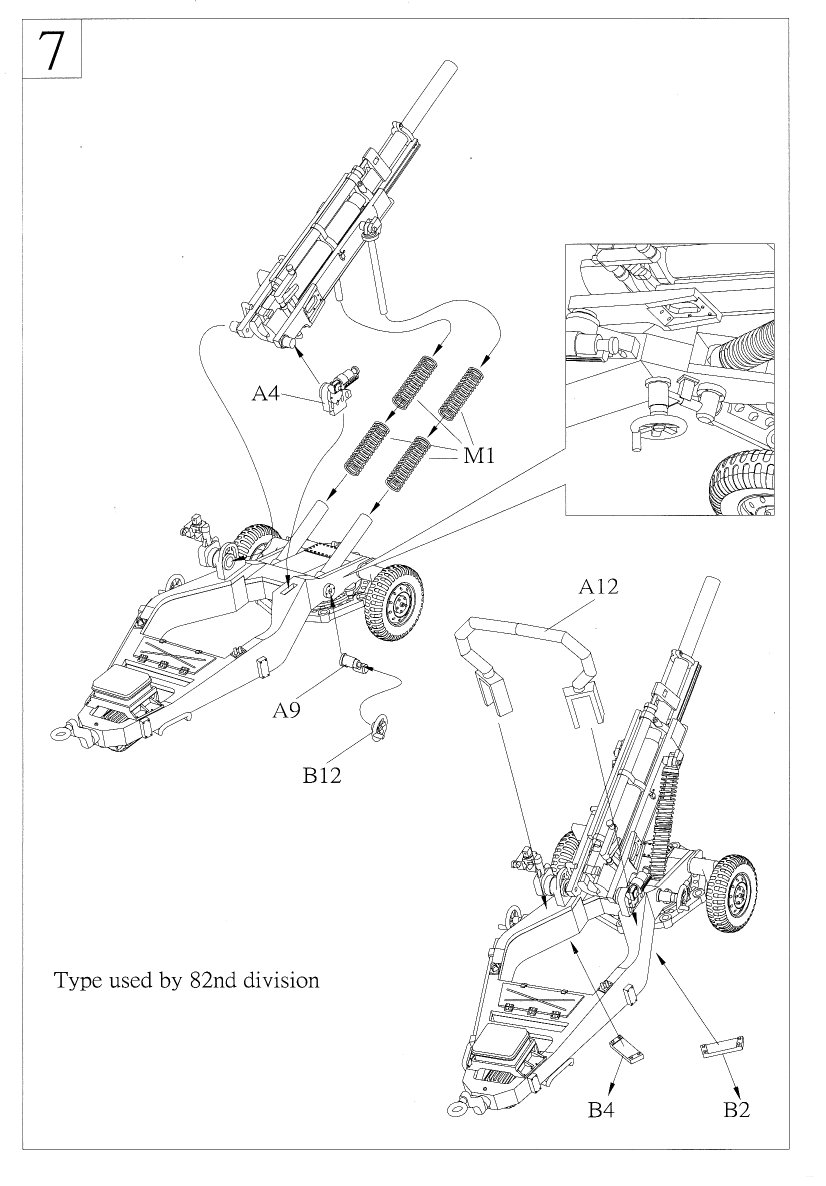
- On the right side is the elbow telescope which is used for elevation and
moves with the barrel. Toxso has molded it to the trunnion support (part A4), parallel to the ground, so if the barrel is placed for angled fire
this sight should be cut from the bracket, re-attached and aligned with the barrel. I didn't bother doing this, so my gun is in what I
like to call the "crouching" position, that is, barrel parallel to the ground for direct fire. The other sight is the panoramic telescope which is used to
determine deflection (azimuth left or right) and does not move so it can be left as per the instructions.
- For early versions of the gun, ca. the Vietnam era, perform the following changes: remove the bracket and rod pointed to by the red and black arrows in the
picture of the barrel modifications above, discard the box on top of the rear portion of the box trail and remove its tray, and don't use the rollbar.
These guns would be in overall olive drab camo and often sported US ARMY in either yellow or white on the recuperator. Some youtube.com video from the Vietnam War
era also shows the gun sometimes used a large muzzle brake. It appears that early post-Vietnam guns received the box on the trail but not the extra
bracket & rod in front of the recuperator.
- I drilled out the holes in the floor of the box tray. I didn't immediately notice that the box itself had no bottom so this had to be covered to prevent
seeing the box's hollow inside now that I had opened up the holes.
- The space between roll bar's forks is too wide producing a noticeable gap when the bar was slipped over the legs of the trail. I reduced the gap with small strips of
plastic sheet.
- The kit does not include the red and white striped ranging poles. These could be added to the right side of the trail if desired. They're not absolutely necessary
as I've seen many a picture of the gun with them absent.
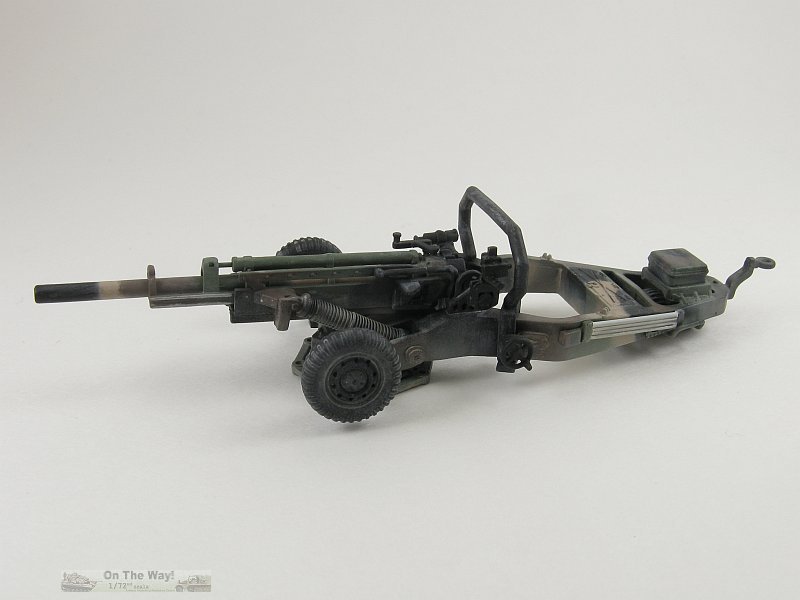
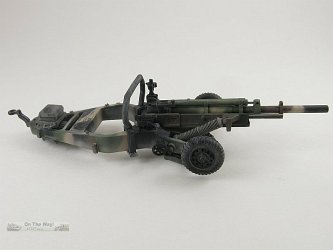
- The painting guide offers olive drab as the sole camouflage option. This is good for Vietnam era guns, but guns in green/black, green/black/brown or overall sand can
be found with a browse through the internet. So pick a camo option and build the gun to match. Don't just settle for the kit's recommendation. I chose to paint my gun
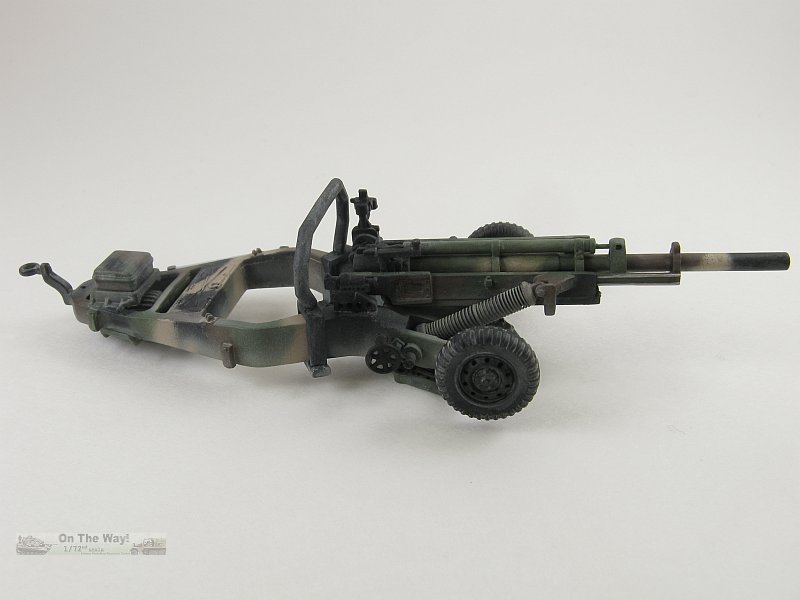
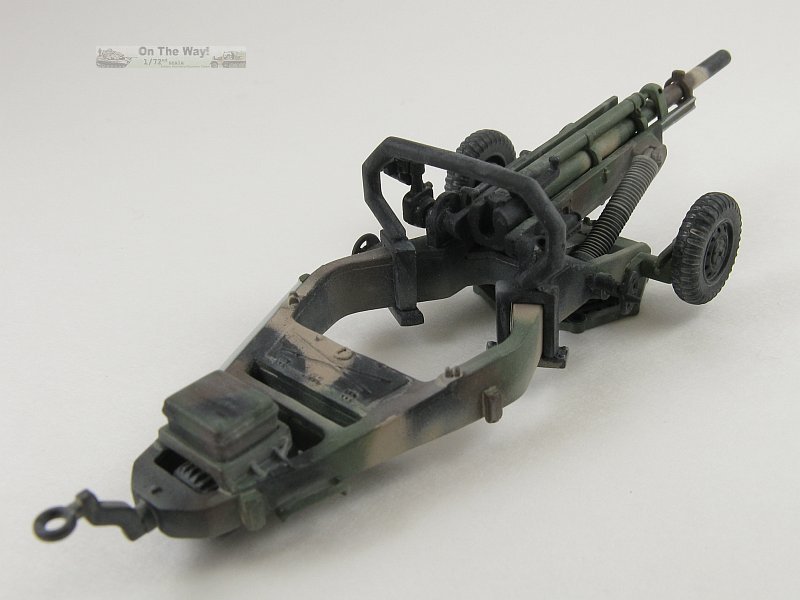
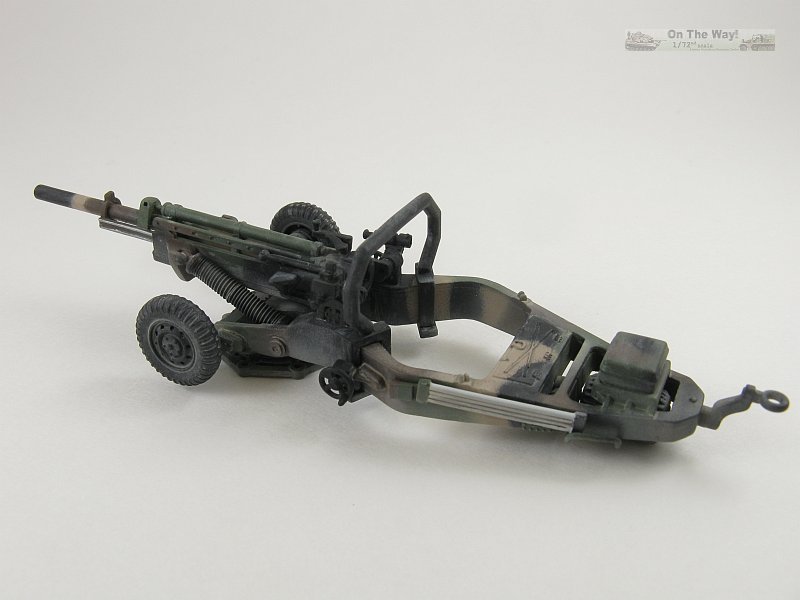
similar to some seen in Operation Iraqi Freedom, ca. 2004 - black/brown/green/sand with heavy weathering.
- 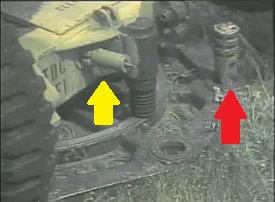
Refer to the picture above: If the gun is to be placed in a diorama make sure to
plug the stake holes in the base plate to represent stakes (red arrow) hammered into the ground (according to [6] the holes are filled as thus: "Under normal conditions, all eight carriage
stakes must be emplaced before firing charge 7. For firing charges 1 thru 6, firing may begin when a minimum of two carriage stakes have
been emplaced.") . Also add the
control assembly used for retracting and extending the wheels for raising and lowering the carriage (yellow arrow).
- The lunette (towing ring) is flat and lacks the strengthening ridges. It needs to be orientated according to the gun configuration.
For towing it should be down  ,
and for firing it should be up ,
and for firing it should be up  . This is not shown in the instructions. . This is not shown in the instructions.
Conclusion (Review)
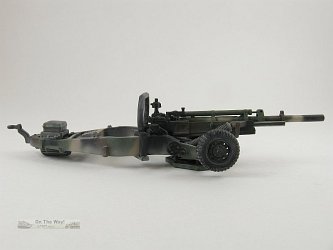
A nice kit overall. It's an easy build only marred by the inaccurate gap between the recuperator and the barrel.
References
[1] cyberplasticmodeler
[2] toadmanstankpictures (1)
[3] toadmanstankpictures (2)
[4] wikipedia
[5] army-guide
[6] Operator's Manual for Howitzer, Light, Towed, 105-mm, M102 (1015-00-086-8164) - (available as a free pdf download from
redleg2scale)
[7] Hirtenberger Defense Systems (Company Ammunition Brochure)
[8] Cannon Crew Member MOS 13B Skill Levels 1 Through 4 Field Artillery Ammunition III Edition A - (available as a free pdf download from
armymanuals)
[9] finescale.com (AFV 1/35 scale M102 build)
[10] armorama
[11] Silicon Valley Scale Modelers
[12] Silican Valley Scale Modelers
[13] kitmaker.net
Preview sample supplied by KW Leung of Toxso Model.


Toxso Model products are available at

|