|
A Brief History
When the German military started rearming prior to World War II, it wished to field both a heavy field gun as well as a howitzer that would use
the same carriage. The result was the 10cm sK 18 and 15cm sFH 18. Both guns were accepted into service in 1933-1934. The gun was actually designated
10cm sK18 even though the calibre was actually 10.5cm[2] .Employed as a field piece early in the war, they were mostly used as coastal
defence guns later. Approximately 1,500 guns were produced until 1945.
The Kit
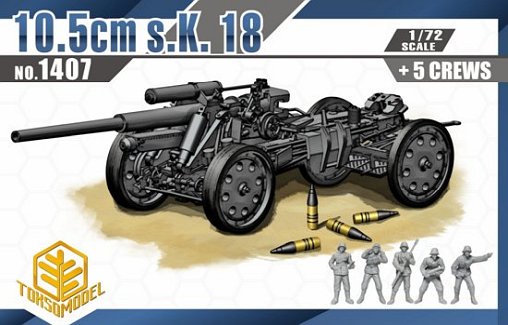
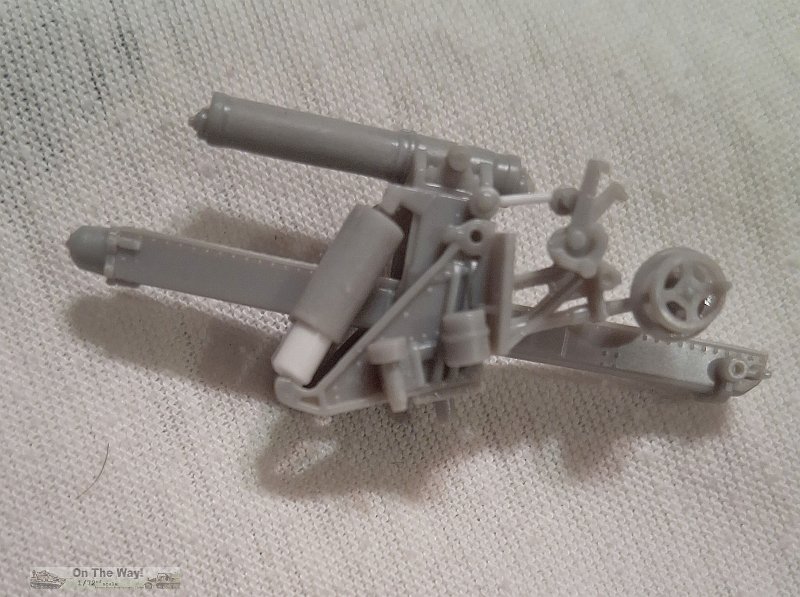
The kit comes in a sturdy top opening box. Inside there are 4 sprues containing 119 parts. The plastic is a hard polystyrene style moulded in light grey. There is some
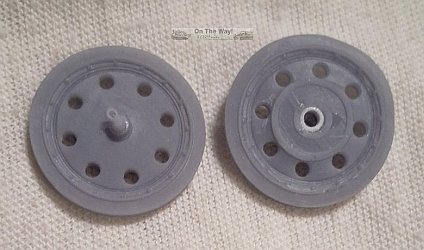
fine mould lines here and there. Detail is excellent except for the tires. All of them are completely bald. The gun tube has the muzzle already opened saving the modeller
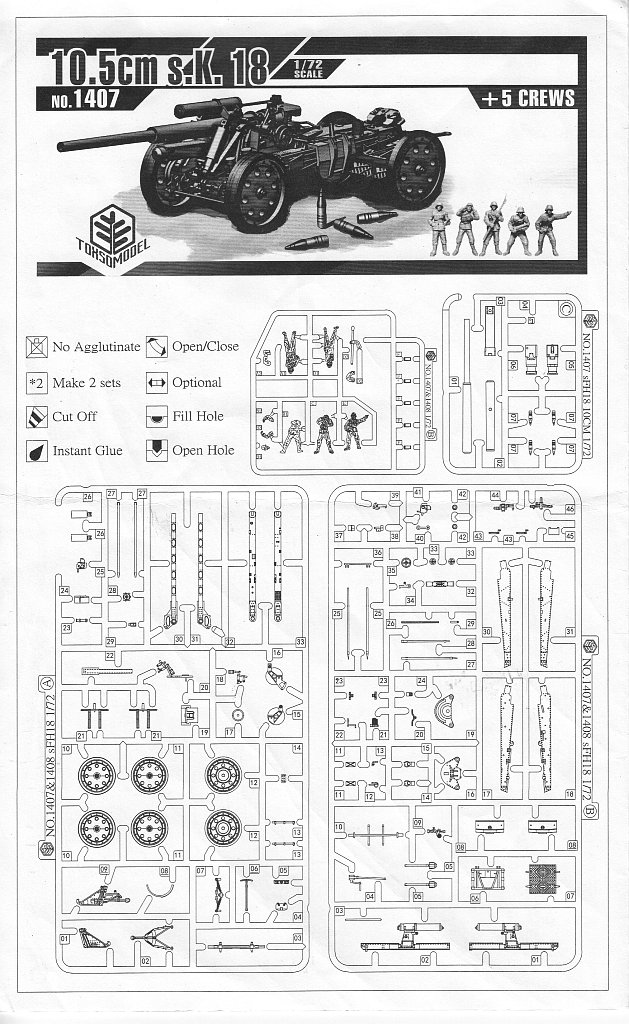
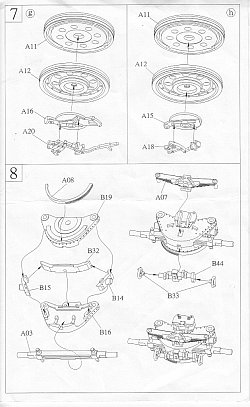
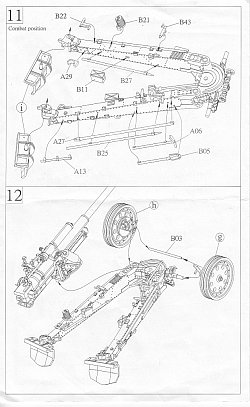
the effort of having to drill this out. No decals are included nor expected. The instruction sheet covers the build in 14 steps. Each step is presented as the familiar
exploded diagram and quite easy to follow.
Unfortunately Toxso uses the confusing name 10.5cm sK18.

The Build
For the most part I followed the instructions as much as possible. I also built it in sub-assemblies as is my usual custom:
carriage and mount, limber, wheels, gun tube &, spades and all the tools and aiming poles; all to be brought together once painting was complete.
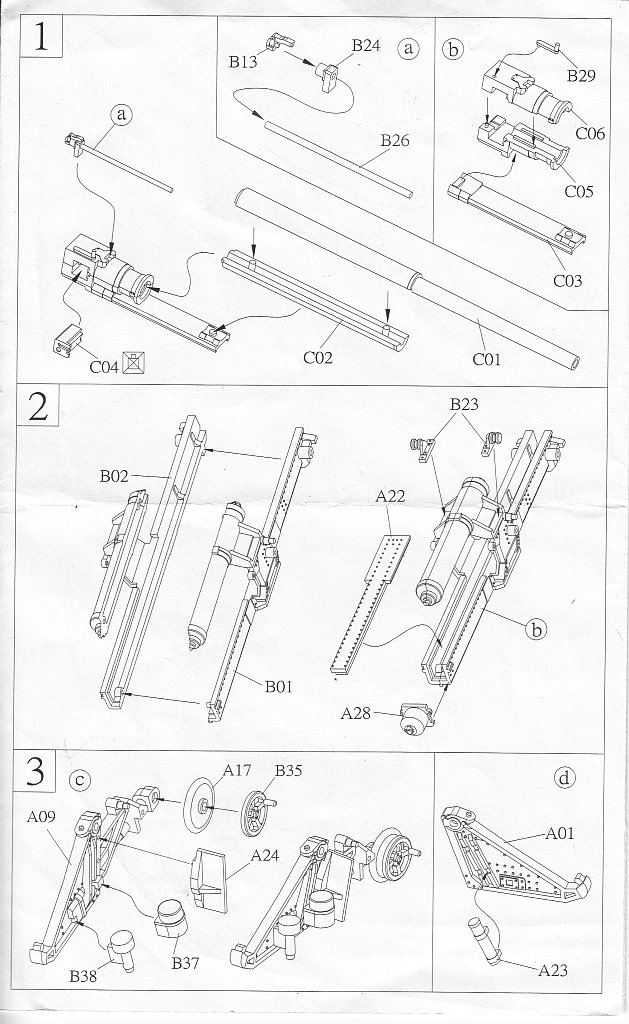
Step 1: The only modification here was cutting down the recoil tube rod (part B26), leaving only a few millimetres. Since I was planning on building my gun in firing position this
would not be visible. For those planning to build it in travel position, leave this piece as is since it will be completely visible with the gun tube retracted.
Step 2: Proceed as directed.
Step 3: Part B37 will not fit due to it lacking the notch intended to fit over a corresponding rectangular peg on the mount's left frame (part A09).
Removing the peg solves that problem.

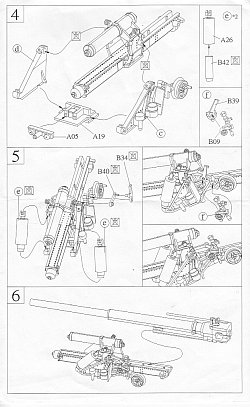
Step 4: The instructions suggest not gluing the elevation balance cylinder parts (A26 & B42) together to allow barrel movement, for which Toxso designed
a large amount of play between the parts. I've never liked making my barrel movable so I replaced part B42 at Step 4e with some plastic rod
to remove a large gap which didn't really look correct to my eye.
Step 5: Once again the instruction suggest not gluing parts together here to allow the barrel to move. I followed the build sequence except that
I glued all the pieces in place and left the sights (built in Step 4f) off, to be added later.
Step 6: Skip this step until the end. Leaving it separate eases painting a immensely.
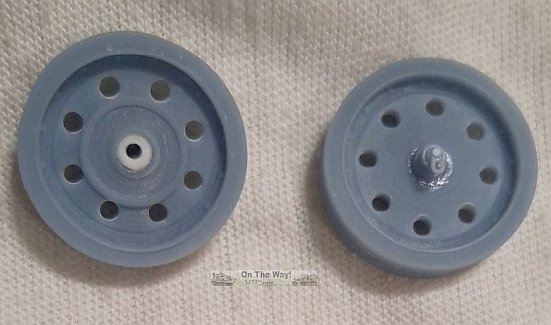
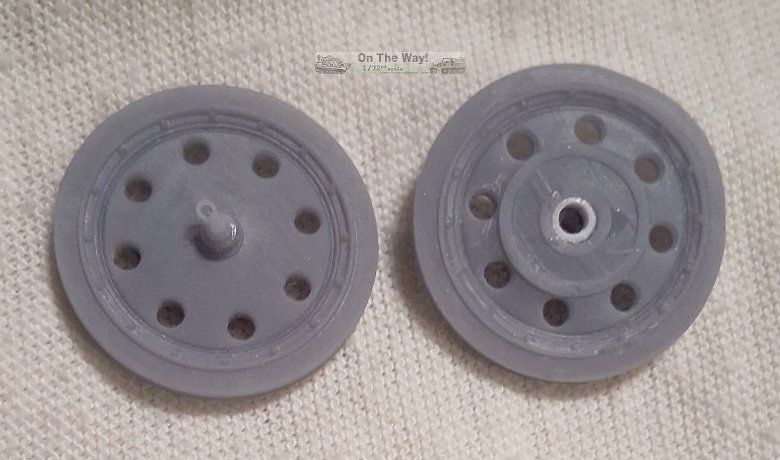
Step 7: This is where I veered the most from the instructions. Those bald tires mentioned previously were replaced with a set of 3D printed
wheel/tire combination
designed and printed by my buddy Will Alcott. These are what appear to be late war style that closely resemble those found on other guns such
as the 8.8cm Pak 43/41.
Because the replacement wheels differed with how they attached, sections of styrene tubing were glued into the wheel hubs to fit the axle stubs.
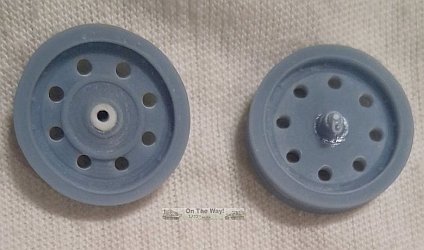
I glued together the two wheel backing plates (A16 & A20 and A15 & A18) but did not add them to the wheels. This was done later in step 12.
As you can see below there were at least two
tire styles (assumed to be early & late). Additionally as seen below a gun could have both styles mounted if need be.
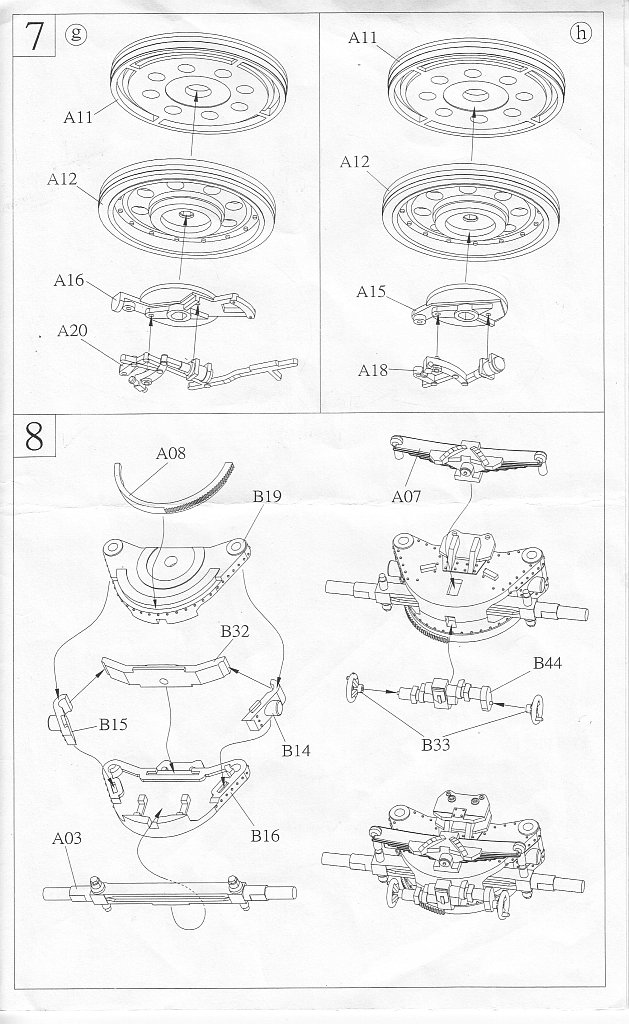
Step 8: Directions were followed here.
Step 9: Construction here was also followed as directed. I find it odd that Toxso didn't suggest not gluing the trail arms.
I didn't glue them right
away so I could first spread the legs so they don't touch the wheels, and then add the glue.
later.
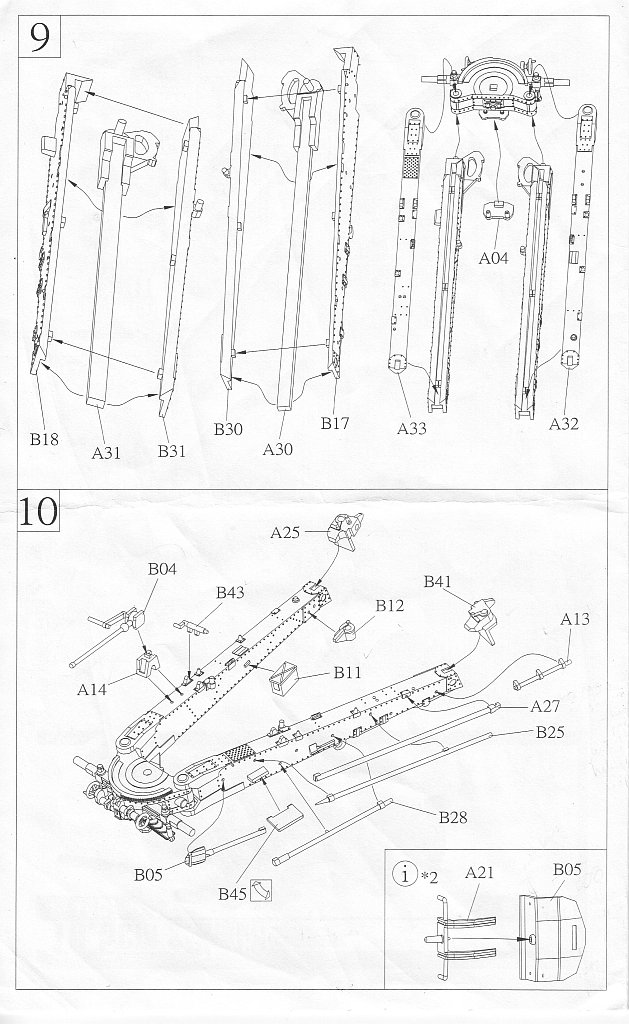
Step 10: Add the various tools and rods if you wish. I left them off to ease painting and added them later. Don't put the auxiliary elevation
gear with it's shaft (part B04) on now as the rod on part B04 interferes with placing the gun mount onto the carriage. Also, adding it here as
instructed will align the shaft parallel to the trail arm, which is wrong. Cut it off and add it after placing the mount onto the carriage at Step 12.
This allows the shaft to be placed at a downward angle to hit the side wall properly.

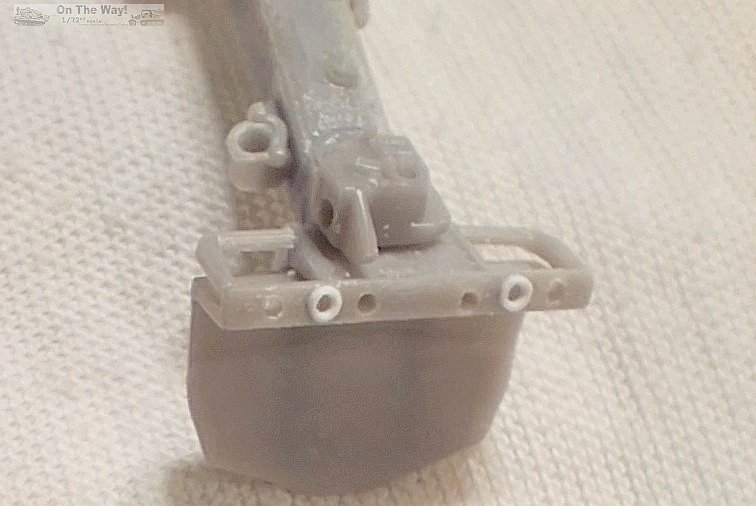
The crew platform (part B45) is flat so it was replaced with a piece of diagonal cross-hatched plate found in my spares box.
There is the option to fold it against the trail leg for travel position.
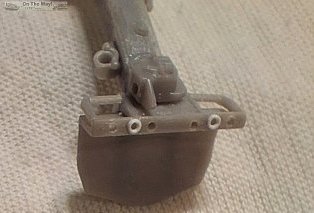
Faces of the spades have sizable ejector pin marks. Leave them as is when mounting the spades for travel because they will be
hidden from view. I added some holes and extra details to the spades.
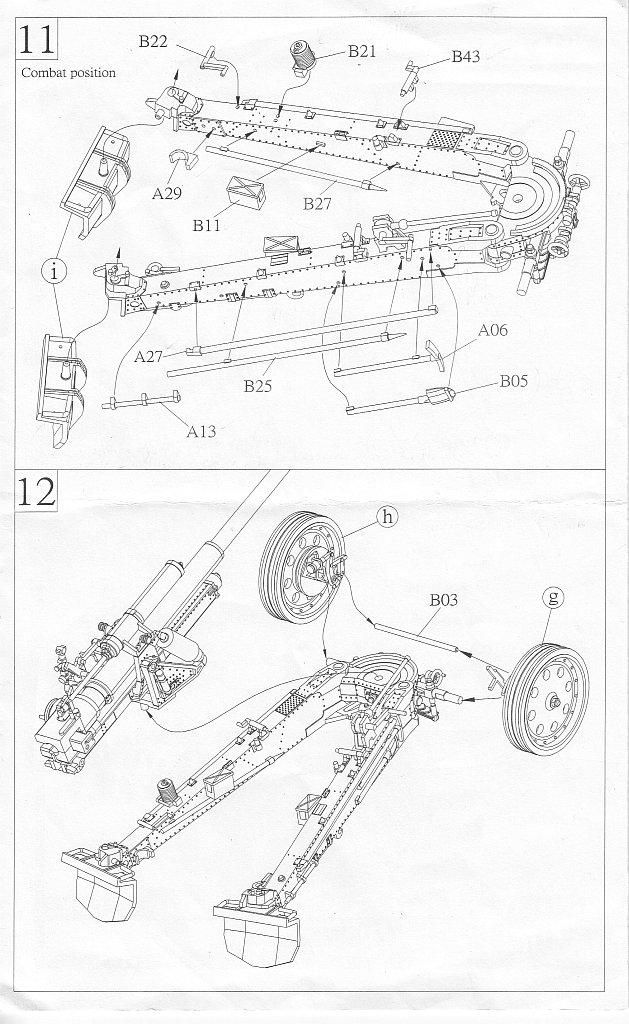
Step 11: Again, add the various tools and rods if you wish. I left them off to ease painting and added them later.
I felt the detail on the winch's drum (part B21) was poor so I manufactured a cover for it from lead foil.
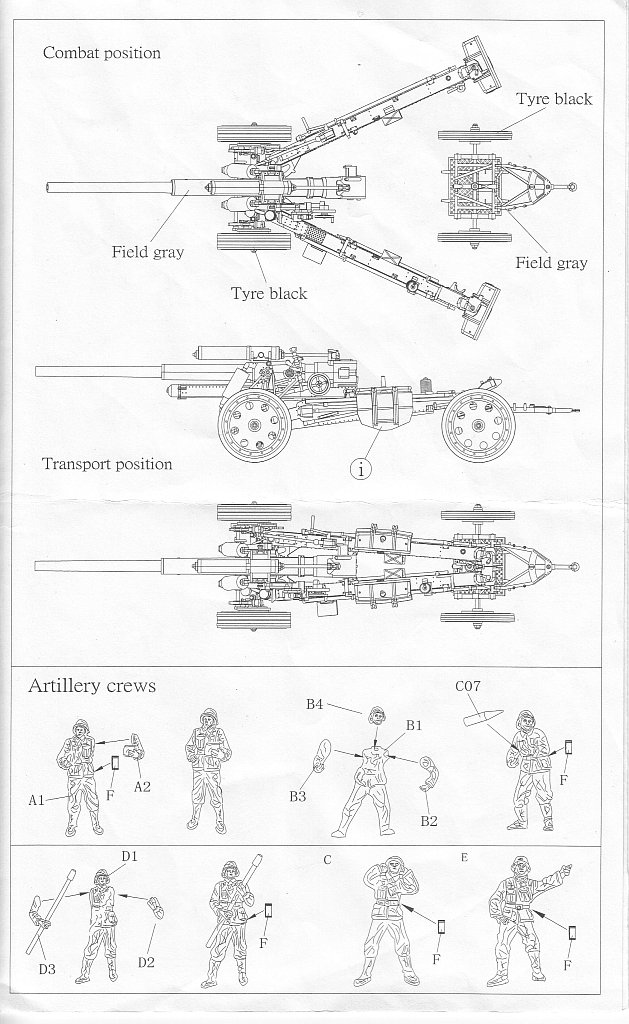
The spades from Step 10i can be added here. I left them off to ease painting. It's odd that Toxso titles Step 11 as "Combat Position", yet there
is no separate step outlining what to do for "Travel Position". All that is provided is drawing from above showing closed trails with the spades
mounted on top, midway down the trail leg.
Step 12:
Here is where you're supposed to add the wheels and the bracing rod (part B03). As mentioned above, I went about this differently.
Using slow acting liquid cement, I first glued the
wheel backing plates (which were previously built in Steps 7g & 7h) to the axle ends, waited a couple of minutes and then added the bracing rod.
After the glue had set sufficiently to prevent sagging, all the parts were aligned and then braced to hold the alignment in place until the glue had
firmly set.
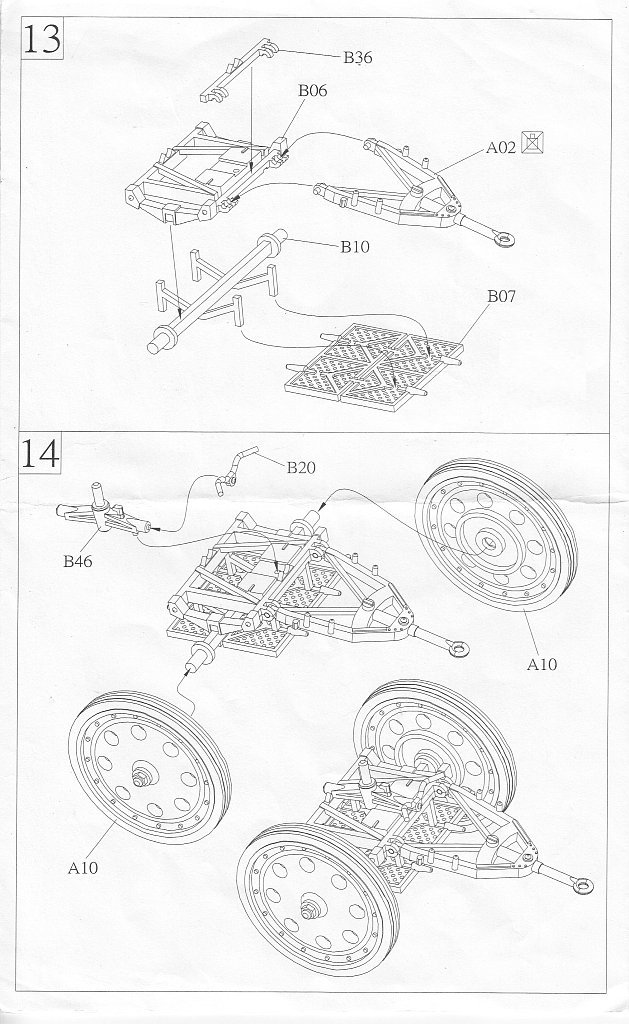
Steps 13 & 14: These two steps cover limber construction. I lost part B20 forcing me to fashion a replacement. Like in Step 7, the
wheels were replaced with custom 3D designed and printed items by my buddy Will Alcott.
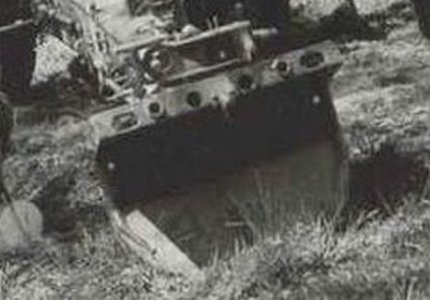
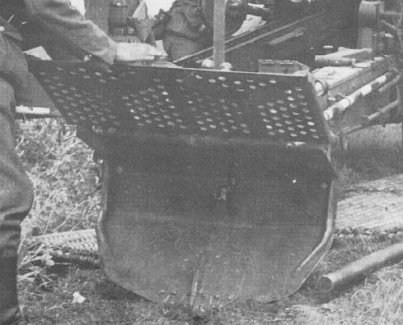
All of the holes in Part B07, over 100 in total, were drilled out. This makes a world of difference to the look. I'm not sure
what purpose this panel serves on the real gun, but the photo below shows them mounted on the spades.


As for the figures, their faces look a bit too zombie like. Uniforms do look nice though and their poses are fairly realistic.
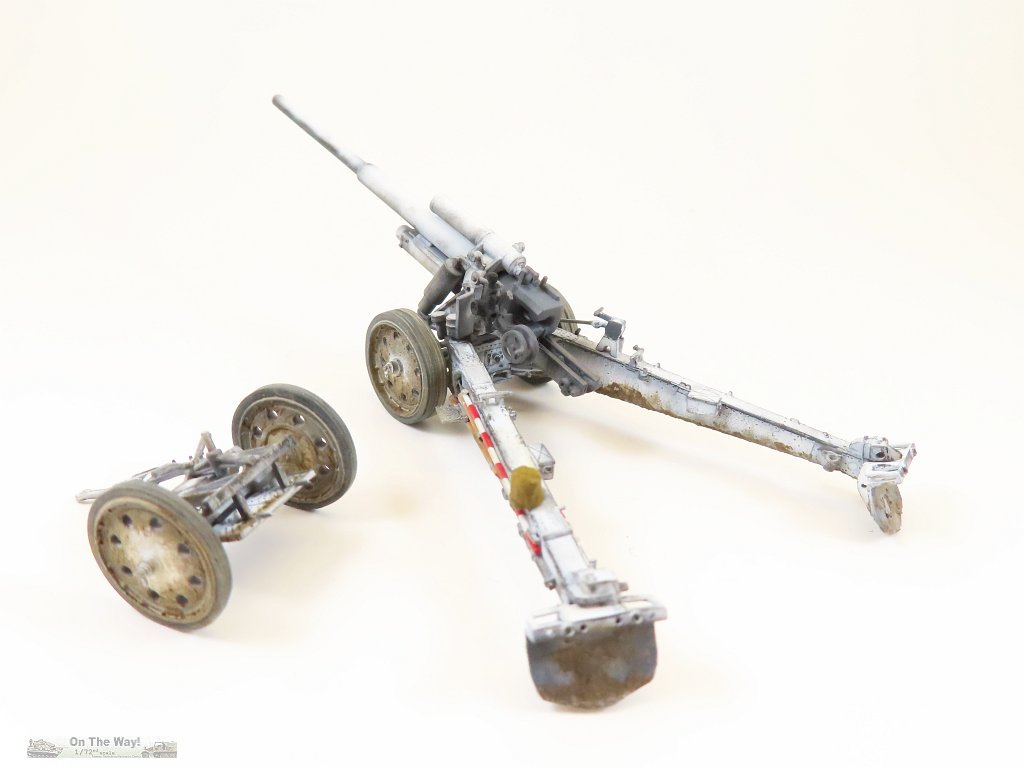
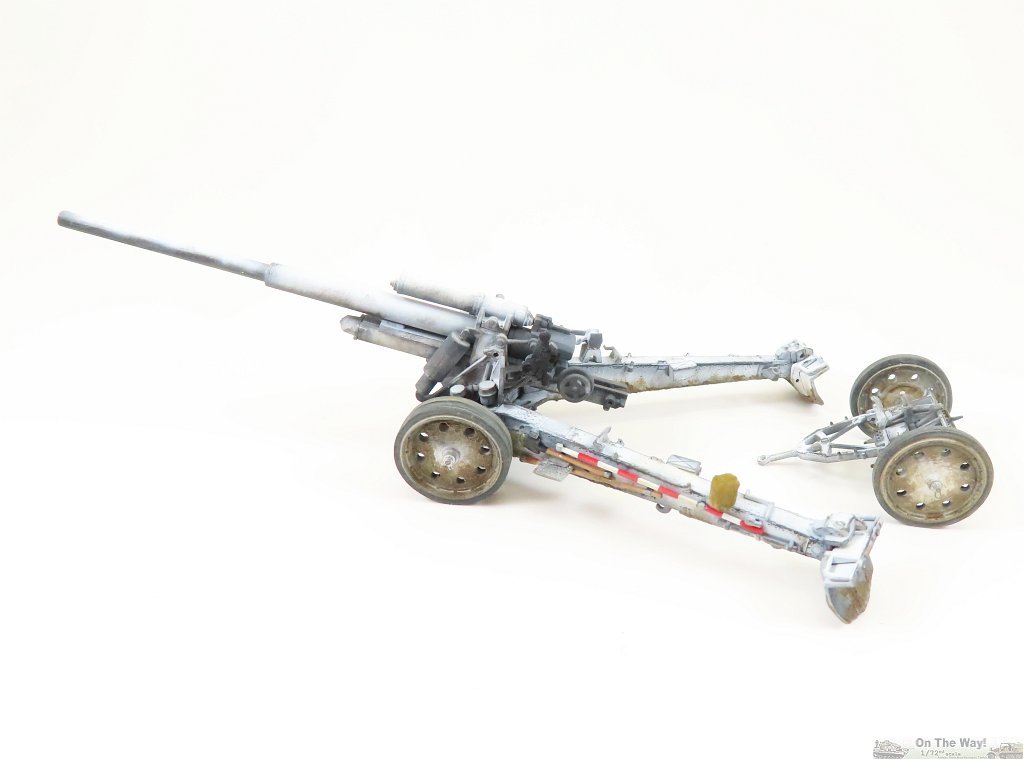
Painting & Weathering
This kit sat on my "shelf-of-doom" for nigh on a decade. The reason why escapes me. When I returned to this kit, old man winter had us in a
real deep freeze so I thought - why not paint this in winter camouflage?
I started with a light grey primer, followed by
a coat of Panzer grey, all done with Tamiya Lacquers from the small glass jars. The white is Testors Modelmaster enamel. Both these paints were
thinned using Mr. Color Leveling Thinner. This product is fantastic. Chips, scratches and rubbing was done with Tamiya Panzer Grey using a
combination of fine brushes, sponge pieces dipped in paint, airbrushing and some dry brushing. Dirt and mud is a skill I need to perfect, and what
better subject to experiment with than something in winter camouflage.
So this kit got dirty with some muck in the form of Vallejo Light Sienna power (73.104) mixed with Liquitex Matte Gel, dabbed on the wheels,
spades and underneath the trail legs. A dry brush of Testors Modelmaster Africa Dunkelgrau '42 replicated drier mud.
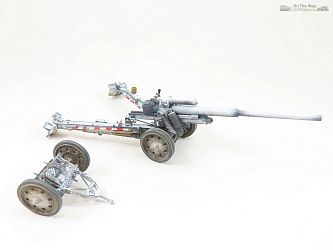
Conclusion
Part detail is decent. Construction isn't difficult either. Just the
slightly confusing instructions in places slows down the build. Overall, a very decent effort. The finished model certainly looks the part.
References
[1] German Heavy Field Artillery 1935-1945, Joachim Engelmann, Schiffer Military/Aviation History, Atglen 1995 ISBN: 0-88740-759-5
[2] German Artillery at War 1939-45 vol.1, Frank V. de Sisto, Concord Publications Company, Hong Kong 2007 ISBN: 962-361-143-9
[3] German Artillery at War 1939-45 vol.2, Frank V. de Sisto, Concord Publications Company, Hong Kong 2008 ISBN: 962-361-144-7
[4] sFH-18 Family in Detail, Wings and Wheels Publications, František Kořán, Jan Horák and Petr Doležal, Prague 2008 ISBN: 978-80-86416-73-1
[5] Toadmans Tank Pictures
[6] Pazerserra blog (build of 1/35 Trumpeter 15cm sFH18)
[7] Miniatres.da (15cm sFH18 specs)
[8] maquetteland.com (10cm sK18 walkaround)
[9] net-maquettes.com (10.5cm sFH18 walkaround)
[10] history-classics
[11] On the Way!
Afterword
This kit has been re-popped by Italeri (kit 7082 - German s.FH.18 with crew (15cm) & 10,5cm sK18). It is identical to the Toxso kit but containing
an additional sprue for the 15cm sFH18 barrel, giving the builder the option of constructing either the 10cm sK18 or the 15cm sFH18. This would
have been a logical inclusion with the original Toxso release.
Review sample supplied by Toxso.
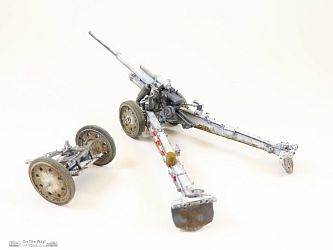
The End Result

|