Solfig

Schneider CA.1 2ème Modèle

Review by - Al Magnus

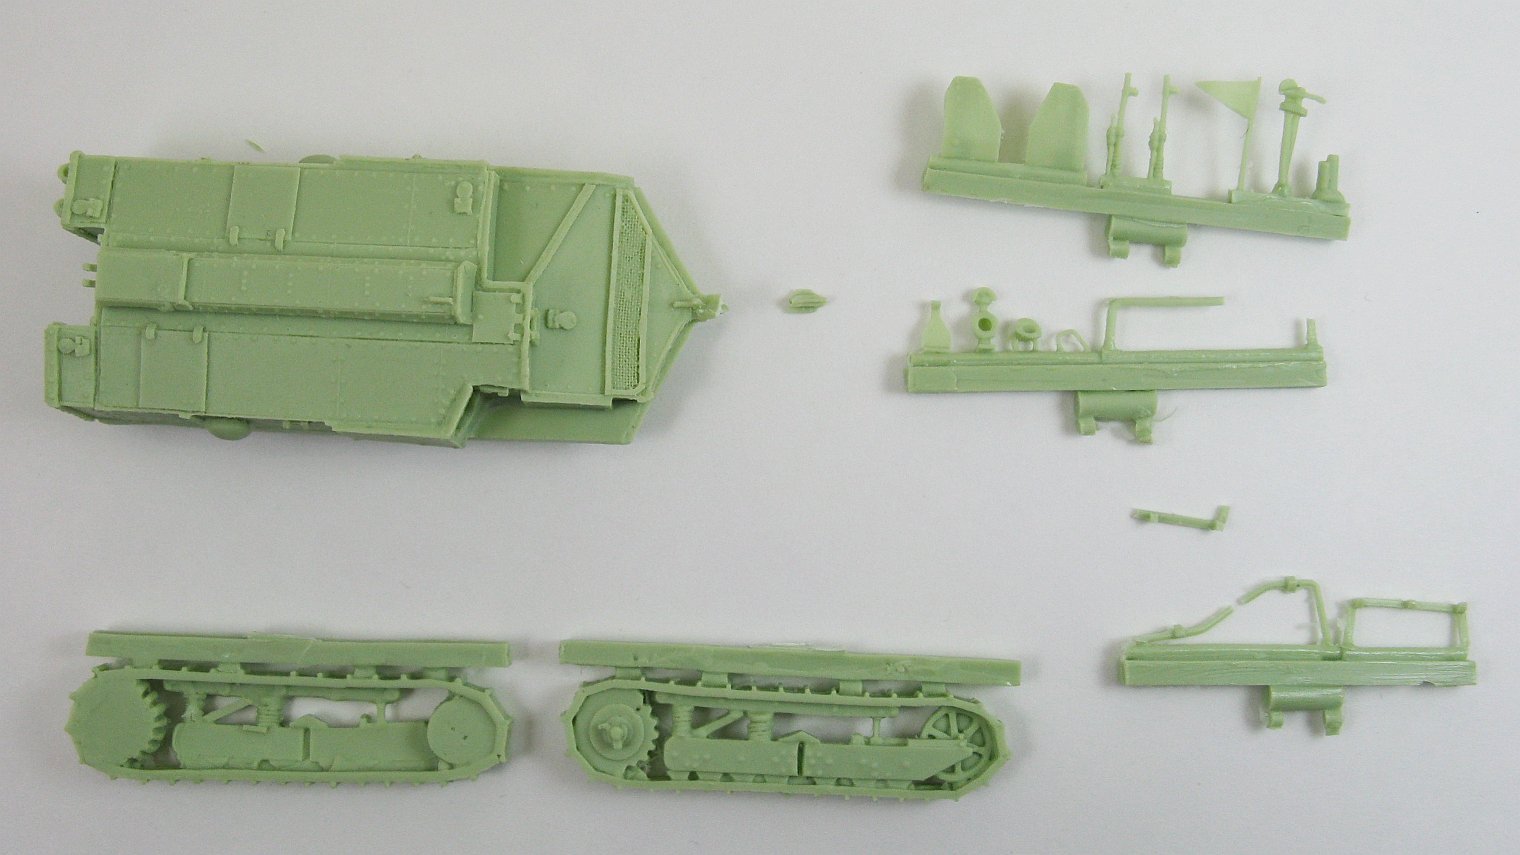
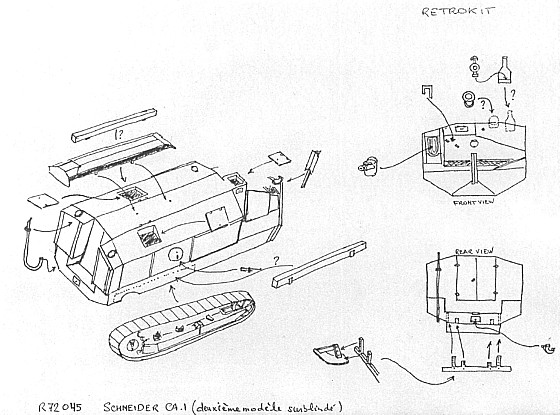
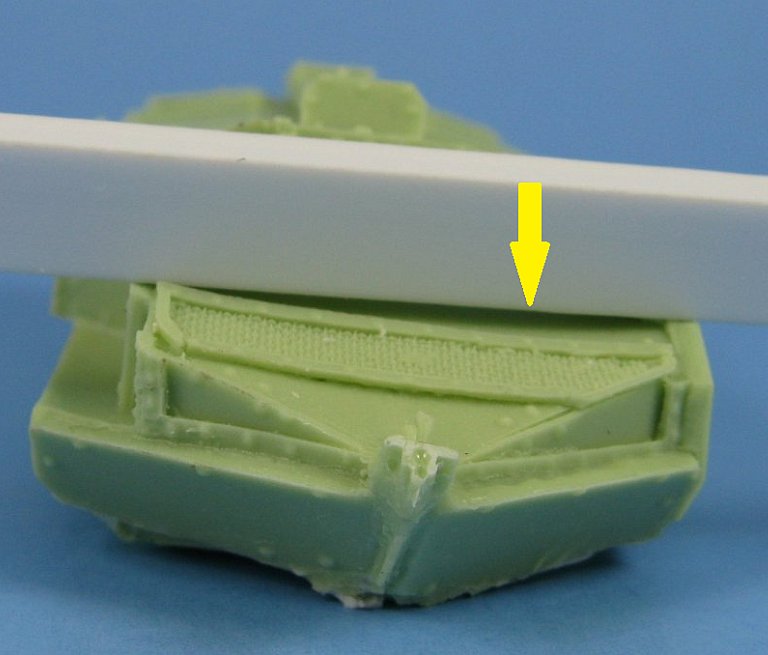
There are too few WW1 armour subjects available in injected plastic which is unfortunate. Outside of the nice injected plastic offerings from Emhar, this leaves the smaller resin manufacturers to fill the void.

The Schneider CA.1 tank was not very successful. In combat it proved easy to knock out due to the exposed fuel tanks located on the side. This kit represents the CA.1 Type 2 version with extra body armour and the fuel tanks relocated to the rear of the tank framing the rear door. In all, some 400 Schneider CA.1s of all versions were manufactured by August 1918, when production ceased. At least one Schneider was delivered to Italy but it was not liked and there was no Italian production of the tank. After the war, the tanks were rebuilt as recovery vehicles and tank transporters. Six were sold to Spain in 1922, and from 1923 to 1926 were used in fighting in Morocco, the surviving four vehicles later taking part in the Spanish Civil War near Toledo on the side of the Republican army.

I find it interesting that the box has the RetrokiT logo on it. At one time Retrokit was run by two partners, Dominic Jadoul and Marc Urwicz. Marc Urwicz is now based in France and continues to offer some of the Retrokit items under the new name Solfig. Dominic Jadoul is based in the UK and offers his part of the Retrokit line as RetrokiT. Receiving a box labelled RetrokiT from Solfig can only lead to confusion with the modeling public. So what kit are you actually getting when you see RetrokiT on the box? Is it a RetrokiT model or is it a Solfig model? Is it from old RetrokiT stock or a new Solfig item? You'd think that for brand recognition something should have been done to distinguish the Solfig line from the old Retrokit line - like maybe print some new Solfig labels to place over top of the RetrokiT printing on the box.


Parts

This kit is packaged in a zip lock bag with bubble wrap within a sturdy cardboard box. Even with the good protection my kit still arrived with a few broken pieces. There are 18 parts cast in a light pea green resin. No decals are included so those wanting to put even basic markings on the model will need to get them from another source.

    Two sheets of A4 sized paper comprise the instructions, all in French. One sheet covers a history of the tank printed on both sides of the paper. The history looks to be very complete, but unless one speaks French they are not very useful. The other sheet contains a guide for markings and colouring plus a parts placement guide which is basically useless on its own. It consists of a 5-view drawing of the tank with letter callouts for the parts. These letters are not to be found anywhere on the castings so one is left to guess by the shape of he part as to where it is placed. Some parts have small black dots beside them but I have no idea as to what they signify. There is even one part (A) that, as far as I can tell, doesn't even exist.

Of interest is the instruction sheet for what looks to be an earlier release of the Retrokit Schneider CA.1 found on the landships.com site. As you can see the layout of the two kits is pretty much the same though it appears that Solfig has simplified the molds somewhat - adding the hatches, the beam on the prow (which arrived broken on my sample) and the vent that run across the top of the body (which may explain the missing part A in the Solfig instructions).


This kit is as crude as they come which is quite a surprise to me, as most of the recent releases by RetrokiT/Solfig have been of fine quality (see the recent previews by Stephen Brezinski for kits R72212 & R72230.). The small parts are not too bad but the track units and the body leave a lot to be desired.


First of all let's look at the tracks. Outside of the seam that runs down their middle and the few track links that aren't molded too well, they are bowed lengthwise from front to back when viewed from above. This bow looks to be fairly easy to straighten with some hot water and clamping. Unfortunately the tracks also have no rear detail. This tank sits quite tall on its tracks so the lack of detail would be very conspicuous. Detail would have to be added if one has any desire to make this a display model, otherwise it might be best to glue the model to a base to make viewing the underside difficult.


Picture 1


Now we come to the body. This is a solid chunk of resin that's so poorly molded that it's difficult not to shake one's head in wonderment.

Let's start with the underside. Picture 1 at left shows the plethora of air bubbles found here as well as a barely flashed over spot at the fender to body junction, that's so thin that it lets light through it much like a window (yellow arrow). One can only hope that the majority of the bubbles are flashed over, for if they are not, the only solution that comes to mind regarding their removal would be to cut a piece of thin styrene plastic to size and glue it over the bottom pan to cover them over,
but then ....


Picture 2

...... there's the lengthwise warp to the body, twisting it like a thread of a screw. In Picture 2 to the left, I have drawn a red line parallel to the bottom edge of the body's rear, and another yellow line parallel to the edge of the body's front. As you can see the two lines are not even close to being parallel showing just how much of a twist there is in the body. With a piece of resin this large I have serious doubts that there is any way to remove the twist,
but then .....


Picture 3

...... there's the widthwise bow that is even more sinister. In Picture 3 to the left, I have placed a piece of styrene strip across the glacis plate to show the distinct of bow in the hull. The bow (yellow arrow) is so severe that it actually makes the forward superstructure lean to the side. Fixing this will not be easy, probably even impossible.

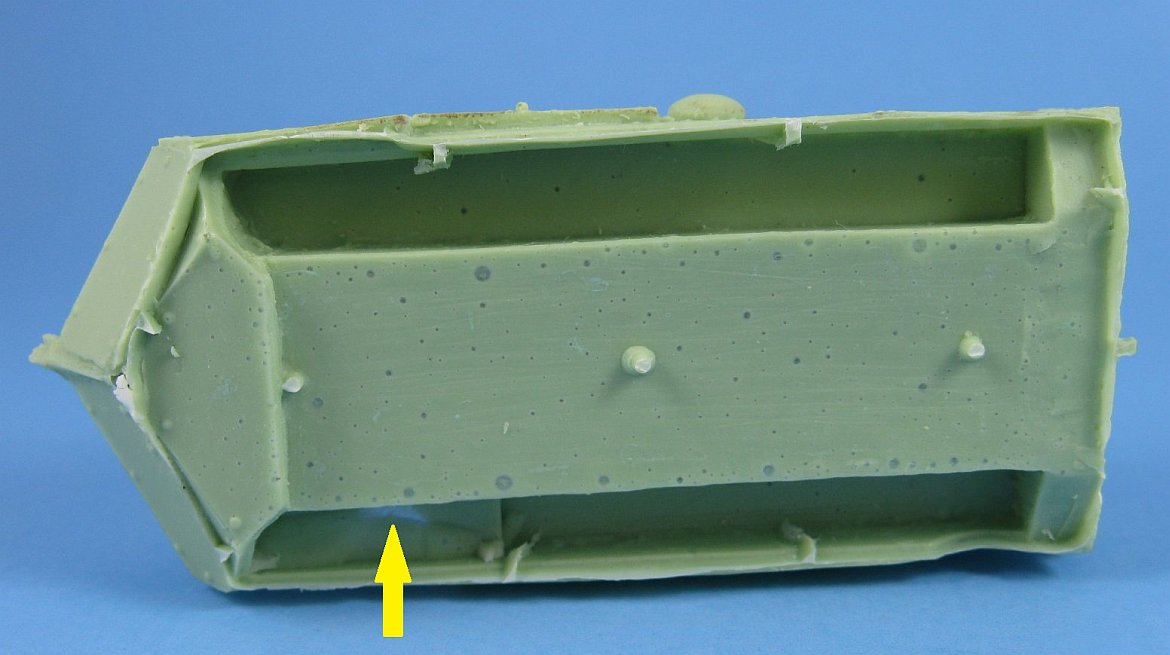
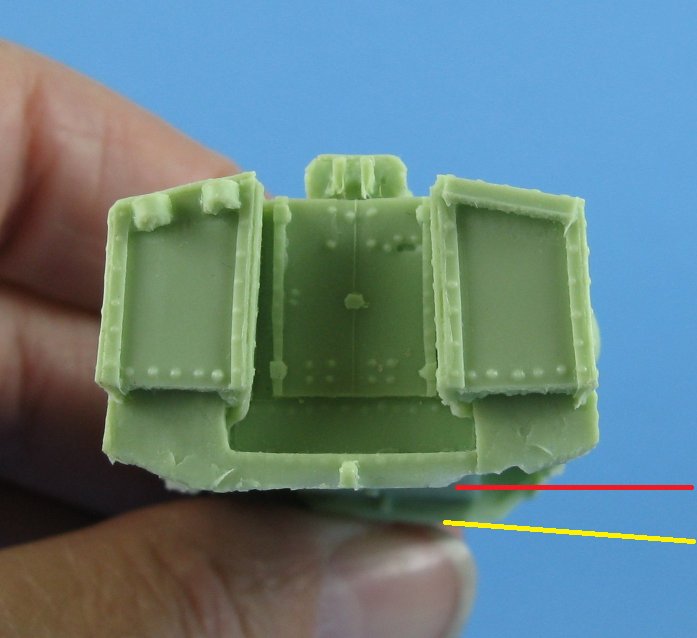
Life is full of disappointments. I had great expectations for this kit, hoping to add an important, though unsuccessful World War One tank to my collection. Unfortunately that's not going to be the case. In my view this kit is totally unbuildable.

Review sample provided by Marc Urwicz of Solfig.

Back to Solfig Kit List Back to Home Page

Article Last Updated: 05 April 2012