|
|
www.onthewaymodels.com |
Sonderanhänger Ost (für RSO) mit 2cm Drillingsflack [sic] |
|||
| Kit # 7212 | Construction Review by Rob Haelterman | ||||
|
|
www.onthewaymodels.com |
Sonderanhänger Ost (für RSO) mit 2cm Drillingsflack [sic] |
|||
| Kit # 7212 | Construction Review by Rob Haelterman | ||||

|
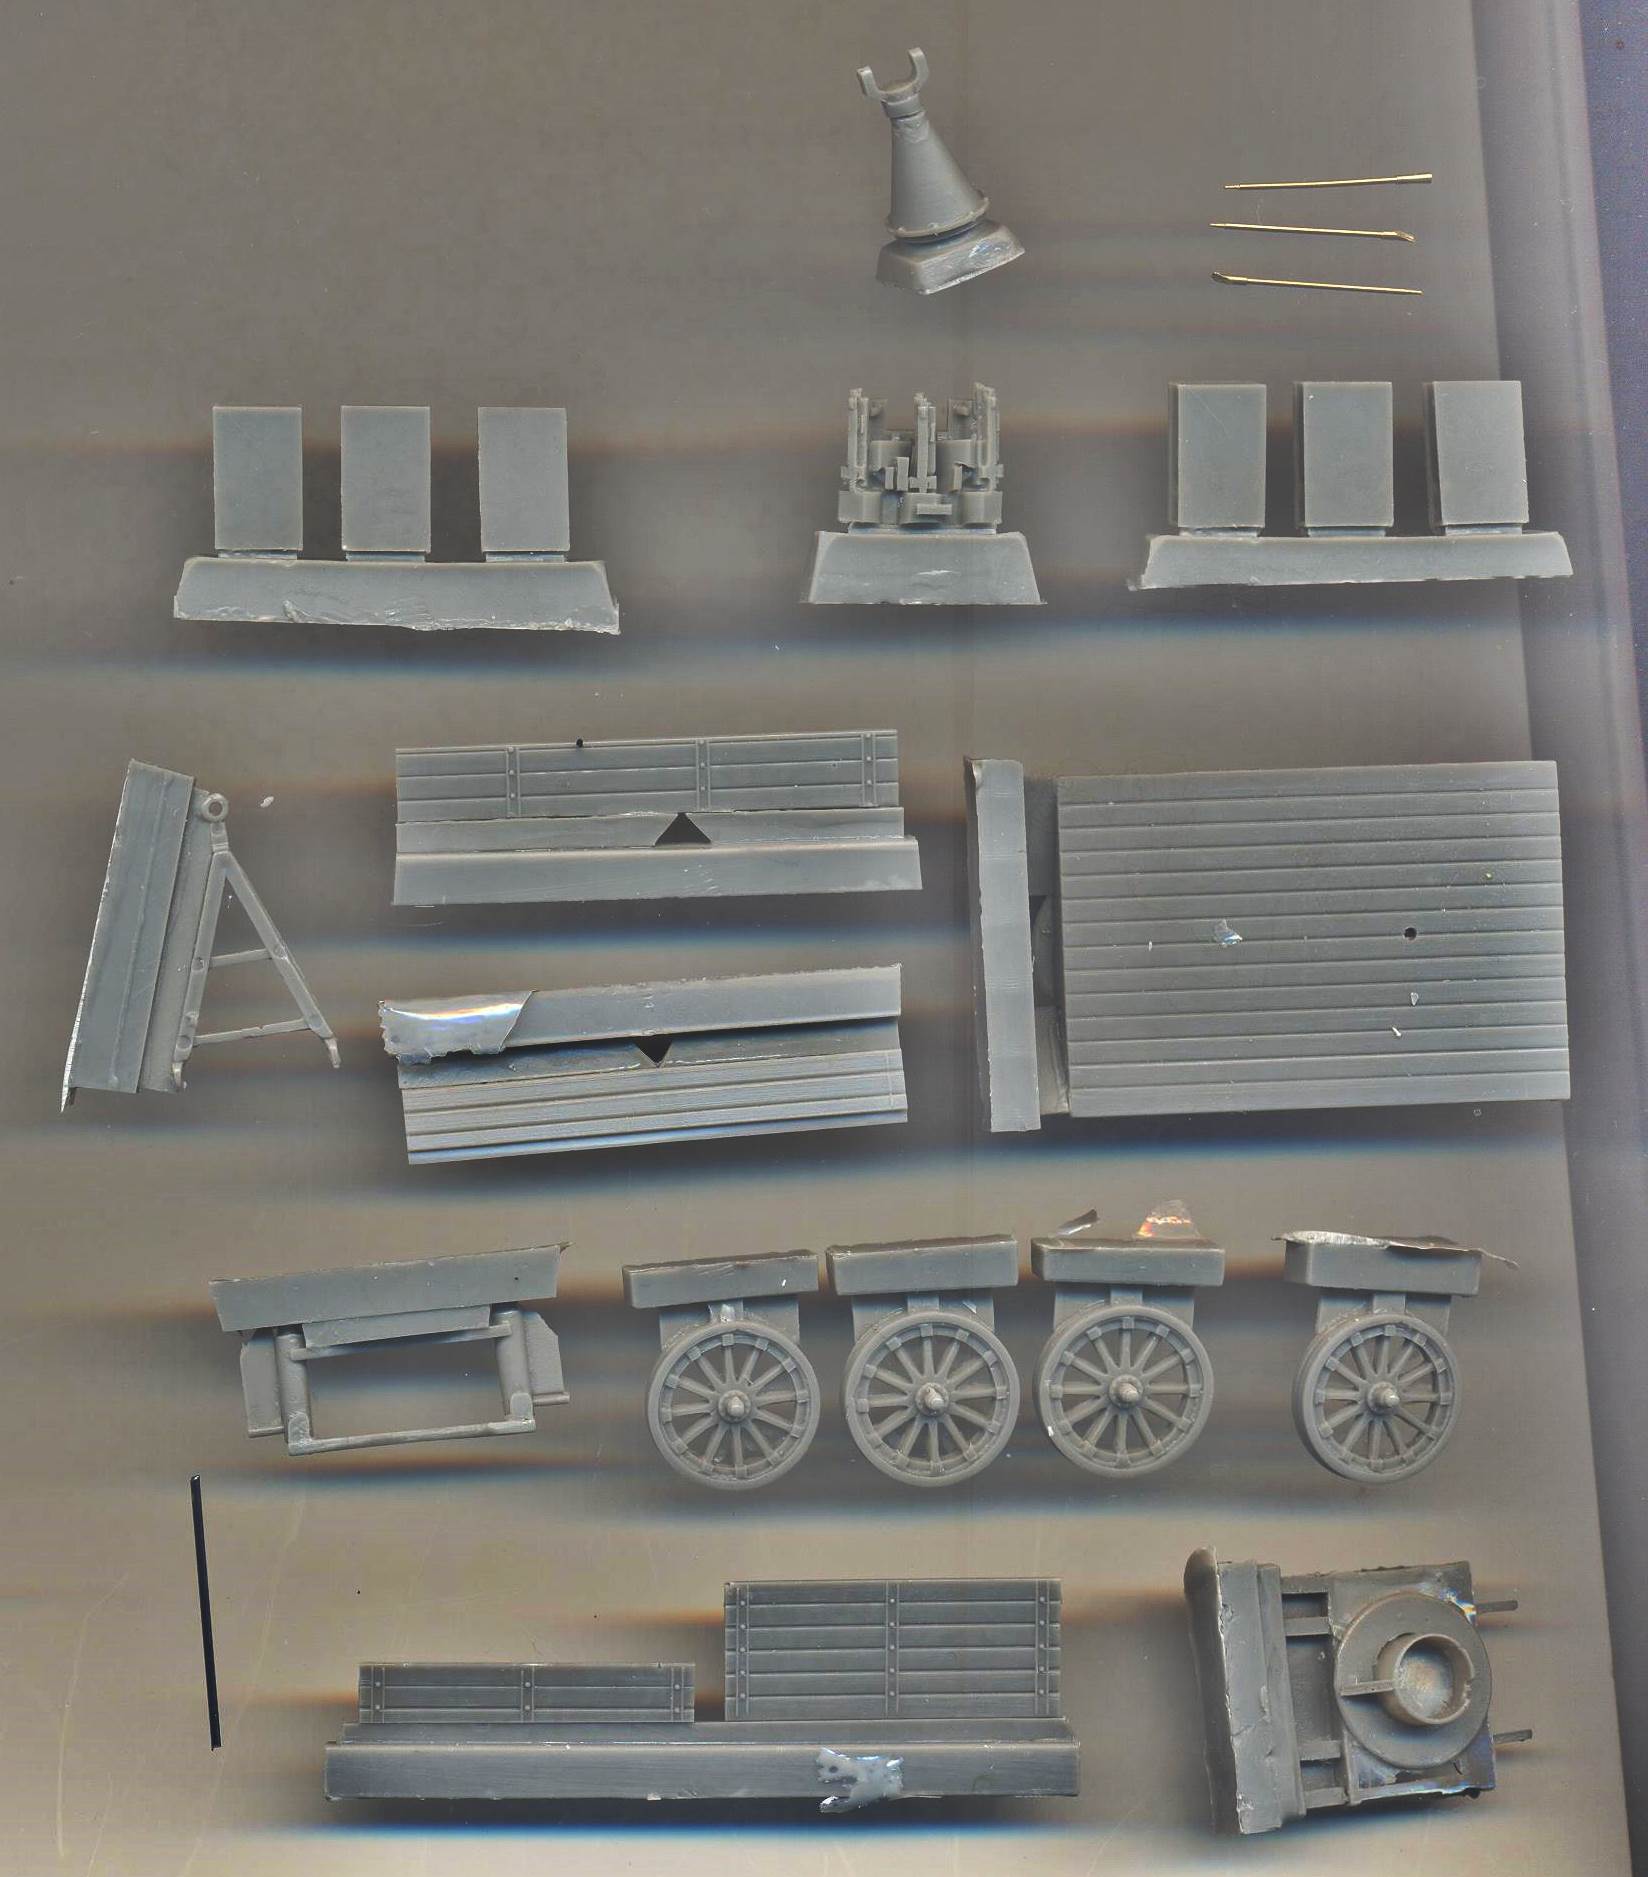
| History Box Parts Schatton must have some sort of co-operation going with CMK, as the Drilling body and ammo boxes are the same as in the CMK conversion set for the Sd.Kfz.251/21. The pedestal is slightly different and while CMK has resin gun barrels, Schatton has brass barrels. You get six ammo boxes, while you only need three, strictly speaking. Note that the empty shells, ammo belts, gun sight, rifle and Panzerfaust shown on the boxtop are not given. More about that later. Casting quality of the resin parts is good for some parts, mediocre for other and sloppy for a few (e.g. the front axle assembly). Note that the A-frame for the trailer coupler and the wheels have ejection marks.... hmmm.... I wonder where these came from...
Instructions, decals, marking options None given. Instructions are not really needed, as you can manage by looking at the box art. If you do so, you will note that the folded down side on the box is a bit odd. It is folded down showing the metal stiffeners, which the kit parts only have on one side. These would then have been on the inside when the side was up, just like we see on the right and rear side. The front side has the stiffeners on the outside. I am not sure if this is correct.
Construction I started construction with the cargo bed and soon discovered that I had been onto something when I looked at the folding sides on the boxtop. It turned out that you can't build the kit as it is shown on the boxtop and for various reasons. First of all, the side panels have a recess that will make you want to install them with the stiffeners outwards. Then you will also notice that the side panels are identical but not symmetrical, meaning that the left and right side of your trailer are interchangeable and thus will look different once installed. After that you will discover that the front and rear panel are not of the same height and thus different from the parts on the boxtop. Judging from my references, the largest panel should go in front. Having
noticed that the kit parts for the trailer weren't the same as on
the boxtop (and already having noticed that the rifle, ammo belts,
etc. are shown but not given), it then struck me that the ammo boxes
on the boxtop weren't the same either. Those on the box have an ammo
feed at the top and reinforcing ribs along their length, which the
parts don't have. And hey, the A-frame for the trailer coupler isn't
the same either.... The wooden body went together without any real trouble; I just scribed the panel lines at the sides and the wood texture to enhance the overall detail. Having a look at how the suspension would need to be assembled I was left clueless regarding the rear axle mounting. As I decided to scratchbuild a completely new rear suspension it was a small step to do the same for the front suspension. It didn't look well aligned and in this way the front and rear suspension would at least match their appearance. (Not that they would match the appearance of the real thing, but that's another matter.) Construction was done using leaf springs from the spares box and various lengths of Evergreen material.
The casting
blocks of the ammo boxes are on their upper side, where any trace
of them is most noticeable. (After completion I noticed that I had
sanded one of the boxes with a distinct slope.) The body of the Drilling
is ok, but it needs some additions: ring and bead sight, shoulder
supports and hand grips for the gunner, ammo belts. (I have the impression
that the shoulder supports were slightly offset to the left; I believe
this was done to have the gunner's right eye aligned with the center
gun.)
Note that in the pictures the small caps on the axles still need to be (re)painted. Painting them was futile as due to handling I kept rubbing off the paint.
References [1] Raupenschlepper Ost "RSO", V. Andorfer, T. Greenland, L. Konetzny, Nuts & Bolts 29
Review sample kindly purchased by author. |
| Back to Schatton List | Back to Construction Reviews |
Article Last Updated: 09 January 2015 |
Back to Home Page |

.JPG)
.JPG)
.JPG)
.JPG)
.JPG)
.JPG)
.JPG)
.JPG)