|
A Brief History
Designed in the USA, the M40 replaced its predecessor, the failed 105mm M27 recoilless rifle. The 106mm M40 was intended primarily as a light weight and easily
transportable anti-tank weapon, that could also be used in an antipersonnel role. In American service it was also mounted on the M50 "Ontos" and M274 "Mule".
Its simple design, inexpensive price and adaptability made it a popular export item, with total production estimated to be in the tens of thousands.
Those attributes made it especially attractive to smaller armies and in particular with various rebel groups around the world. Mounting it on a civilian vehicle,
like the ubiquitous Toyota Landcruiser pickup truck, has become commonplace, providing a quick upgrade in firepower for those with limited manufacturing and financial resources.
Civilian vehicles such as trucks, cars and tractors that are armed with things like machine guns, recoilless rifles and rocket launchers are colloquially called a "technical".
The Kit
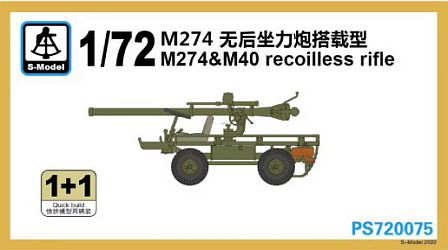
This gun came as part of the kit PS72075 (M274 & M40 recoilless rifle). It comes as a separate sprue consisting of 10 dark green polystyrene plastic parts
for the gun and its associated carriage, 6 rounds and 2 ammo containers, plus 6 PE parts for controls and wheel brackets. Detail is acceptable, though the spotting
rifle's magazine is a glaring omission. All of the photo-etch is rather flat looking.
The plastic is hard. All the pieces exhibit a hairline mould seam, which the green colour makes difficult to determine if their removal was successful. A nice touch
is the open muzzle. Unfortunately, on my copy it was slightly off center, so I attempted to make that right.
Since the carriage is not used with the included M274 Mule, the instructions exclude
its assembly. But, being only 3 parts it doesn't take much effort to figure out how they go together. There are no decals, which is to be expected.
Instructions are simple diagrams with lines pointing to part placement. There are two part choices for the breech (parts 8 & 9, which visually don't differ
much from each other), and nothing in the instructions gives any guidance as to why the option is provided. I chose part 8 and just ran with it.
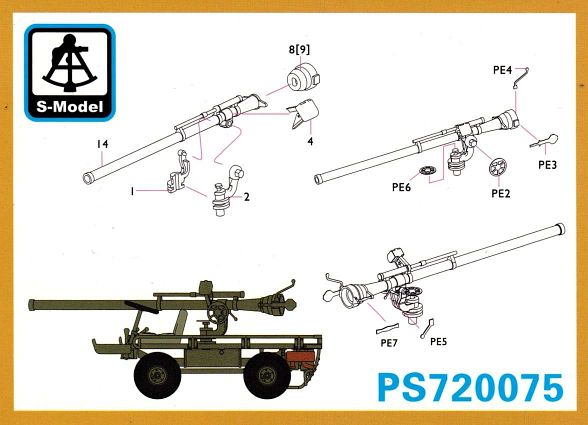
I added handles with knobs fashioned from plastic strip to the control wheels. The knob was cut off the top of the traverse wheel shaft, then the wheel was glued
to the shaft, and then the knob reattached to the top of the wheel (PE6). The right grab handle (PE7) was
replaced with a short section of plastic rod. I should have done the same with the left grab handle (PE3), but for some reason I missed this detail and only noticed
my error after it was too late to add it, lest I might break off previously added parts.
Cyanoacrylate glue (super glue) was used to add a proper knob to the breech lever (PE4). The sight box (part 4) is moulded closed. Its placement on the
gun tube is vague. There are two wires (their purpose remain a mystery to me) run from the base of the mount, one to the breech's right and the other to the
sighting rifle. These were done with thin lead wire.
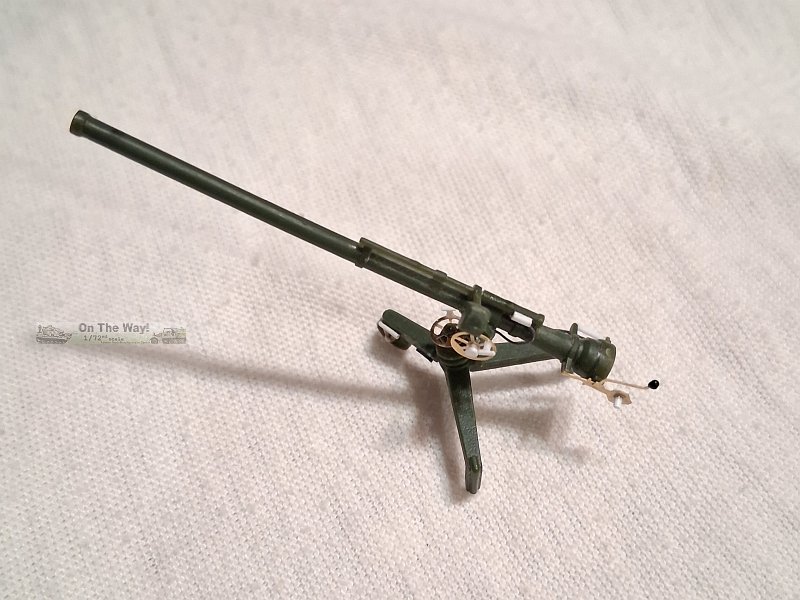
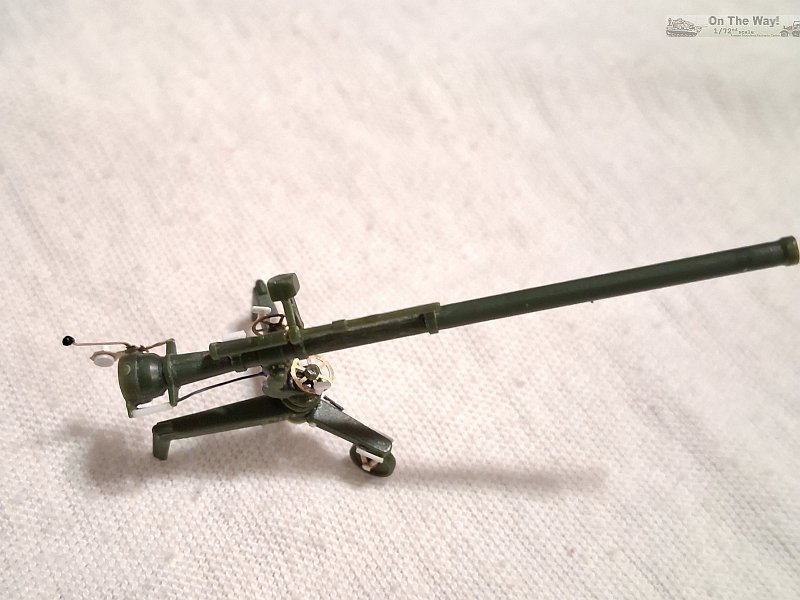
To represent the breech's screw mechanism I glued some plastic strips along with a section of round rod to the breech's interior.
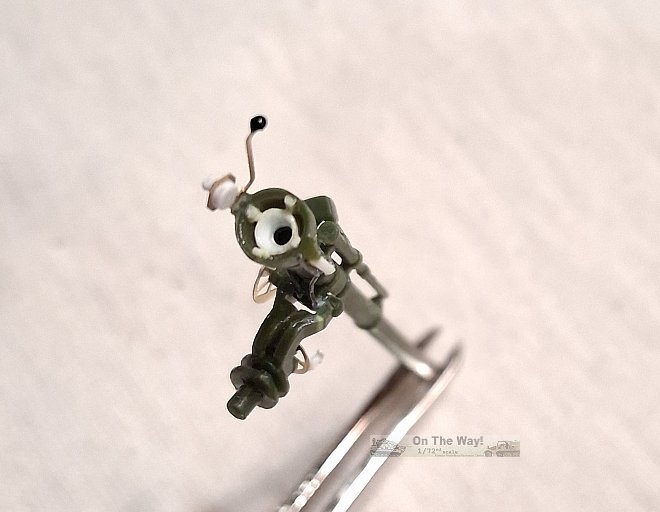
The carriage is acceptable if somewhat simplified. I added a few missing bolt heads and the locking lever. I somehow managed to lose the photo-etched wheel brackets
so I fashioned replacements from spare PE and plastic strip.
Three different styles of ammo rounds are included. Though they look nice on the sprue, once painted they show vent holes that do not wrap completely around the casing
and those close to the seam are stretched. Those flaws kiboshed my plan to add them inside the open bed. Based on [1], it appears that the rounds are
HEAT (High Explosive Anti-tank), HE (High Explosive) & HEP (High Explosive Plastic). These would have been better represented as 3D printed items.
No painting guidance is included. Olive Drab would be the colour of choice for anything in USA service. I chose to paint mine in a patchwork of olive drab, tan &
light and dark grey to match a photo I found of an M40 mounted on a Toyota technical in Yemen. Paints used were the new Tamiya lacquers in the small glass jars,
thinned with Mr. Color Leveling Thinner, which is my new "go to" paint now that my supply of Testors Model Master enamels are dwindling.
References
[1] AD-A023-513 Engineering Design Handbook: Recoilless Rifle Weapon Systems (pdf file available here)
[2] personal photos taken at the MAPS Air Museum (walkaround here)
[3] TM 9-1015-221-34P (pdf download available at liberatedmanuals.com)
[4] TM 9-1015-221-20P (pdf download avalable at liberatedmanuals.com)
[5] scribd (M40 repair manual)
[6] wikipedia
[7] William Maloney
(walkaround of an M40 mounted at the Military Museum Of Southern New England mounted on what looks to be a 37mm M3 anti-tank gun carriage)
Addendum
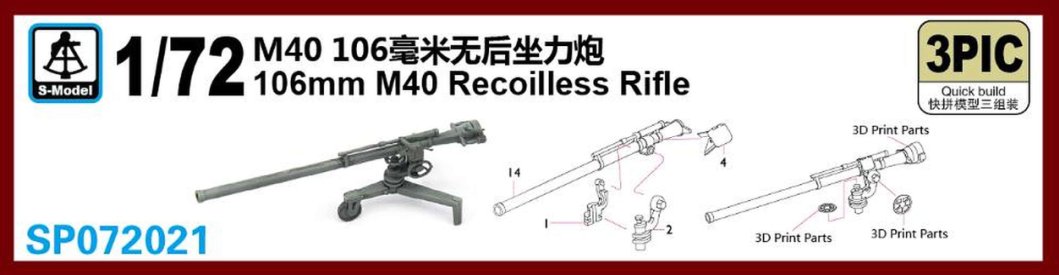
S-model has an updated release of this kit with 3D printed parts replacing the control wheels and breech. This revised
release is available in the following kits: SP072021 (a stand alone set of three M40 rifles), PS720153 (included with an M151A1C) and SP072015 (included with an M113A1).
If I've missed any other S-model kits sporting this new release, please let me know.
Conclusion
Overall a decent effort. Now that 3D printing has become mainstream, one would probably be better off sourcing the new release containing the 3D replacement parts.
I expect that the new 3D parts will address almost all of the detailing points I did for this release and make this an easier kit to put together.
Completed Model

Review sample received from an independent third party donor.
|