|
This review covers the following four RPM Panhard 178 armoured car releases:
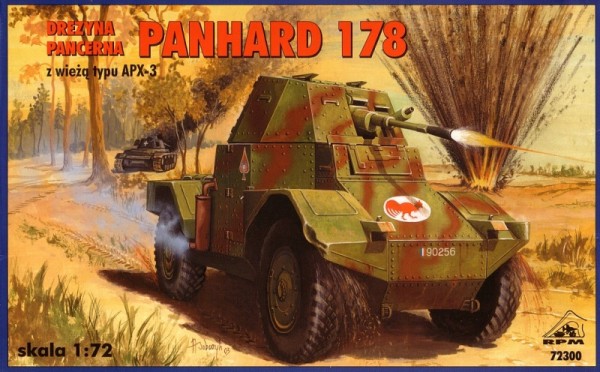
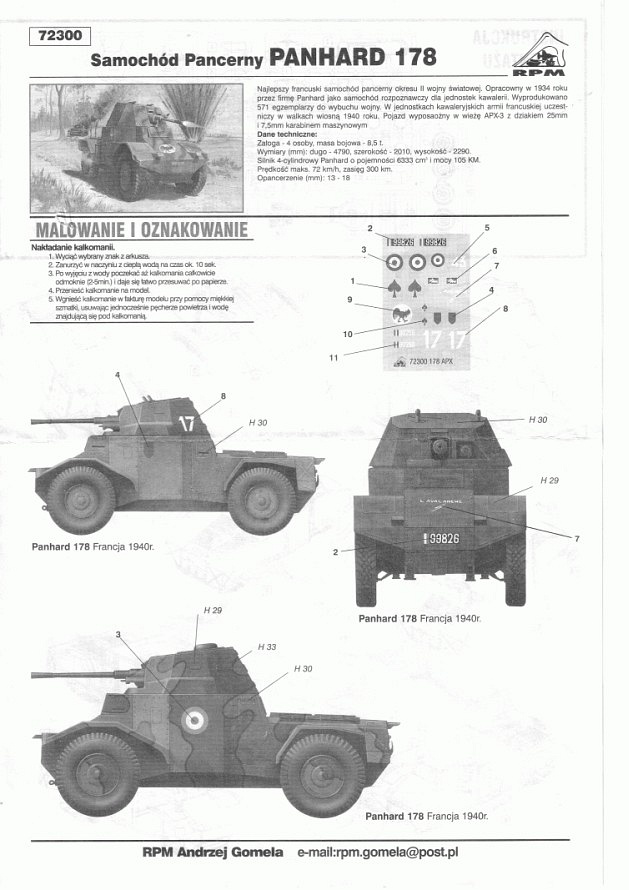
- Panhard 178, kit no. 72300
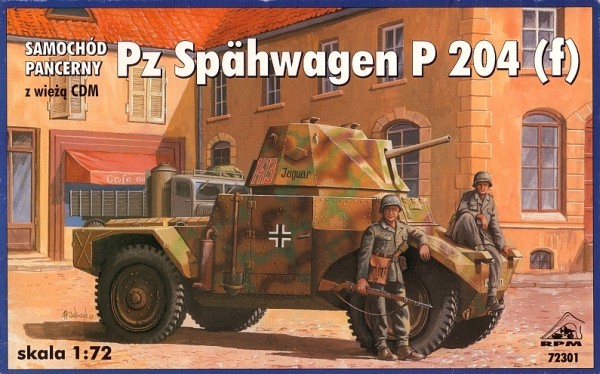
- PzSpw P204(f) with CDM turret, kit no. 72301
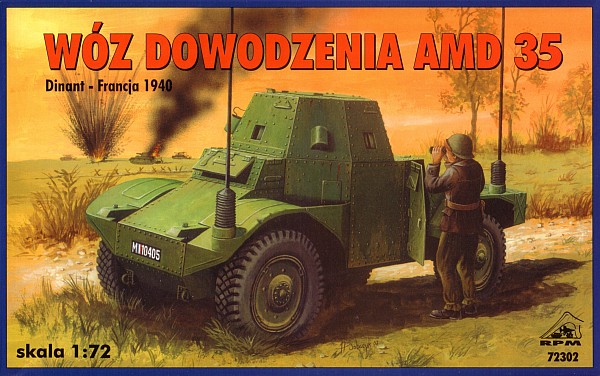
- AMD 35, kit no. 72302
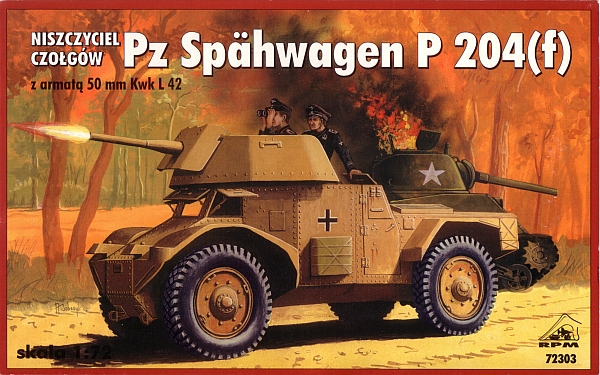
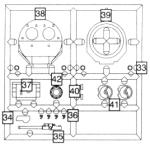
- PzSpw P204(f) mit 50mm KwK L/42, kit no. 72303
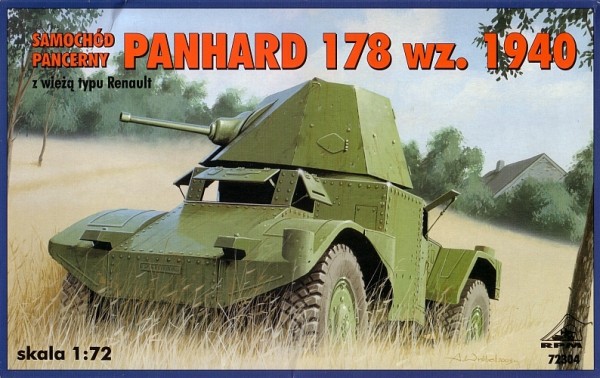
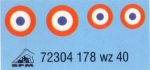
- Panhard 178 model 1941, kit no. 72304
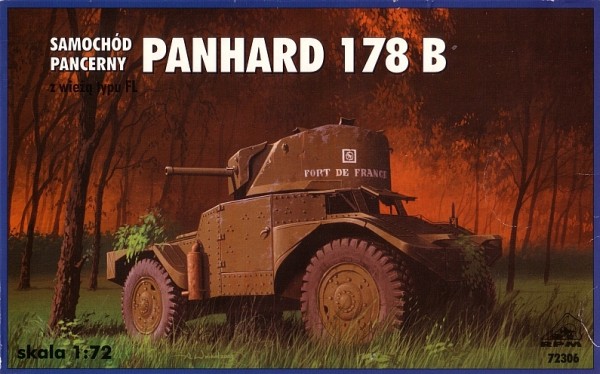
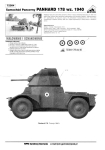
- Panhard 178B, kit no. 72306
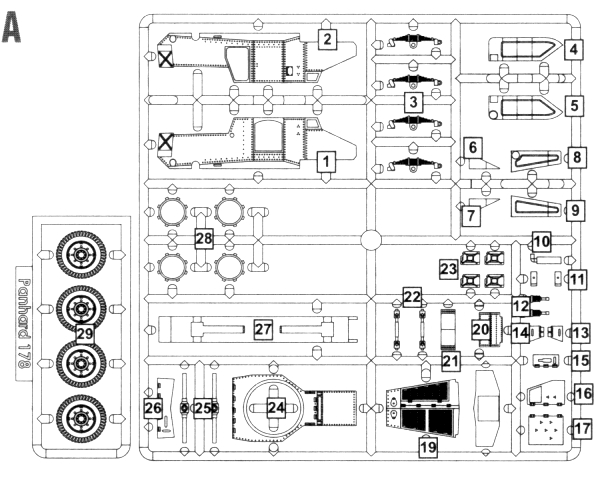
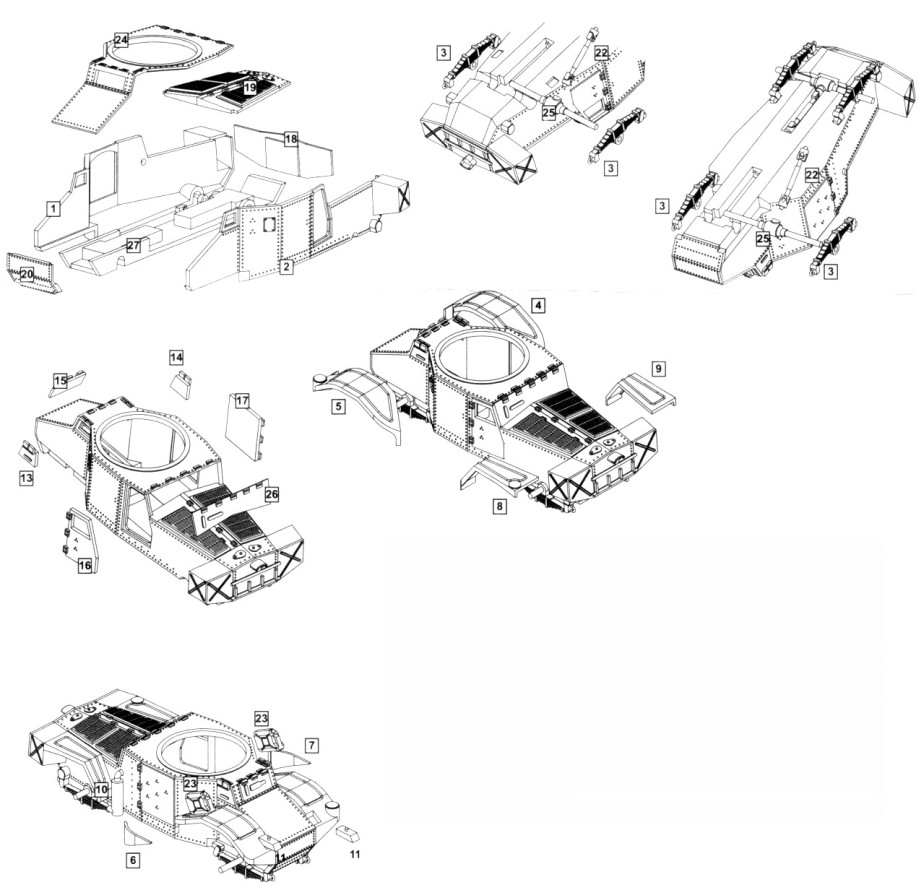
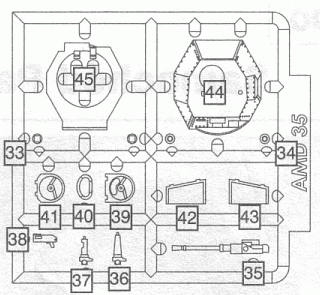
All of these kits are variations of the first kit released - 72300. They all share a common sprue containing 45 parts for the chassis, body and wheels, with each one having a different sprue for the turret and gun. You also get an instruction sheet plus a small set of decals for each.
I found that in all of the kits the decals were slightly out of register (though generally not enough to detract from their look overall except for the roundels for the Panhard 178 model 1941 kit which had noticeable white crescents around the images and off center dots) and there is lots of extra clear material around the images which is best removed before applying the decals. They all settled down nicely especially after a soaking in Microsol decal solvent which is important since they need to conform
over the rivets in places.
The plastic is soft and easily damaged. The parts fit well enough but you do have to fiddle a bit to get a proper fit and minimize the seams. There is very little on the kit that doesn't need some minor tweaking fitwise and you definitely need to check the alignment of everything before gluing. About the only parts that fit together with next to no problem are those for the turrets, and unless you are going to leave the hatches open there's no point in adding the breach pieces to the guns (you're not going to see them anyway), which constitute the only interior detail.
Clamping parts together where possible will help minimize the chance of getting large seams or misaligned parts. What is really nice is the plastic responds well to Tenax liquid cement and you don't need to hold the parts together for long before they are set enough to proceed with further building.
There are some things to look out for in all of the kits due to the common sprue that they share.
- The holes in the spring units need to be opened up enough to get the axles through them and the holes on the back of the wheels need to be enlarged to get the end of the axles into them.
- The walls (parts 1 & 2) slot into the top panel for the body (part 24) through the use of small channel but you will need to remove the extra plastic nubs in these channels from where they attached to the sprue otherwise they'll interfere with the join. Widening the channel with a small file will also be beneficial.
- The port side door (part 16) is missing its window, so this needs to be added along with some hinges. The frame for this door is integral with the body (part 2) but this frame will not survive the removal of its molding stubs. Since I wasn't planning on having this door open I didn't worry about it being missing.
- The tow hooks on the ends of the springs units (part 3) will not survive any method I have tried in removing the springs from the tree. No matter what you attempt (and I tried many different methods) the ends will separate from the springs and stay with the tree. You can try to repair the break or do as I did and manufacture replacement hooks from scratch. Attachment points on the body for the springs are vague so take care here to make sure everything aligns properly and sits level.
- The rivets are not consistent in height so they will need to be sanded down a bit which has the added benefit of helping with the fit of the other parts of the body, such as the doors, visors and fenders.
- There are no door handles. I added scratch built ones made from plastic.
- The fit of the two doors (parts 16 & 17) and the visors (parts 13, 14, 15 & 26) into their openings is tight and will need some adjustment to fit. The hinges on the visors tend to stand a little proud so they should be trimmed/sanded a bit for height. The fit of the front fenders is a bit dodgy.
Holes should be drilled for the gun muzzle and the exhaust pipe exit.
Outside of the general points mentioned above, below is some information specific to the build of each version.
|
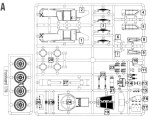
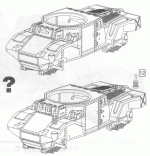
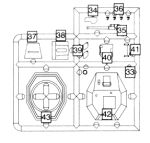
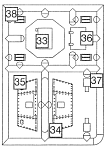
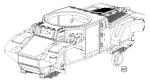
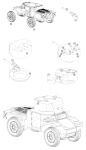
| Common Sprue |
Common Instructions |
|
 |
 |
|
|
| Panhard 178, kit no. 72300 |
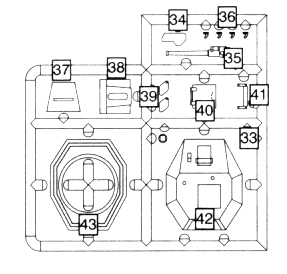
| Turret Sprue |
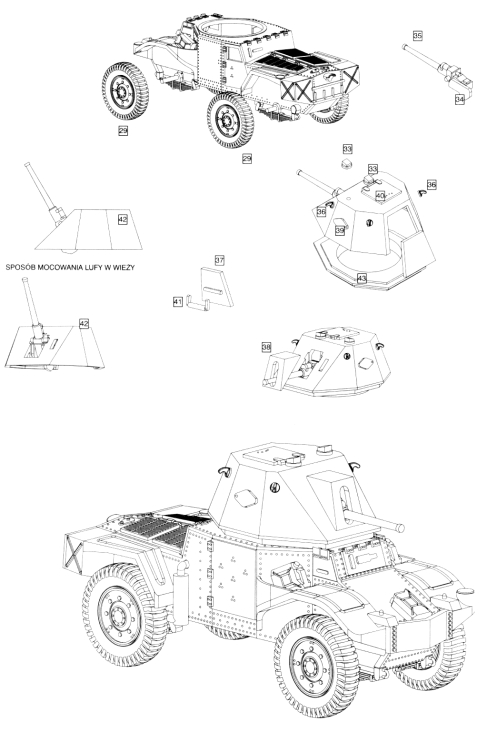
Kit Specific Instructions |
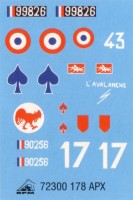
Marking Options |
Decal Sheet |
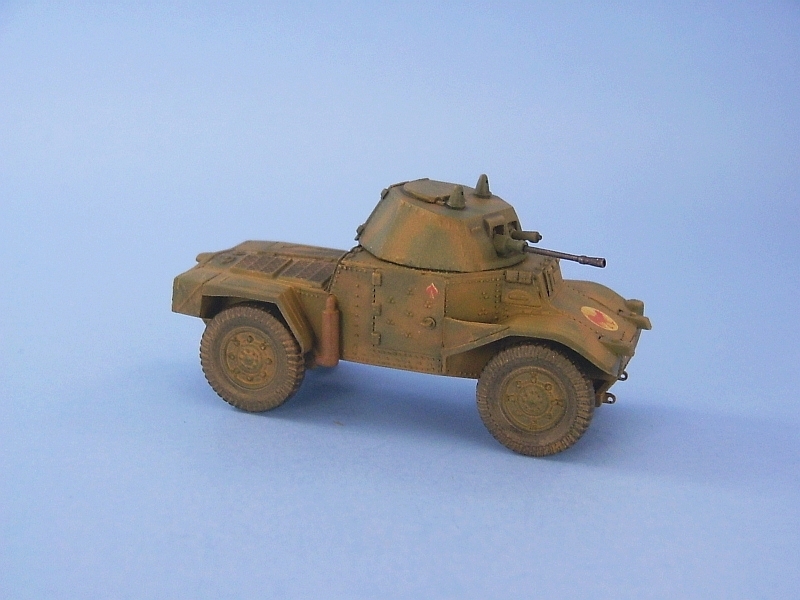
Model Picture |
 |
 |
 |
 |
 |
|
The turret sprue contains 15 parts.
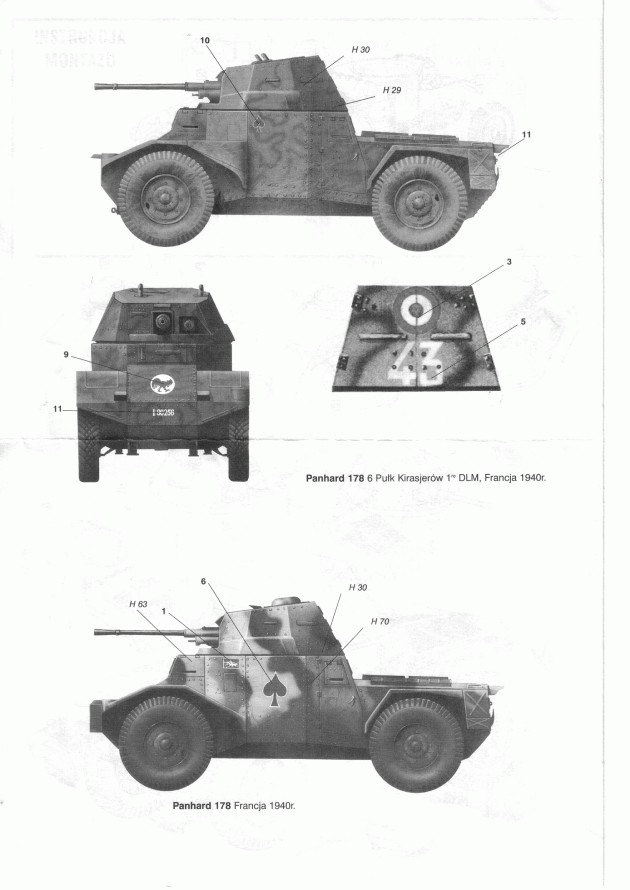
Marking options:
- Vehicle no. 99826, White 17, "L'Avalanche", France 1940, in overall green camouflage.
- Vehicle no. 90256, white 43, France 1940, camouflaged in an overall green with thin dark brown squiggles/bands.
- France 1940, camouflaged in patches of green, sand and red brown.
- France 1940, camouflaged in green and dark brown segmented camouflage with thin black lines separating the two colours.
No units are identified for any of the marking options.
I accidentally broke the main gun on this kit due to the plastic's softness and the thinness of the part, and not matter what I tried I couldn't get the barrel to go back together, so it was replaced with a piece of plastic rod, and I cut the flash suppressor from the original barrel and glued it to the end.
The instructions are vague when it comes to the periscope choices on the turret. I was uncertain as to which version matched which decal option. After referencing the painting guides for clues, it looked to me that the taller periscope option (part 34), was applicable for "white 43" so I used them and drilled out the round openings in their faces.
|
|
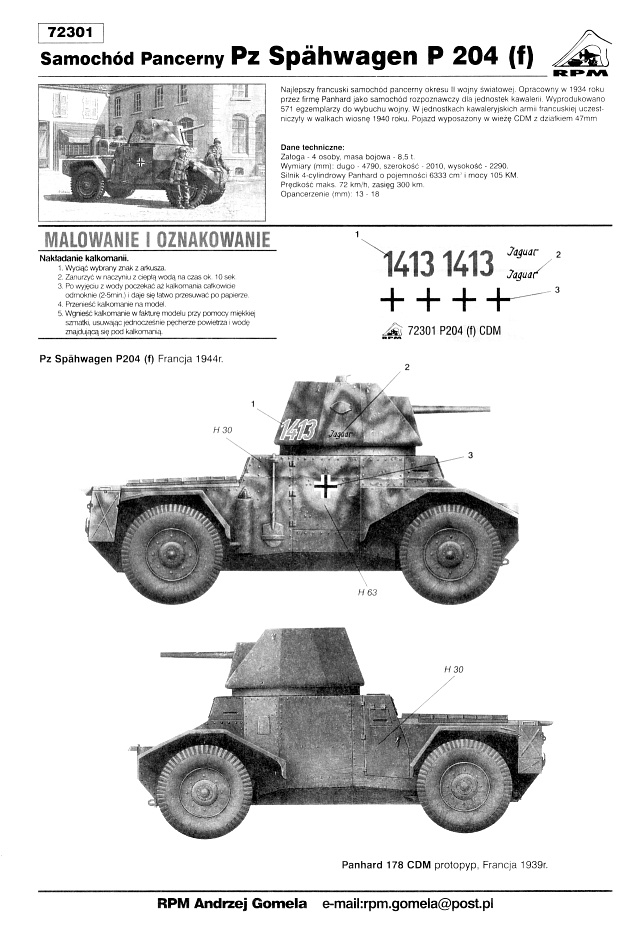
| PzSp P204(f) with CDM turret, kit no. 72301 |
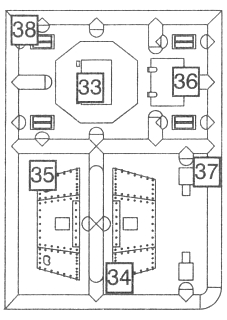
| Turret Sprue |
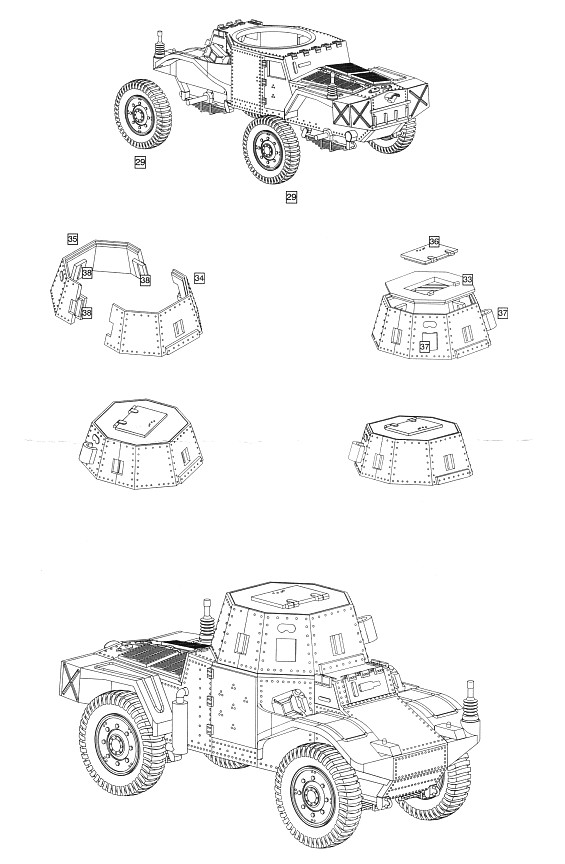
Kit Specific Instructions |
Marking Options |
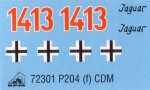
Decal Sheet |
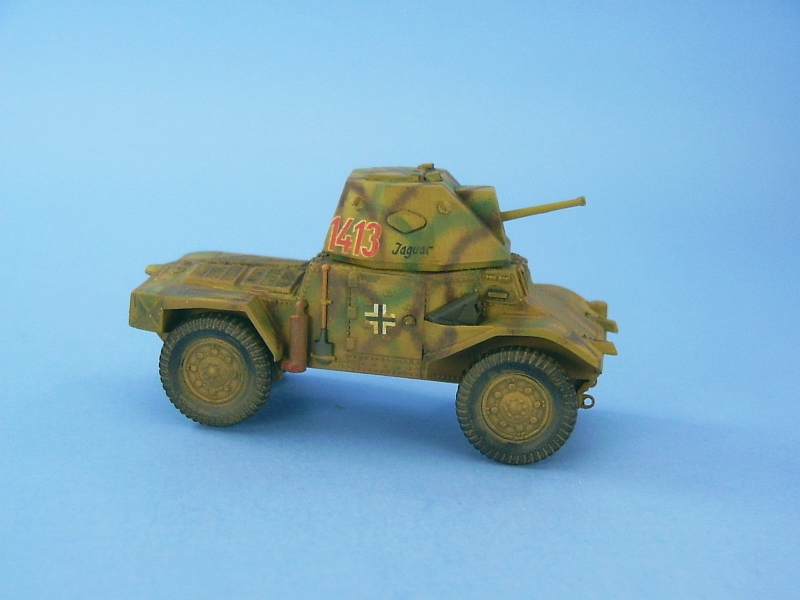
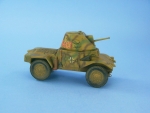
Model Picture |
 |
 |
 |
 |
 |
|
The turret sprue contains 14 parts.
Marking options:
- PzSp P204(f), red 1314 "Jaguar", France 1944, of an unidentified unit, in tan/green/brown camouflage.
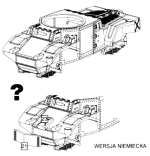
- P178 CDM, prototype, France 1939, in overall green camouflage.
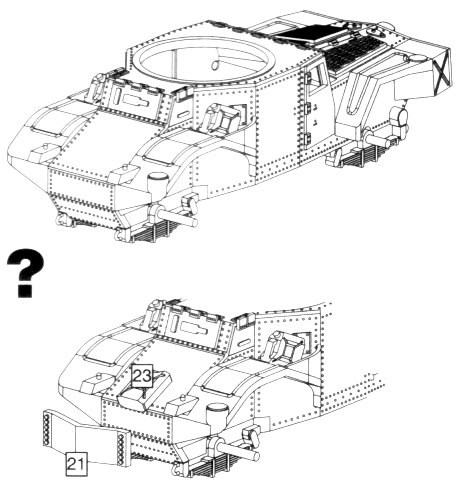
The CDM version does not come with the shovel shown on the German version as depicted on the box top so I added one from my spares box. I also took from my spares box a jerry can, drilled out the handle and placed it in the right front bin, plus I added a tarp which was placed in the left front bin.
According to the instructions the German Panhard CDM should have the additional spaced armour protection (part 21) mounted to the front but a picture of this particular SpPz P204(f) I found on the web does not show the extra armour, so it was left off.
|
|
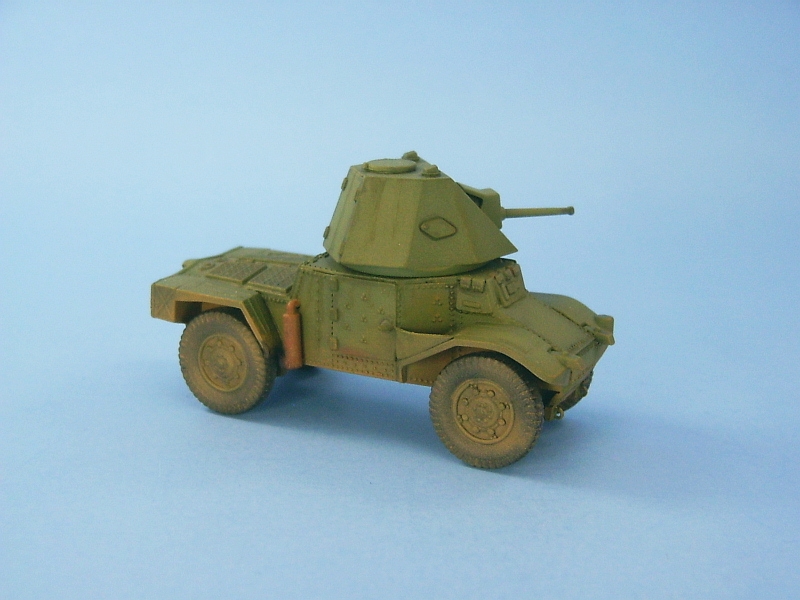
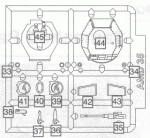
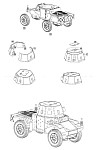
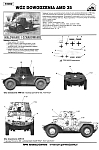
| AMD 35, kit no. 72302 |
| Turret Sprue |
Kit Specific Instructions |
Marking Options |
Decal Sheet |
Model Picture |
 |

 |
 |
 |
 |
|
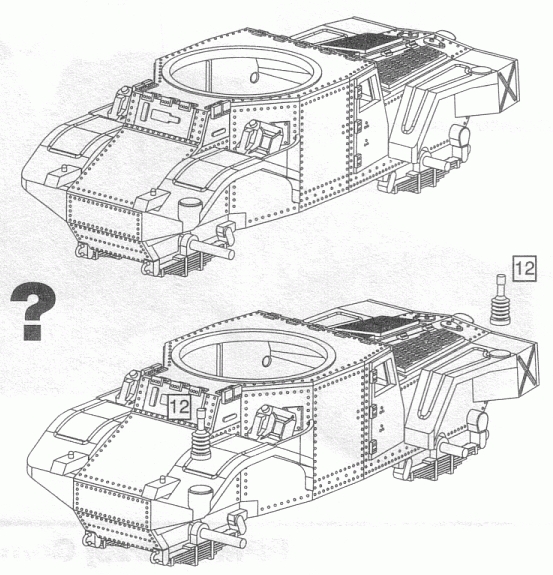
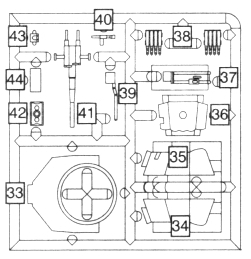
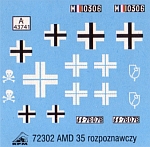
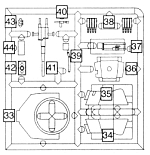
The turret sprue contains 10 parts.
Marking options:
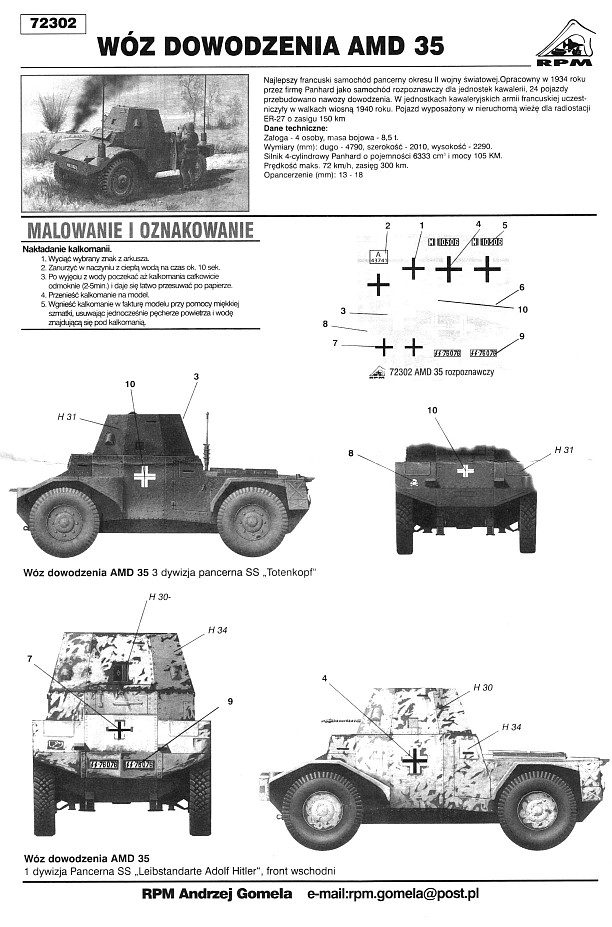
- Captured AMD 35 of the 3rd SS Panzer Division "Totenkopf" in overall dark grey camouflage.
- Plate number SS-76076 a captured AMD 35 of the 1st SS Panzer Division "Leibstandarte Adolf Hitler" in overall dark grey camouflage with winter white wash over top.
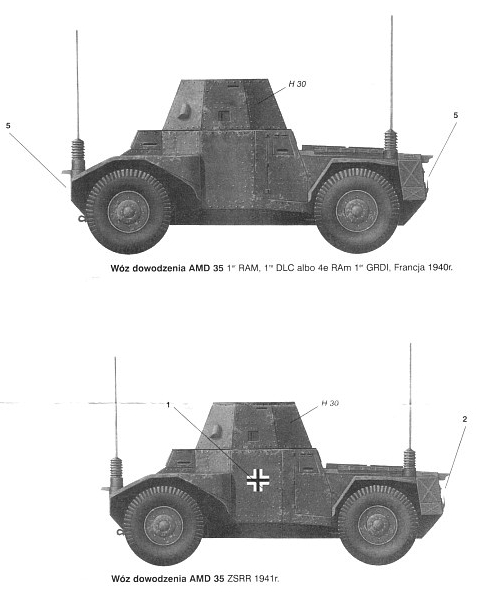
- Unidentied captured AMD 35, Russian 1941 in overall dark green camouflage.
- French AMD35, plate number M10306 of the 1er RAM, 1er DLC or 4eme RAM, 1er GRDI, France 1940 in overall dark green camouflage.
Of interest is the fact that the box top artwork does not portray any of the marking options on the decal sheet.
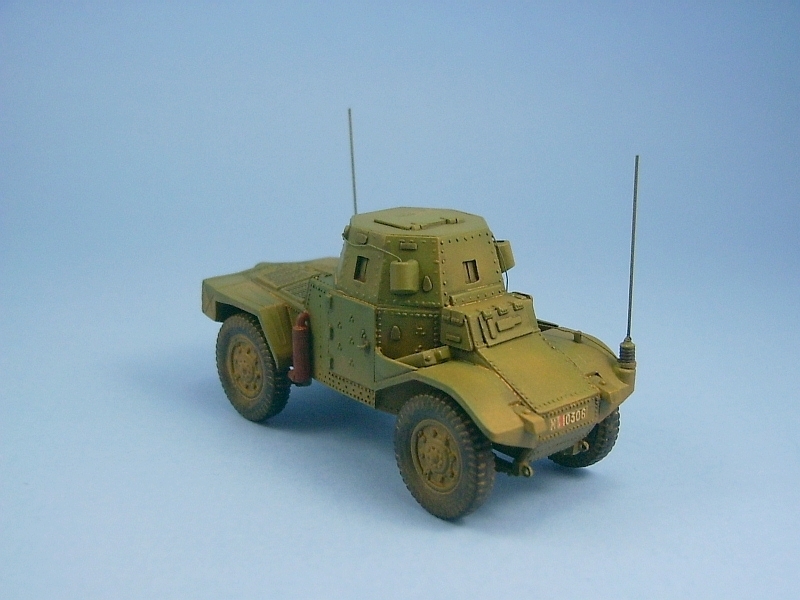
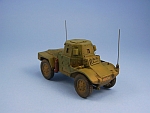
The turret is a bit of a disappointment. It should be festooned with rivets, but most are missing from the parts, so I added them which really improves
the look of the kit. The turret also doesn't fit well to the hull. There is some interference with the hinges for the rear visor which requires
their removal before the turret will sit flush. I tried to move the turret a bit forward to try and avoid the interference but it creates a slight
overhang over the front portion of the hull. The observation ports on the left and right side of the turret were a tad too small for the inserts (parts 38) and required a bit of a trim to the openings.
The mounts for the antennae (parts 12) are incorrect. I trimmed off the protrusion at their top and then drilled a hole to accept some piano
wire aerials. There is no mention of what length these should be so I just estimated their length based on some pictures found on the web. I also had to decide on whether or not the aerials
were the same length. The mount on the front fender sits a shade lower than the corresponding one on the rear fender. Aerials of the same length would make the rear one stand taller than the front. Being the symmetrical
kind of guy that I am, I made an executive decision and trimmed the rear antenna so that it's top was level with the front antenna.
I did a little extra detailing. I added missing pistol ports to the turret plus the two wires, one which runs from the left front antenna mount
to the protrusion on the turret and the other wire that runs from the right rear of the turret to the forward protrusion on the turret. Under the left front wire I placed an
insulator peg made from a section of plastic rod.
I also took from my spares box a jerry can (I don't really like the look of the kit's cans), drilled out the handle and placed it in the right front bin.
Of the six versions I built this one would have to rank as the most difficult.
|
|
| Panzer Spahwagen P204(f) mit 50mm KwK, kit no. 72303 |
| Turret Sprue |
Kit Specific Instructions |
Marking Options |
Decal Sheet |
Model Picture |
 |

 |
 |
 |
 |
|
The superstructure sprue contains 13 parts.
Marking options are for a single generic vehicle, camouflaged in overall tan with green & brown splotches, France 1943.
I found the instructions quite vague regarding the construction of the gun particularly the gun sight (part 40) and its location. I suspect that it's supposed to mount on the left hand circular end of the gun (part 44)
but it interfered with the gun shield so I mounted it to the rear of the circular end.
This version has a open fighting compartment and RPM do not provide any interior detail. Test fitting of parts revealed that the gun only partly blocks the interior from view, so I added a superficial interior,
blanking off part of the rear compartment and adding seats and steering wheels taken from the spares box.
The superstructure containing the gun is missing the U-shaped structure (vision slot?) on each side so I cut two from the hulls of some derelicts in the parts box and glued them to the superstructure.
Both the superstructure and the gun shield are missing their rivets. Being lazy I didn't bother trying to add them. I thinned the gun shield and the edges of the superstructure to make them look a bit closer to scale thickness.
The left side stowage box as depicted on the box top as well as in the web photograph of this vehicle is not included.
I scratch built one and also added a shovel from the spares box to the right side just behind the door as I did for RPM kit 72301.
According to the instructions you have the option of adding the additional spaced armour protection (part 21) mounted to the front but a picture of this particular SpPz P204(f) I found on the web does not show the extra armour, so it was left off.
|
|
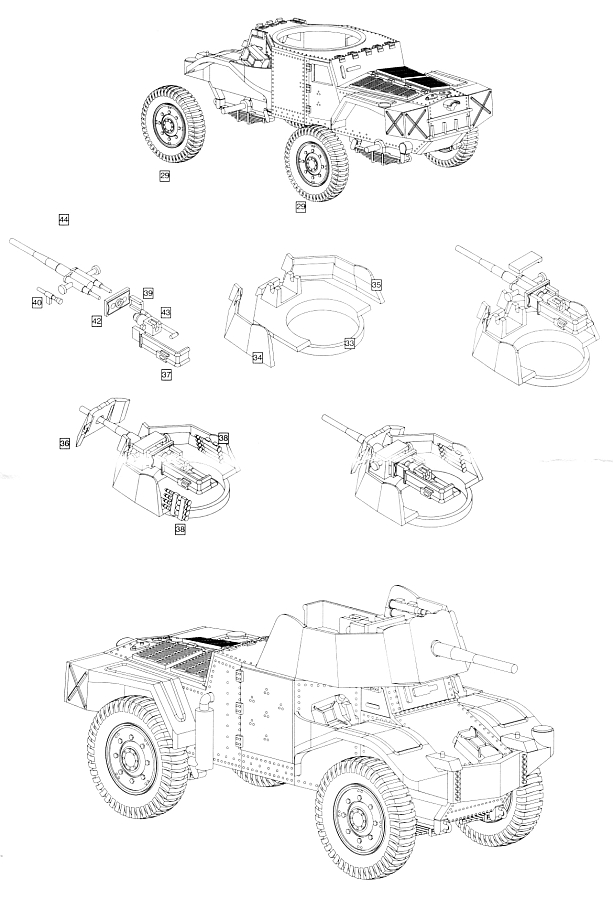
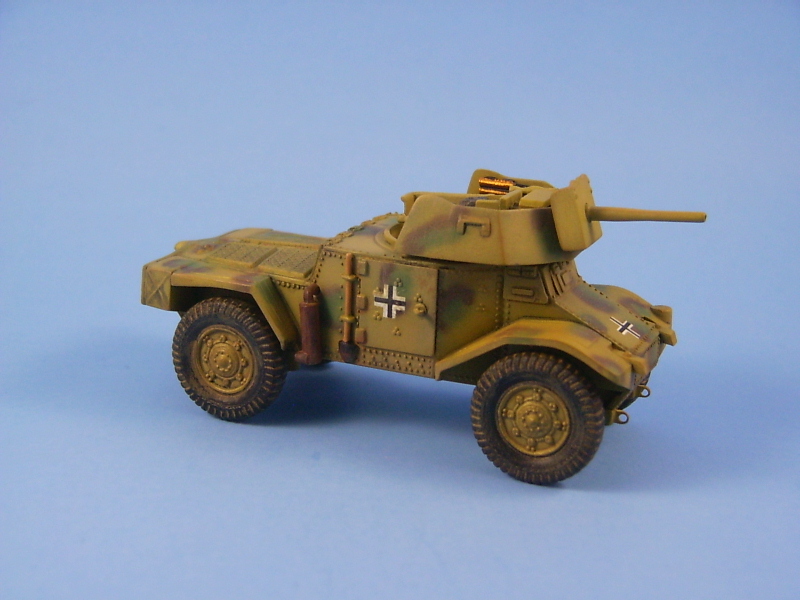
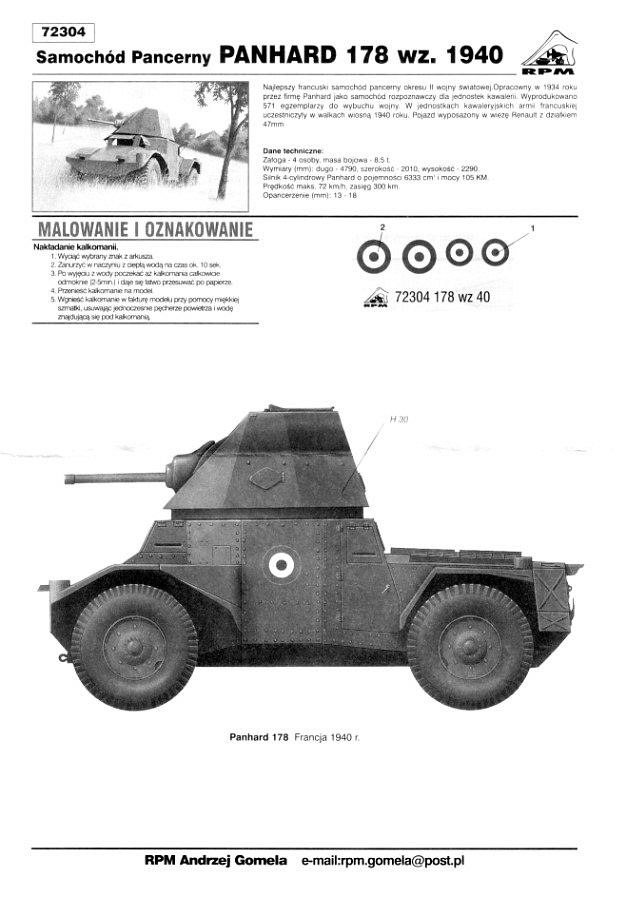
| Panhard 178 model 1940, kit no. 72304 |
| Turret Sprue |
Kit Specific Instructions |
Marking Options |
Decal Sheet |
Model Picture |
 |
 |
 |
 |
 |
|
The turret sprue contains 17 parts.
There is only one marking option, that for the prototype vehicle in overall green camouflage, France 1940.
I added the two openings in the gun mantlet just above the barrel.
I found a couple of pictures of this particular vehicle on the web. Unfortunately both pictures show the right side of the armoured car with the door open so it wasn't possible to see if the French roundel markings were actually on the vehicle. I decided to be lazy and I did not use them on the kit. Besides these decals were the worst of the lot with regards to register and I didn't have any suitable replacements.
|
|
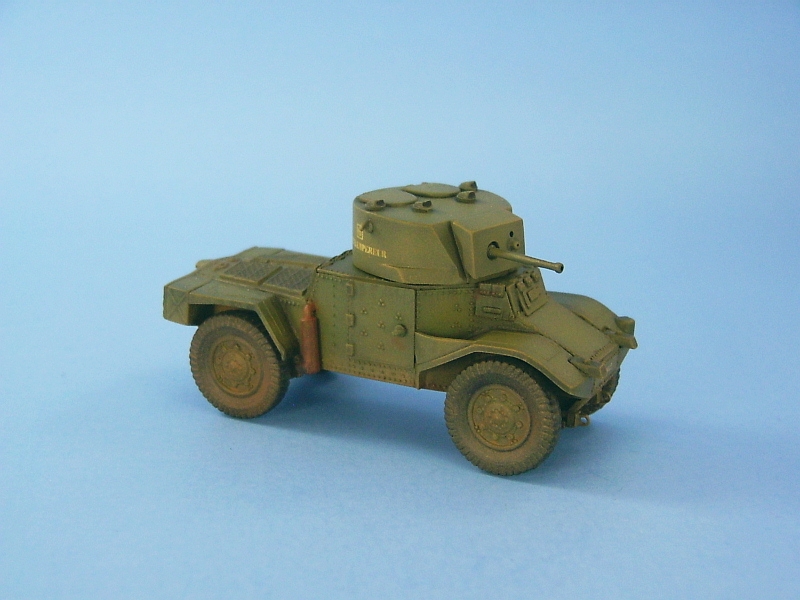
| Panhard 178B, kit no. 72306 |
| Turret Sprue |
Kit Specific Instructions |
Marking Options |
Decal Sheet |
Model Picture |
 |
 |
 |
 |
 |
|
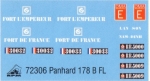
The turret sprue contains 18 parts.
Marking options:
- Vehicle no. RR5009, "Lan Son", unit is unidentified, in overall green camouflage, Indo-China circa 1946-1949.
- Vehicle no. RR5000, "Nam-Dinh", unit is unidentified, in overall green camouflage, Indo-China circa 1946-1949.
- Vehicle no. 30032, "Fort L'Empereur", 1er RCA, northern Africa, in overall green camouflage.
- Vehicle no. 30033, "Fort De France", 1er RCA, northern Africa, in overall green camouflage.
The instructions are vague on the decal options for the Indo-China vehicles. I think I have the names and the plate numbers matched correctly in the list but I'm not 100 percent sure.
Addendum: February 12, 2022
An email from Will Alcott points out some serious errors with the 178B variant:
"looks like RPM kind of pooched the turret on the 178B - hatches in the wrong place, wrong slope on the forward roof,
missing episcopes, wrong number of lifting hooks, missing offset in the gun mount...". So, after a quick one over of the built kit, it's apparent that
when I first wrote this review, over 10 years ago, my research was not very rigorous, as I overlooked a host of obvious errors on the 178B turret.
So, let's take a quick look at what Will is talking about.
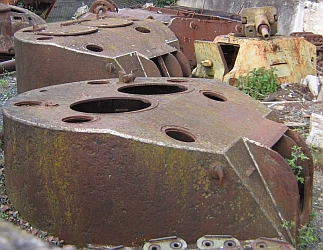
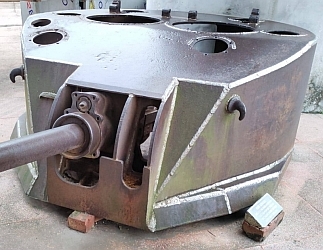
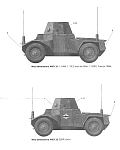
Above, two shots of real turrets found at Saumur.
Notice the slope on the roof just behind the mantlet,
six episcope openings and four lifting hooks. |
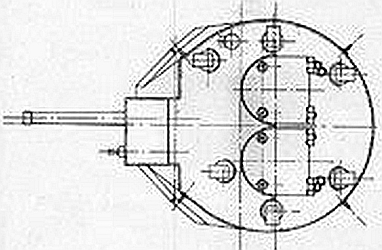
Drawing of the turret's top, showing the same features
as found on the Saumur turrets. Also note the angled
slices beside the mantlet are not equally sized
and offset
the mantlet to the left of the center line. |
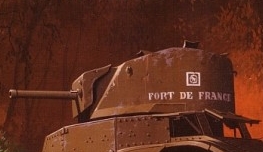

Box top and painting/marking guide from the
RPM kit. Notice they both show the turret
slopes behind the gun mantlet and
the episcopes at the rear of the turret. |
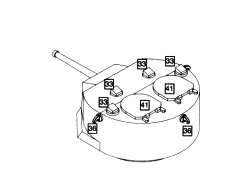
RPM's instructions show only four episcopes.
The two rear scopes are missing. Also there
are just three lift hooks vs. the proper four.
You can also see a line across the turret
that is missing in the plastic and probably is
where the slope should start that was missed
in the design process of the kit. |
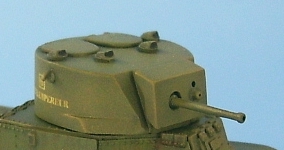
The kit's turret on my completed model. No
slope behind the mantlet, nor any offset to
the mantlet, and only four episcopes. The
mantlet isn't correct too, seeing as it is the
same height as the front of the turret. |
|
All in all, four of these five kits really aren't that bad, so don't be put off by my comments. The 178B is the only one so far that
has any severe problems. I only point out some of the issues as a warning to other builders so they know what to expect when building these kits. Even
though they can not be classed with the big boys like Dragon and Revell, I can recommend these RPM kits to anyone who wants to build something a bit
different and doesn't mind the extra work to put these armoured cars together.
Review samples purchased by the author.
|