![]()
 |
T-26 Model 1933 Light Tank w/PART Photoetched Tracks & ARMO 45mm Gun Barrel |
|||
| Mirage Kit #72609; PART Kit #P72-107; ARMO Kit #72710 | Review by Doug Chaltry | |||
 |
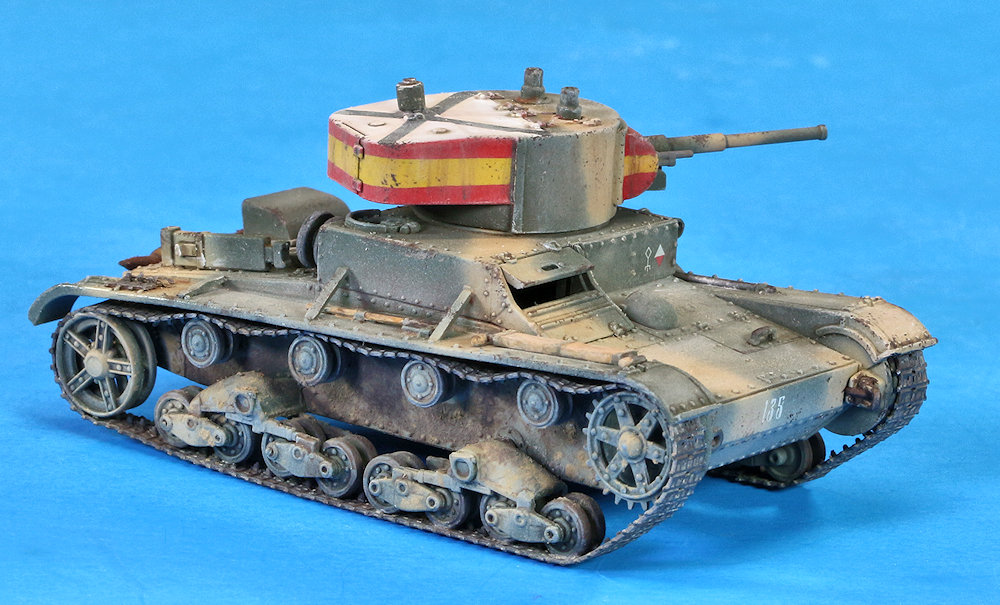
| When
you look at that picture above, does something look a
little... off ... about it to you? Well, you're not
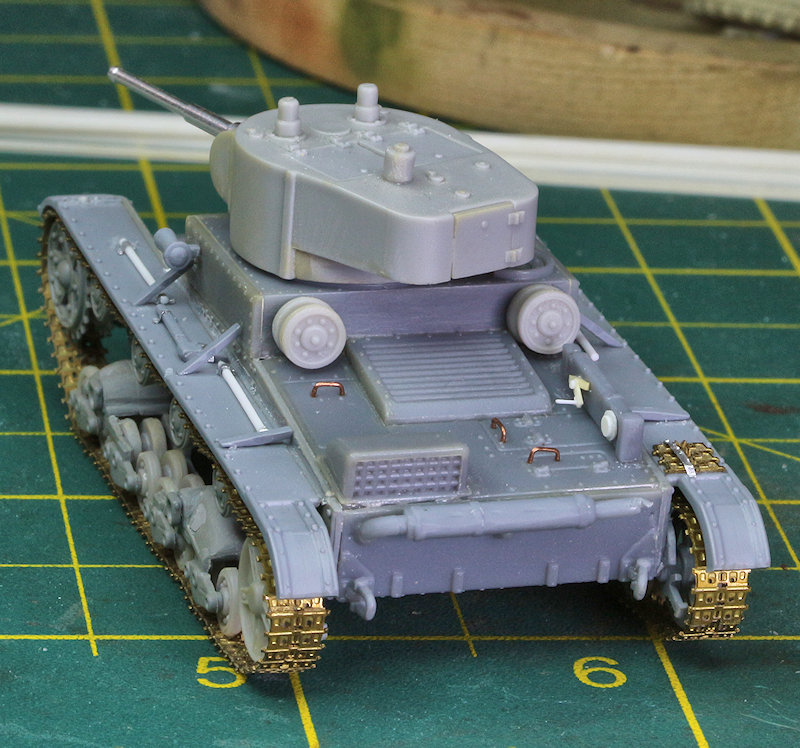
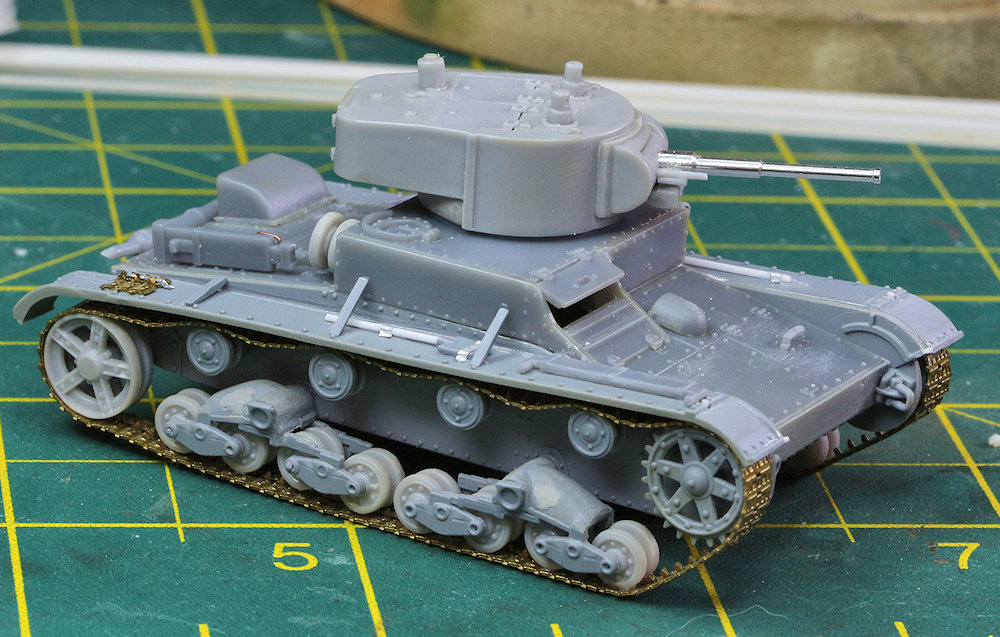
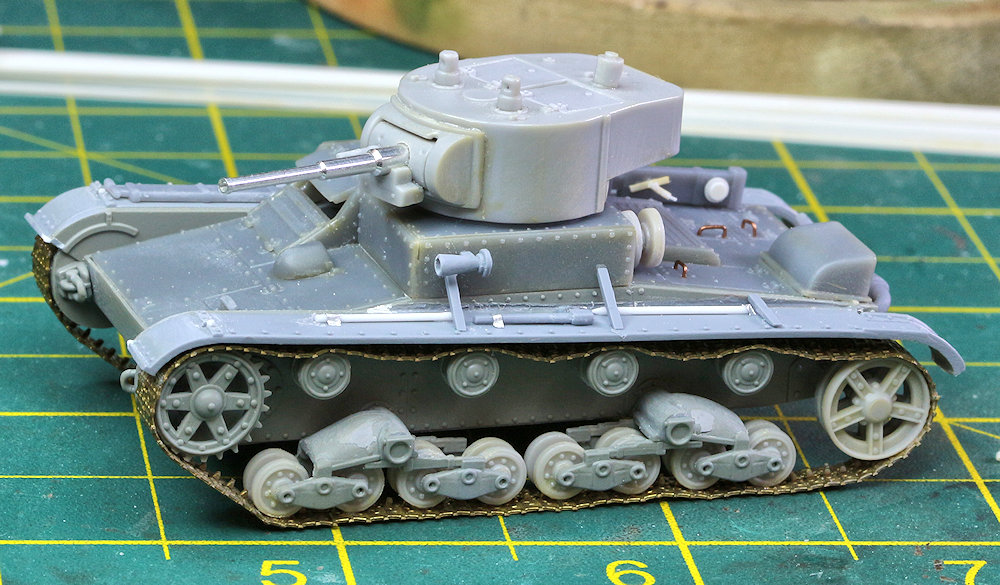
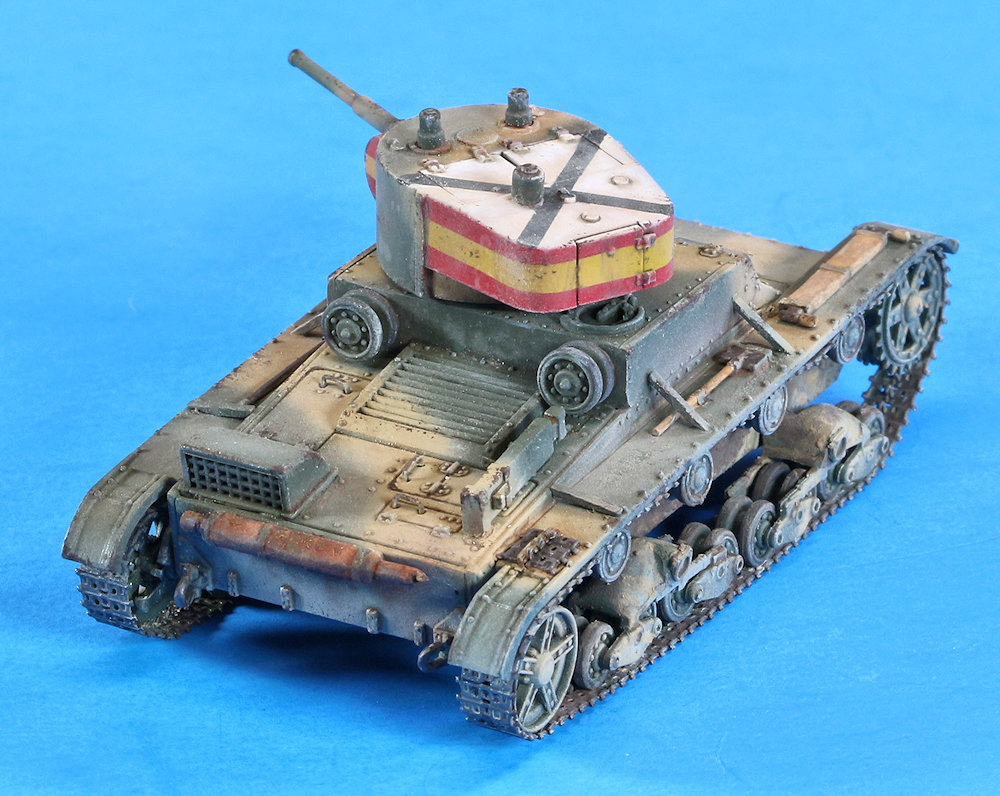
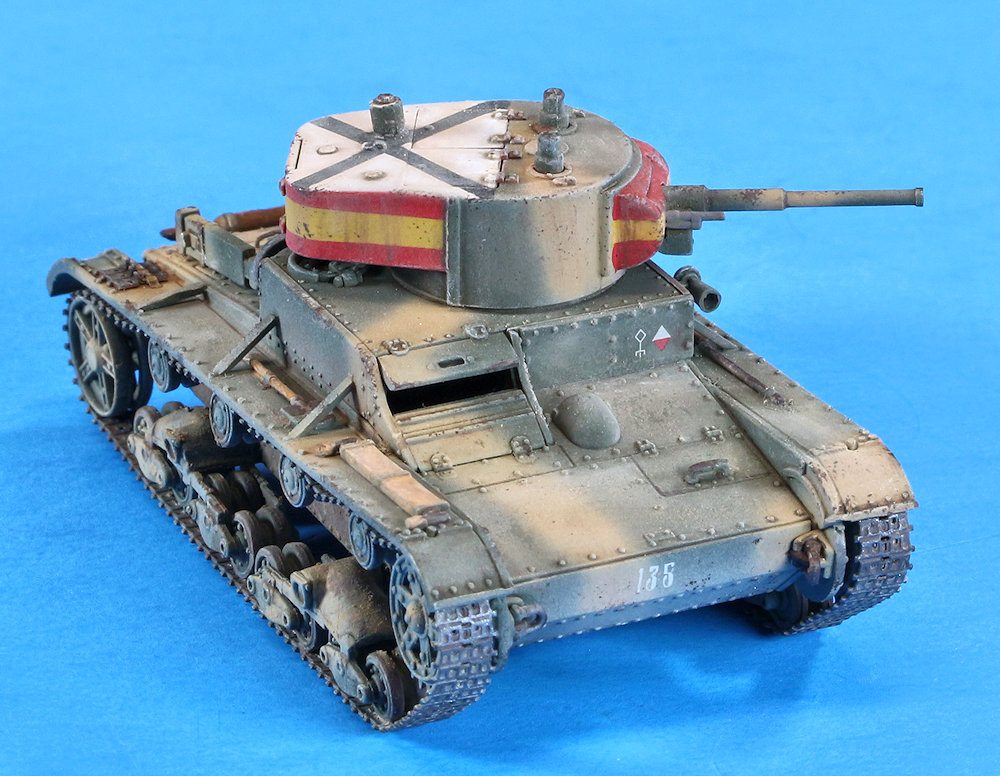
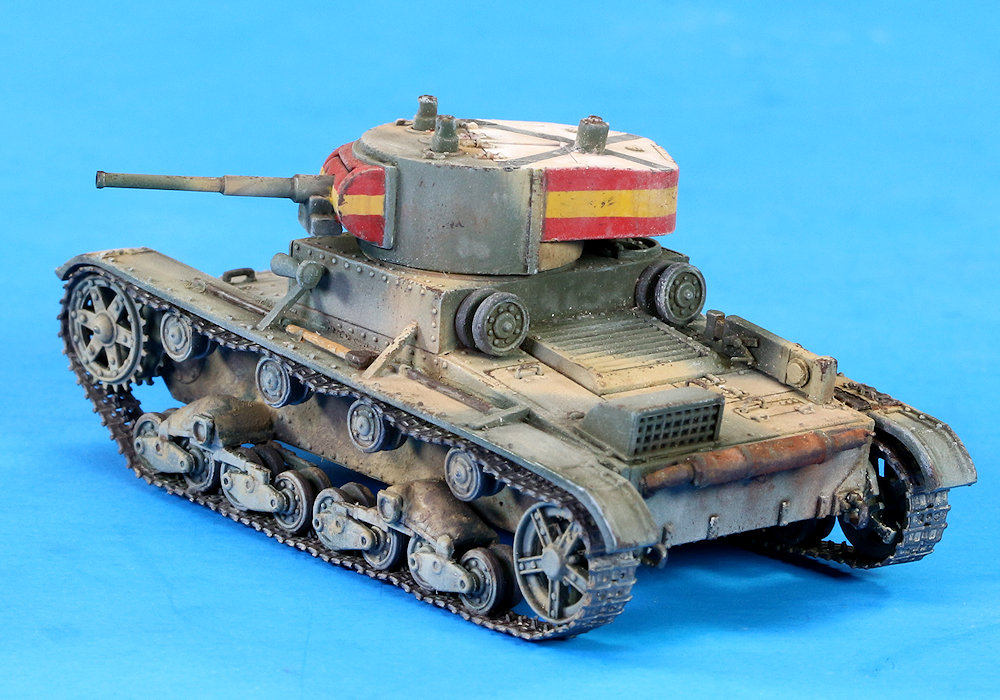
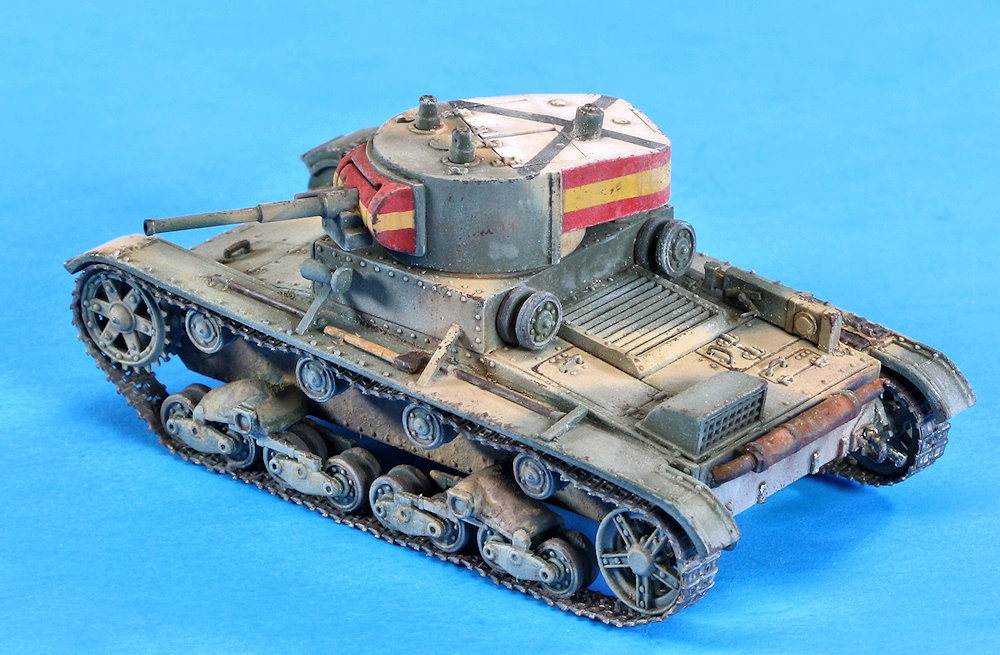
wrong. More about that in a bit. Continuing on my quest to eliminate my horrendous collection of shelf queens, this time I returned to a model that I started building around 15 years ago. I've always liked Mirage kits; they look especially good in the box. Granted, they are a little more challenging to build than they first appear, but they have very fine detail, and the scale accuracy and parts fit is generally pretty good. One of the things that I had always found appealing is how they release complete series of specific kinds of tanks by re-using parts from prior versions, in this case, the Soviet T-26 light tank. But this particular model has some errors in details that illustrate how one must be careful in that approach to model making. I have seen several different approaches to labeling the developmental sequence of T-26 versions; in English-language books, they are usually denoted with a letter such as T-26B, T-26C, etc. I have also seen a couple variations of using the year of production (or design?) as the identifier, which is how I believe the Soviets named them. For my own research, I followed the labeling methodology in the Wydawnictwo Militaria series of monographs. According to that reference source, there were major design changes (for the single turret versions of the T-26) in 1933, 1934, 1935, 1936/37, 1938 and 1940. This kit is labeled the 1933 version, but the kit details do not completely match that version. In fact, the majority of the kit appears to be of the 1935 version, considering the layout of the various engine and transmission access hatches. Stowage of tools on the hull and fenders varied between versions. At the time I was building the kit, I was proceeding under the assumption that it should be a Model 1934, but with some errors from using the 1935 hull, which I was willing to ignore, and I thus replicated the tool layout of the Model 1934. But in retrospect, as I am writing this, I think that this should just straight up be a Model 1935. One key feature to leave off for both the 1934 and 1935 Models are the fender storage bins (kit parts T34 & T35); these bins did not make their appearance until the Model 1936/37, and there are a great many other changes that were made with that version, so this is definitely not a Mod 1936/37. The most important thing to remember is to consult photographs. I have seen several photos of Spanish T-26s of these earlier versions with no storage bins (in addition to later Models as well). The following photos illustrate the modifications I made to the tool stowage. You can also see the metal 45mm gun barrel I used from ARMO, and the photoetched tracks from PART. Also apparent in these photos is how I need to be more careful with bending new hatch handles; the ones I did are lopsided.
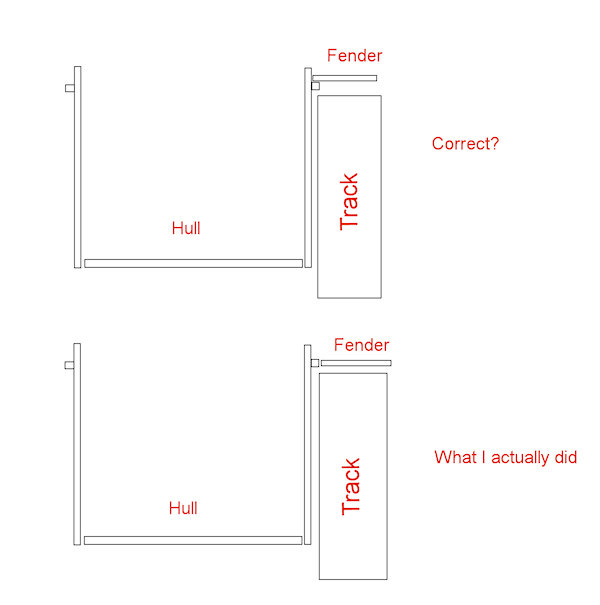
The tracks really are not too bad. When I first got them and looked at them in their packaging, I was thrilled. The detail on these things is amazing compared to the plastic tracks included in most kits. But when I started to build them, I dampened my enthusiasm for them, as they are really quite thin, even with two layers of folded brass. This is one of those items that I think don't really live up to initial expectations. However... after painting them, I have once again flip-flopped, and I think they actually look fairly decent. Yes, they still are a little thin, particularly the outside surface which has very shallow detail in the tread pattern. But the paint and weathering pretty well hide that shortcoming, so I wouldn't hesitate to use these again in the future (which I pretty much have to, considering that I have another three sets of them in my collection...). Anyway, back to my initial point about something being "off" with the looks of the model. I wasn't talking about all of the detail considerations discussed above. No, it's the fenders. Take a look at the following drawing, which illustrates how I attached the fenders to the hull:
Looking at scale plans of this tank, the tracks should be centered under the fenders. From the top view, the only part of the vehicle's suspension that is visible outside the fenders should be the hubs from the wheel's suspension units, which are also the widest part of the vehicle. When measuring the scale of this kit, it indeed scales out perfectly to 1/72nd scale wide, when measuring from these outermost hubs. So there is something wrong with the design of the model, because if you attach the fenders to the hull as you are supposed to, as shown in the upper part of the above drawing, then the fenders fail to completely cover the tracks. So I decided to glue the fenders to the outside of the locating ridge on the side of the hull instead of on top of it as intended. This way the tracks are centered under the fender as they are supposed to be. But in consequence, the overall appearance of the tank looks more squat and wider than it should. The next T-26 I build will follow the instructions; I think that having the tracks stick out from under the fenders a little bit will look better than what I have done here. For painting and finishing, I used my now-standard paints from ATOM, and various weathering products from AMMO, Vallejo and AK. I have always lauded Mirage for their incredibly thin decals; the carrier film absolutely disappears once covered with a clear coat. However, this is the second model of theirs that I built in which many of the decals shattered while trying to apply them. In this case, the markings of the front of the tank went on well, but the identifying cross on the turret roof did not. I ended up having to mask and paint that marking, which was probably for the best anyway. I didn't even try to use the yellow stripe decals for the vivid turret markings; that was masked as well. It was only after looking at these photos of the completed model that I realized I forgot to finish painting the coaxial machinegun! Screw it; I'm not going through the effort of taking and editing new photos. I'll take care of the gun the next time I'm at my workbench.
My sincere thanks to Rafal Niedzielski for sending this kit to me, so many years ago. |
| Back
to Mirage Kit List Back to PART Accessories List Back to ARMO Accessories List |
Back to Construction Reviews Back to Home Page |
| Article Last Updated: 26 January 2026 |