|
Miniart
|
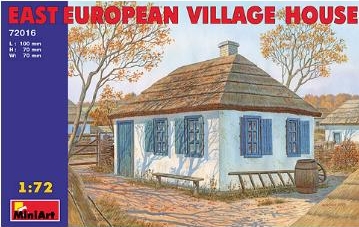
East European Village House |
|||
| Kit #: 72016 | Review by Jeff Hamblen - jhamblen(at)nkjo.opole.pl | |||
|
Miniart
|
East European Village House |
|||
| Kit #: 72016 | Review by Jeff Hamblen - jhamblen(at)nkjo.opole.pl | |||
 |
|
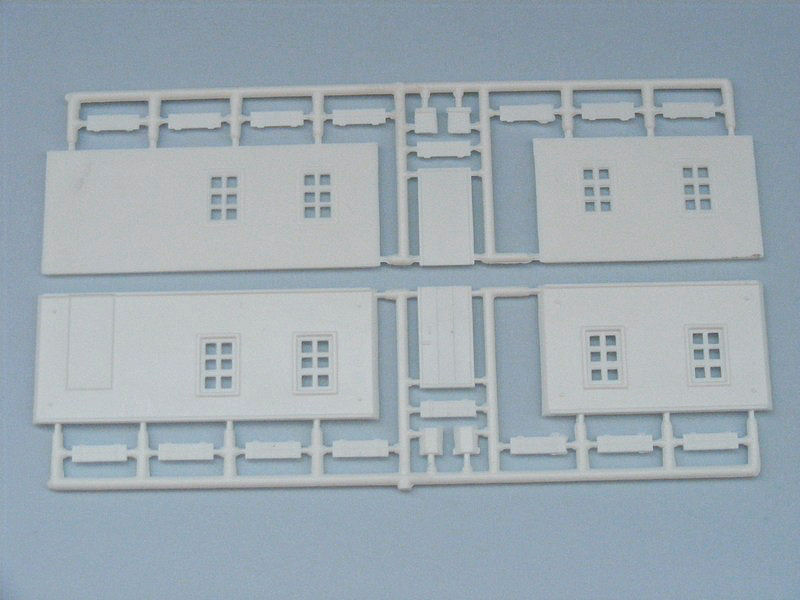
I was pretty happy when I heard that Miniart was going to start making 1/72 buildings and accessories for dioramas. HO Scale buildings have always looked too small and out of proportion. TM and Remi from Poland both make vacuformed buildings and ruins but the details were never too sharp and the assembly wasn't the easiest. Miniart's 1/35 scale buildings combine vacuform with injection-molded details, and they have continued this in their 1/72 series.
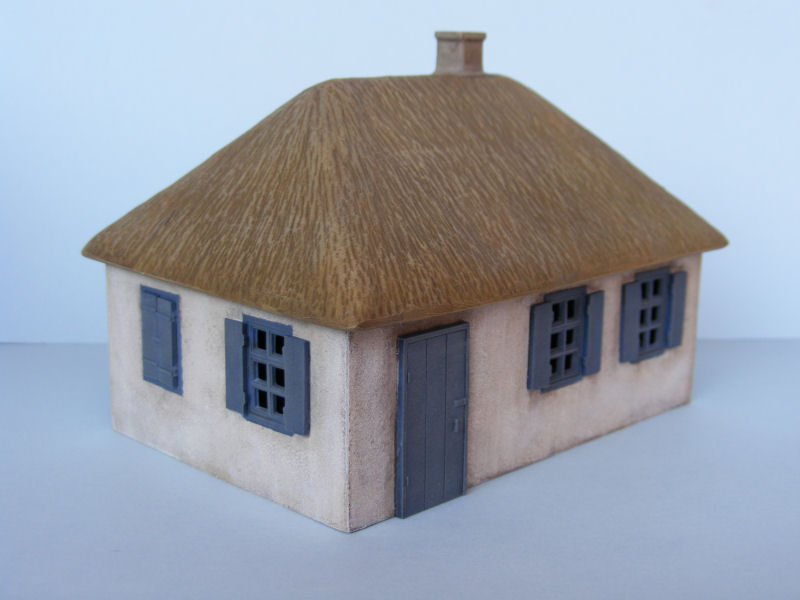
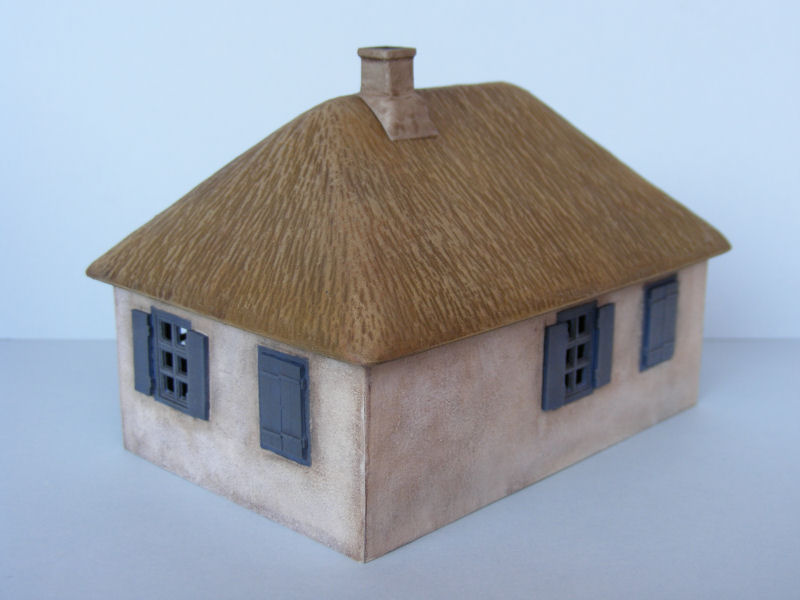
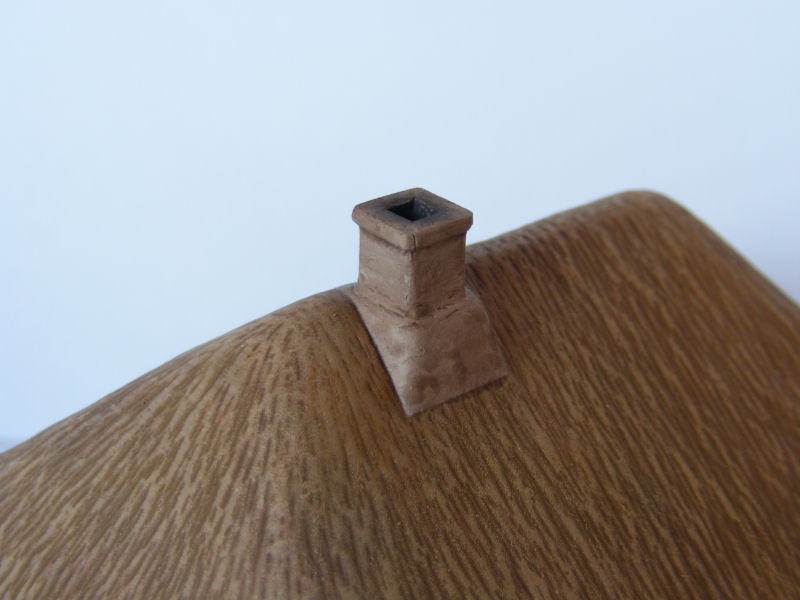
After letting everything dry overnight, I painted the interior of the building and roof with flat black. It wouldn't be too hard to scratchbuild an interior and since the roof is separate, it would also be easy to show off. Before painting the exterior, I glued the chimney to the roof and filled the small gaps with Mr. Dissolved Putty from Gunze. I used several shades of white and off-white on the walls in very light coats to vary the tone and then washed the model with some Citadel Wash - Devlan Mud. Finally I drybrushed a little flat white to bring out the detail of the stucco. Then I masked the window frames and painted them Citadel Shadow Grey which is more blue than grey. After a quick wash, I drybrushed some various shades of grey on the shutters and frames for weathering. The exterior of the shutters has better detail, so I glued some open and some closed for variety. For the roof, I used different colors on top of a Gunze Khaki basecoat. I suppose if someone was ambitious, you could scratch a roof from paint bristles, but the texture of the vacu roof is fine for my tastes.
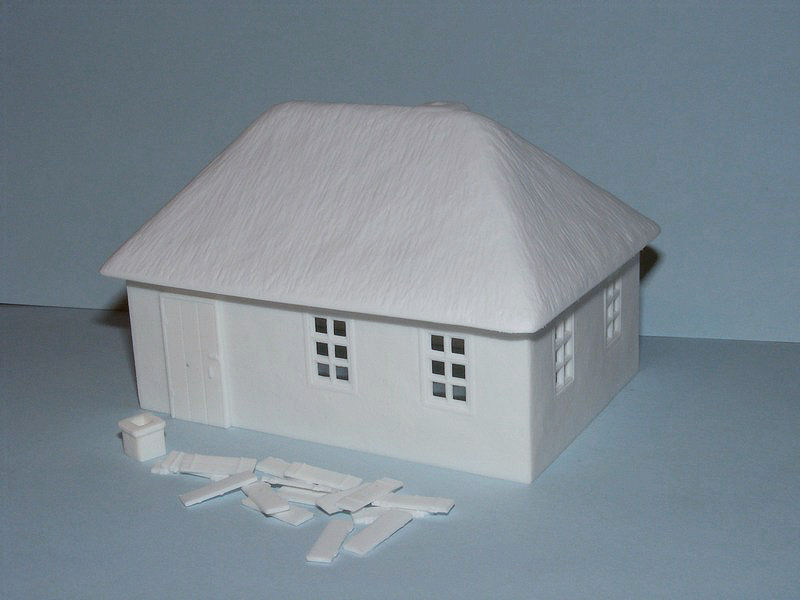
The built model measures about 60mm by 90mm and with the chimney, about 70mm tall. I haven't glued the roof yet or added clear styrene for the windows. I'll wait until I have a clearer idea of what the diorama will look like. Simple additions could be some flower boxes under the windows and a bench next to the front door. By itself, it looks fine but I think the extras could add a touch of character. According to Milan's report from Nuremberg, Miniart also plans to release a companion barn for this house plus some city buildings and ruins. Hopefully they will sell well and Miniart will release some smaller versions of their 1/35 kits. |
| Back to Miniart Kit List | Back to Construction Reviews |
Article Last Updated: 10 May 2009 |
Back to Home Page |