|
Sd.Kfz.222 | |||
| Kit # 7251 | Review by Rob Haelterman - heman_148(at)hotmail.com | |||
|
Sd.Kfz.222 | |||
| Kit # 7251 | Review by Rob Haelterman - heman_148(at)hotmail.com | |||
 |
| 1. Packaging
Flimsy side opening cardboard box with individual zipper-type plastic bags (organised per subassembly).
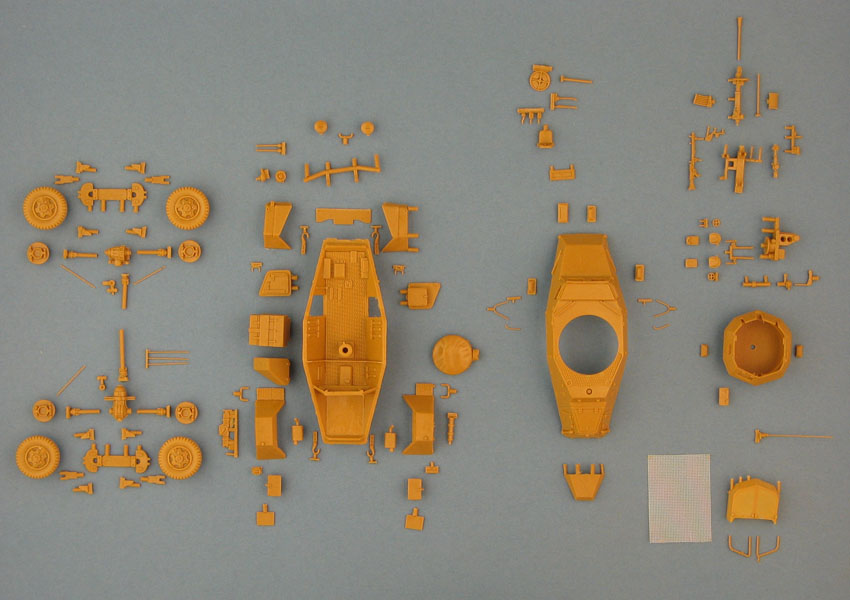
2. Type of kit Resin kit with interior, but no decals
or painting options. Tulle provided for turret mesh. 3. Quality of casting The casting quality is very good, with no air bubbles, warpage or other annoying discrepancies. Only one small, fragile part was broken on the sprues. The detail is quite crisp (better than the ICM kit). Most parts come with quite big molding 'carrots', which are sometimes hard to carve away, especially on the insides of the wheels, which require a major effort.
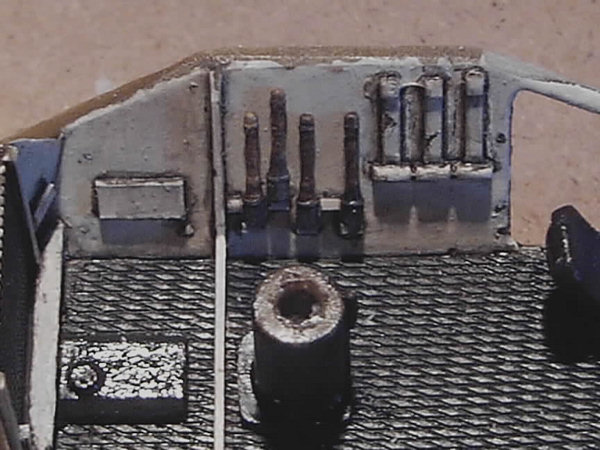
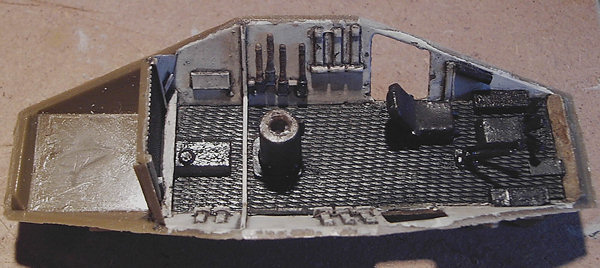
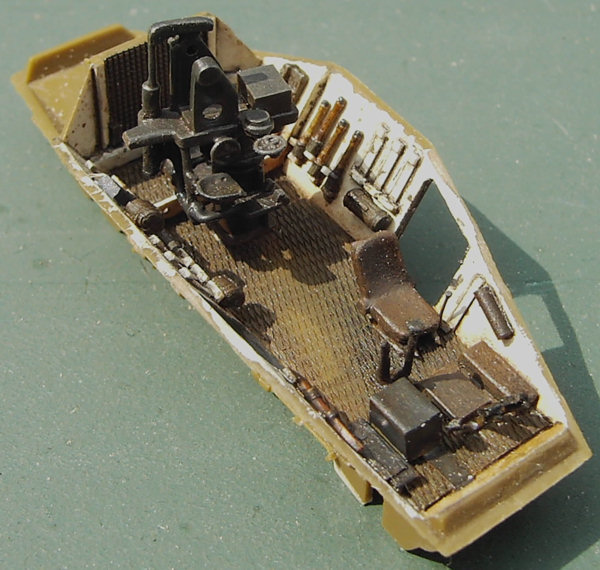
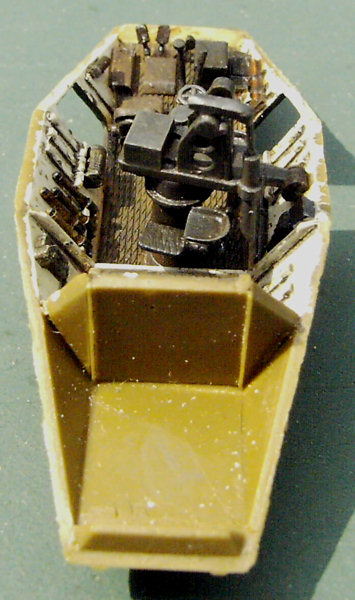
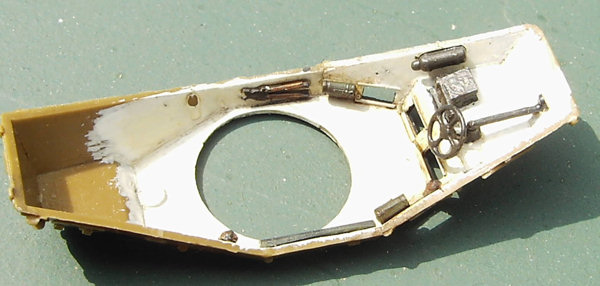
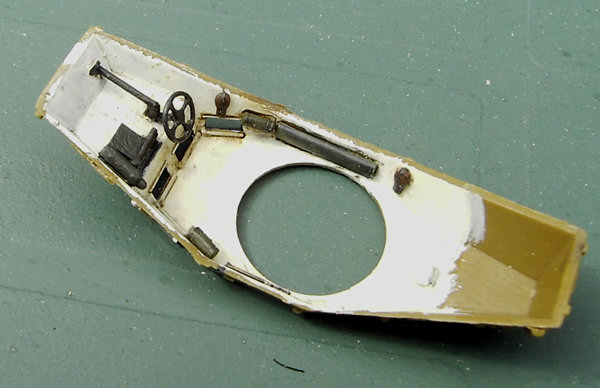
This resin kit has a lot more detail than ICM's to the point that it is somewhat over-engineered (especially the chassis). It is also more expensive, but you get a LOT of parts for your money. The interior is nicely done and well catered for, but still lacks some items, like personal gear (haversacks, gas mask canisters,…), MP40s, pioneer tools. If you really want to add some detail, you could also add the frame to the back of the driver's seat, which should be a bit more reclined as well.
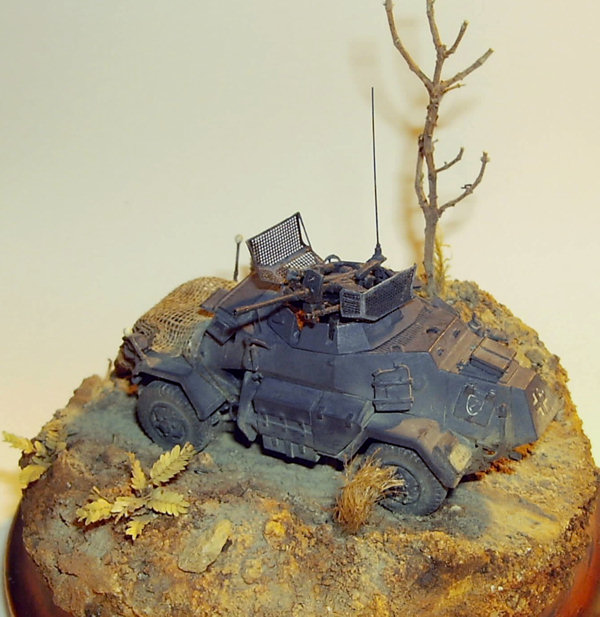
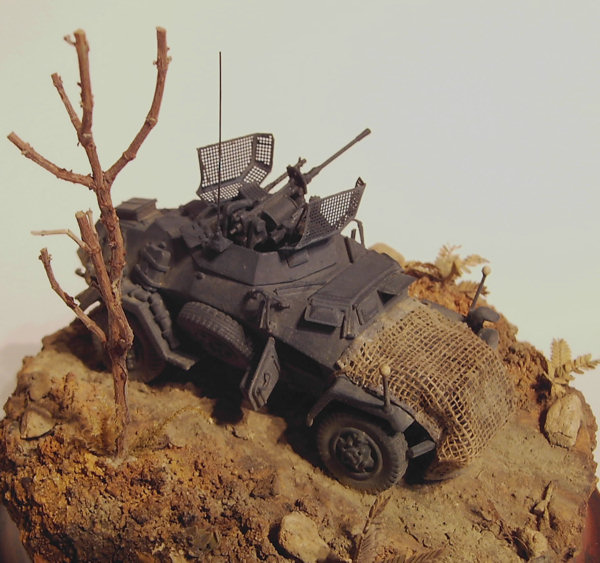
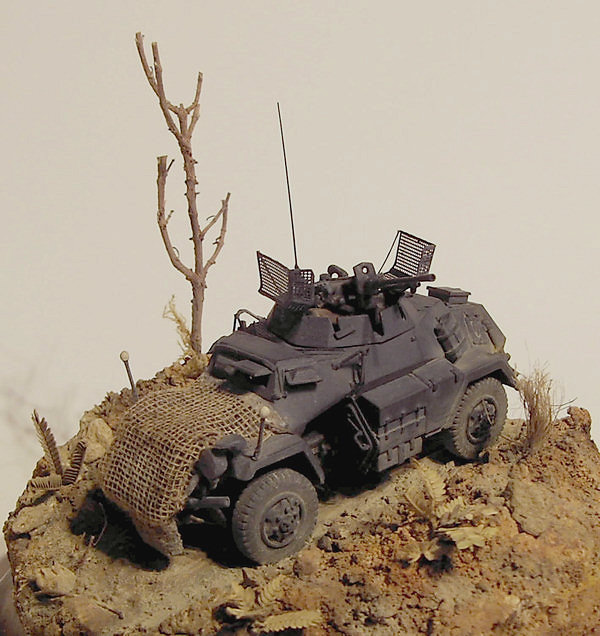
The gun mount is correct, and has nice detail, but the spent cartridge bags are missing. A very nice thing about this kit is that it allows you to open most hatches and visors. Pictures on the boxtop show an alternative type of hubcaps (with recesses and without hubcaps protectors), that I associate with LSSAH vehicles in the Balkan campaign [13]. I found the wheels of MarS' Sd.Kfz. 223 in my example (standard type, with integrally molded protectors). Stan (MarS) was so kind to send me a new set. The grating behind the turret is solid, but with texture added. It would be quite difficult to create a see-through effect without major surgery, but it is convincing enough with a suitable wash. The turret mesh frame is of the higher type, and is a weak part of the kit. The frame is quite chunky, and you are supposed to make the mesh itself from a piece of tulle that is included with the kit. I found the latter quite difficult to cut, glue and paint, but managed to a certain degree. You will need to add the support rods if you leave the mesh open. You get footsteps under the rear fender, these were (apparently) only fitted to late war vehicles (judging from the available photographs. The typical small plate on the turret in front of the optics is not provided, but is easy to make from some plasticard. Mars gives you turn indicators with cage and width indicators. The latter are quite thick for this scale. (More about them later.) The worst fit I encountered in this kit were the exhaust, and I ended up making new tubing and carving cut-outs in the rear fenders.
4. Version and accuracy
Looking at the evolution of the Sd.Kfz.222, this kit has a lot of the distinguishing features of a 5. Series vehicle:
Features that it does not, but should have are
The rear license plates are of the square (i.e. early) type, which I haven't seen on later vehicles. It is easy to modify. So, the kit is basically a mix of features. Most of the features that should be altered to make it into a correct 5. Serie vehicle should be rather easy to do. Unfortunately, I didn't have all the necessary information at hand at the time of construction. Besides, the Balkan campaign setting I chose is chronologically rather way off, as 5. Serie vehicles were produced from May 1942 to June 1943. According to my references, Mars got
most angles in the nose region wrong, which results in a nose that
is too wide and too shallow. It is very noticeable when put next to
the ICM kit. As MarS points in the direction of a LSSAH vehicle (if you get the hubcaps on the boxtop and if you make abstraction of the 5.Serie vehicle it is), you can always scratchbuild the added spaced armor on the nose as done by this unit and hide most of the nose. You can even drape a camouflage net over it, as was sometimes done. In this way it becomes harder to tell that this vehicle would need a nose-job. The wheels are a lot better detailed than those from ICM, but they are either too big, or there is something wrong with the dimensions of the sides of the hull. This means that the spare wheel looks quite big when mounted on the sides. The wooden block for the jack and the spade are missing. The box on the top of the engine compartment is missing, which at this time was an almost universally fitted item.
5. Instruction sheet: The instructions consist of hand drawn "exploded" sketches, which are not always 100% clear. The lack of numbering on the kit parts (which are very numerous) does not make it any easier. Because the parts are packaged according to their subassembly you can eventually figure out where everything goes. 6. Decals and painting options: None. As noted above, you would best look for the "Dietrich" (key symbol) badge and make this a LSSAH vehicle in the Balkans. Colors would be Panzergrau overall. 7. General Impression: Until recently this was by far the best Sd.Kfz.222 in this scale. (Ok, I can't compare with the Al.by kit, which should be very nice too.) It is not cheap, takes some care and attention to build and has a poor turret mesh and nose shape. But at least you can build it with all doors open ! The wheels are also very nicely detailed with a nice hub and thread pattern. Then the ICM kit came around. It is
dimensionally more accurate, a breeze to build, relatively cheap,
but overly simplified in the turret area. It has no interior detail
and all hatches are closed; the wheel pattern is a bit simplified;
the turret mesh is nice; you get an abundant amount of decals (including
ones for LSSAH !). Detail is less crisp than the Mars kit. So, at this point it all depended on your personal taste, requirements and budget. For a while we also had the Goffy interior set, which brings the ICM kit a long way: you have a good interior, open doors (but closed visors), but still a poor turret and wheels. The total retail price of ICM + Goffy is about the same as the MarS kit. As of 2012, it seems that Goffy is no longer in business and this set is no longer available. I guess we still do not have the definite 222, but if you want a cheap, easy to build, accurate 222 with all hatches closed and plan to put figures in the turret, I would opt for the ICM (or Dragon) kit. (A lot depends on the retail price of the latter. I've seen ICM kits in a very wide range of prices.) If you want a one stop, detailed 222 with all hatches open, go for the Mars kit, and perhaps add a better turret mesh and nose armor, and tweak it here and there.
Pictures above:
8. References [1] Samochody pancerne 4x4, J. Ledwoch, Militaria. [2] Myssing-Lynx website (http://www.missing-lynx.com). Discussions on forum, mainly Robert Johnson, 27/02/05 [3] AFV Interior, http://afvinteriors.hobbyvista.com/ [4] DAK SdKfz 222 http://members.verizon.net/~blu.skink/blueskink/222_interior/222_interior.htm [5] Littlefield collection pictures, http://russiannavy.net/photos/littlefield (/Sept_2004/Sdkfz222) [6] Petr Vanek, private communication. [7] SS Armor, R.C. Stern, Squadron/Signal [8] Panzer Colors I, B. Culver & B. Murphy, Squadron/Signal [9] Panzer Colors II, B. Culver, Squadron/Signal [10] Panzer Colors III, B. Culver, Squadron/Signal [11] Gepanzerte Radfahrzuege, W.J. Spielberger, Militärfahrzeuge 4, Motorbuch Verlag [12] Panzer Tracts N°13, Panzerspaehwaegen, T.L.Jentz, Panzer Tracts [13] Panzerspähwagen, Ryton [14] Steelmasters 53, “Les automitrailleuses SdKfz 222 et 223”, October 2002 [15] SdKfz 253, 252 & early 250, Archive Part 1, M. Kögel, Total Detail [16] Panzer Tracts N°13-1, leichter Panzerspaehwaegen and kleiner Panzerfunkwagen, T.L.Jentz & H.L. Doyle, Panzer Tracts |
| Back to MarS Kit List | Back to Construction Reviews |
| Article Last Updated: 16 November 2008 20 July 2012 |
Back to Home Page |