|
MK72
|
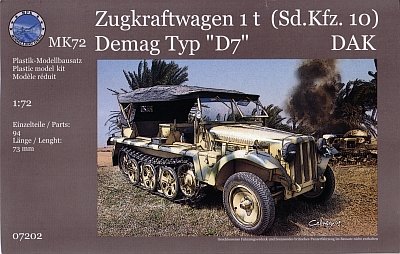
Zugkraftwagen 1t (Sd.Kfz. 10) Demag Typ D7 DAK |
|||
| Kit #: 07202 |
Review by
- Al Magnus
|
|||
|
MK72
|
Zugkraftwagen 1t (Sd.Kfz. 10) Demag Typ D7 DAK |
|||
| Kit #: 07202 |
Review by
- Al Magnus
|
|||
 |
|
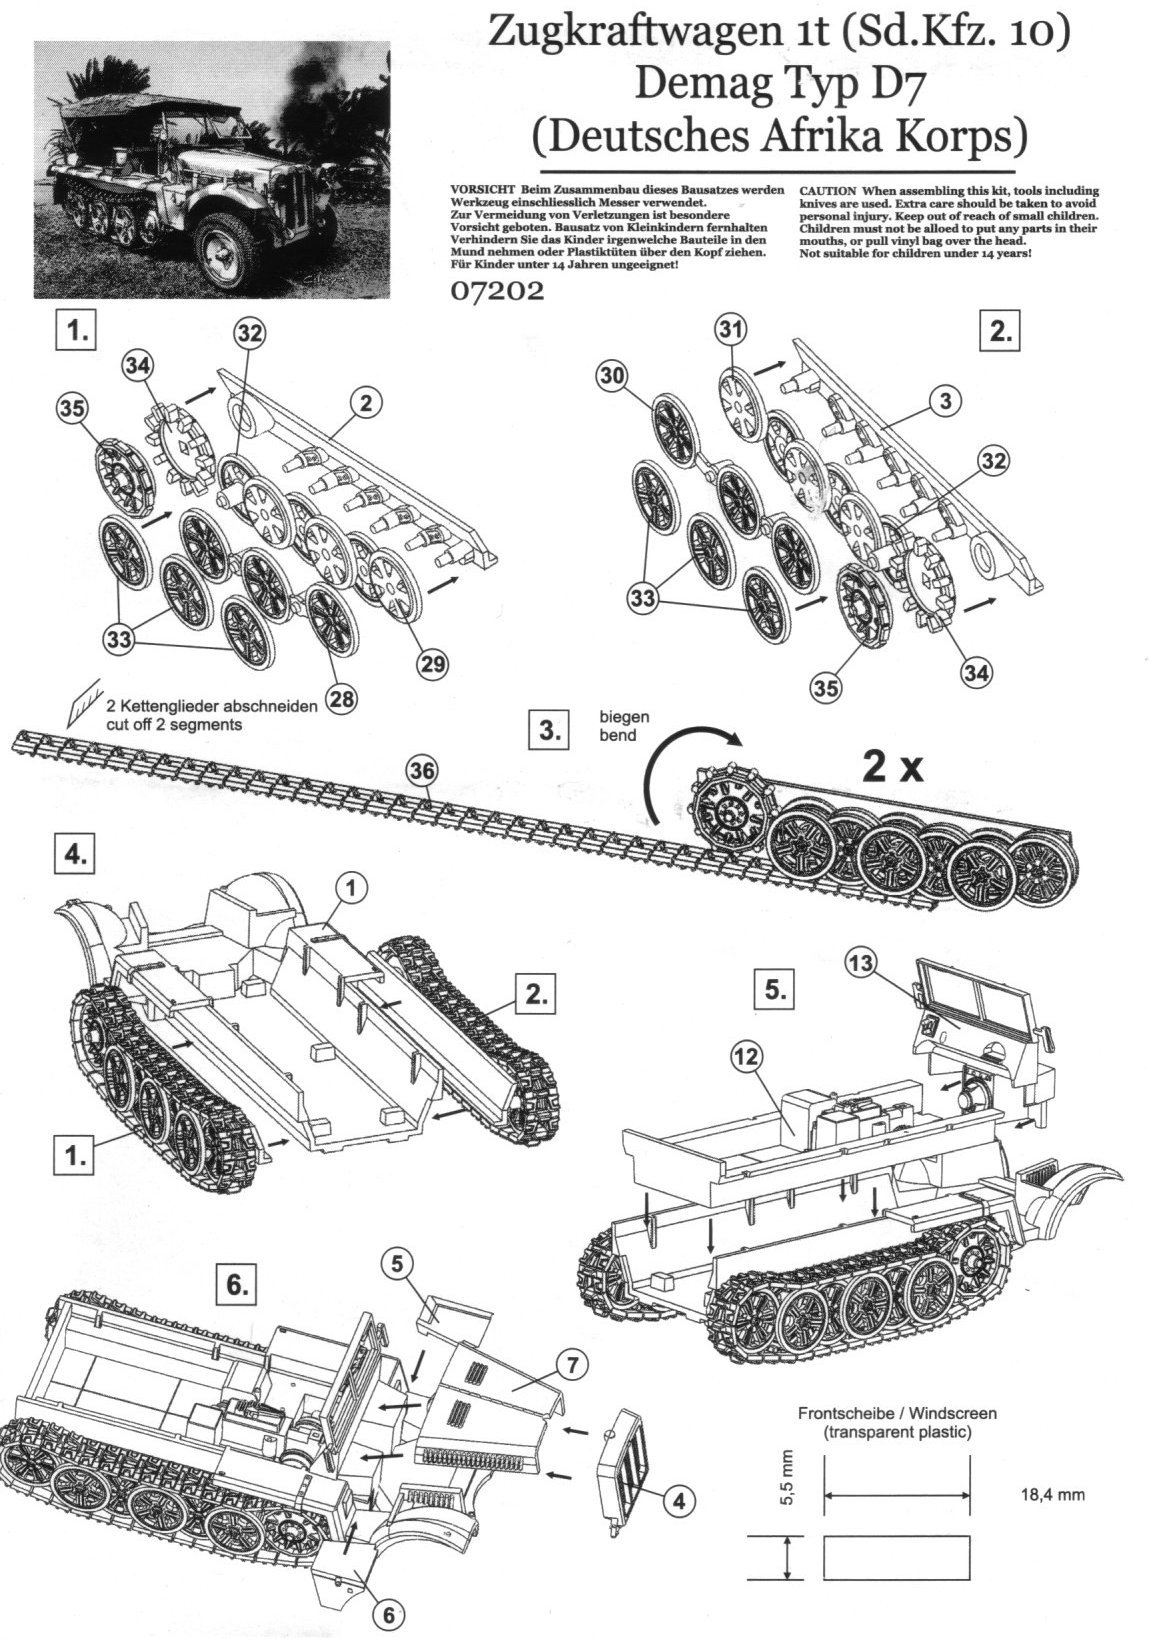
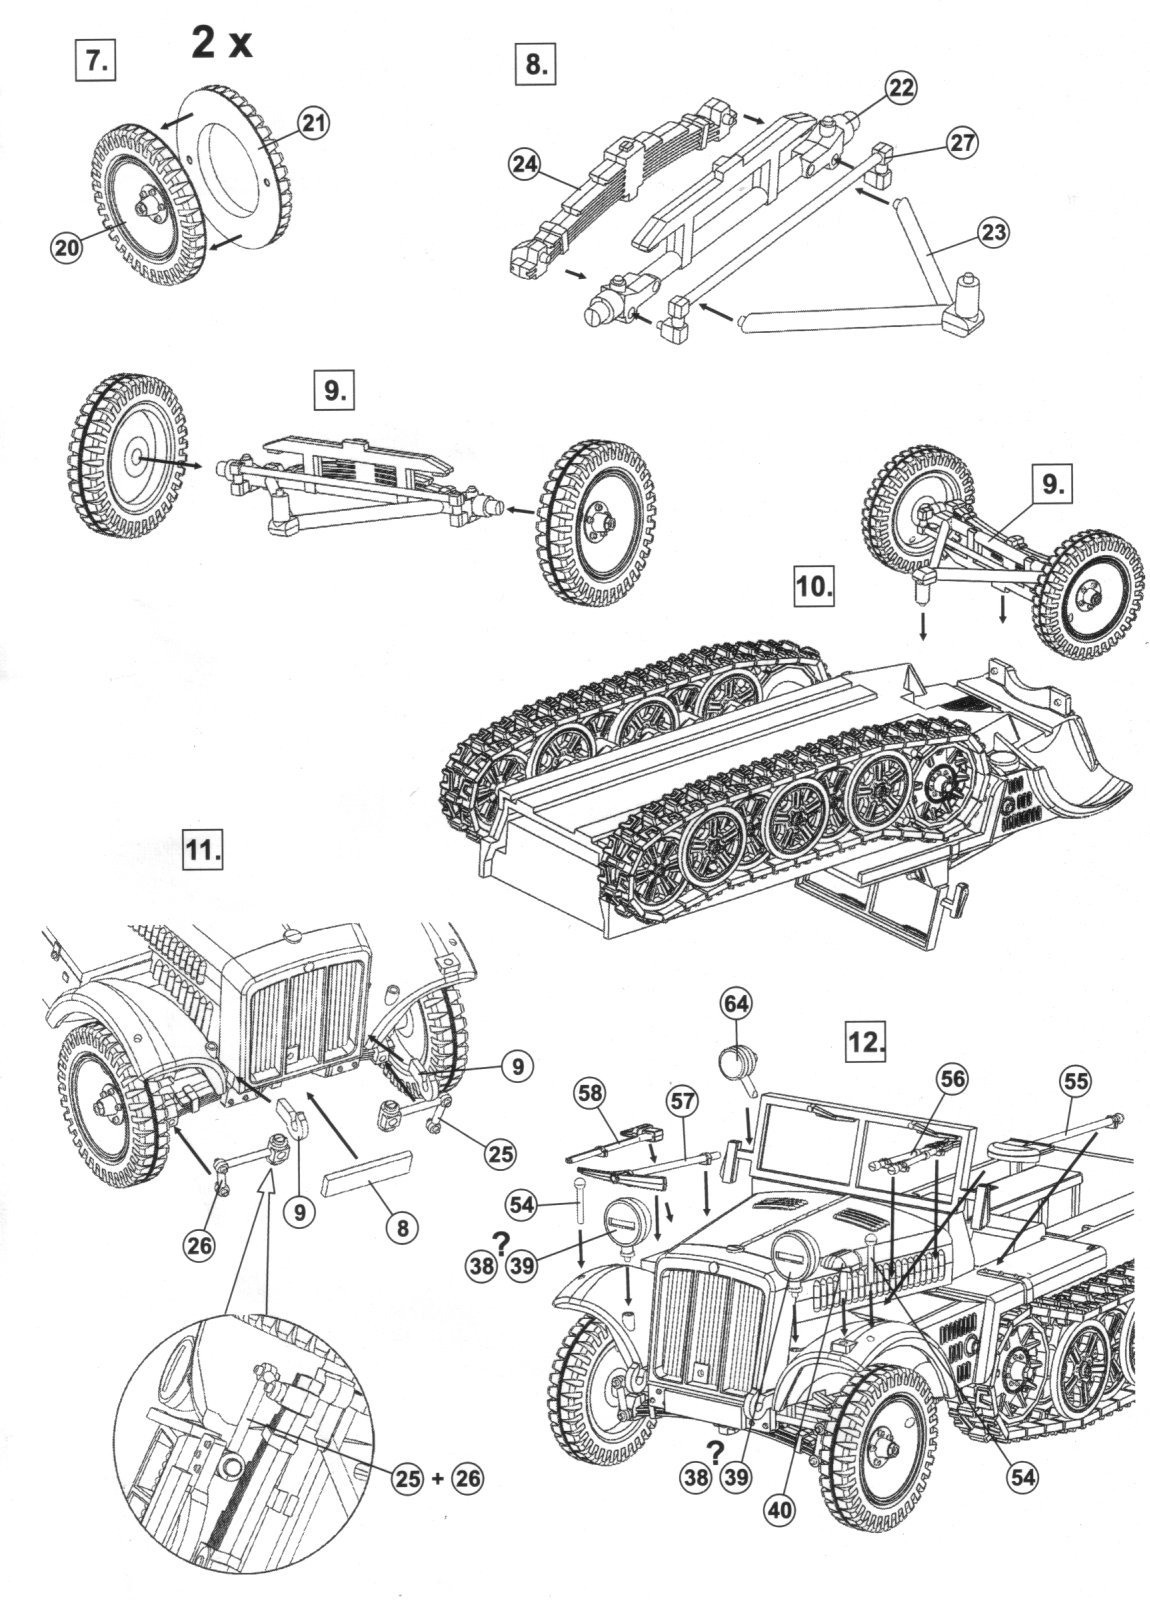
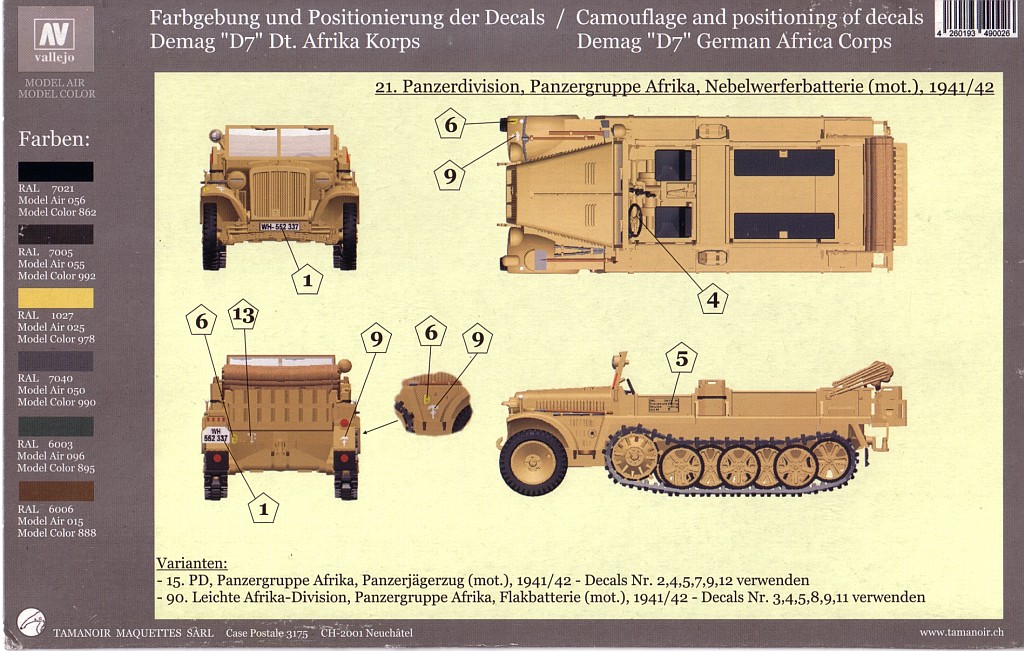
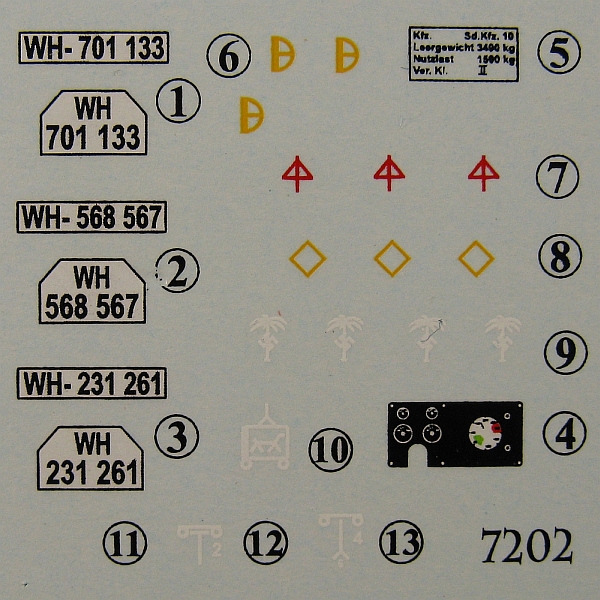
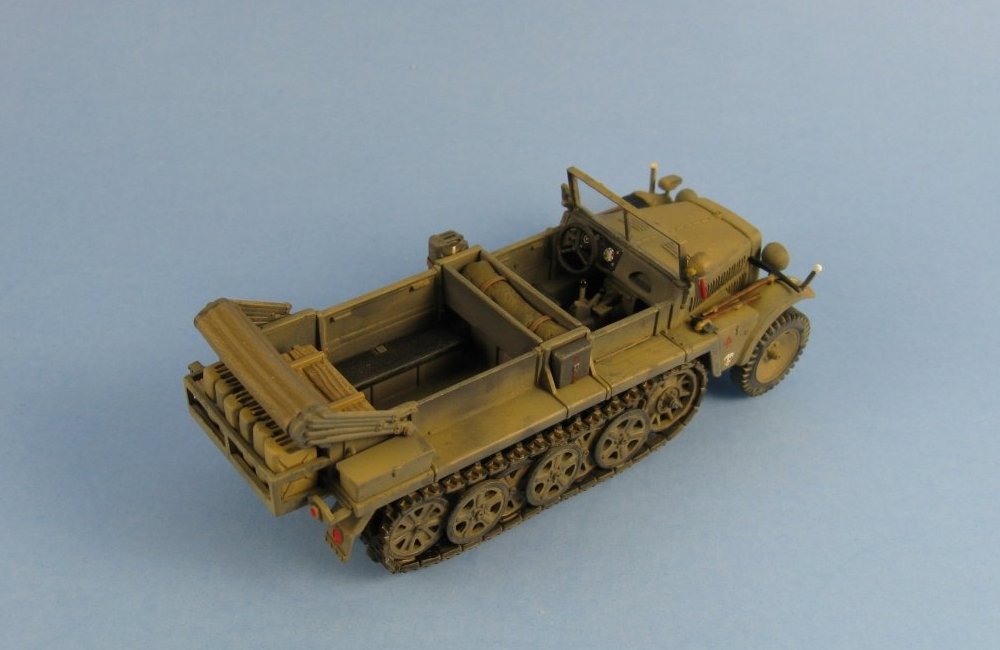
Parts are molded in light grey plastic that has a touch of brittleness, yet remaining flexible, reminiscent of what Hasegawa or Dragon produce. Personally I prefer this style of plastic over the soft plastic that has become more common these days, especially from the Eastern European manufacturers. Also included is a very nicely done and clear instruction sheet, a clear piece of acetate for the windshield plus a small sheet of decals. Detail is crisp. It would have been nice to have a sprue diagram showing the parts layout included with the instructions. All the parts come on a single tree which makes them rather tightly packed together. Take care in removing the parts so as to not bump and damage adjacent pieces. Parts 44, 59 & 60 are not used and I assume these are for their other Demag release for the European version (kit no. 07201). Decals provide three marking options, all for machines in North Africa with the Deutsches Afrika Korps, and all
in overall desert tan camouflage: I was also confused somewhat by the decal sheet. For the first, second and third marking options the colouring guide states that images 13, 12 and 11 are to be used respectively. Well there wasn't a 11, just a 10, 12 & 13. Assuming that the 13 was correct for option one, I used decal 12 for option two. There is very little flash on the pieces but the majority of the parts do carry a small seam line. There is one particularly onerous one that runs down the side of the hood right through the molded on cooling louvres. Some care will be needed here to get rid of the line without destroying the louvre detail. To remove the seam I lightly ran the tip of an Xacto knife a few time between each of the louvres and then followed that with a light sanding with some fine grit paper folded knife thin. Next some light sanding along the the louvre edges removed the seam line there and lastly I quickly brushed some methylene chloride (MEK) over the louvres to melt any remaining seam. I use methylene chloride because it's aggressive action quickly dissolves the plastic yet it does not leave any melt marks in the plastic due to its quick evaporation rate. There are some ejector pin marks scattered about. Though most are located in thoughtful spots where they can not be seen once they are on the kit, there are a few that are found in rather poor locations: on the underside of the chassis and on the outward facing portion of the front wheel rims. There are also a few sink marks, with the most significant one found on the dashboard face, which definitely needs to be filled. I figured that for ease of construction I would build the kit as three sub-assemblies: body, left and right track units. My original plan was to have the front suspension as a fourth sub-unit and add it following the painting, but on second thought I figured it would be safer to have it mounted to the vehicle to prevent any mishaps during the remainder of the build. But then again, being uncertain that the model would sit level with the front suspension in place before the track units, I tested the sit by blue tacking the front wheels and bogie units to the body and then set the vehicle on its tracks. Everything looked good at the time, but I think something went amiss when I actually glued the suspension to the front of the chassis/body. I suspect that the front axle got pushed further down into its recess than when I had it jury rigged with the blue tack, because after I added the track units I discovered a slight gap between the wheels and the ground of slightly less than a 1mm. Ah well, live and learn, as they say! Some additional items to look out for during the build:
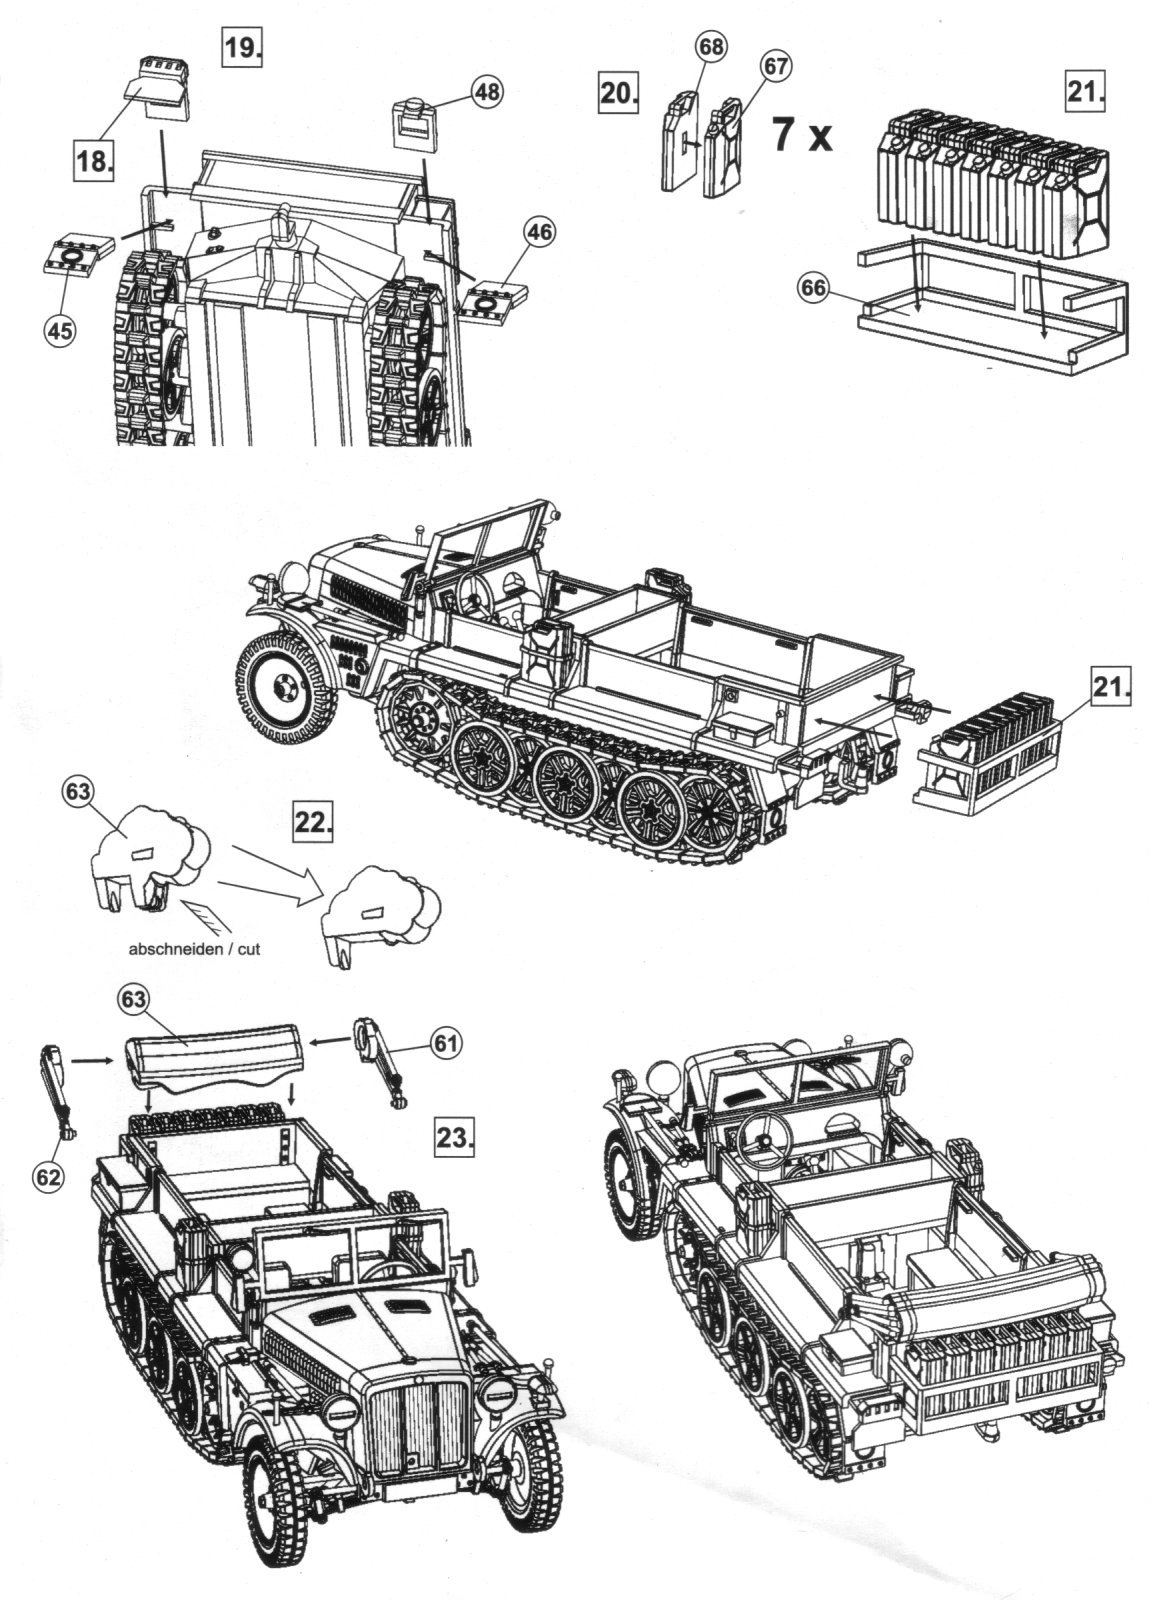
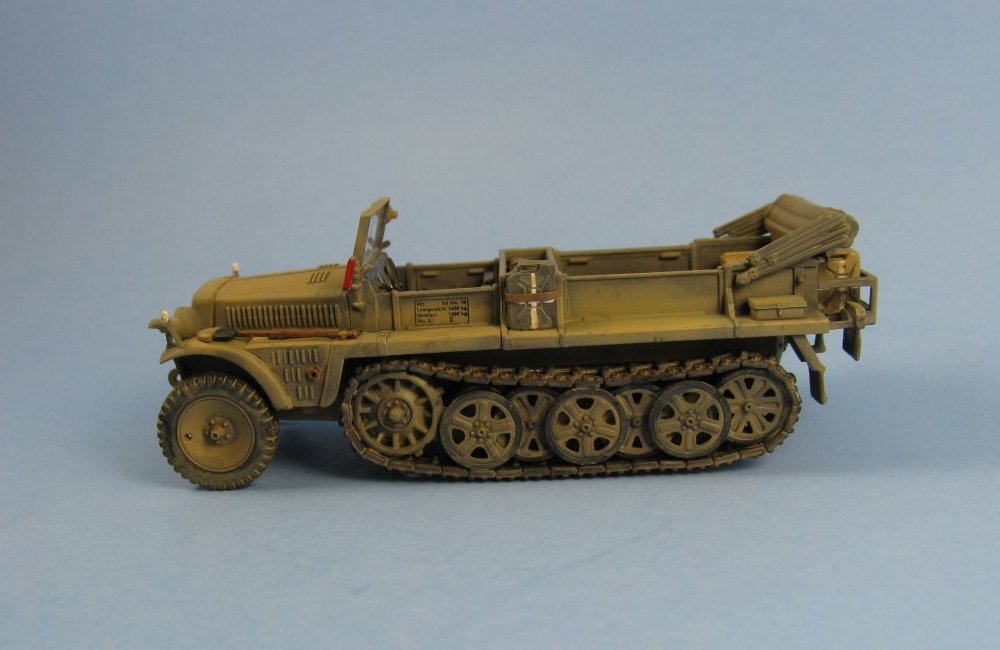
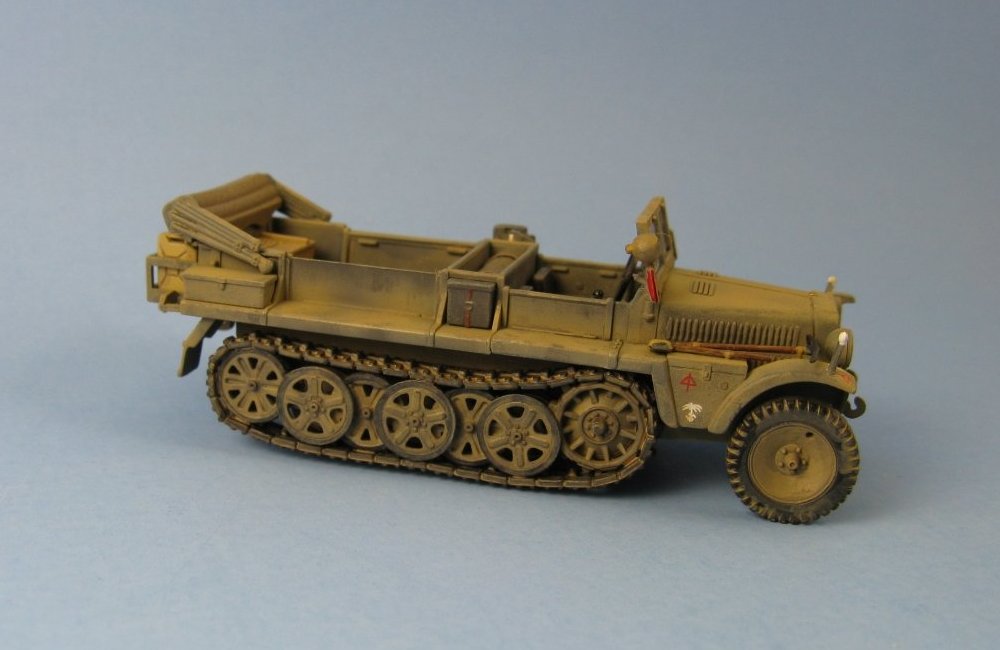
I modified the base kit somewhat. I missed a couple of ejector pin marks in the panel in the rear of the back compartment (part 65) that didn't reveal themselves until I'd started my weathering so I covered them over with a box taken from my spares. For something different I also added a small box to the right side in place of one of the kit's jerry cans and I added a rolled up tarp made from two part epoxy putty to fill the void in the storage box behind the front seats. This also hid a couple of seams inside the box that I was not able to completely remove due to the constricted space. Normally I'd replace the fender markers with some scratchbuilt items but in this case I used the kit's markers since my references showed them to be flat disks like those in the kit versus the ball found on a lot of other vehicles. The exhaust pipe outlet was drilled out (found on part 5) and the holes in the wheels were refined with a drill bit. As a final touch I added a small brass disk for the radiator cap, this coming from a set of leftover etched pieces of a depth charge set. As far as painting is concerned all decal options specify the same camouflage scheme. I varied a bit here in that I painted the interior of my model in Panzer Grey (Modelmaster 2094 enamel) versus the overall tan called for in the colouring guide. The exterior was done in a combination of Panzer Grey and Afrika Grunbraun (Modelmaster 2099 enamel. Tracks were painted black and, as I figured the dry African environment would not do much as far as rusting, I did practically none for this. Heavy weathering was mostly done with Afrika Dunkelgrau (Modelmaster 2103 enamel), my favourite colour for all my earth tone weathering. So all that's left to do is add a base to hide that annoying gap under the front wheels and maybe a 37mm anti-tank gun to the towing hook and the build will be complete Overall I think this is an excellent first effort for a company with such little experience under its belt with injected plastic kits. With some more experience I feel that MK72 will be right up there with the “Big Boys”, like Dragon, Revell and Trumpeter in the not too distant future. All I hope that they continue down the path of offering kits of subjects that are slightly more on the esoteric side. We could use some plastic injected kits of the Bren Carrier, some Allied Armoured Cars (hopefully they'll re-release their Humber Scout Car in injected plastic) and maybe some Japanese subjects (Please MK72, resist the urge to produce more Tigers, Panthers, Panzer IVs and Shermans!). For another look at the MK72 Demag, please check out Rob Haelterman's build of the sister kit, no. 07201, here. Review sample provided by MPK via Henk of Holland. References:
|
| Back to MK72 Kit List | Back to Construction Reviews |
Article Last Updated: 01 January 2011 |
Back to Home Page |