|
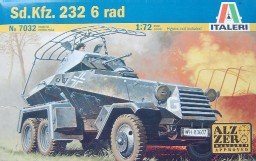
Sd.Kfz. 232 (6-Rad) | |||
| Kit #7032 | Review by Rob Haelterman | |||
|
Sd.Kfz. 232 (6-Rad) | |||
| Kit #7032 | Review by Rob Haelterman | |||
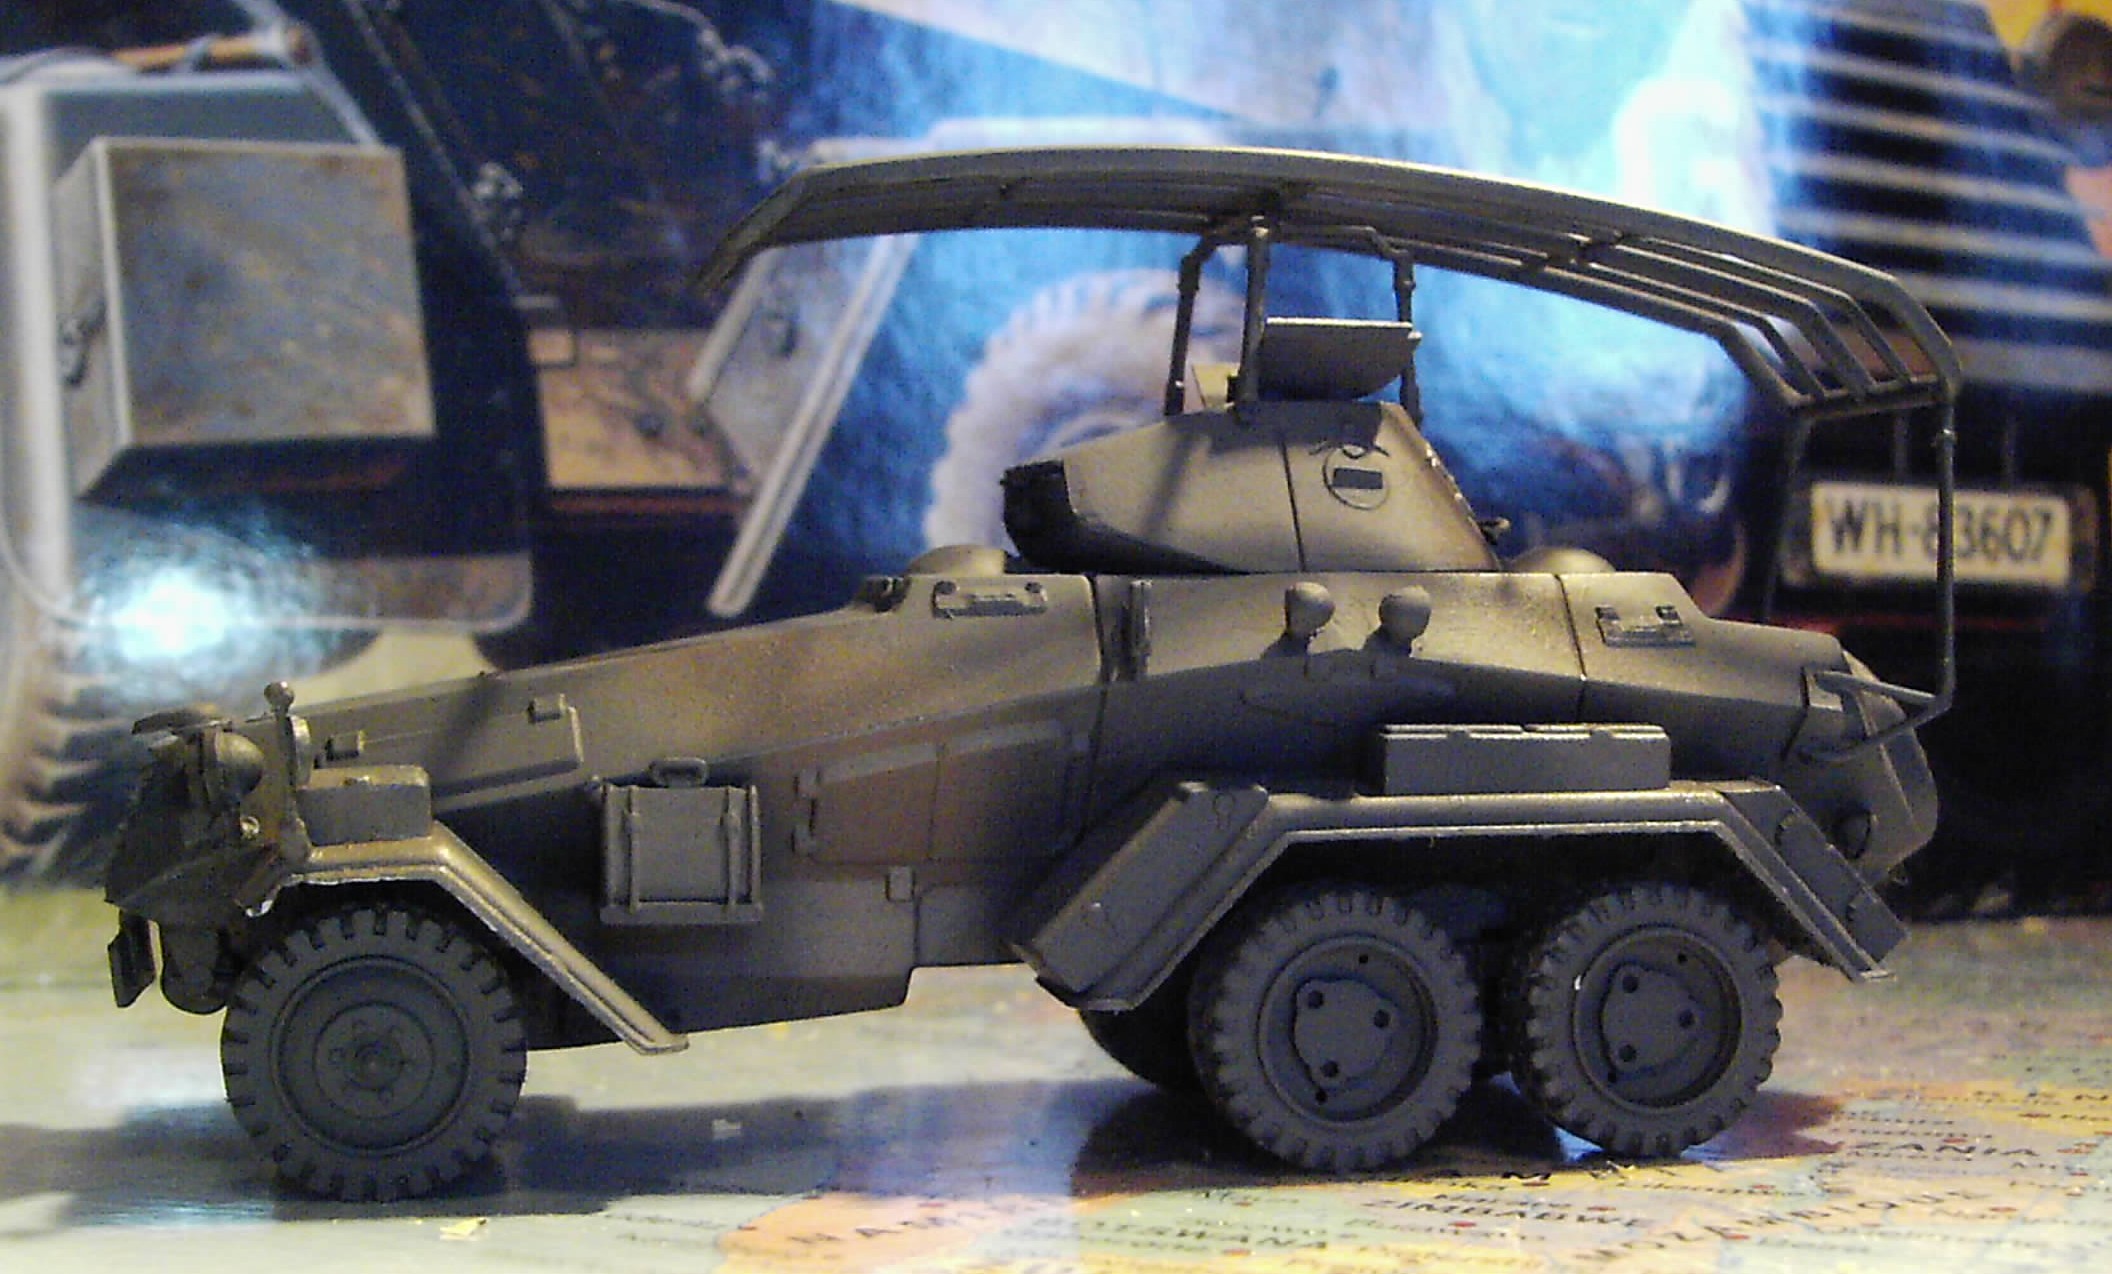
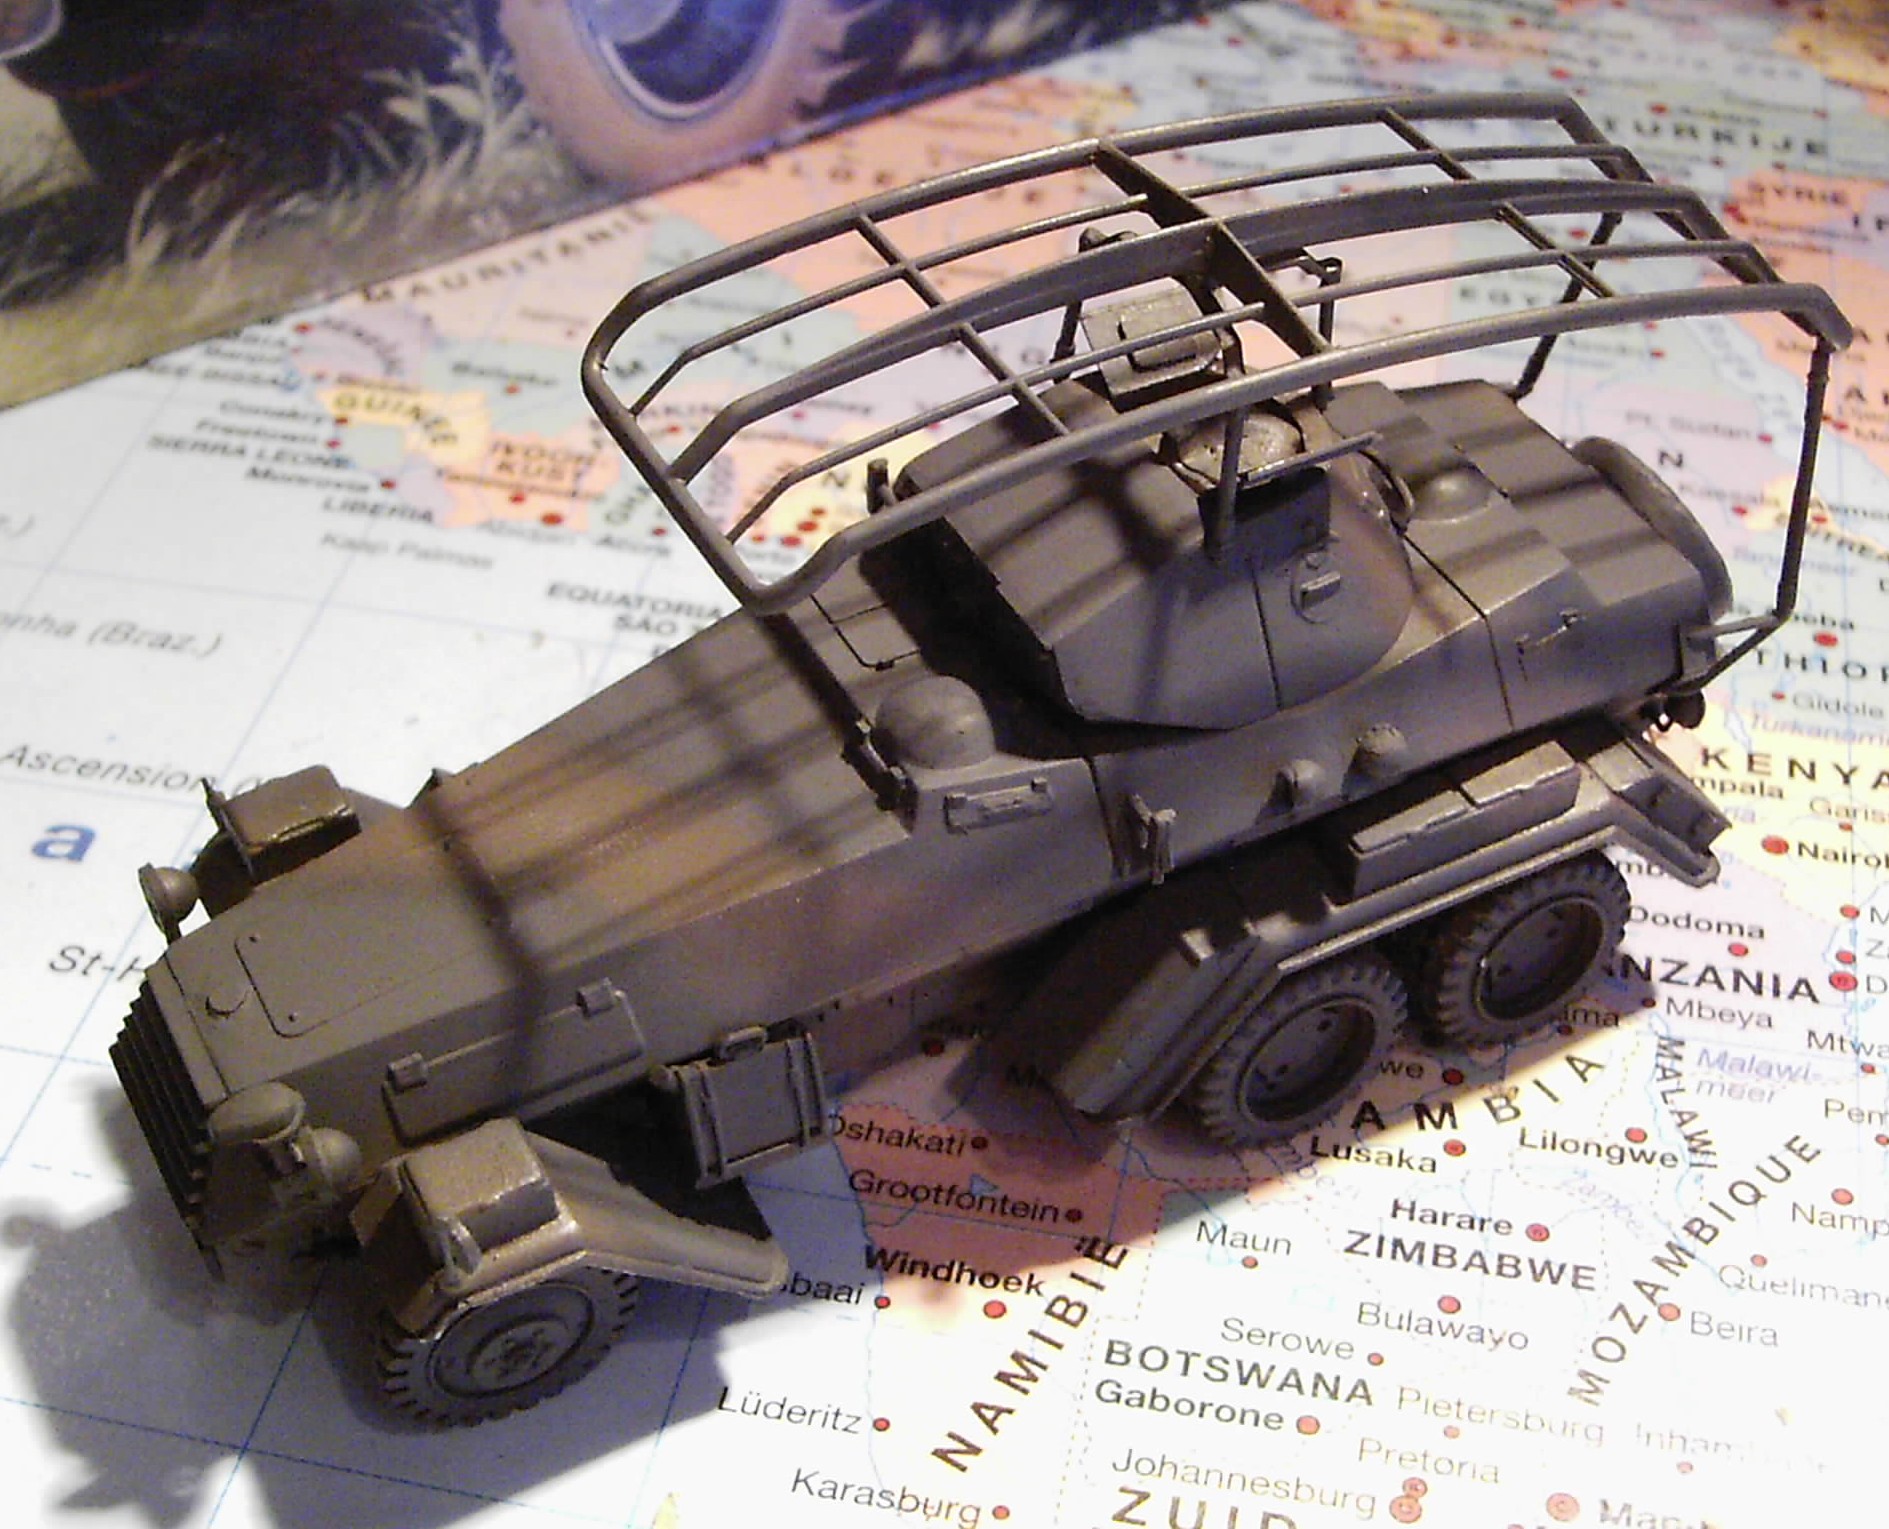
After probing the market with the re-release of the venerable Esci kits, Italeri is slowly expanding its range with its own new releases. This is one of them. It must be said however that Italeri does not envisage competing with the high end of the market and even explicitly markets these kits for the wargaming community. While this means that some kits (e.g. the Sd.Kfz.234 series) can be built with simplified parts or the more detailed ones, it does not mean that these kits are sub-par. They can, by all means, be built into competition models with some loving care, as Simon Barnes already pointed out. Nevertheless, this kit is not without its faults. While Simon discovered that the kit is too wide, I have not measured the overall dimensions as it would be quite hard to rectify if something was amiss, and, besides, the kit seems to capture the overall looks of the vehicle relatively well. (See Simon Barnes' preview for more comments and for pictures of the sprues and decals.)
1. History and versions But which vehicle is it ? First recall that the Sd.Kfz.232 is the radio version of the Sd.Kfz.231. But, just telling someone you are building a Sd.kfz.232 won't do. For instance, you had the Sd.KfZ. 232 (6-Rad) and the Sd.KfZ. 232 (8-Rad), but the 6-Rad came in three distinct versions, depending on the chassis: Daimler-Benz, Bussing-NAG and Magirus. Of these, Daimler-Benz only built a few and Magirus built the most. Based on pictures in [4], it seems that the Sd.Kfz.232 (6-Rad) appeared on all three chassis types, while the Sd.Kfz.263 (6-Rad) was only built on the Magirus chassis. To complicate matters, 19 vehicles (Sd.Kfz 231 and 232) had the Daimler-Benz superstructure on the Bussing-NAG chassis. To distinguish between vehicles built on different chassis, the most obvious identifiers are: wheelbase (Magirus being shortest, and Daimler-Benz being longest), front and side radiators and shape of front fenders. There are a few other differences, but to me it seems that this kit has most of the distinguishing features of a Bussing-NAG vehicle, including a wheelbase that is spot-on. The kit also has the old style of gun mantlet (with MG13 instead of MG34, to the right instead of left of the 2cm gun), which was still seen in the summer of 1940, although rarely [4].
2. Accuracy There are some annoying errors / omissions that can be more or less easily rectified :
3. Construction Building the kit poses no real challenge. Fit of the parts is generally very good with some very minor amount of putty needed here and there. Most of it went to the lower part of the spare wheel which is hollow and extends below the rear plate and the "cheeks" of the turret. The plastic is quite easy to work with and reacts well to MEK. You get some detail on the lower chassis if you want this to be visible. Strangely enough, there is some scribing detail behind the top plate on the nose, as if the person making the master for this kit overdid himself while cutting some parts. It is easy to sand, but strange. The boxes that are integrally molded with the fenders are hollow underneath, so you'd better fill them in. The other boxes have to be glued on, but there are no locating pegs or holes. The gun barrel is not bad, but if you have a spare brass barrel lying around, use it. The nice thing is that Italeri gives you the small details like width indicators, turn indicators, headlights and a very nice Notek, which are sometimes missing in other kits. Be careful with the Notek, as it only appeared early in 1940. The 4 small lights near the apex of the hull need their shafts cut off, as they were fitted directly to the hull. The rearview mirror on the left width indicator needs modification, as it is a double mirror in the kit. Strangely enough, Italeri got this right on the Sd.Kfz.234, but not in this one. If you want to add the frame antenna, I hope you did not forget to open up the locating holes for the supports. The manual does not mention this, but it would not be a bad idea. The saddest thing about this kit is that all hatches are closed. Even though I had planned to build this kit OOB, I could not resist to open up the commander's hatch. While, in the meantime, Italeri has releases the Sd.Kfz.231 (6-Rad) as well, it is only a matter of omitting the frame antenna and adding a small (optional) semi-circular anti-aircaft MG mount on the turret (installed in 1935) if you want to build the Sd.Kfz.231 starting from this kit.
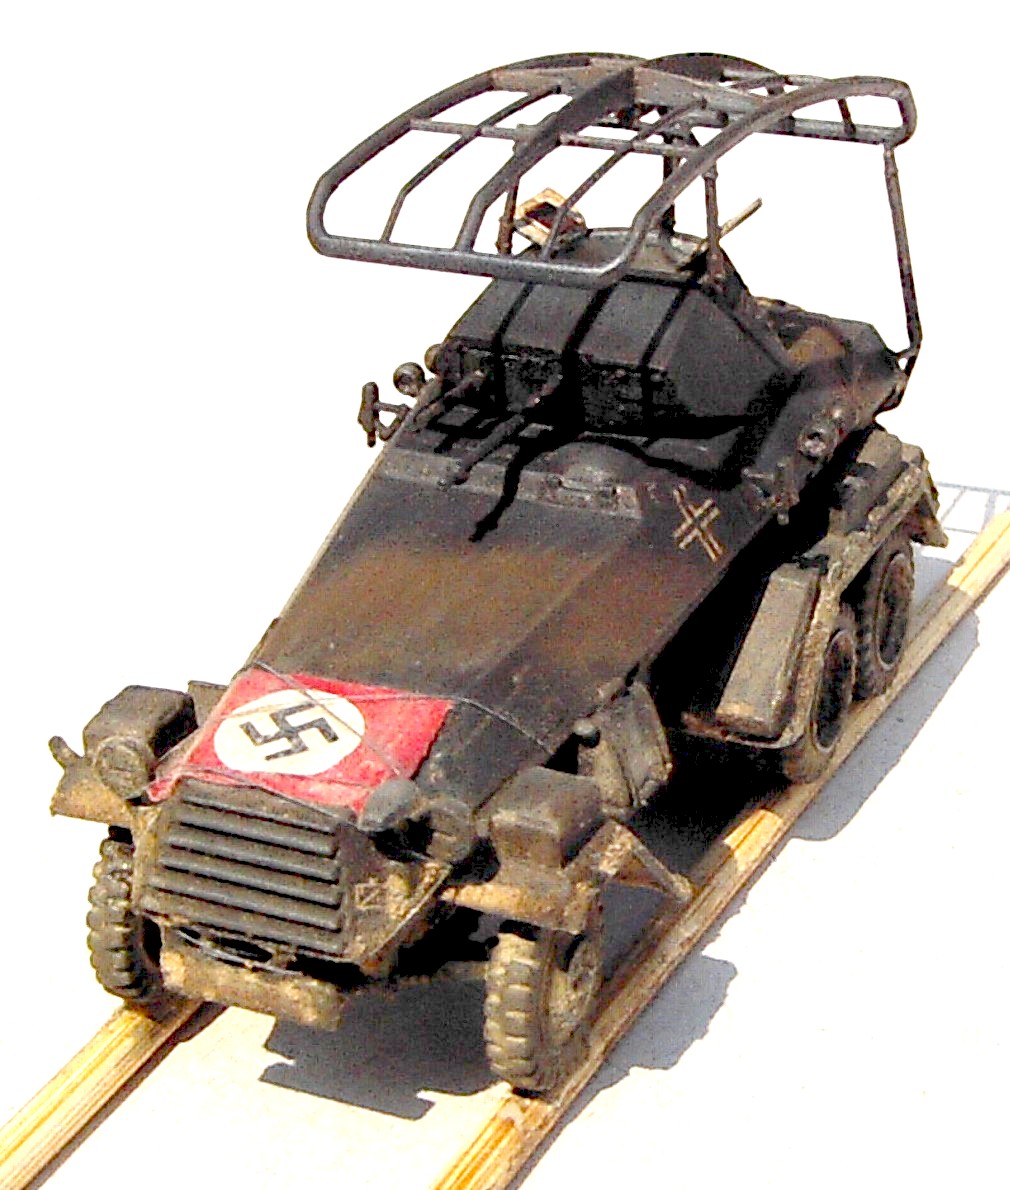
4. Painting If I can believe my references, none of the painting schemes that Italeri proposes are correct. Risking to become very unpopular in Italy, I arrived at the following conclusions
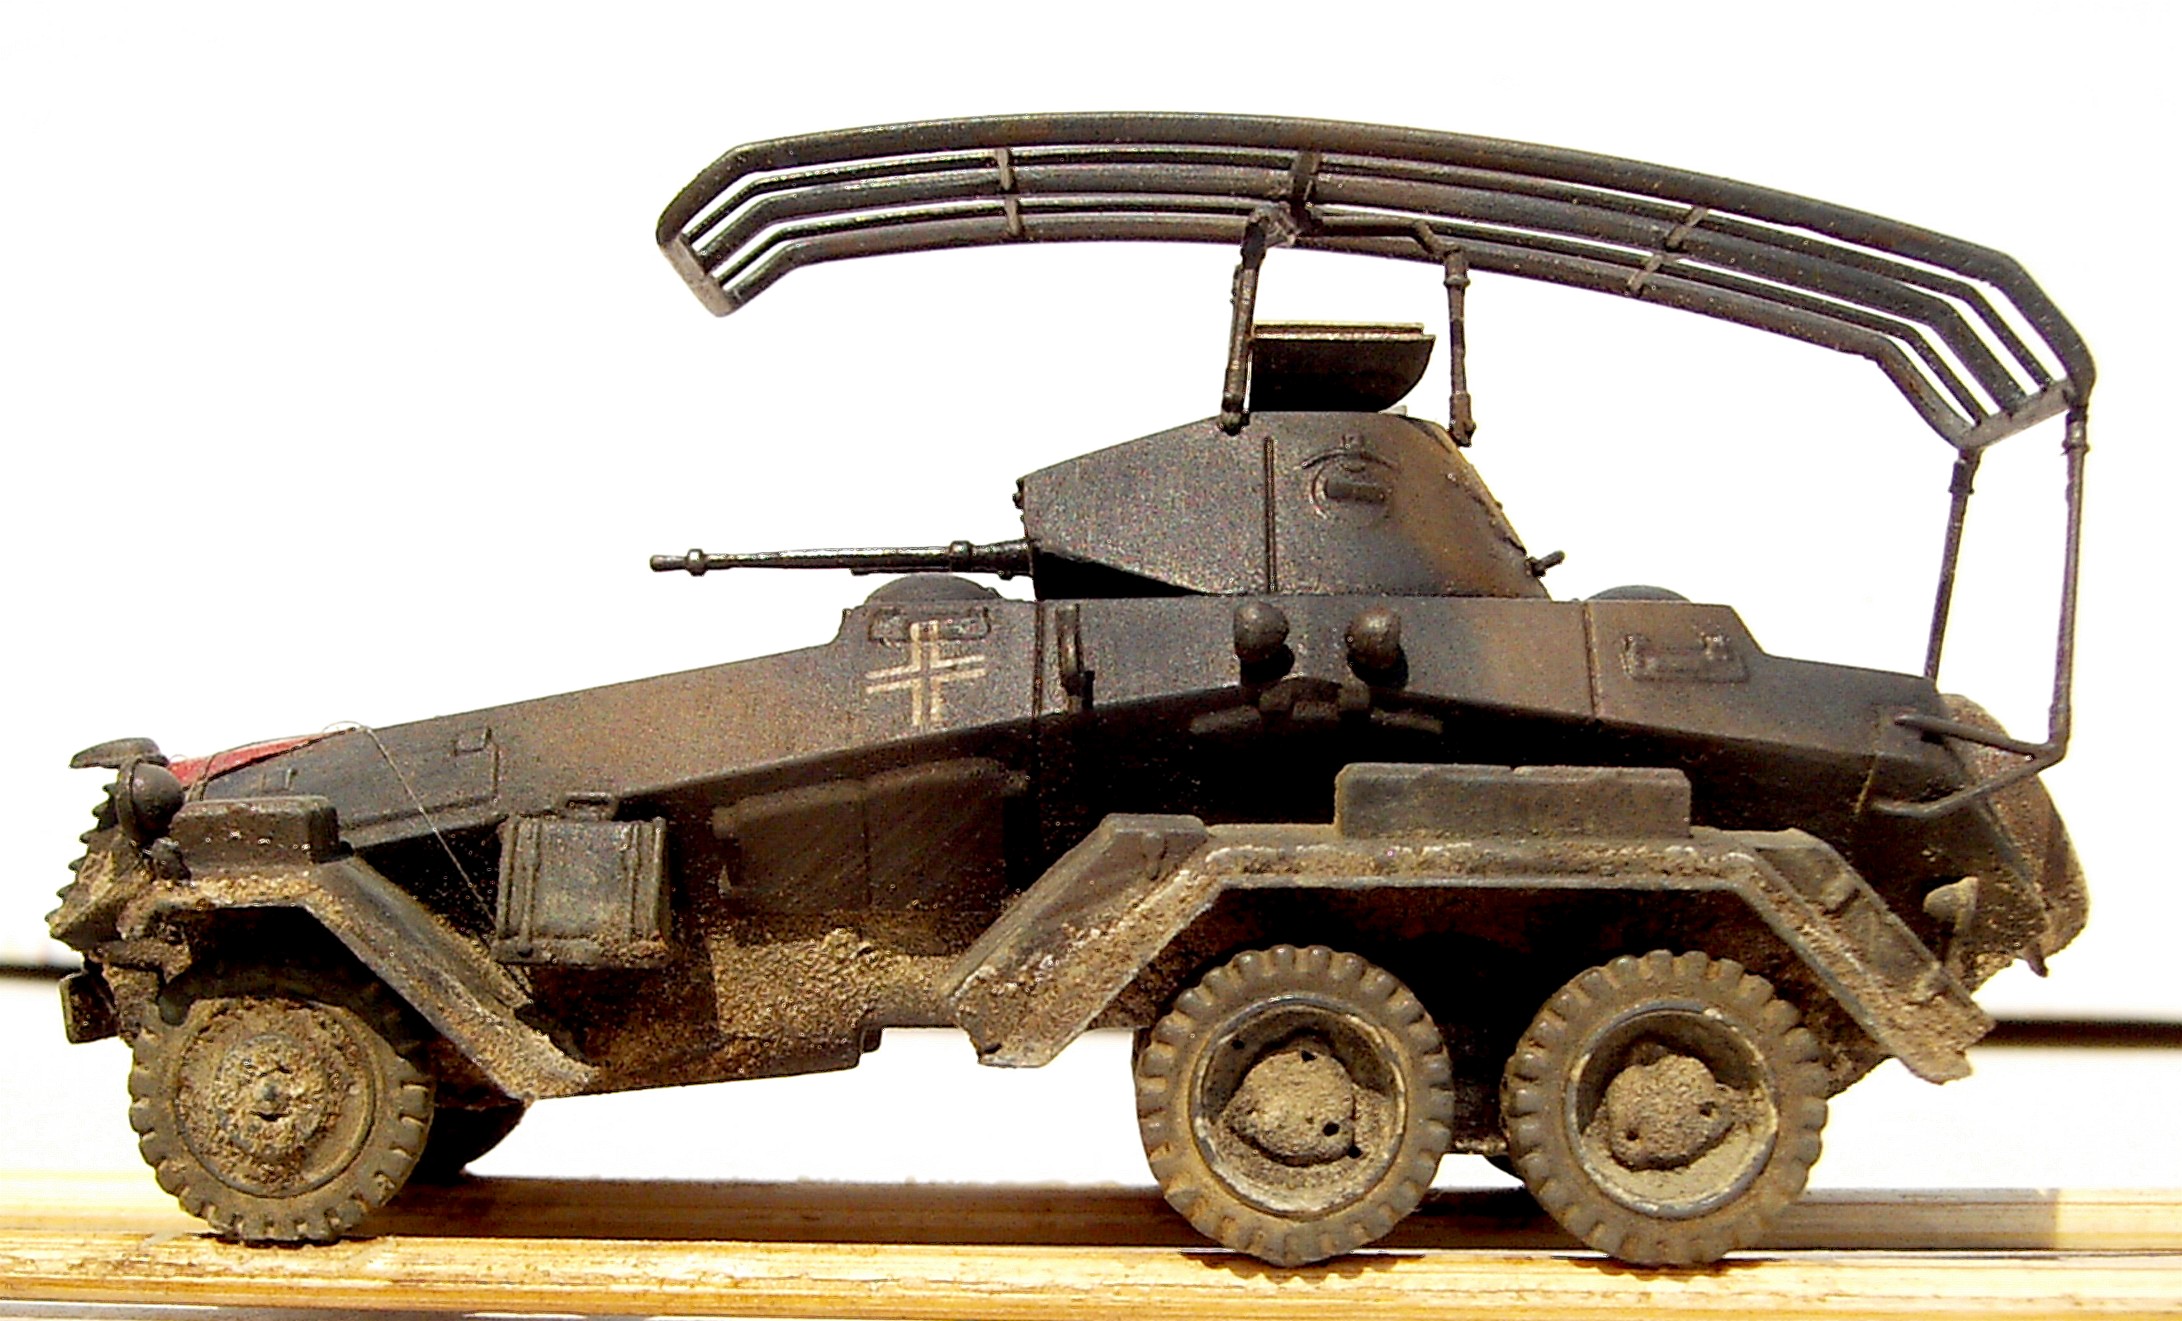
Below is my rendition of the 232, after building and painting it in 4 days, bettering my previous record by 125 days (which goed a long way to explain why I either missed or ignored some errors in the kit) ! Of course, at that point I still needed to touch up the paint job here and there, add the details, and give it a minor nose job, as I rushed my sanding in that area.
I chose a vehicle from 3 Pz.Div. with its initial insignia used in France 1940
(as confirmed by [4], even though the picture on page 34 shows a vehicle with the new mantlet).
The decals are nice. The white crosses really are white, opaque and sharp. Only the yellow unit markings were a bit soft around the edges. It could be just my decal sheet, and I did not care as it imitates the effect of stencil painting. The decals for the licence plates are very nice, even including the official "stamp".
5. References: [1] Die Gepanzerte Radfahrzeuge des Deutschen Heeres 1909-1945, W.J. Spielberger. Band 4 der Reihe "Militärfahrzeuge" , Motorbuch Verlag [2] Panzer Tracts No. 13 - Panzerspähwagen, by Jentz and Doyle [3] German Armoured Cars and Reconnaissance Half-tracks 1939-1945, B. Perret, New Vanguard 29, Osprey Publishing [4] Schwerer Panzerspähwagen (6-Rad), H. Duske and H. Erdmann, Nuts & Bolts 48, Nuts & Bolts Verlag |
| Back to Italeri kit list | Back to Home Page |
|
Last updated: 03 November 2010 16 February 2025 21 September 2025 |

.JPG)
.JPG)
.JPG)
.JPG)