|
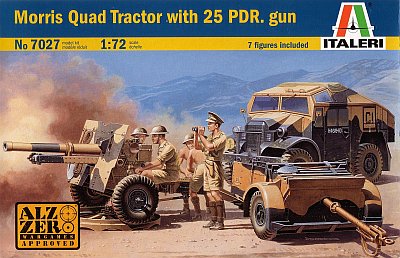
The 25-pounder was the iconic field gun of the Commonwealth forces. It was also used in a variety of self-propelled applications.
It was adaptable, it packed a powerful punch, and above all it was
reliable. The 25 pounder fired separate ammunition where the projectile and the propelling charge, usually in a brass case with its integral primer, were loaded separately.
Production ran throughout the Second World War and over 13,000 copies were manufactured in Great Britain, Australia and Canada.
 |
This kit is a rehash of the 30-plus year old ESCI 25-pounder & Morris Quad Tractor kits, combined together in one box. Flash, seams
and ejector pin marks are quite prevalent probably due to aging molds, though detail is still quite nice even after all these years.
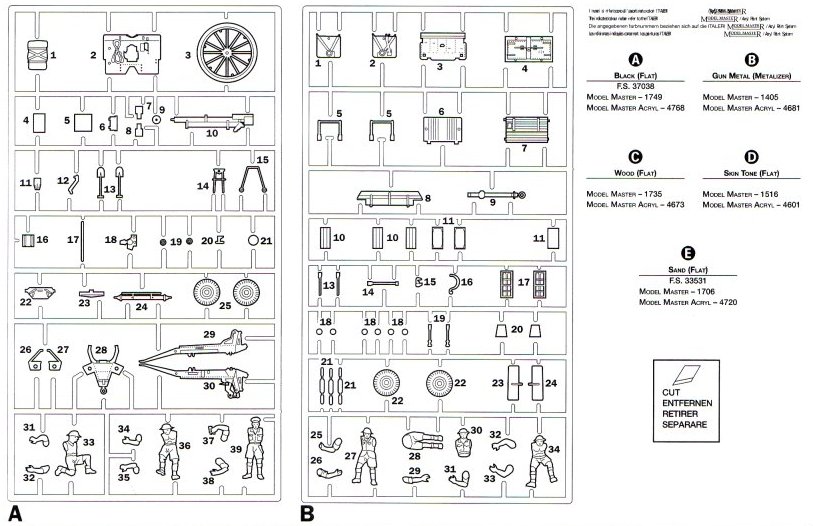
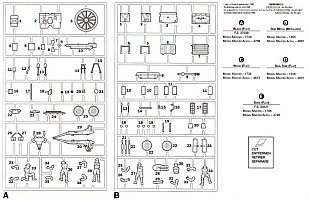
Inside the box there are 176 parts spread over four sprues (81 parts on two sprues for the Morris Tractor + 1 figure, and 95 parts over
two sprues for the gun,
limber + 6 figures), all molded in a softish light grey styrene plastic, which I found very easy to damage if one is not careful. There is a small sheet of
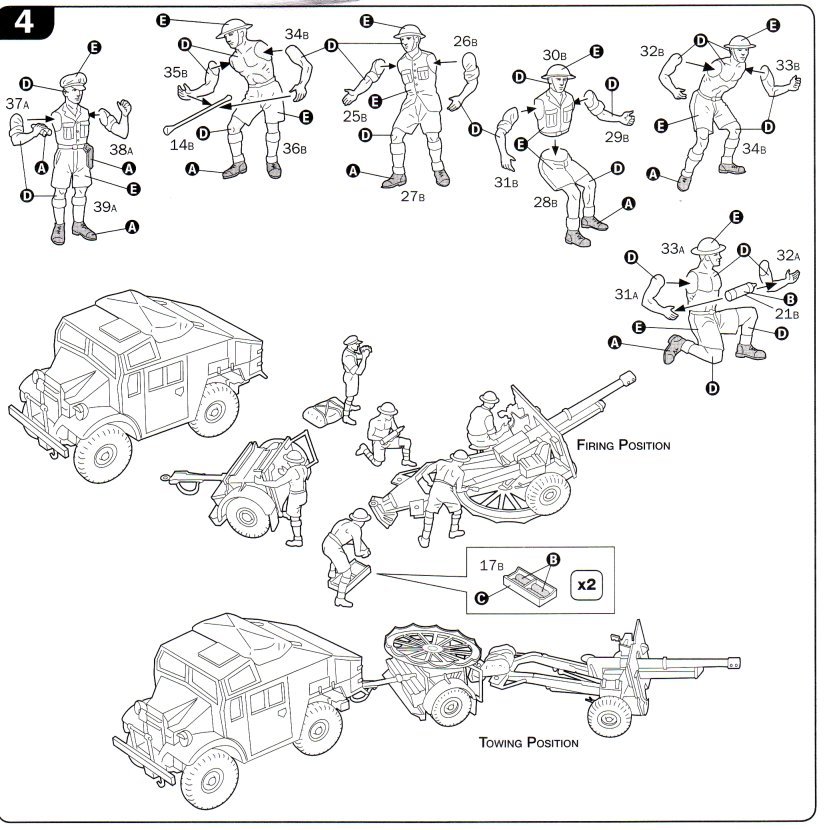
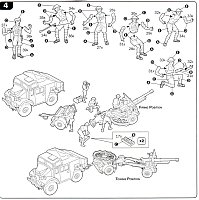
clear acetate style plastic for the windows, an equally small decal sheet and a 10 page instruction manual, with 6 build steps for the Tractor and 3 build steps for the
25-pounder and limber.
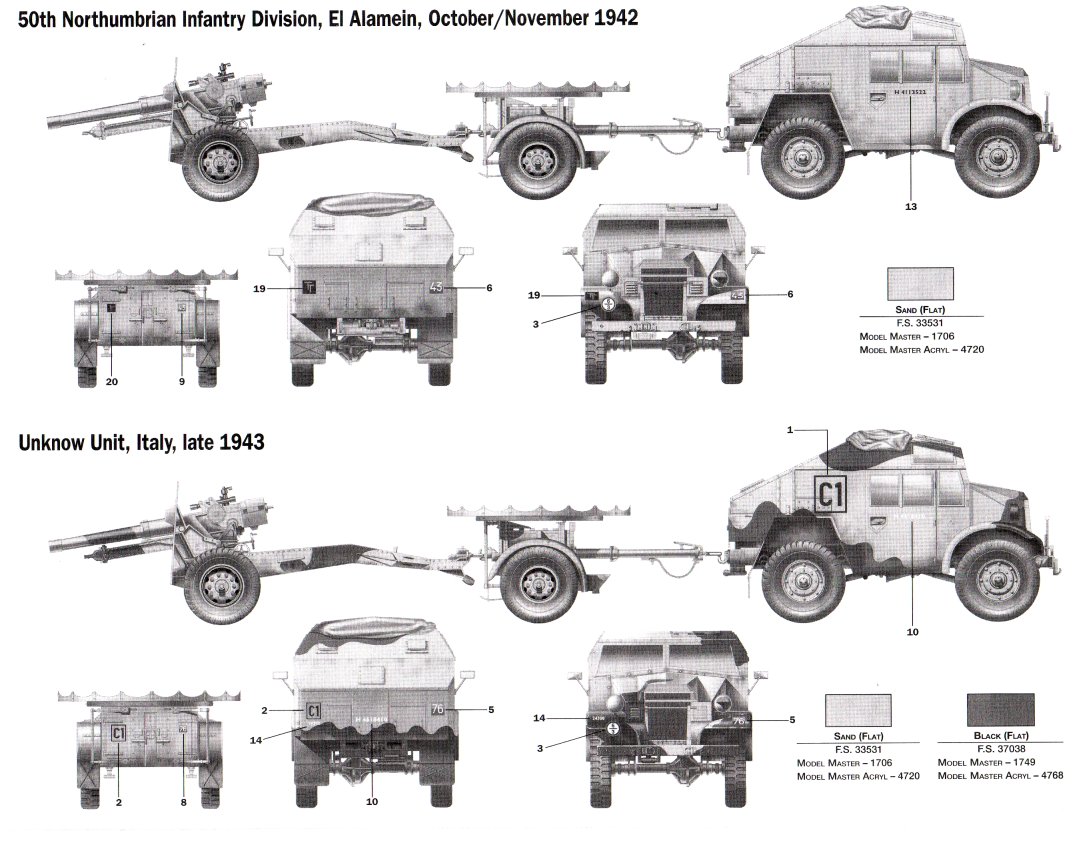
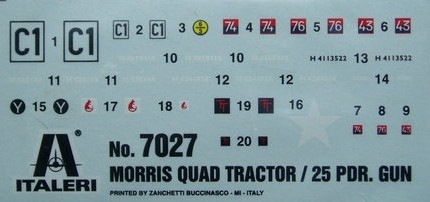
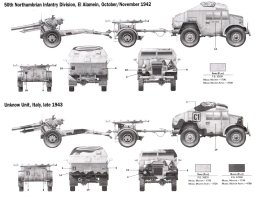
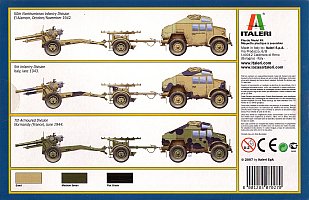
Decals cover 4 options:
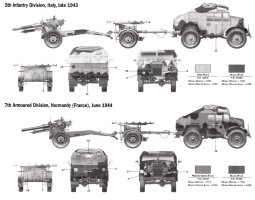
- 50th Northumbrian Infantry Division, El Alamein, October/November 1942
- An unknown unit, Italy, late 1943
- 5th Infantry Division, Italy, late 1943
- 7th Armoured Division, Normandy, June 1944
The decals, printed by Zanchetti Buccinasco of Italy, are excellent - in register, with clear images and dense inks. The leftovers will make a welcome addition to the
spares box.
From what I can decipher from my references it appears that the gun is a Mk.II version, with a Mk.II trail and No.22 platform. The limber is a No.27 ammunition trailer. There are a couple of build
options available: the gun can be built in firing or travel mode, and the barrel can have a Solothurn muzzle brake, or not. |
Before reading further I suggest checking out the review of the Esci release by Doug Chaltry here for his
take on the 25-pounder.
I won't comment on the Morris Quad Tractor portion of the kit since my goal was to build the 25-pounder gun and limber. As a result,
the Morris parts wound up in the spares box. I was not impressed by the figures. The mold shift had given them rather peculiar features and the helmet brims were ovoid.
|
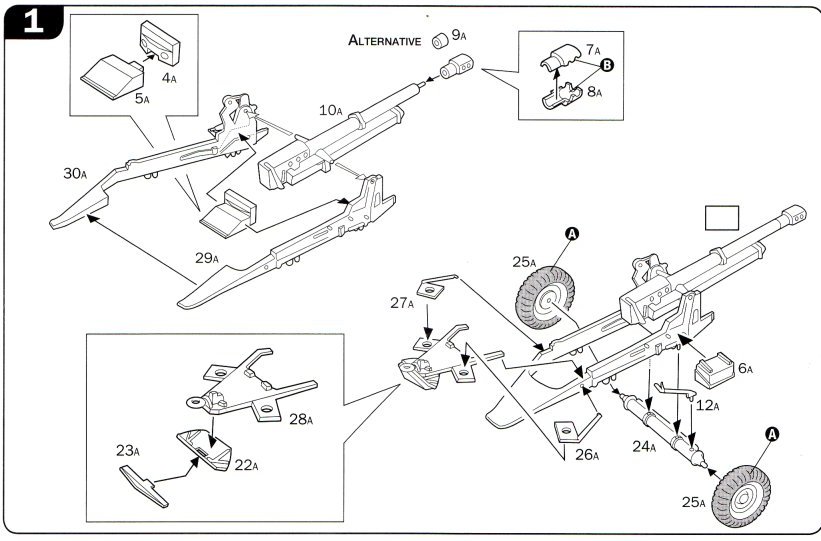
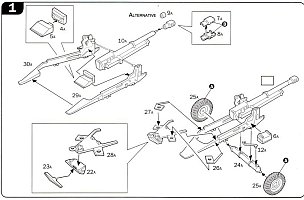
Step 1: Building the 25-pounder, pt.1
Step 1 is to build the trail, spade, barrel and add the wheels.
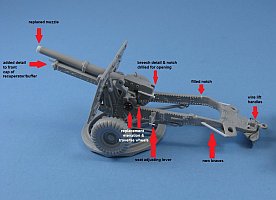
Starting with the barrel, I tossed both the straight and Solothurn muzzle ends (parts 9A or 7A
& 8A). Both were poorly cast with noticeably off center openings. Also the muzzle brake's diameter where it attaches to the barrel is too small, being of the same
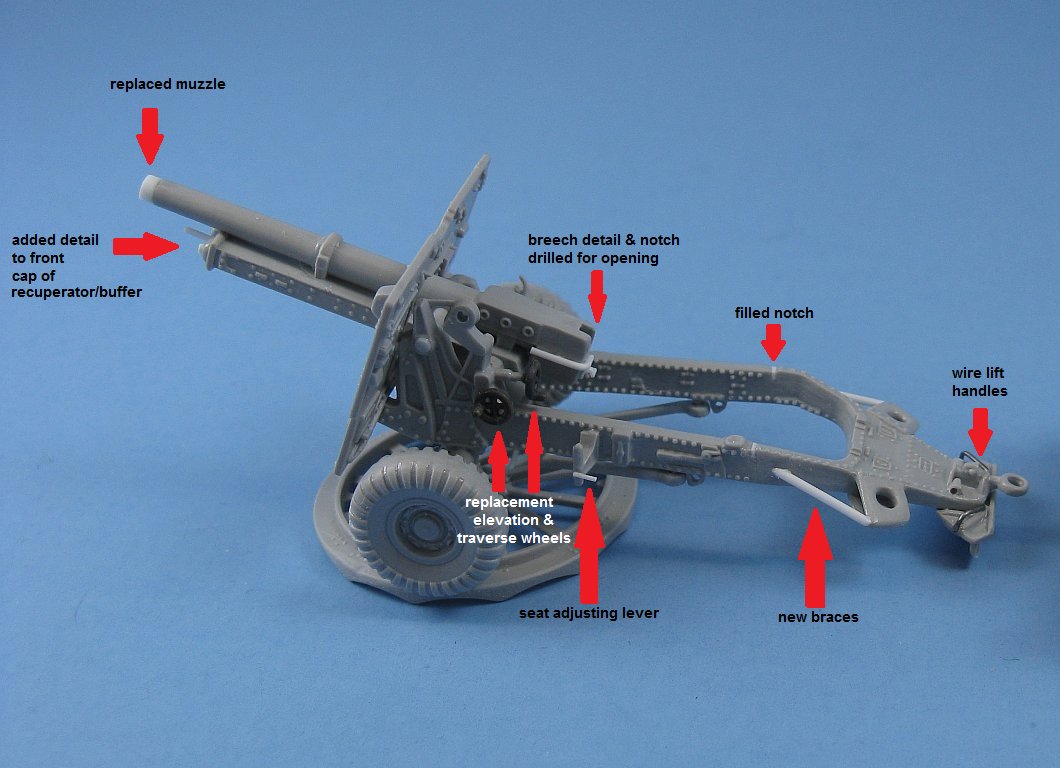
diameter as the barrel, but references show it to be slightly larger. I added a straight extension from plastic rod and drilled out the end. Some detail was added to the
breech including the firing lock & breech opening. The end cap of the recuperator/buffer enclosure is void of detail which was added with a piece of plastic rod and some disks punched from
plastic sheet. I set the barrel aside for the time being and moved on to the trail.
The cross member pieces (parts 4A, 5A) don't fit well and on top of that, where they eventually attach to the box carriage, is poorly indicated in the instructions.
I found it difficult to place properly leaving some concern as to whether or not it might affect the alignment of other parts later on. The instructions have you make the
spade assembly separate from the trail. If you do then the spade will not fit. This turned out to be the best method: add part 28A
to trail, then add the spade parts 22A & 23A in this order. There is a gap at the top of the trail that should be filled.
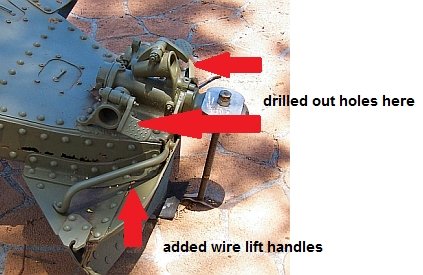
Then I started drilling some holes: in parts
26A, 27A & 28A to refine them somewhat, the hole for the traversing handle as well as the two holes to its left and right, and the tow loop. The brace pieces on
26A & 27A were replaced with some smaller diameter
plastic rod. Then I added the missing lift handles to the spade made from thin wire.
Both storage boxes (16A) have hollow bottoms that require a cover.
Vague part location vague was encountered again with the first stowage box. When I finally figured out where it belonged I had to open up the hollow back some to get
it to fit. The kit has a nice
set of rivets on the trail except on the top inside curve. Strips of Archer rivet decals fixed this problem. The final item was replacing the molded on tow loop that sits
beneath the shield. A new one was made from plastic sheet and some copper wire.
The axle was added and placement points were vague once again so some work was needed to get it in place and aligned properly. Wheels were left off to be added
later. Adding the brake lever (part 12A) revealed crowding by the previously attached stowage box. After all this I then put the barrel between the pivot points on the
carriage.
|
 |
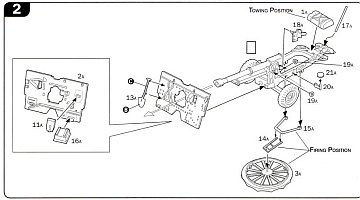
Step 2: Building the 25-pounder, pt.2
This is step is mostly concerned with the shield and turntable/platform.
The shield had a lot of ejector pin marks to fill and it's difficult to do without destroying detail. The molded on rope is nice but it would have been much
better had it been a separate piece like the shovel. Some of the 25-pounder photographs showed what looked much like a pistol holster attached to the backside of the shield,
so I figured since I wasn't using any of the kit figures I might as well cut a holster from one of the figures to represent this.
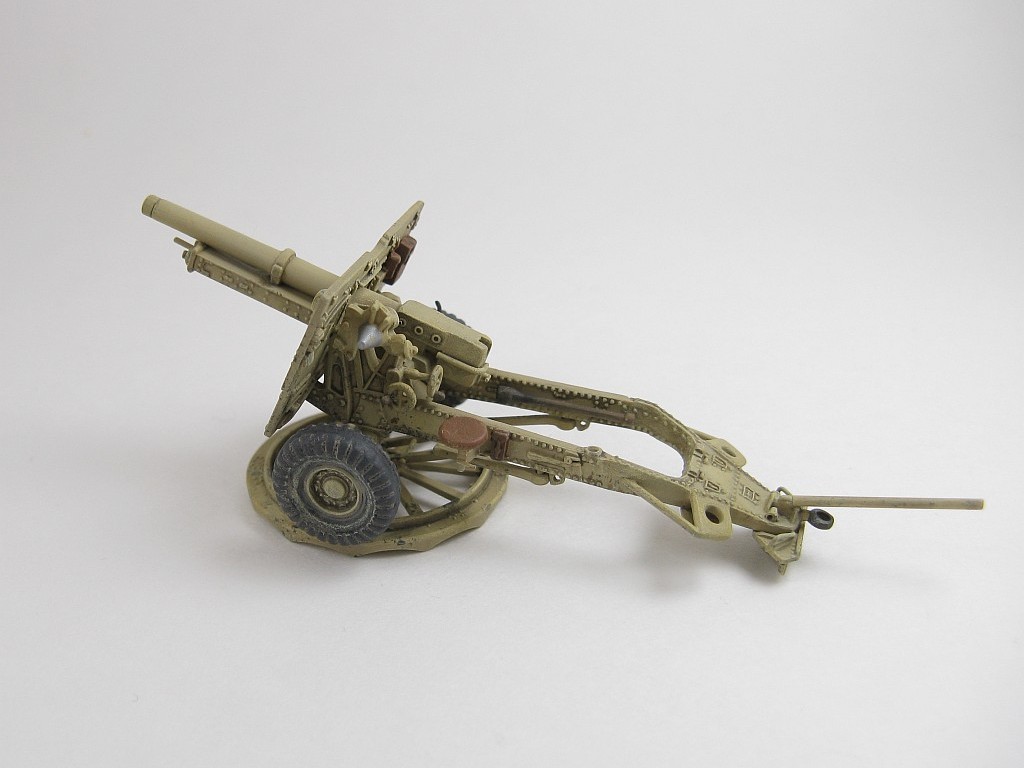
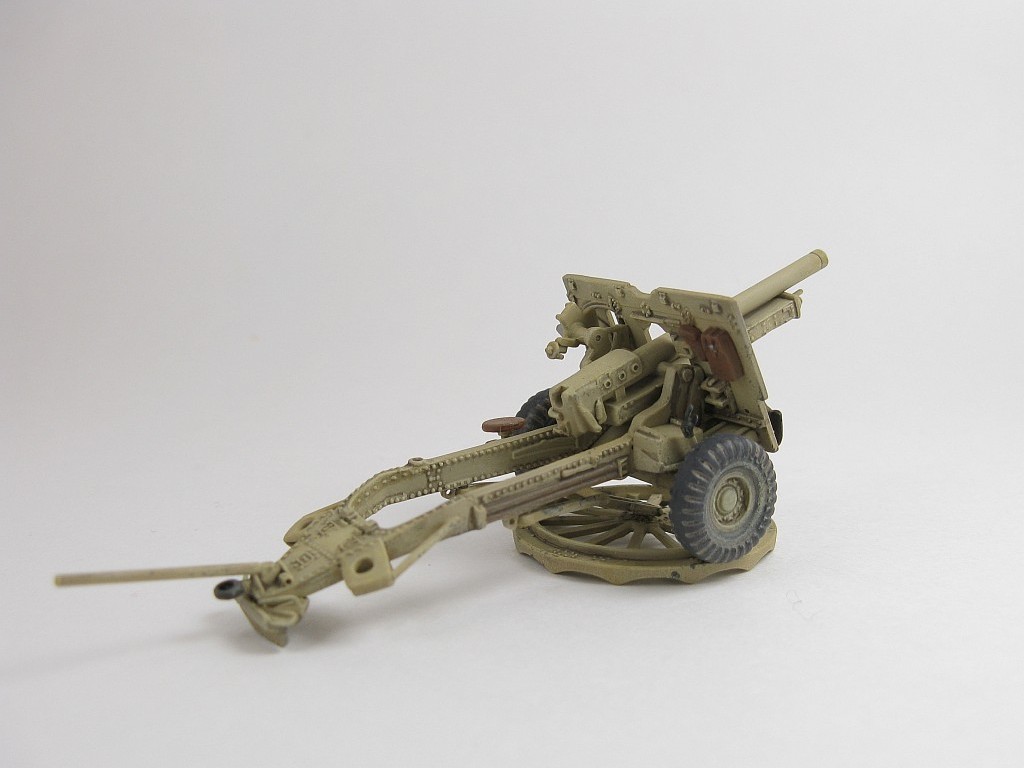
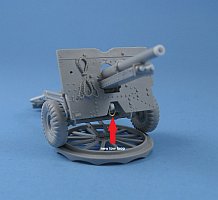
I chose to build my gun in firing position. I noticed here that the platform was missing the small center protrusion to which the struts would attach, so one was
made attached to the platform using some plastic rod. Obviously, if the gun is built for towing then the missing protrusion saves you the effort of having to cut it off.
The instructions provide only a vague idea as to how the struts, carriage and platform should align with each other.
The struts should
run straight between the platform and the carriage with the wheels touching the outer edge of the platform. To do this, I suggest that parts 14A & 15A be glued together
first, then before they set, place the turntable on a flat surface, dry fit the wheels on the axle, place the struts in position between the turntable and gun carriage, and
then keep everything in place with something like blue tack while the glue sets. You may need to add some weight on top of the carriage to keep the wheels touching the
turntable.
I discarded the poor tarp and the traversing handle (part 17A) was replaced with some plastic rod. Do not add it if gun is built for towing.
With no figure in which to hold the ram rod (part 14B) I had to search through my references to discover that it locates to the inside right of the trail.
If you choose the towing option the instructions have you add the turntable as a stowed item atop the trailer, but
don't provide directions on what to do with the struts that run between the trail and the platform: do they stay in folded position on the trail, or should they be discarded?
You could also mount the platform under the trail,
tight against the bottom of the trail but you'll need to change the orientation of the struts as well to do this.
It should be noted that the instructions have you add the traverse wheel (parts 19A) in the wrong spot.
It should go to the protrusion directly on the side of the trail under the elevation wheel. Also, the kit's aiming wheels are pitifully undersized. I replaced them
with ones taken from the spares box.
Attaching the shield revealed that the buffer/recuperator enclosure interferes with opening limiting the elevation of the gun barrel. Since I didn't want to have a
high shooting angle on the barrel this really didn't matter to me.
My final change here was to add a lever to the seat post.
|

|
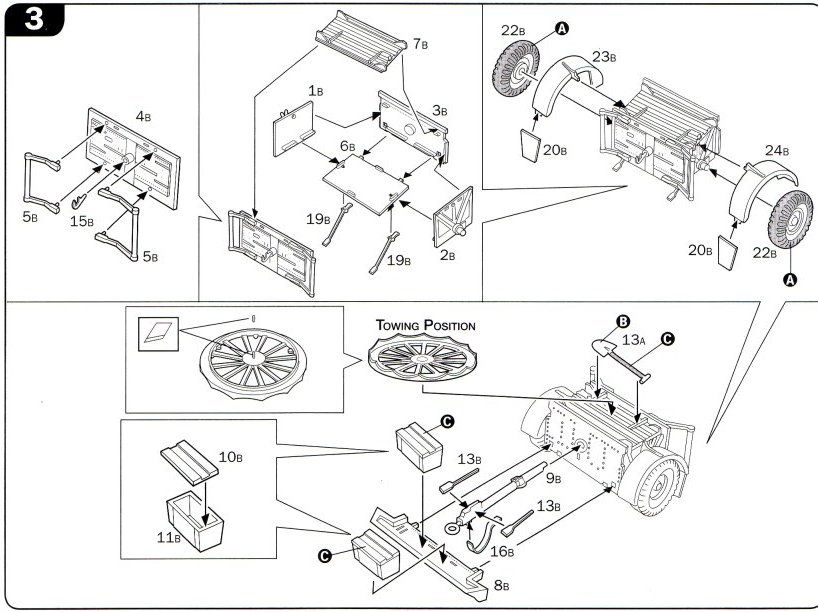
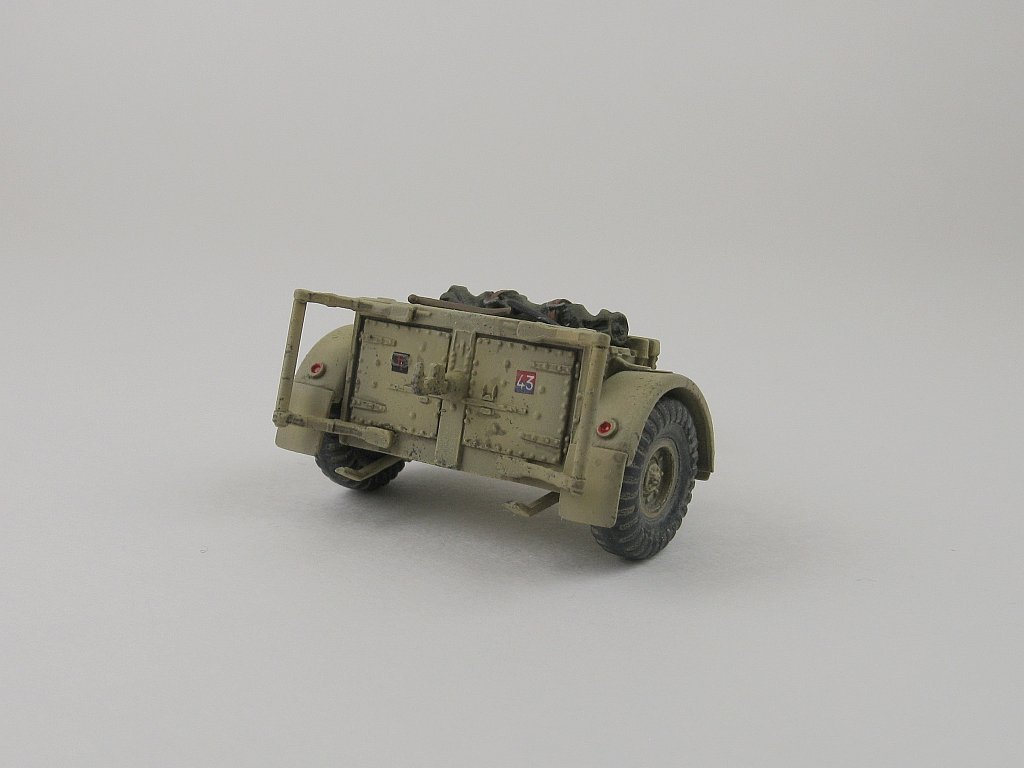
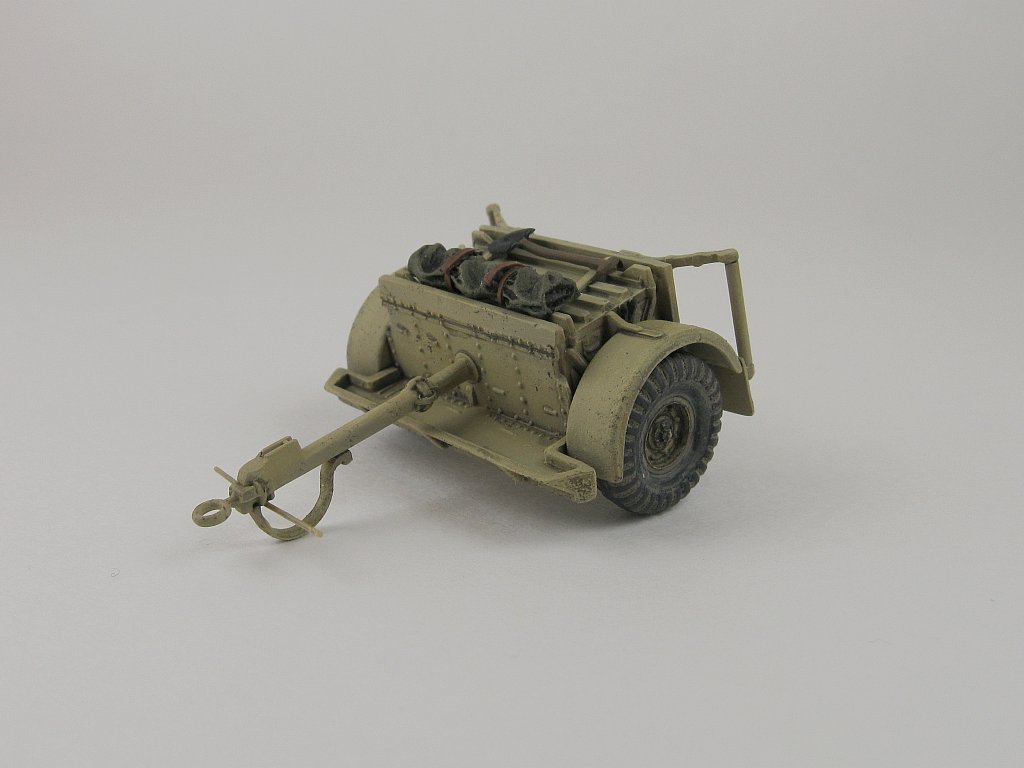
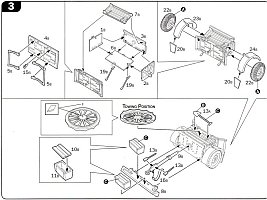
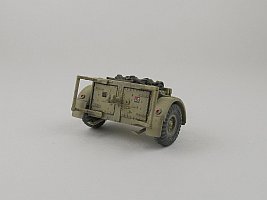
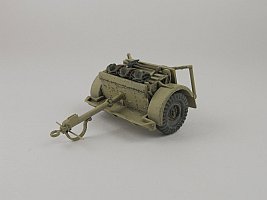
Step 3: Building the Limber
This was the easiest part of the build. The ammo trailer practically fell together on its own. Fit is excellent throughout.
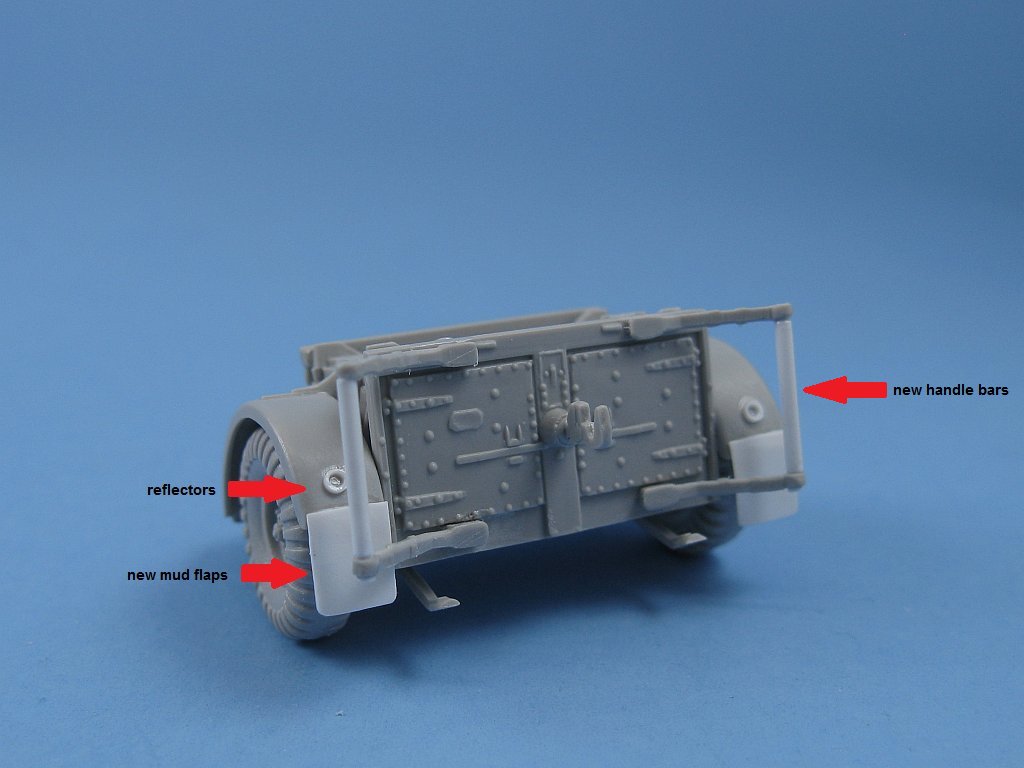
I replaced the handles located on the side of the trailer's tongue (parts 13B) as they were too chunky and used a thin plastic rod to represent them extended
instead of in the folded position as per the instructions. I also replaced the non too round handle bars on the rear doors.
A new set of thinner mud flaps were made from sheet styrene and reflectors were added to the fenders. As with the gun the wheels, and the shovel, were left off to ease painting.
Since I was not adding the platform to the top of the trailer I decided to put an aftermarket resin tarp here in its stead.
Some ammunition is supplied, both as separate shells & casings, and as a set molded inside a couple of trays. The individual
shells
are not consistent in size or shape and look more like small grains of rice than anything else, while the casings are acceptable but definitely need to be hollowed
out to look convincing. The
shells
and casings molded in the trays are excellent looking pieces and it's unfortunate that their standard of excellence isn't reflected in their separate counterparts.
With the hope to eventually put this gun in a little diorama and wanting something that I could add to make the scene a bit more interesting, I decided to separate
the heads from the figures ("Off with their heads!", as the Queen of Hearts would say), and then hollowing out and saving the helmets for future use.
|
Conclusion
This makes into a reasonable rendition of the venerable 25-pounder gun. Even though the kit first appears some 30 years ago detail is still quite good.
It's nice to see Italeri release this old Esci kit but the molds are definitely starting
to show their age. The modeller wishing to build this gun and limit the
amount of work required during clean up should explore the option of obtaining a copy of the older Esci release, which still shows up fairly often on auction sites like
eBay where the selling price is not too exorbitant yet.
References:
[1] 25-Pounder Field Gun 1939-72: Osprey New Vanguard 048, Chris Henry, Osprey Publishing, Oxford 2002 ISBN: 9781841763507
[2] wwiiequipment.com
[3] Armoured Acorn
[4] Wikipedia
[5] canadiansoldiers.com
[6] Primeportal (walk around #1)
[7] Primeportal (walk around #2)
[7] British Artillery in World War 2
[8] dish.ru (walkaround)
Review sample purchased by the author.


|