www.icm.com.ua |
BTR-152K |
|||
Kit # 72521 |
Review by
- Al Magnus
|
|||
www.icm.com.ua |
BTR-152K |
|||
Kit # 72521 |
Review by
- Al Magnus
|
|||
 |
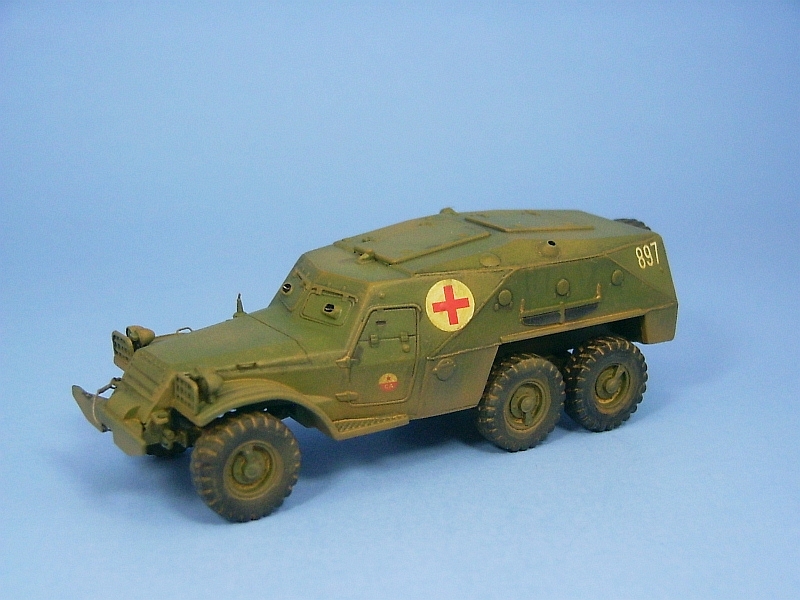
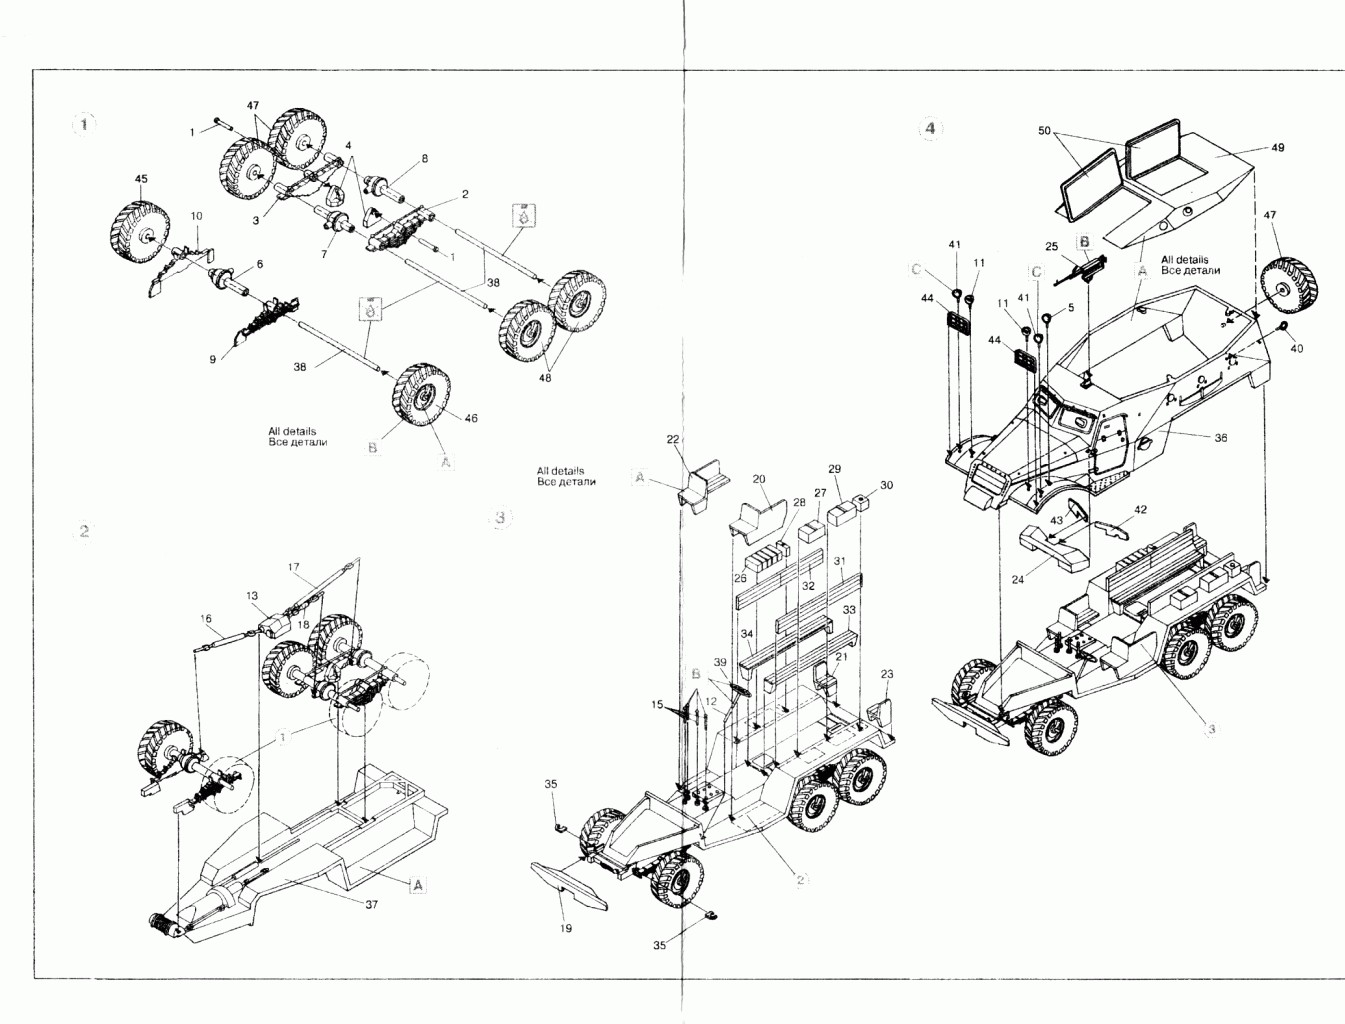
The kit consists of 57 body parts molded in black and a light or dark grey plastic, plus seven wheels (though for some reason my kit had 8) molded in black plastic. There is also an instruction sheet and a small decal sheet. This build was mainly a test of how to add welded seams to a kit. I added the seams with lengths of small diameter stretched sprue, which were softened with liquid glue and then contoured with the sharp edge of a hobby knife. When the seams dries they were lightly sanded with fine sandpaper. The decals are excellent but my kit’s sheet appear to be for the open topped version of the BTR-152. None of the vehicle numbers on the decal sheet matched the numbers on the instruction sheet, so I searched the web for ideas on markings and settled on the Red Cross medical markings because they appeared to be fairly generic. I used one of the numbers by cutting off an extra digit so it would fit and applied it to the rear of the body. The gun was discarded and put into the parts box as it wasn’t needed on the ambulance version. I also assigned all of the interior pieces to the parts box since I was not going to have the roof hatches open. The trickiest part of the build came with the suspension. Both location points for the front and rear suspension parts were vague, with the front suspension points being the worst. Somehow I managed to get the locations correct as the suspension didn’t need any tweaking to get all the wheels to touch the ground. Some of the drive shafts need to be shortened to fit between the transfer case and the differentials. Some trial fitting is needed here to get an idea on how much to remove. I added these after I had the rest of the suspension in place. It made for tricky maneuvering to get the shafts around and under the other suspension components but I found that this allowed me to get the suspension solidly glued in place first and I didn’t have to worry about things shifting around as I added the other parts. The frame is molded right to the chassis though this isn’t really a problem because the suspension and drive train parts cover most of it from view. The upper body (part 36) is molded as one complete piece which I liked but there was a prominent seam down the middle that was difficult to remove, especially on the radiator cooling louvers. The cover to the troop compartment (part 49) doesn’t mate well to the body so it and the top of the body need sanding to level the mating surface to get the top to sit flat. The front hatch in the roof interferes slightly with the gun pedestal so some trimming is needed here. Also the front hatch lid has a slight gap between it and the roof so some filling required here as well. I backed the opening with some plastic strip. There is no detail to the back of the leaf springs (parts 2, 3 9 & 10) . Pioneer tools are molded directly to the body (I do so wish that manufacturers would mold the tools separate. I’m more than willing to pay an extra dollar or two for a kit to have this done). I added a tow cable to the front, running one end to the right side tow hook and the other to the underside of the cable spool on the front bumper. I added an antenna mount on the right side just in front of the door and I cut off the solid handles on the hood and replaced them with some thin wire handles bent to shape. Wheel rims have very nice hub detail on the front but none on the rear. The tires have fairly accurate tread detail. If you look closely you’ll see I goofed with the wheels. I used all of the same ones when I should have used the two different ones with the smaller hubs on the front axle (I didn’t notice there were 6 of one tire type and 2 of the other). So it goes! I drilled out the vision blocks on the front windscreen and on the roof. The brush guards for the lights needed some of the openings drilled out as they were filled with flash All in
all this is a nice little kit, which wasn’t as easy a build
as I had hoped, but a lot better in quality and much easier to build
than most Eastern European kits I’ve run into.
Review sample purchased by the author. |
| Back to Manufacturer Kit List | Back to Construction Reviews |
Article Last Updated: 18 January 2009 |
Back to Home Page |