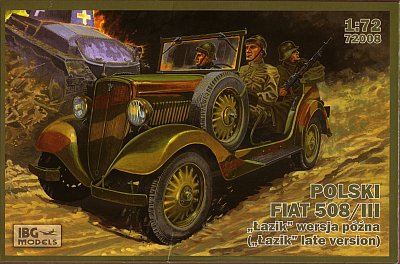
|
History
Search as I could, there isn't much on the web regarding this vehicle. The car was built under licence during the 1930s
in Poland and featured upgraded suspension to handle the poor roads found in Poland at the time. Apparently a number of them were converted to military use. The
508/III "Lazik" was used as a liaison car in a similar capacity as contemporary German kübel types. Following the Polish surrender useable Fiats were
incorporated into the German armed forces.
The Kit
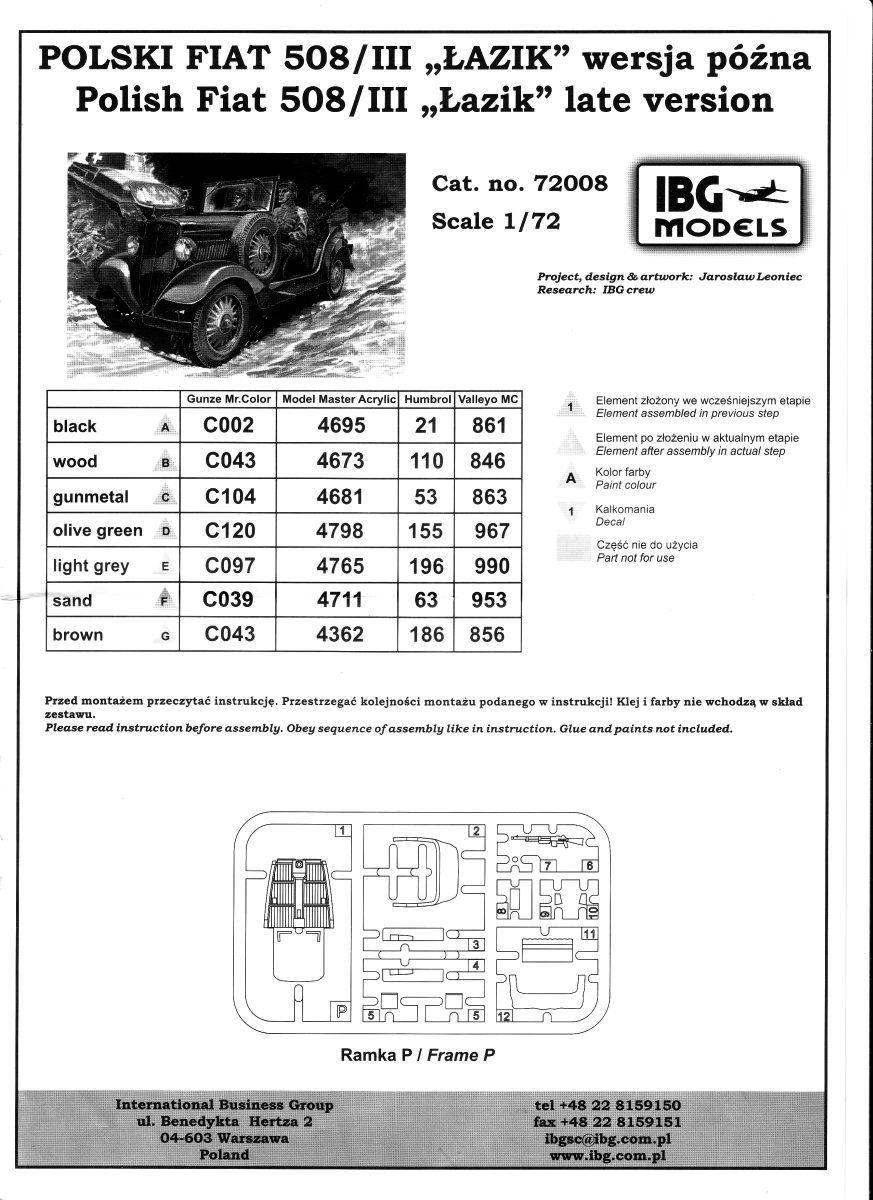
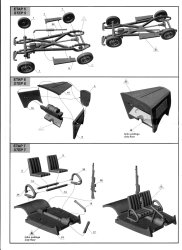
The kit comes in the familiar end-opening box popular with a lot of manufacturers these days. Inside there are two sprues of softish grey styrene plastic:
one unmarked and containing 53 parts, the other marked P and containing 13 parts. There was no flash present though a lot of the parts did have faint seam lines.
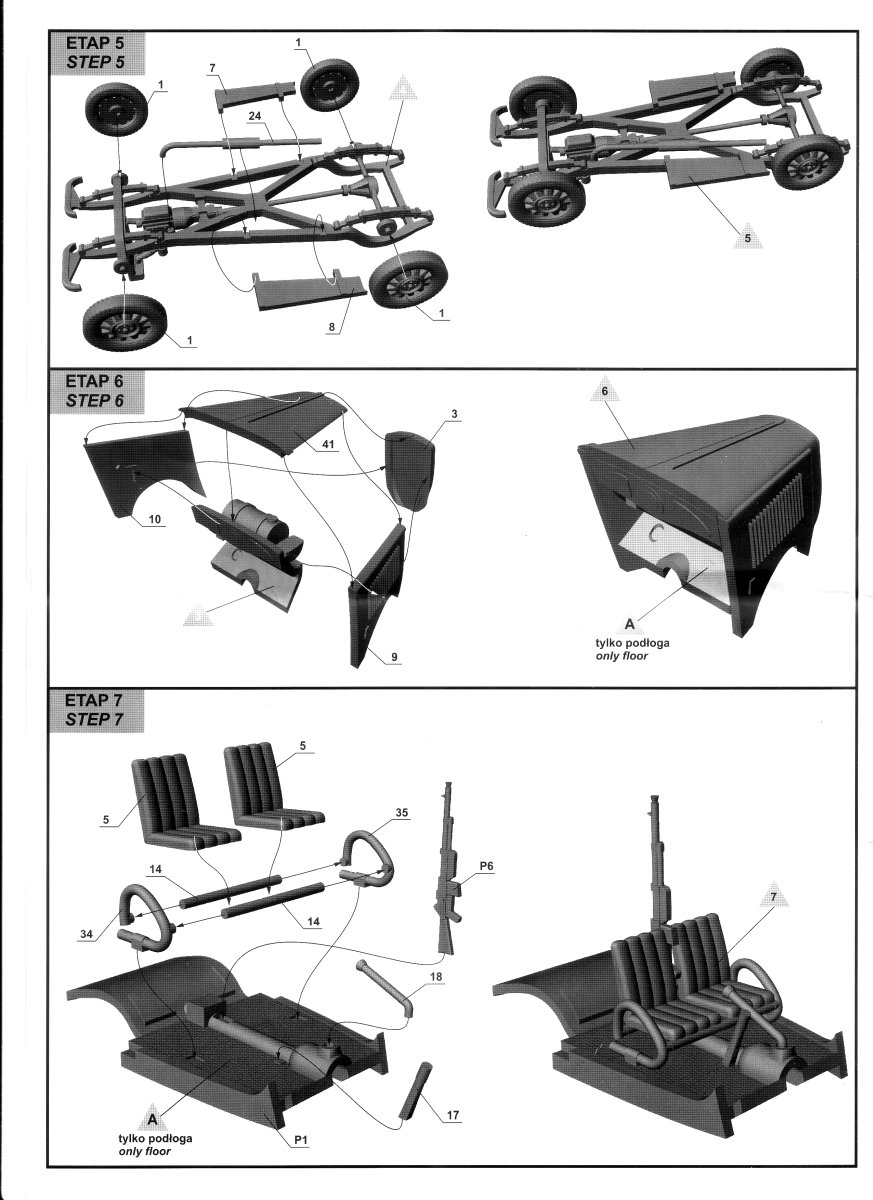
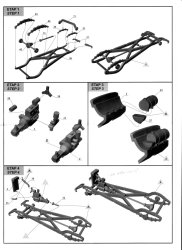
The instruction sheet consists of 8 pages with a build sequence spanning 12 steps using the familiar exploded diagram format. Four parts are highlighted in grey to
indicate that they're not to be used. There is a small sheet of thin
clear plastic with the outline of the glass printed on it. Paint call-outs are for Gunze Mr. Color, Model Master Acrylic, Humbrol
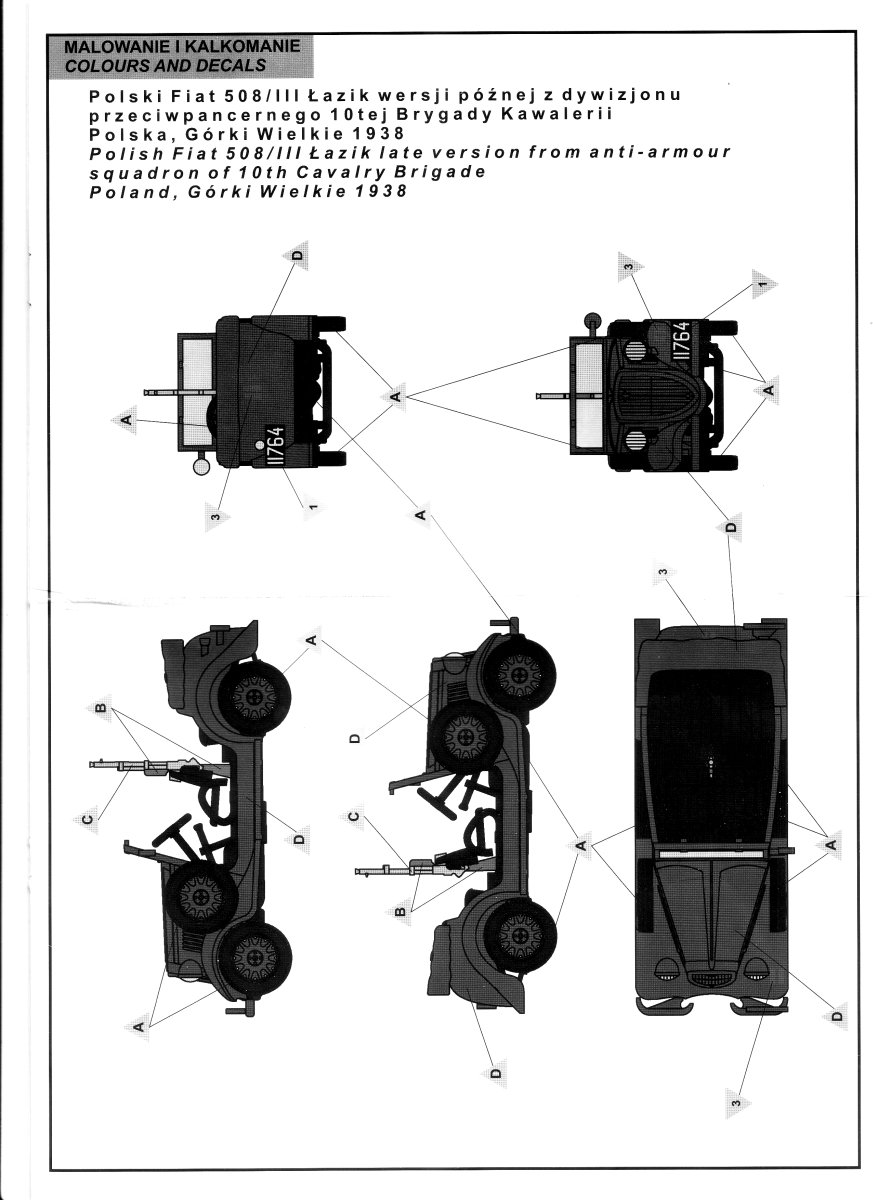
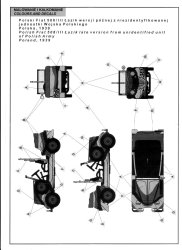
and Vallejo paints, which is better than the oft found generic paint colours. Decals come on a minuscule sheet with marking options for two vehicles, both for the
Polish Army:
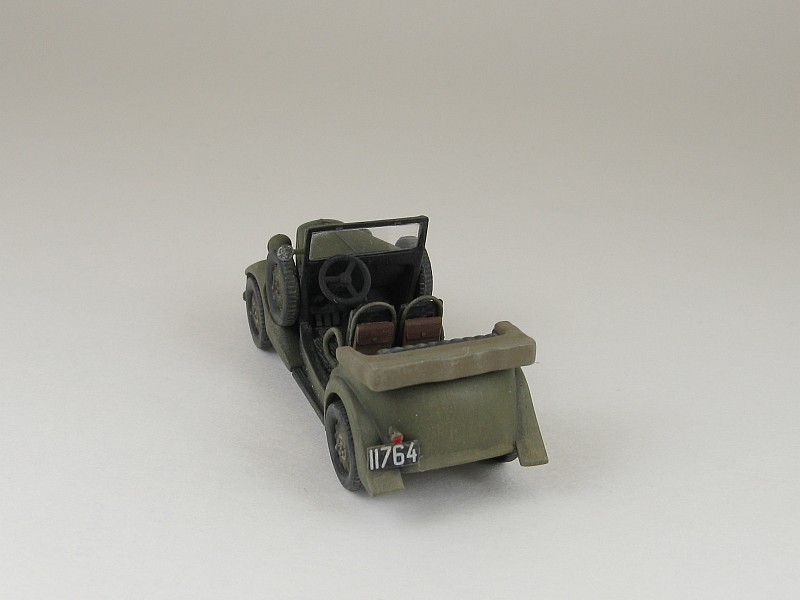
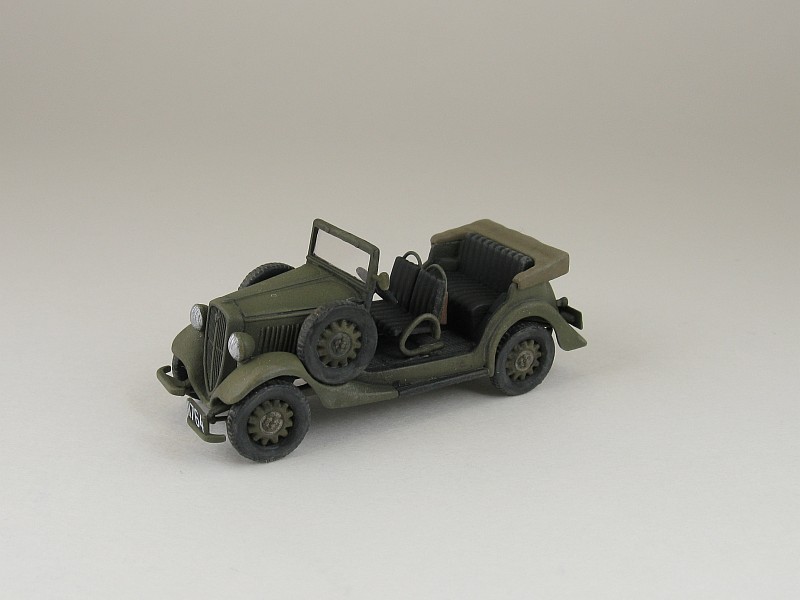
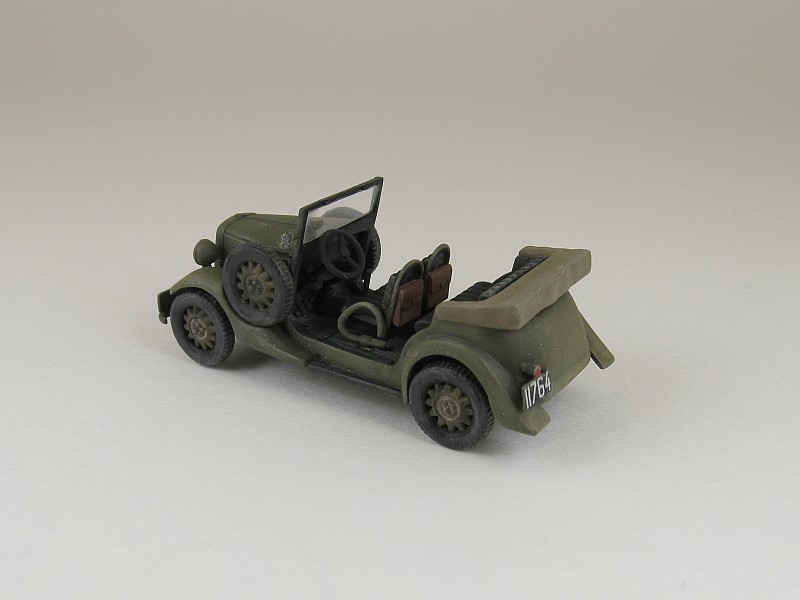
- Overall olive drab vehicle, plate number 11764, from the anti-tank squadron of the 10th Cavalry Brigade, 1938.
- Multi-coloured olive green, tan and brown camouflaged vehicle, plate number 15117, of an unidentified unit, 1939.
If you check out reference [2] you'll find a few pictures of German beute Fiats, so you could paint these in German grey for something different from what's offered
in the box.
According to reference [1] there are some accuracy issues with the wheels and the cooling slits on the side of the engine compartment and slats in the radiator grill.
Checking out the photos found on reference [2] I see that on the real vehicles the wheels have 18 spokes, while the kit has only 12. As for the cooling slits the
kit has 16 while the real vehicle apparently has 24. None of these are major problems in my mind and are probably the result of molding
such a small vehicle in 1/72 scale.
Construction
|
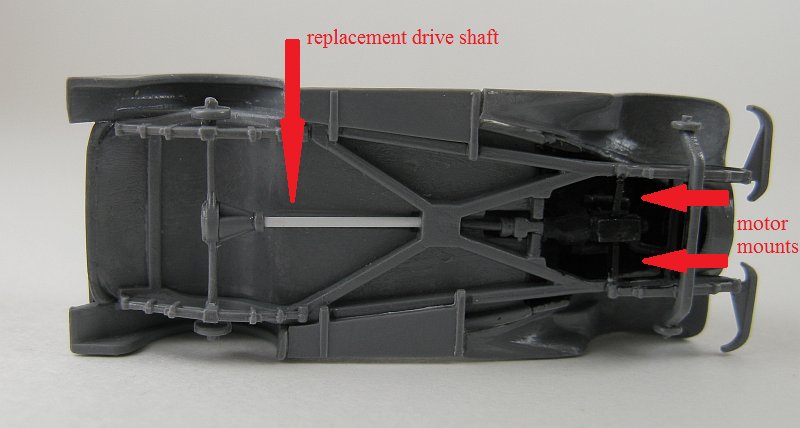
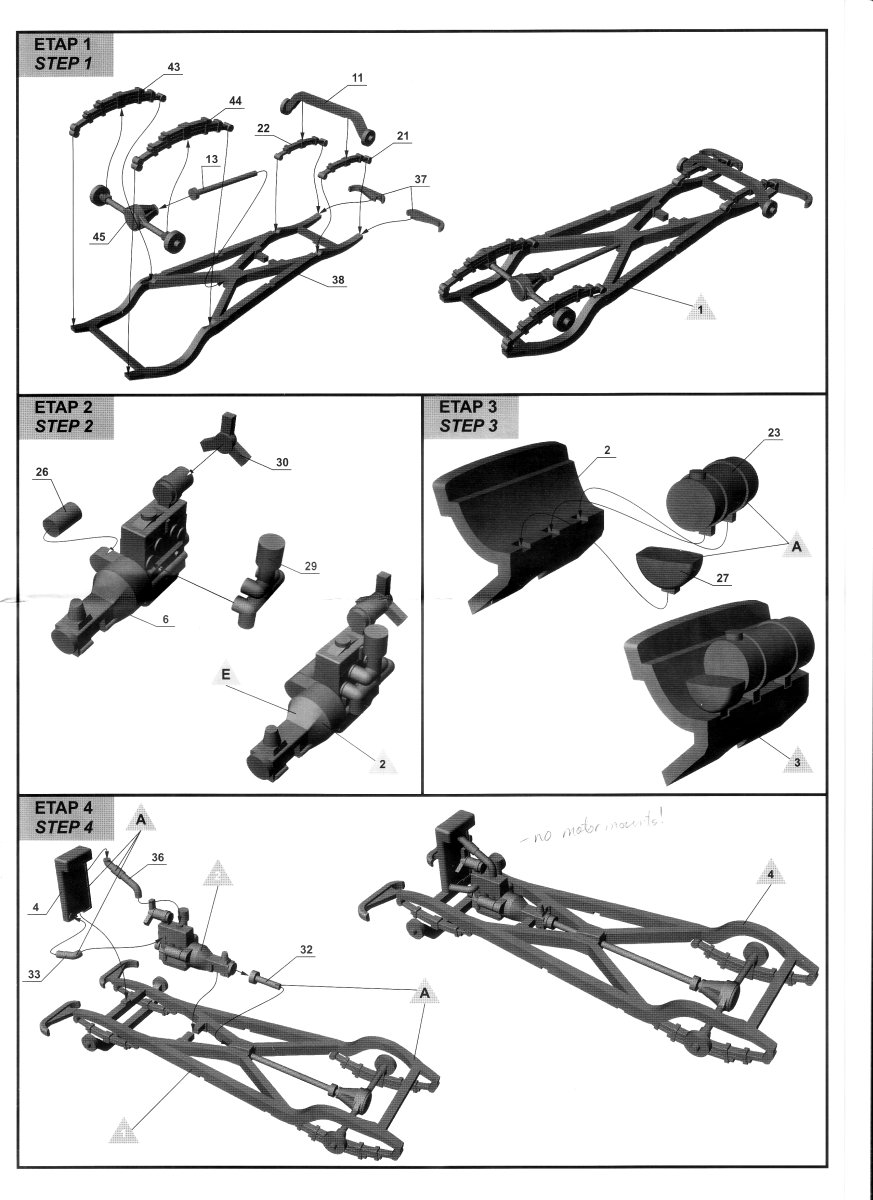
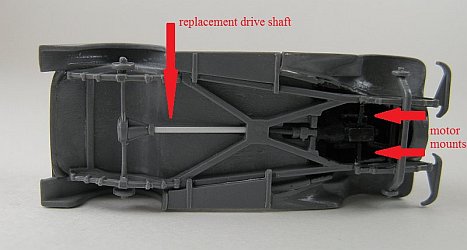
Steps 1 through 3 were followed pretty much as outlined in the instructions. The drive shaft was too short so it was replaced with a length of round plastic rod.
In Step 3, since I wasn't planning on opening the hood I didn't bother adding the gas tank and oil reservoir to the firewall as they wouldn't be seen anyway.
Mounting points for a lot of the suspension parts, as well as the front bumpers are quite small and easy to break off while handling the model.
At this point I started skipping back and forth through the instructions. After completing the construction of the engine compartment in Step 6, and adding the
window frame (part 40) from Step 8, I skipped back to Step 4 to add the engine, radiator and pipes to the frame.
I wanted the engine compartment built first so I could test its fit with that of the radiator to find any interference problems.
There are no motor mounts which leaves the engine hanging in space supported only by the transmission. I had no idea what real mounts would look like for this
vehicle so I just made a pair cut from some square rod and placed them to span the gap between the engine block and the frame rail.
|
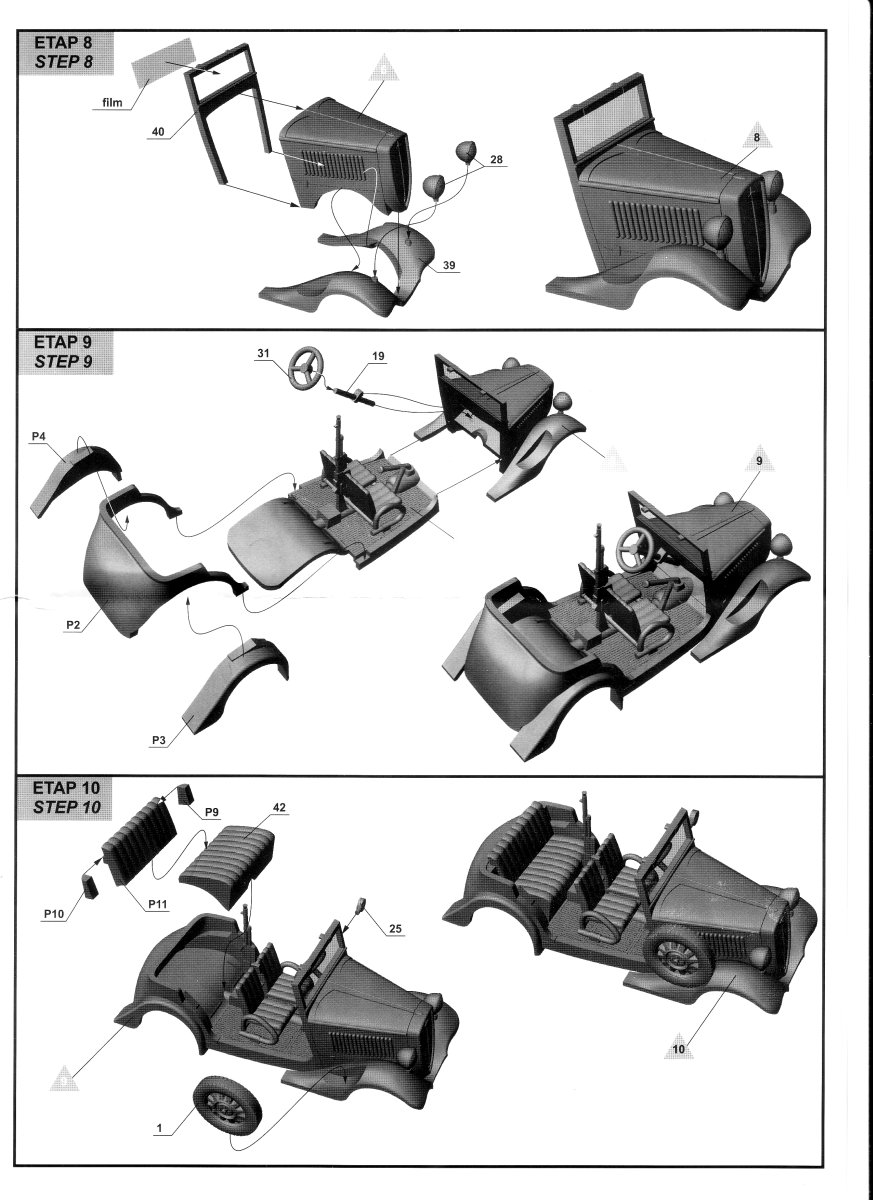
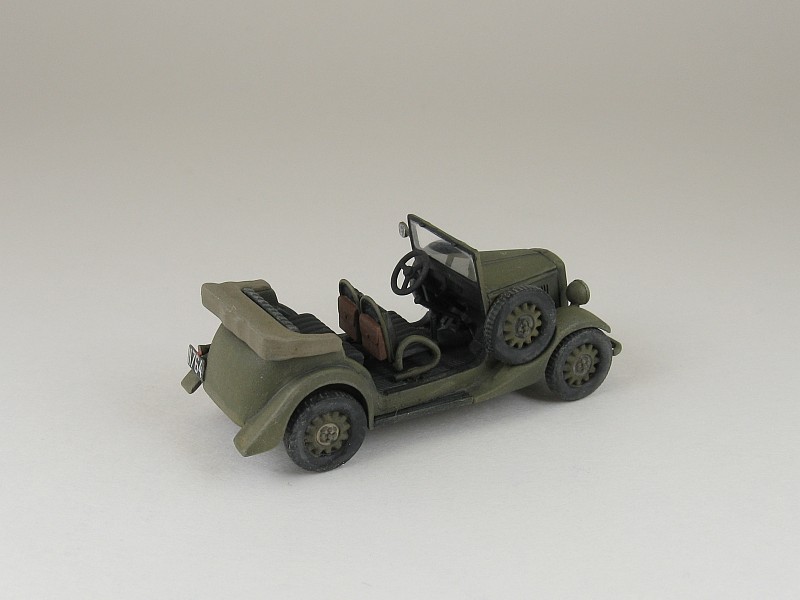
Based on past experience I've found that it's not wise to build the body and frame separate, so I didn't follow the instructions and built the body right onto
the frame as I went along. I added the engine compartment, floor pan (part P1) and the rear body panel (part P2) to
the frame. Then the rear fenders (parts P3 & P4) were added, followed by the running boards (parts 7 & 8), and then the front fenders (part 39).
The fit is quite poor in places. Look out for large gaps where the engine compartment assembly meets the floor pan. The front
fenders don't fit well so these had to be glued to the engine compartment in stages, one side at a time. There was also a gap between the
fenders and the running boards. For most of these large gaps I used medium consistency cyano to bridge the gap and then hit it with accelerator to set the glue.
The rear seat (parts 42 & P11) and the bolsters (parts P9 & P10) were added next. The bolsters don't fit well in their assigned places and left large gaps
that required filling.
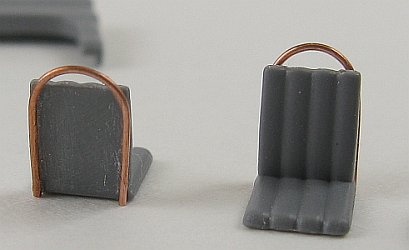
The frame for the bucket seats was built and I added roll bar loops to the backsides of the front seats. The seats were not placed on the frame, nor was the
frame added to the model until painting was complete.
All of the tiny interior parts, the gear shift lever, transmission select lever and steering wheel were
also left off until painting was complete, but I did add simple brake, clutch and gas pedals to the floor board. I also added the
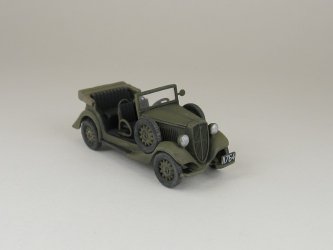
the front & rear licence plate brackets, thinning them before gluing. The kit versions are much too thick.
I drilled out the rear light lens so I could add a drop of gloss red paint to it later.
Many of the small parts are easy to break, which happened with the rifle (part P6). Close inspection showed it to be too flat anyway so I didn't bother repairing it.
The front lights were added at this point. The small attachment point made placing and alignment difficult.
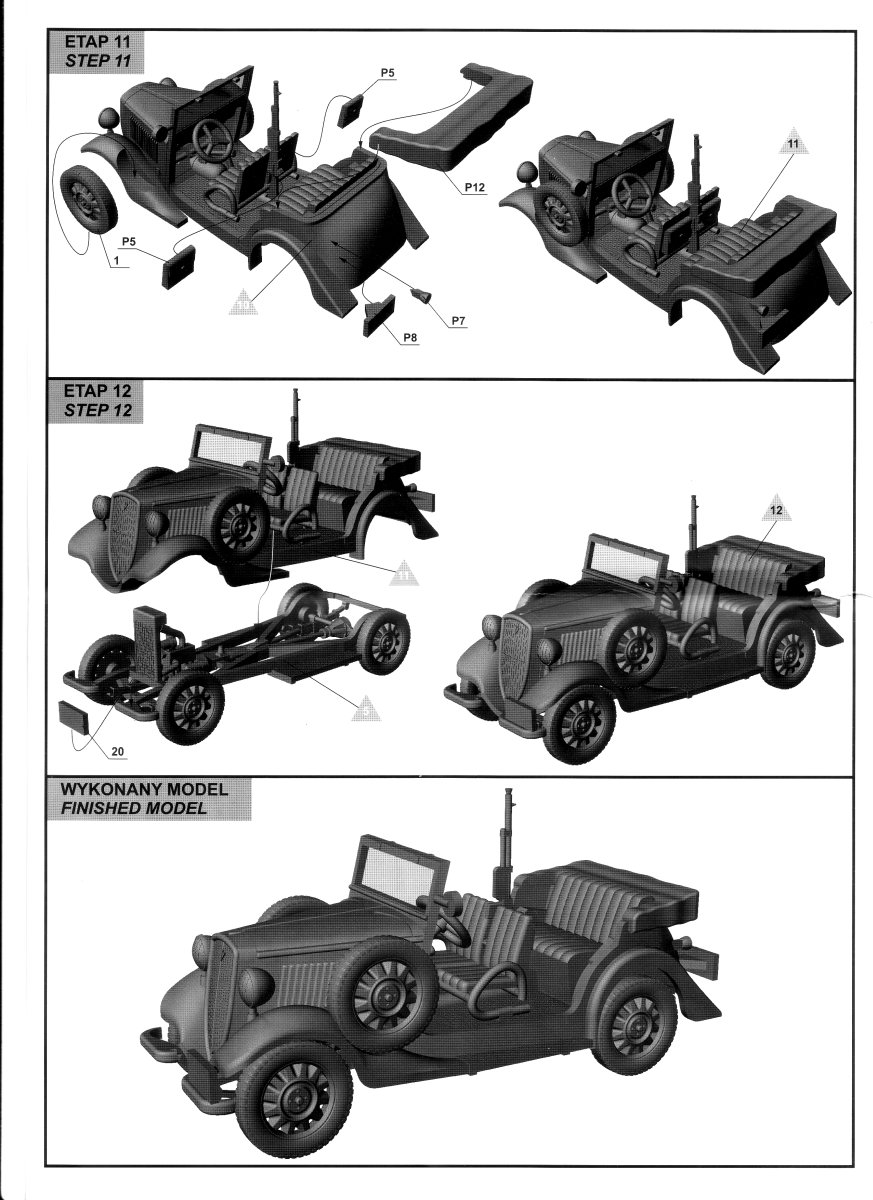
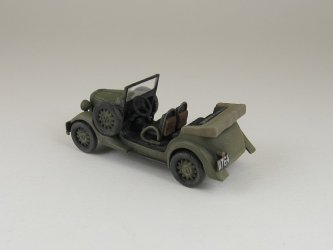
The wheel rims and tires are atrocious. There's no edge to the rim making it most difficult to paint a nice round circumference on the tires and not run paint onto the
rims. As for the tires, the tread pattern is not much more than
parallel bars running across the tread area. In my kit the wheels were also molded slightly out of alignment so removing the excess plastic pretty much destroyed
what tread pattern there was anyway.
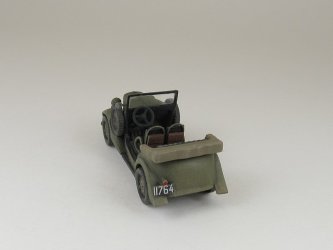
I chose to keep the painting simple and selected the overall green option. Decals proved to be excellent. They snugged down
nicely after a few applications of Microsol. At this point the clear glass was added.
Following the paint I added the windscreen. The clear plastic supplied by IBG was not great. It had a slight haze
and any fingerprints that got on it just didn't want to wipe clean. After much fiddling I was able to cut and fit a replacement from one of my spare clear sheets
left over from another kit.
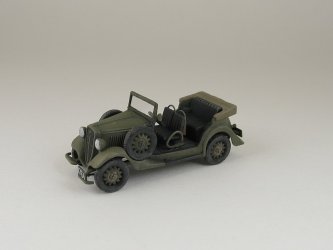
Then came the remaining small parts (outside rear view mirror, steering wheel, levers & passenger compartment cover), seats and wheels. This is where I found
a couple of issues. The seat frame was not quite long enough to slip properly into the slots molded to the floor. So be warned, the cross members should be
replaced for a proper fit. Also I found that the wheels and fenders had some interference problems. The only solution that came to mind was to carefully cut the locating
pins from on the ends of the axles and then attach the wheels with slow setting cyano glue to allow positioning of the wheels as the glue set.
Unfortunately the end result was still not to my liking.
Conclusion
This is an interesting kit and I applaud IBG for bringing out something that's not exactly mainstream fare. On the other hand this is a tiny and difficult,
maybe I should say trying, kit to build.
Fit is not the best and the parts are minuscule. It will take some effort on the part of the modeller to get an acceptable build from what comes in the box.
References
[1] plastikowe.pl (IBG Fiat 508/III Furgon preview)
[2] odkrywca.pl
Review sample purchased by the author.


|