M4 Sherman
Manufacturer: HäT Industries (Kit #99001)
When I first looked at this kit, I decided that I could approach it in one of several different ways: first, I could simply build it right out-of-the-box; second, I could add some simple details, and make minor alterations to make it look more like a detailed scale replica; or third, I could go all the way, super-detail and modify the entire thing. Since this kit was donated by HäT as a review item, I thought it would be best to build it simply as it comes, so that the modeler can see what they get right out of the box.
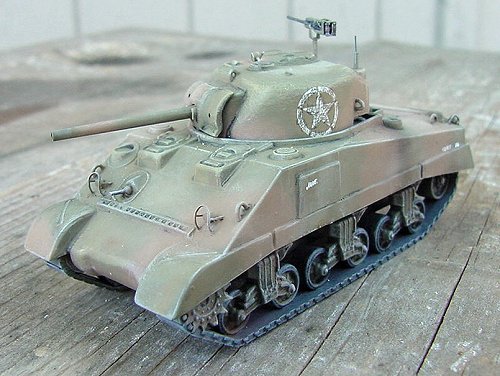
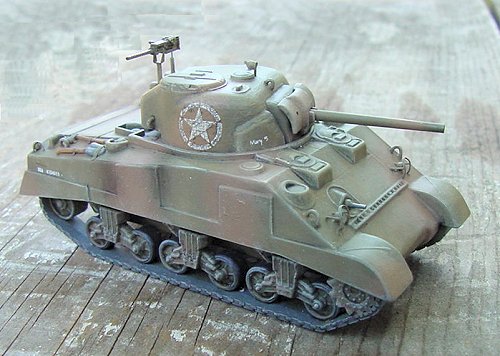
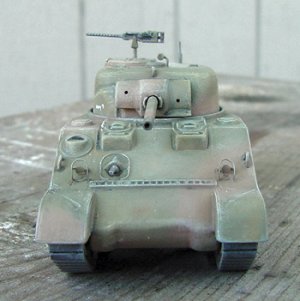
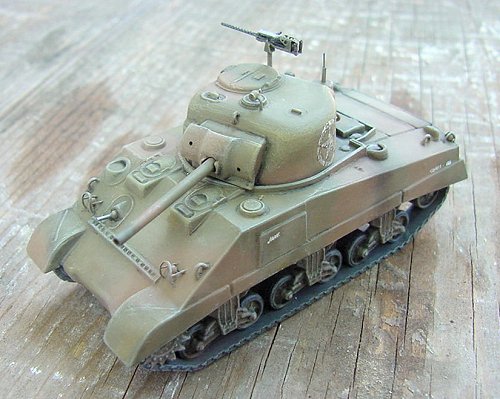
But after I put it together (which took about five minutes), I figured I would add some lift rings too, since they are such a prominent feature of Shermans. So, I put four lift rings onto the hull, and another three onto the turret. I simply used bent styrene rod to replicate them. But then I thought that the model really could use some headlights, so I added some from styrene. The lights looked pretty silly without their protective framework, so I added some from an Extratech etched brass set. And since I already added headlights, I might as well add tail lights too, which I then proceeded to do (along with their protective frames). Oh, yeah, and don't forget the bow machinegun and ball mount ...
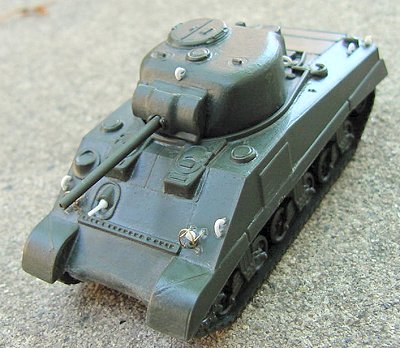
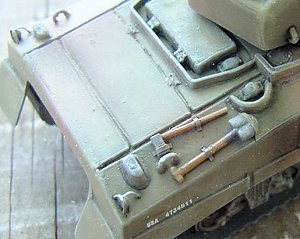
So that was pretty much all of the work that went into building the model. I decided to paint the tank as a member of 756th Tank Batallion in Italy, 1944, which had a neat camouflage scheme of tan and olive drab. Once I painted the tank, however, it looked a little bare, so I added a shovel and axe to the rear hull. The mounting brackets for these two tools were made from strips of lead foil that came wrapped around the top of a wine bottle.
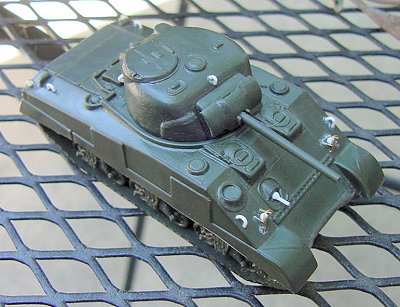
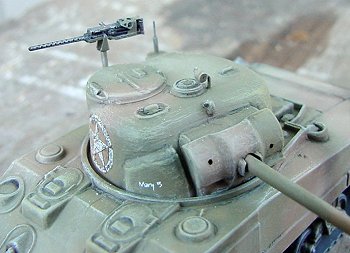
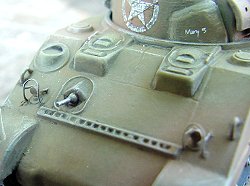
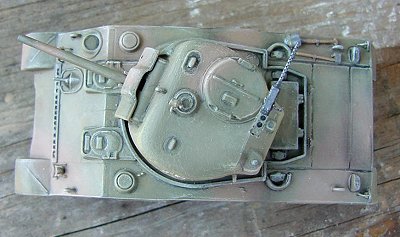
I thought I was finished, but the turret looked really plain, so I decided to add the small spotlight next to the roof ventilator, and also an antenna mount on the rear of the turret. That helped a lot, but it still needed a little lift, so I put together a .50 cal machinegun and mounted it behind the commander's hatch. It's a version of the gun with a perforated barrel, instead of the standard HB M2 version typically seen on US tanks, but I think it looks really cool. Although it's more appropriate mounted in an airplane, I've seen a handful of photos of this type of machinegun mounted on a Sherman, so it's not completely out of place (the gun is resin and etched metal from Aires).
And that was it. Finally. So I ended up going the middle route anyway, of adding several details to improve the looks of the model, without actually spending an inordinate amount of time converting it to a more "complete" model. All told, I think it took about four or five hours to complete, and most of that was painting.
It looks very good as is, but when you pick it up, you can see several places that could have used more attention if I wanted to spend some more time on it. For example, had I thought of it, I would have added the tow hooks to the differential housing, and detailed the side skirts some more.
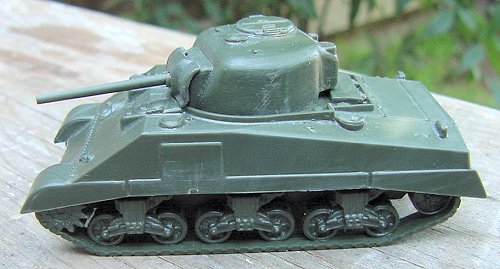
As a wargaming piece, this is a perfectly suitable and well made model. From the perspective of building a static display model, the main weak areas of the kit are the tracks and the rear hull. The tracks are over-simplified; they have very weak shoe detail, and no guide teeth. The inside of the track is perfectly smooth. This was done because of the way the track and wheel assemblies were molded as a single piece. It's not that big of a deal, but if you want to improve it, it would be easy to substitute the wheels and track from an ESCI kit. The sprocket wheels are molded solid, and I had planned on taking a motortool to them to separate the rear sides into two sprockets, but I forgot :}
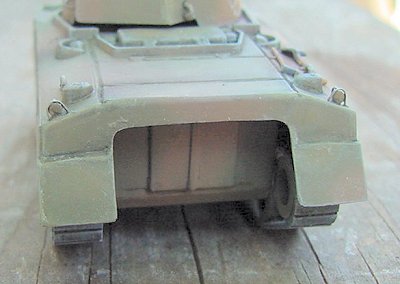
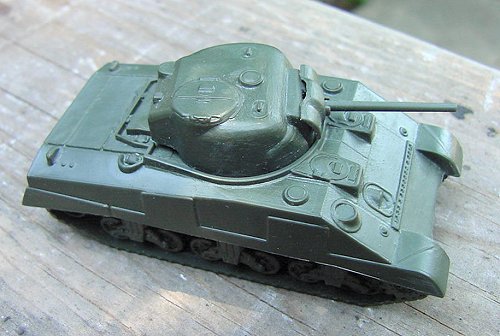
The rear face of the hull has an engine access door, and that's it. There is no bolt detail, no axles for the idler wheels, and no exhausts. I think that HäT could have easily added a little more detail in this area without making the kit any more complicated. Oh yes, and the ammunition loading door is missing from the left side of the turret.
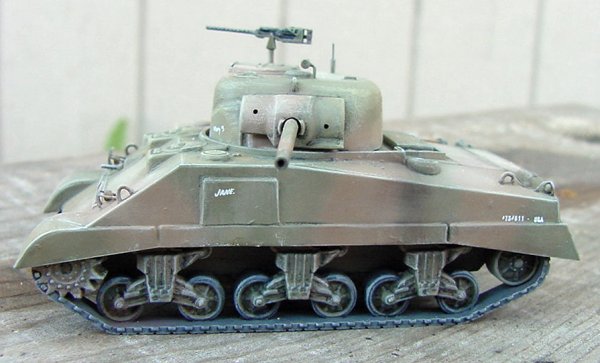
My favorite part of the model is the gun barrel: it is molded perfectly straight, perfectly round, and with only a very minor molding seam to be sanded off. It would be worth buying a couple of these models just to use the gun barrel on other Sherman kits. In fact, the price would be cheaper than buying turned-aluminum aftermarket barrels (which are a little small anyway), and you would also end up with some spare hulls for conversion projects.
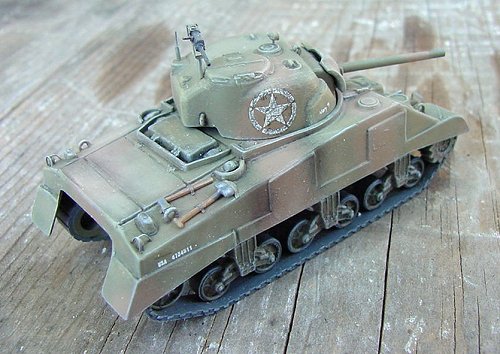
There were no decals included in the sample I received, and I don't think that commercial examples come with any either. The stars on the turret sides are from an old Microscale decal set, with black pencil used to scribble them out (the crews did this to reduce their visibility). The other markings are rub-on transfers from SMA/SSP. I painted the kit with AeroMaster and Testors Model Master acrylics.
I was very pleasantly surprised at how well this model turned out, and I can highly recommend it to all modelers, not just wargamers. The only suggestions I would make to HäT would be to add a couple of small detail parts like headlights and a machinegun. That wouldn't have been too hard to do, still keeping within their simple design philosophy for this kit.
Thank you very much to HäT for providing the review sample.
| Back to HäT Kit List | Back to Home Page |
| Back to The Sherman Story |